Are you tired of your woodworking projects not fitting together as perfectly as you envisioned? You’re not alone.
Many DIY enthusiasts and seasoned woodworkers alike face the challenge of making precise cuts. But what if you could change that with just a few simple tips? Imagine the satisfaction of seeing your pieces align flawlessly, saving you both time and materials.
You will discover practical tips for marking wood that ensure your cuts are spot on. Dive in, and let’s transform your woodworking skills from good to exceptional, turning every project into a masterpiece.

Credit: www.familyhandyman.com
Choosing The Right Tools
Marking wood correctly is important for making clean cuts. Using the right tools helps you mark with accuracy.
Good marking tools and measuring devices ensure your cuts fit well. This saves time and reduces waste.
Essential Marking Tools
Choosing the right marking tools is key. They help you draw clear and precise lines on wood.
Common marking tools include pencils, marking knives, and scribes. Each has a special use for different tasks.
- Pencils:Easy to use and erase. Good for general marks.
- Marking knives:Cut thin lines. Great for exact cuts.
- Scribes:Scratch lines into wood for strong marks.
- Chalk lines:Best for long, straight lines.
Selecting Accurate Measuring Devices
Measuring devices help you get exact lengths and angles. This makes your cuts fit perfectly.
Common measuring tools include tape measures, rulers, and squares. Use them to check distances and angles.
- Tape measures:Flexible and good for long measurements.
- Steel rulers:Provide straight, firm edges for marking.
- Combination squares:Measure and mark 90° and 45° angles.
- Calipers:Measure small distances with high precision.
Credit: www.familyhandyman.com
Preparing The Wood Surface
Marking wood accurately needs a clean and smooth surface. Dirt and roughness can cause wrong marks. Preparing the wood well helps cuts stay precise and neat.
Two key steps to prepare wood are cleaning and smoothing the surface, and identifying the grain direction. These steps make marking easier and cutting more accurate.
Cleaning And Smoothing
Start by removing dust, dirt, and oils from the wood surface. Use a dry cloth or a soft brush to clear loose particles. For sticky or oily spots, a damp cloth with mild soap works well.
- Wipe the surface with a dry cloth first
- Use a damp cloth with soap for stubborn dirt
- Let the wood dry completely before marking
- Sand the surface lightly with fine-grit sandpaper
- Remove sanding dust with a brush or cloth
Sanding evens out rough spots and helps pencils or markers make clear lines. Avoid sanding too hard to keep the wood from getting damaged.
Identifying Grain Direction
Wood grain affects how cuts look and how easy it is to mark lines. Knowing grain direction helps you make smoother cuts and better markings.
| Grain Type | How to Spot | Effect on Marking |
| Straight Grain | Lines run parallel along the wood | Marks stay clear and straight |
| Cross Grain | Grain lines run across the board | Marks may blur or skip |
| Curly Grain | Wavy or swirly patterns | Marking needs more care |
Measuring For Precision
Cutting wood with accuracy starts with careful measuring. Small errors in marking can lead to big mistakes in your project.
Using the right tools and methods helps keep your cuts clean and exact. Let’s explore key tips for measuring precisely.
Using Calipers And Squares
Calipers help measure thickness and small distances with high accuracy. Squares ensure your angles are correct and lines are straight.
- Use calipers to check board thickness before marking.
- Place a square firmly against the wood edge for straight lines.
- Double-check measurements before marking to avoid mistakes.
- Keep tools clean and calibrated for best results.
Marking Consistent Reference Points
Marking clear and consistent reference points guides your saw and keeps cuts aligned. Always use the same spot to start measuring.
| Tip | Purpose |
| Use a sharp pencil or marking knife | Creates thin, clear lines for accuracy |
| Mark from the same edge or face | Keeps measurements consistent across pieces |
| Label your marks | Prevents confusion during cutting |
| Use a marking gauge | Helps score straight lines parallel to an edge |

Credit: www.familyhandyman.com
Marking Techniques
Marking wood accurately helps you make precise cuts. It reduces mistakes and saves time in woodworking projects.
Using the right tools and methods is key to clear, exact lines on wood surfaces. This guide covers two important marking techniques.
Using Marking Gauges
A marking gauge helps you draw straight and even lines parallel to the wood edge. It improves consistency on repeated cuts.
- Adjust the gauge to the desired width from the edge.
- Hold the gauge firmly and slide it along the wood edge.
- Keep steady pressure to leave a clear scribe line.
- Use the line as a guide for your saw or chisel.
Applying Sharp Pencil And Knife Marks
Sharp pencils and knives create fine lines that improve cutting accuracy. Each tool works best for different marking needs.
| Tool | Best For | Tip |
| Sharp Pencil | General marking and layout | Keep lead sharp for thin lines |
| Knife | Scribing precise cut lines | Score lightly to avoid splintering wood |
Avoiding Common Mistakes
Marking wood for cutting needs care. Small mistakes can cause big problems in your project.
Use simple tips to keep your marks clear and your measurements exact. This helps you cut wood perfectly every time.
Preventing Smudges And Faded Lines
Smudges and faded lines make it hard to see where to cut. Avoid these by using the right tools and techniques.
- Use a sharp pencil or fine-tip marking knife.
- Keep your hands clean and dry to avoid smearing.
- Mark wood before sanding to keep lines clear.
- Apply light pressure to avoid deep grooves.
- Use painter’s tape on the wood surface to mark, then trace.
Double-checking Measurements
Checking measurements twice helps avoid cutting errors. Measure the wood piece, mark it, then check again before cutting.
| Action | Why It Matters |
| Measure twice | Catch mistakes early |
| Mark clearly | Easy to see cutting lines |
| Check angles | Ensure correct cuts |
| Use a ruler or square | Maintain straight lines |
Advanced Tips From Experts
Marking wood for precise cuts is key to good woodworking. Experts use smart tricks to get exact lines every time.
These tips help avoid mistakes and save time. Use tools and techniques that improve your marking accuracy.
Using Templates And Jigs
Templates and jigs guide your marking and cutting. They repeat shapes and angles with perfect accuracy.
Create templates from hardboard or plywood. Clamp them firmly to your wood before marking.
- Templates ensure consistent shapes for multiple pieces
- Jigs help hold wood steady during marking
- Use sharp pencils or marking knives on jigs
- Test templates on scrap wood first
Incorporating Laser Guides
Laser guides project straight lines onto wood surfaces. They help mark cuts without measuring again.
Attach laser guides to saws or workbenches. Align the laser line with your cut marks for better precision.
- Laser lines show exact cut paths on wood
- They reduce eye strain and guesswork
- Use laser guides in dim light for best visibility
- Check laser alignment regularly for accuracy
Frequently Asked Questions
What Tools Are Best For Marking Wood Accurately?
Use sharp pencils, marking knives, or fine-tip markers for clear, precise lines. A combination square helps ensure straight, accurate marks. Avoid thick markers that obscure details.
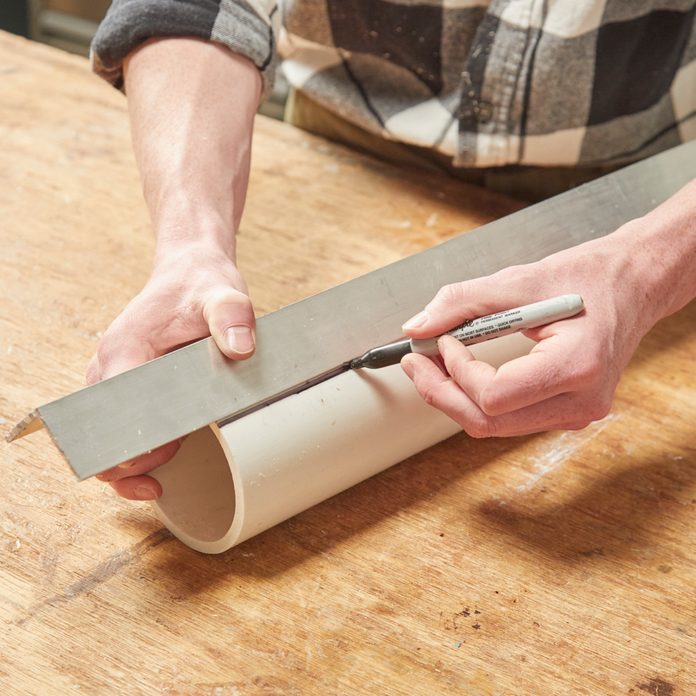
How Do I Ensure Straight Lines On Wood For Cutting?
Use a straightedge or ruler to guide your pencil or knife. Clamp the wood to prevent movement. Mark lightly first, then darken the line for clarity.
Why Is Measuring Twice Important Before Marking Wood?
Measuring twice helps prevent costly mistakes and wasted material. It ensures your cuts fit perfectly. This practice boosts accuracy and saves time during woodworking projects.
What Techniques Improve Marking Curved Cuts On Wood?
Use flexible curves or templates to trace smooth, accurate curves. Mark with a pencil or knife for precision. Practice steady hand movements to avoid uneven lines.
Conclusion
Precise wood marking makes cutting easier and more accurate. Use sharp pencils or marking knives for clear lines. Measure twice to avoid mistakes and save time. Keep your tools clean and well-maintained for the best results. Practice careful marking before cutting to build confidence.
These small steps help create better woodworking projects. Stay patient and focused, and your cuts will improve. Good marking leads to great craftsmanship every time.