If your drill press isn’t running smoothly, the problem might be a worn-out belt. Replacing drill press belts can seem tricky, but with the right tips, you can fix it quickly and get back to work.
You’ll discover simple steps to replace your drill press belt safely and efficiently. Whether you’re a beginner or just need a refresher, these easy-to-follow tips will save you time and frustration. Keep reading to make sure your drill press runs like new again!
Signs Belt Needs Replacement
The drill press belt is key for smooth machine operation. Over time, belts wear out and lose efficiency.
Knowing the signs that the belt needs replacement helps avoid damage and keeps your work safe.
Unusual Noises
When the drill press belt wears down, it can cause strange sounds. Squealing or chirping noises often mean the belt is slipping or misaligned.
- Squealing noises during startup or use
- Chirping sounds at higher speeds
- Grinding or rubbing sounds near the belt area
Slipping Belt
A slipping belt reduces power transfer. The drill press may slow or stall under load. This slip often results from belt stretch or loss of grip.
| Symptom | Cause | Effect |
| Drill speed slows | Belt stretch | Reduced drilling power |
| Belt spins on pulley | Loss of grip | Slipping and noise |
| Motor strains | Excess slip | Overheating |
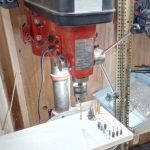
Visible Wear And Tear
Look closely at the belt for cracks, fraying, or glazing. These signs show the belt is aging and losing strength.
Common visible signs include:
- Cracks or splits along the belt edges
- Shiny or glazed surfaces that reduce friction
- Missing chunks or uneven thickness
- Frayed fabric or fibers showing
Credit: www.familyhandyman.com
Choosing The Right Replacement Belt
Replacing the drill press belt is important to keep your tool working well. Picking the right belt helps maintain speed and power. It also prevents damage to the machine.
This guide covers how to measure belt size, types of materials, and matching belts to your drill press model.
Measuring Belt Size
Measure the old belt or the pulleys to find the correct size. The belt length is the most important number. You also need to know the belt width and thickness.
- Use a tape measure to get the belt length around the pulleys.
- Measure the belt width with a ruler or caliper.
- Check the belt thickness to match the original belt.
- Write down these numbers before buying a new belt.
Material Types
Belts come in different materials. Each material offers different strength and durability. Choose one that fits your drill press use.
| Material | Strength | Durability | Common Use |
| Rubber | Medium | Good | General purpose |
| Leather | High | Very good | Heavy duty |
| Polyurethane | High | Excellent | High performance |
| Neoprene | Medium | Good | Heat resistant |
Compatibility With Drill Press Model
Not every belt fits every drill press. Check your drill press manual or label for belt specifications. Using the wrong belt may cause poor performance or damage.
- Look for the belt type recommended by the manufacturer.
- Match the belt size to your drill press model.
- Confirm the belt material suits your drill press speed and load.
- Use belts made for your drill press brand if possible.
Preparing For Belt Replacement
Replacing a drill press belt needs careful preparation. Getting ready helps you do the job quickly and safely.
This guide covers three important areas. You will learn what tools to gather, safety steps to follow, and how to reach the belt area.
Gathering Necessary Tools
Before starting, collect all tools needed for the belt replacement. Having tools ready saves time and avoids interruptions.
- New drill press belt matching your machine
- Wrenches or socket set for bolts
- Screwdrivers for covers
- Pliers for belt tension
- Rags to clean dirt and oil
- Flashlight for better visibility
Ensuring Safety Precautions
Safety is key when replacing belts. Follow these steps to protect yourself from injury.
| Safety Measure | Reason |
|---|---|
| Unplug the drill press | Prevents accidental start |
| Wear safety glasses | Protects eyes from debris |
| Remove loose clothing | Avoids getting caught in moving parts |
| Work in a well-lit area | Improves visibility and accuracy |
| Keep hands dry and clean | Ensures a good grip on tools |
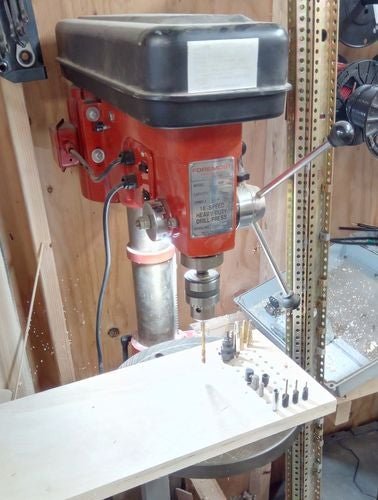
Accessing The Belt Area
To replace the belt, you must open the drill press covers and reach the belt area. Follow these tips.
- Locate and unscrew the belt cover
- Set screws and covers aside safely
- Use a flashlight to see inside clearly
- Check belt condition before removal
- Note belt routing for correct replacement
Credit: ftp.spaceneedle.com
Step-by-step Belt Removal
Replacing the drill press belt helps keep your machine working well. Removing the old belt is easy with the right steps. Follow these clear instructions to do it safely and quickly.
This guide shows how to loosen tension, remove the old belt, and check the pulleys before installing a new belt.
Loosening Tension
Start by turning off and unplugging the drill press. Find the tension lever or motor mount that holds the belt tight. Move the lever or loosen the bolts to reduce tension on the belt.
Keep the belt loose enough so it can slide off the pulleys without force. Be careful not to drop any parts while loosening.
Removing Old Belt
With the tension loose, gently slide the belt off the small pulley first. Then, remove it from the larger pulley. Avoid pulling or twisting the belt too hard to prevent damage.
Set the old belt aside for inspection or disposal. Check if it is cracked, stretched, or worn out to know why it needed replacement.
Inspecting Pulleys
Look closely at both pulleys after removing the belt. Check for dirt, dust, or damage like cracks and chips. Clean any debris to help the new belt last longer.
If the pulleys show signs of wear, consider replacing or repairing them. Smooth pulleys help the belt run quietly and efficiently.
Installing The New Belt
Replacing the belt on your drill press is a simple task if you follow the right steps. Installing the new belt correctly will help your drill press work smoothly.
Focus on positioning the belt, adjusting the tension, and testing the alignment. These steps ensure the belt lasts longer and works well.
Positioning The Belt
Start by placing the belt on the smaller motor pulley first. Then loop it over the larger spindle pulley. Make sure the belt sits in the grooves properly.
- Check the belt is not twisted
- Ensure the belt fits snugly in the pulley grooves
- Keep the belt centered on both pulleys
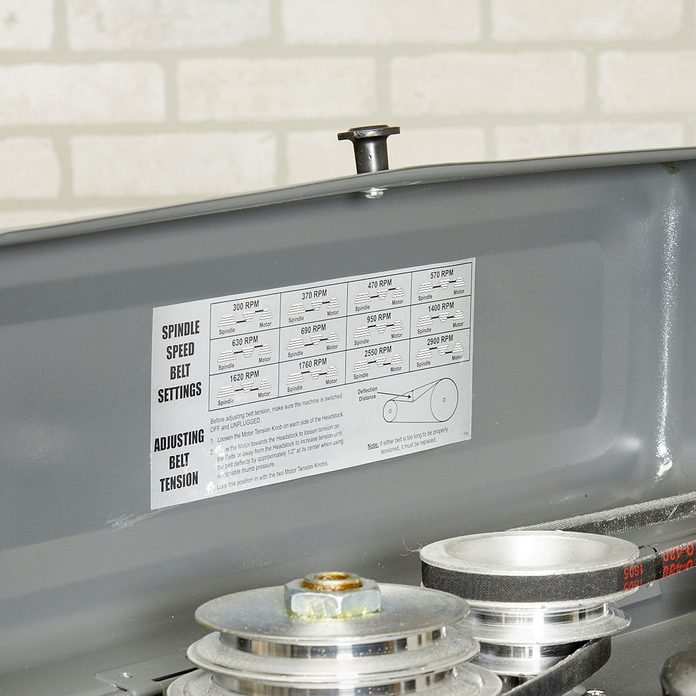
Adjusting Tension Correctly
The belt should be tight but not too tight. Too much tension can wear out bearings. Too little tension causes slipping.
| Tension Level | Effect |
| Too Tight | Wears bearings fast |
| Too Loose | Belt slips during use |
| Just Right | No slipping or damage |
Testing Belt Alignment
Check that the belt runs straight and true on both pulleys. Misalignment causes noise and belt damage.
- Turn the pulleys slowly by hand
- Watch the belt for wobbling or slipping
- Adjust pulley positions if needed

Credit: dr-johnyk.com
Maintaining Drill Press Belts
Drill press belts need regular care to work well. Good maintenance helps them last longer.
Keeping belts clean and checking for damage is important. This prevents machine problems and keeps work safe.
Regular Inspections
Look at the drill press belt often. Check for cracks, frays, or worn spots. These signs mean the belt may fail soon.
Also, check the belt tension. It should be tight but not too tight. Loose belts slip and tight belts wear out faster.
- Inspect belt surface for damage
- Check for proper belt tension
- Listen for slipping or unusual noise
Cleaning Tips
Clean belts to remove dust and oil. Dirt can cause slipping and reduce belt life. Use a dry cloth or soft brush.
Avoid using water or harsh chemicals. These can damage the belt material. Keep the pulleys clean too.
- Wipe belts with a dry cloth
- Brush off dust and debris gently
- Do not use water or solvents
- Clean pulleys to avoid belt damage
When To Replace Again
Replace the belt if you see deep cracks or if it slips often. A worn belt reduces machine power and safety.
Also, replace the belt if it looks shiny or glazed. This means the belt lost grip and cannot work well.
- Replace if belt has deep cracks
- Replace if belt slips frequently
- Replace if belt surface is shiny
- Replace if belt tension cannot be maintained
Frequently Asked Questions
How Do I Know When To Replace Drill Press Belts?
You’ll know it’s time to replace drill press belts when they show signs of wear. Look for cracks, fraying, or a loss of tension. These indicate that the belt’s efficiency is compromised. Regularly inspecting your belts can prevent equipment damage and maintain optimal performance.
What Tools Are Needed For Belt Replacement?
To replace drill press belts, you’ll need basic tools like a wrench, screwdriver, and possibly pliers. These tools help remove the old belt and adjust pulleys. Having these on hand ensures a smooth replacement process, minimizing downtime and maintaining your drill press’s efficiency.
How Often Should I Check Drill Press Belts?
Check your drill press belts every three to six months. Regular inspections help catch wear and tear early. This proactive approach can prevent unexpected breakdowns and prolong the life of your equipment. Consistent maintenance ensures optimal performance and safety during operations.
Can I Replace Belts Without Professional Help?
Yes, you can replace drill press belts yourself. With the right tools and instructions, it’s a manageable task. However, if you’re unsure, consult the machine’s manual or watch online tutorials. This ensures a correct and safe replacement, maintaining the efficiency of your drill press.
Conclusion
Replacing drill press belts can keep your tool running smoothly. Check belt tension and alignment often for best results. Use the right belt size to avoid damage or slipping. Take your time and follow safety steps carefully. Small efforts help extend your drill press’s life.
Keep practicing, and it will become easier. Proper maintenance saves money and improves work quality. Stay patient and confident while doing the replacement. Your drill press will thank you with better performance.