Are your chisels not cutting as smoothly as they used to? Dull chisels can make your woodworking frustrating and slow.
But sharpening them doesn’t have to be a headache. With the right tips, you can bring your chisels back to life and enjoy clean, precise cuts every time. Keep reading, and you’ll discover simple, effective ways to sharpen your chisels quickly and easily—saving you time and effort on every project.

Credit: woodworkersinstitute.com
Choosing The Right Chisel
Picking the right chisel is key to good woodworking. The right tool makes sharpening easier and your work better.
Think about what you will use the chisel for. Different chisels fit different jobs and skill levels.
Types Of Chisels
There are many types of chisels. Each has a different shape and use.
- Bench Chisels: Good for general woodworking tasks
- Mortise Chisels: Strong and thick for heavy cutting
- Paring Chisels: Thin blades for fine detail work
- Corner Chisels: Used to clean out corners and joints
- Firmer Chisels: Durable and used for heavier cuts
Material Considerations
Chisels come in different materials. The blade’s steel quality affects sharpness and durability.
High carbon steel holds an edge longer but can rust. Stainless steel resists rust but dulls faster.
- High Carbon Steel: Sharp and durable, needs care to avoid rust
- Stainless Steel: Rust-resistant, requires more frequent sharpening
- Tool Steel: Balanced strength and sharpness for many uses
Selecting Based On Use
Choose a chisel that fits the work you plan to do. Size and shape matter for each task.
For heavy chopping, use a thick, strong chisel. For fine carving, pick a thin, sharp one.
- Light Work: Smaller, thin chisels for detail
- Heavy Work: Larger, thick chisels for strength
- General Use: Medium size with balanced blade
- Carving: Specialized shapes for curves and detail
Credit: www.anneofalltrades.com
Essential Sharpening Tools
Sharpening chisels needs the right tools for the best results. Using proper equipment helps keep your chisels sharp and ready.
We will cover three key tools: whetstones, honing guides, and lubricants with accessories. Each tool plays a special role in sharpening.
Whetstones And Grit Levels
Whetstones come in different grit levels for sharpening chisels. Coarse grits remove nicks fast. Fine grits polish the edge.
- Coarse grit (200-400): Fixes chips and reshapes edges.
- Medium grit (800-1000): Sharpens dull blades.
- Fine grit (3000-8000): Polishes and smooths edges.
Honing Guides
Honing guides hold chisels steady while sharpening. They keep the angle consistent. This makes sharpening easier and more accurate.
| Type | Use |
| Clamp-style | Holds the chisel firmly with a clamp. |
| Roller guide | Allows smooth movement on the stone. |
| Angle guide | Sets the exact sharpening angle. |
Lubricants And Accessories
Lubricants help stones work better and last longer. You can use water, oil, or special sharpening fluids. Accessories include strops and cleaning cloths.
- Water: Common for water stones; keeps stone wet.
- Oil: Used with oil stones; reduces friction.
- Strop: Polishes and removes burrs after sharpening.
- Cleaning cloth: Wipes stones and tools clean.
Preparing The Chisel
Sharpening a chisel starts with good preparation. A clean, properly set chisel sharpens better and lasts longer.
Taking time to prepare the chisel helps you get a sharp, precise edge with less effort.
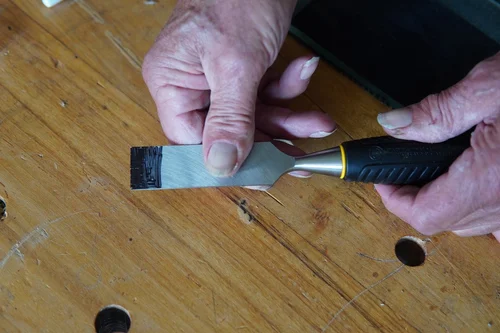
Cleaning And Inspection
First, clean the chisel to remove dirt and rust. Use a cloth and some light oil or rust remover.
Next, check the blade and handle for any damage. Look for chips, cracks, or loose parts.
- Remove all rust and dirt from the blade
- Check for nicks or chips on the cutting edge
- Ensure the handle is solid and not cracked
- Tighten any loose parts before sharpening
Setting The Bevel Angle
Set the bevel angle before sharpening. This angle affects how sharp and strong the edge will be.
Most chisels use a bevel angle between 25 and 30 degrees. Use a guide or angle gauge to check this.
- Measure the current bevel angle with a protractor or angle guide
- Adjust your sharpening setup to match this angle
- Maintain a steady angle during sharpening for best results
Securing The Chisel
Hold the chisel firmly before sharpening. This keeps it steady and safe to work on.
Use a clamp or vise to secure the chisel on your workbench. Avoid holding it by hand.
- Place the chisel blade flat in a vise or clamp
- Do not overtighten and damage the chisel
- Keep the chisel stable to avoid slips
- Wear safety glasses to protect your eyes
Sharpening Techniques
Sharpening chisels keeps them effective and safe to use. Proper techniques make the blade sharp and long-lasting.
Each part of the chisel blade needs attention during sharpening. Grinding, creating a burr, and honing the back are key steps.
Grinding The Bevel
Grinding the bevel shapes the cutting edge. Use a grinding wheel or sharpening stone for this step.
Keep the bevel angle steady. Move the chisel evenly across the grinding surface to avoid uneven edges.
- Hold the chisel at the correct bevel angle (usually 25-30 degrees)
- Use light pressure to prevent overheating the blade
- Grind until the old edge is removed and a new edge forms
Creating A Burr
A burr is a tiny folded edge that shows the blade is sharp. It forms on the opposite side of the bevel.
After grinding, check for the burr by gently feeling the back of the blade. The burr means the edge is ready for honing.
- Grind the bevel until you feel a slight rough edge on the back
- The burr should run the full width of the blade
- If no burr forms, continue grinding carefully
Honing The Back
Honing the back removes the burr and makes the edge smooth. Use a fine sharpening stone for this step.
Lay the chisel flat with the back on the stone. Move it in small circles or back and forth to polish the surface.
- Keep the back flat against the stone
- Use light, even pressure
- Hone until the burr disappears and the back is smooth
Maintaining The Edge
Keeping your chisels sharp helps you work safely and easily. A sharp edge cuts cleanly and lasts longer. Proper care keeps your tools ready for any project.
In this guide, learn simple ways to maintain your chisel’s edge. Use stropping, regular touch-ups, and smart storage to protect your tools.
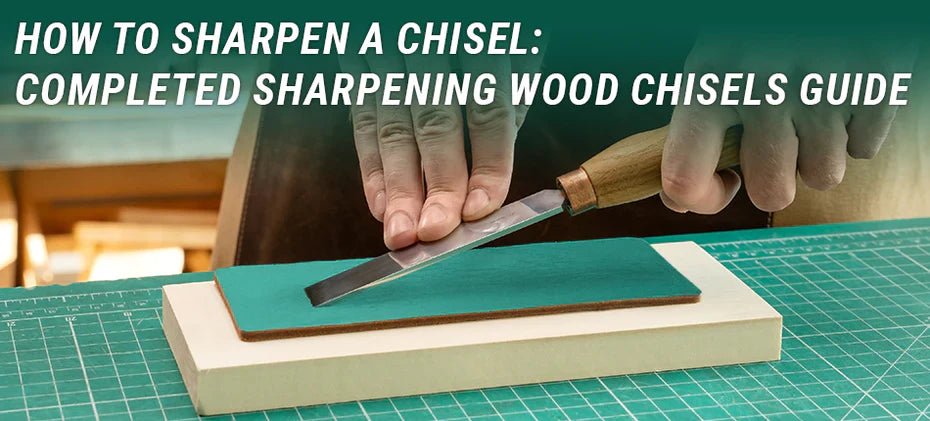
Stropping Methods
Stropping removes tiny burrs and polishes the chisel edge. Use a leather strop with polishing compound for best results. Stropping keeps the blade smooth and sharp between major sharpenings.
- Apply a fine polishing compound to a clean leather strop.
- Hold the chisel flat and draw the edge backward along the strop.
- Repeat 10 to 15 times on each side of the blade.
- Check the edge for a smooth, polished finish.
Regular Touch-ups
Touch up your chisels often to avoid heavy sharpening. Light honing keeps edges sharp and extends the life of the blade. Use a fine sharpening stone or honing guide for better control.
- Clean the chisel edge before honing.
- Place the chisel on a fine-grit stone at the correct angle.
- Move the blade smoothly across the stone in a controlled motion.
- Check the edge regularly and stop when sharpness is restored.
- Finish by stropping the blade for a polished edge.
Storage Tips
Storing chisels properly protects the edge and prevents damage. Avoid loose piles where blades can knock together or get dull. Use holders or cases designed for chisels.
| Storage Method | Benefits | Tips |
| Wooden chisel rack | Keeps blades separated and organized | Place rack in dry area to prevent rust |
| Leather roll case | Protects edges and is portable | Clean chisels before storing to avoid corrosion |
| Magnetic strip | Easy access and keeps chisels visible | Ensure magnets do not dull edges by avoiding metal contact |
Common Mistakes To Avoid
Sharpening chisels is important for good woodworking results. Avoiding common mistakes helps keep your tools sharp and safe.
Knowing what to avoid makes sharpening easier and better. Learn about common errors and how to prevent them.
Overheating The Steel
Grinding chisels too fast can heat the steel. Overheating makes the blade lose its hardness.
When steel gets too hot, it can become soft and dull quickly. Watch the color change to blue or red on the blade.
- Use light pressure when grinding
- Keep the chisel moving on the grinder
- Cool the blade often with water
- Stop if the steel changes color
Incorrect Angles
Sharpening at the wrong angle weakens the edge. The chisel may not cut well or chip easily.
Use the correct angle for your chisel type. Usually, 25 to 30 degrees is good for most woodworking chisels.
- Check the original bevel angle before sharpening
- Use guides or jigs to keep a steady angle
- Practice keeping a consistent angle on both sides
Skipping Steps
Skipping sharpening steps leads to poor edges. Each step removes scratches and improves sharpness.
Start with coarse stones or belts and move to finer ones. Skip no step to get a smooth, sharp edge.
- Begin with grinding or coarse sharpening
- Use medium grit to refine the edge
- Finish with fine stones or strops for polish
- Do not rush the process
Advanced Tips For Professionals
Sharpening chisels is key for clean woodworking cuts. Professionals need advanced methods for better edges.
This guide covers using diamond plates, micro-bevel techniques, and customizing edge profiles to improve chisel sharpness.
Using Diamond Plates
Diamond plates provide fast and consistent sharpening. They work well on hard steel chisels and remove metal quickly.
Use a coarse plate first, then move to finer plates to polish the edge. Keep the angle steady while sharpening.
- Start with 325 grit diamond plate for shaping
- Progress to 600 grit for smoothing
- Finish with 1200 grit or higher for polishing
- Use water or oil as lubricant to reduce heat
- Hold the chisel flat and maintain a consistent angle
Micro-bevel Techniques
A micro-bevel is a small second bevel on the edge. It helps keep the main bevel sharper longer and improves cutting control.
Create the micro-bevel by raising the angle 1 to 3 degrees from the main bevel. Use fine stones or diamond plates for this step.
- Sharpen main bevel at the usual angle
- Raise angle slightly for micro-bevel
- Use fewer strokes on micro-bevel to keep it thin
- Polish micro-bevel for a smooth cutting edge
- Check edge sharpness regularly during use
Customizing Edge Profiles
Different woodworking tasks need specific edge shapes. You can customize edge profiles for better results.
Flat, hollow, or chisel grind profiles change how the tool cuts. Adjust the grind by changing sharpening angles and bevel shapes.
| Edge Profile | Use | Sharpening Tip |
|---|---|---|
| Flat Grind | General woodworking | Keep consistent bevel angle, polish well |
| Hollow Grind | Fine paring chisels | Use a concave stone or wheel, maintain curve |
| Chisel Grind | Heavy chopping | Sharpen at higher angle for strength |

Credit: woodworkersinstitute.com
Frequently Asked Questions
How Often Should You Sharpen Chisels?
Chisels should be sharpened regularly to maintain their effectiveness. Depending on use, aim to sharpen them after every 2-3 hours of active use. Regular sharpening ensures precision and prolongs the life of your chisels.
What Tools Are Needed For Sharpening Chisels?
To sharpen chisels, you’ll need a sharpening stone, honing guide, and lubricant. A sharpening stone helps grind the edge, while a honing guide maintains the correct angle. Lubricant reduces friction, ensuring a smooth sharpening process.
Can Beginners Sharpen Chisels Effectively?
Yes, beginners can sharpen chisels effectively with proper guidance. Start by learning the basics and using the right tools. Practice regularly to improve your skills and achieve sharp, precise edges.
Why Is Proper Angle Important For Chisel Sharpening?
Maintaining the correct angle ensures efficient cutting and edge durability. A consistent angle provides a sharp edge, reducing the effort required during use. It also helps in preventing damage and prolongs the lifespan of the chisel.
Conclusion
Sharpening chisels keeps them effective and safe to use. Regular care improves cutting and saves time. Use the right tools and follow steps carefully. Stay patient and practice often for best results. Keep blades clean and dry after sharpening. This simple routine helps your chisels last longer.
Enjoy smoother, more precise woodworking with sharp chisels. Small efforts make a big difference in your work.