Are you tired of your sanding discs getting damaged or lost just when you need them most? Proper storage can save you time, money, and frustration.
When you store your sanding discs efficiently, they stay in great shape and last longer, making your projects smoother and easier. You’ll discover simple yet effective tips to keep your sanding discs organized and protected. Keep reading to find out how a little effort now can make a big difference every time you work.

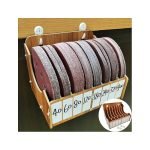
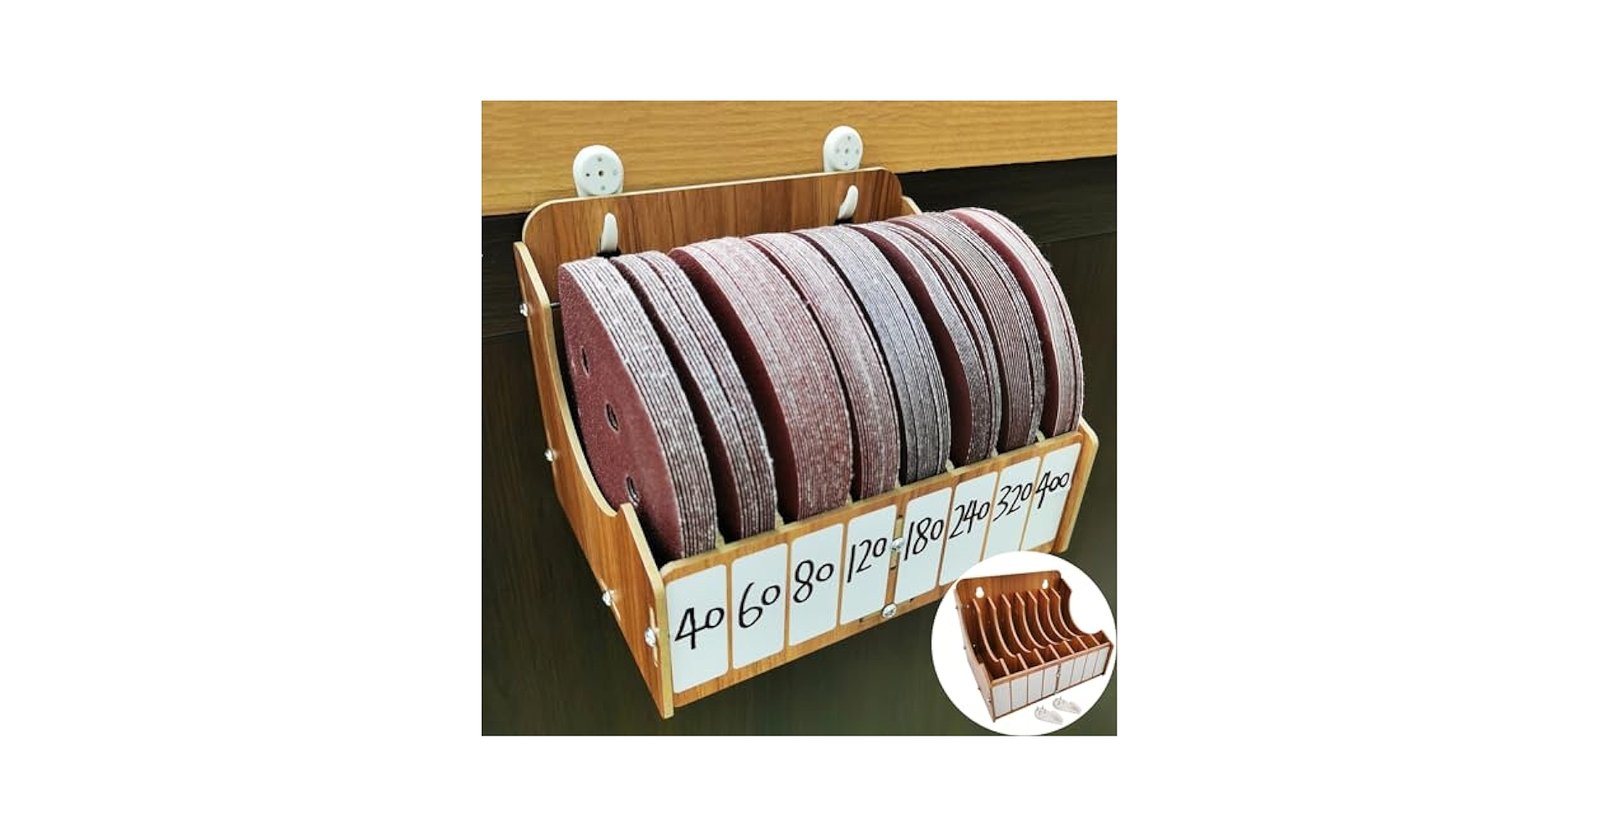
Credit: www.amazon.co.uk
Choosing The Right Storage Method
Keeping sanding discs organized helps you find them quickly. It also protects the discs from damage and dust.
Choosing the right storage method depends on space, disc type, and how often you use them.
Stacking Vs. Hanging
Stacking sanding discs saves space and keeps them flat. You can stack discs of the same size or grit to avoid mix-ups.
- Stack discs on a flat surface or shelf
- Place paper or thin sheets between discs to prevent scratches
- Store stacks in a dry place away from moisture
- Do not stack too high to avoid warping
Hanging discs lets air flow around them. It also keeps them wrinkle-free and easy to grab.
- Use hooks or pegs on a wall or board
- Hang discs by their center hole
- Group by size or grit for quick access
- Keep away from direct sunlight to avoid fading
Using Containers And Drawers
Containers and drawers protect discs from dust and damage. They also make it easy to organize many discs in one place.
| Storage Type | Benefits | Considerations |
| Plastic Containers | Dustproof, stackable | Choose clear containers to see contents |
| Drawer Units | Easy sorting by size or grit | Use dividers to keep discs separate |
| Toolboxes | Portable and sturdy | May need foam inserts for protection |
Label containers or drawer sections clearly. This saves time and keeps your workspace neat.
Organizing By Grit And Size
Keeping sanding discs in order saves time and space. Sorting them by grit and size helps you find the right disc fast.
Clear organization also protects discs from damage. It keeps your workspace neat and ready for any project.
Labeling For Easy Access
Label your storage containers or shelves to spot the discs you need quickly. Use clear and simple labels for grit and size.
- Write the grit number on each container
- Include the disc diameter on the label
- Use color-coded stickers to separate grit types
- Place labels where they are easy to see
Sorting Techniques
Sort sanding discs by grit in ascending order. Group discs of the same size together for quick selection.
| Grit Range | Storage Method | Disc Size |
| Coarse (40-60) | Use labeled trays or small bins | 4″, 5″, 6″ |
| Medium (80-120) | Store in divided drawers | 4″, 5″, 6″ |
| Fine (150-220) | Keep in clear plastic sleeves | 4″, 5″, 6″ |
| Very Fine (240+) | Use sealed containers to prevent dust | 4″, 5″, 6″ |
Protecting Discs From Damage
Sanding discs need careful storage to keep their shape and function. Poor storage causes damage and shortens disc life.
This guide shows easy ways to protect sanding discs from moisture, dust, and physical harm.
Avoiding Moisture And Dust
Moisture and dust can ruin sanding discs by weakening their surface and clogging their grit. Keep discs dry and clean for best results.
- Store discs in a dry place with low humidity.
- Use airtight containers or plastic bags to block moisture.
- Keep discs away from dusty areas or cover them well.
- Check stored discs regularly for signs of dampness or dust buildup.
Using Protective Covers
Protective covers shield sanding discs from scratches and dents. Use the right covers to keep discs flat and clean.
| Type of Cover | Benefit |
| Plastic sleeves | Keep discs flat and dust-free |
| Hard plastic cases | Protect discs from impact and bending |
| Cardboard backing | Support discs during storage |
| Stackable trays | Organize discs without damage |

Credit: www.amazon.co.uk
Space-saving Storage Ideas
Storing sanding discs neatly saves space and keeps your workshop tidy. Proper storage also protects discs from damage.
Try different ways to organize your sanding discs to fit your available space. Use smart ideas to keep them easy to find.
Vertical Storage Solutions
Vertical storage uses wall space to hold sanding discs. This saves room on benches and shelves.
Mount pegboards or slat walls and hang discs on hooks. This keeps discs visible and easy to grab.
- Use pegboards to hang discs by size or grit
- Install narrow shelves vertically to stack discs upright
- Attach magnetic strips for metal sanding disc holders
- Label each spot for quick selection
Diy Storage Hacks
You can create simple DIY storage to save space and organize discs. Use items you already have at home or workshop.
Try using old containers or repurpose materials to build custom holders for sanding discs.
- Use empty spice racks to store discs by grit
- Mount binder clips on the wall to hold disc stacks
- Cut PVC pipes and attach them vertically to hold discs upright
- Use cardboard dividers inside drawers to separate sanding discs
Maintaining And Rotating Inventory
Proper storage of sanding discs helps keep them in good condition. It also reduces waste and saves money. Regular maintenance and inventory rotation are key to efficient storage.
Following simple steps can extend the life of your sanding discs. It also ensures you use them before they lose effectiveness.
Regular Inspection
Check sanding discs regularly for damage or wear. Look for cracks, tears, or uneven surfaces. Discs with defects should be removed from use to avoid poor results or accidents.
- Inspect discs before and after each use
- Store discs in a dry, clean area to prevent damage
- Keep discs away from direct sunlight and heat
- Dispose of any damaged or expired discs promptly
First-in, First-out System
Use the first-in, first-out (FIFO) method to manage sanding disc stock. This system helps use older discs before new ones. It reduces the chance of discs becoming unusable over time.
| Inventory Date | Quantity | Action |
| January 2024 | 50 discs | Use first |
| March 2024 | 75 discs | Use after January batch |
| May 2024 | 100 discs | Use last |

Credit: www.amazon.com.au
Frequently Asked Questions
How Should I Organize Sanding Discs For Easy Access?
Store sanding discs by size and grit in labeled containers or racks. This keeps them neat and easy to find quickly. Avoid mixing types to save time and prevent damage.
What Environment Is Best For Storing Sanding Discs?
Keep sanding discs in a cool, dry place away from sunlight. Excess heat or moisture can damage the abrasive surface. Proper storage extends their lifespan and maintains effectiveness.
Can Improper Storage Damage Sanding Discs?
Yes, storing discs stacked or bent can cause warping and reduce performance. Avoid pressure or moisture to preserve grit quality. Proper storage ensures consistent sanding results.
How To Prevent Sanding Discs From Sticking Together?
Use separator sheets or store discs individually to prevent sticking. Avoid humidity and keep discs dry. This maintains their abrasive surface and usability.
Conclusion
Storing sanding discs properly saves time and keeps them in good shape. Keep discs dry and away from dust or heat. Use clear containers or labeled boxes for easy access. Stack discs flat to avoid bending or damage. Organize by grit size for quick selection during work.
Regular checks help spot worn or damaged discs early. Good storage habits make sanding tasks smoother and faster. Simple steps lead to longer-lasting sanding discs and better results.