Are you ready to tackle those small woodworking projects but unsure how to get the best results with a hand saw? Using a hand saw might seem simple, but a few smart tips can make your cutting smoother, safer, and more precise.
Imagine finishing your project faster and with less effort, feeling proud of the clean, sharp cuts you made yourself. You’ll discover easy-to-follow advice that will boost your confidence and skill every time you pick up your hand saw. Keep reading to unlock the secrets that turn a basic tool into your best project partner.

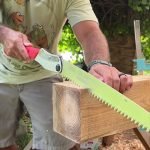
Credit: www.youtube.com
Choosing The Right Hand Saw
Using a hand saw for small projects is simple and effective. Picking the right saw helps you work better and faster.
Not all hand saws are the same. Each type suits different tasks and materials.
Types Of Hand Saws
There are many types of hand saws. Each has a special shape and tooth design for certain jobs.
- Crosscut Saw:Cuts across the grain of wood.
- Rip Saw:Cuts along the grain for fast removal.
- Back Saw:Has a stiff edge for precise cuts.
- Keyhole Saw:Small blade for cutting curves or holes.
- Japanese Saw:Thin blade that cuts on the pull stroke.
Choose a saw type that fits your project size and wood type.
Blade Selection Tips
Selecting the right blade is important. Blade teeth size and shape affect the cut quality.
- Teeth Per Inch (TPI):More teeth mean a smoother cut.
- Large Teeth:Cut faster but rougher.
- Small Teeth:Cut slower but cleaner.
- Blade Length:Longer blades cut bigger pieces.
- Blade Thickness:Thicker blades give more control.
Match the blade to the type of wood and cut you want to make.

Credit: www.youtube.com
Preparing Your Workspace
Before using a hand saw, set up a safe and organized workspace. This helps you work better and avoid accidents.
Clear the area of any clutter and make sure you have enough room to move around freely.
Securing The Material
Hold the material firmly to keep it from moving while you saw. This makes your cuts clean and safe.
Use clamps or a vise to fix the wood on a stable surface. Avoid holding pieces by hand.
- Use clamps to hold small pieces tightly
- Work on a flat, steady table or bench
- Check that the material does not wobble
- Keep your hands away from the blade path
Ensuring Proper Lighting
Good lighting helps you see where to cut clearly. It reduces mistakes and improves safety.
Use natural light or bright lamps to illuminate your workspace evenly. Avoid shadows on the material.
- Work near a window during the day
- Use a desk lamp or overhead light at night
- Position lights to avoid glare on the saw blade
- Make sure the whole cutting area is well lit
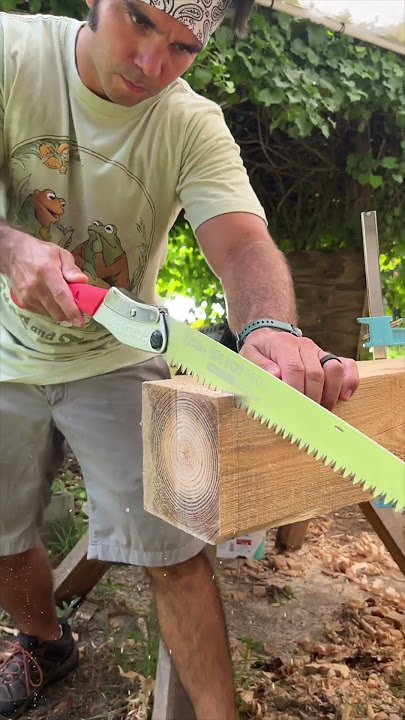
Basic Hand Saw Techniques
Using a hand saw correctly helps you cut wood safely and neatly. Small projects need careful control and steady movements.
Learning the right grip and how to start a cut makes your work easier. These tips will guide you through the basics.
Correct Grip And Stance
Hold the saw handle firmly but not too tight. Keep your wrist straight to avoid strain. Stand with your feet shoulder-width apart for balance.
- Grip the handle with your dominant hand.
- Place your other hand on the wood to steady it.
- Stand so your body faces the wood at an angle.
- Keep your back straight and bend your knees slightly.
- Make sure you have enough room to move the saw smoothly.
Starting The Cut Smoothly
Begin the cut slowly to make a guide groove. Use short, light strokes before moving to longer cuts. This helps keep the saw on track.
| Tip | How to Do It |
| Mark the cut line | Use a pencil and ruler to draw a straight line on wood. |
| Start with light strokes | Saw gently along the line to create a shallow groove. |
| Increase stroke length | Once the groove is set, use longer strokes to cut deeper. |
| Keep saw angle steady | Hold the saw at about 45 degrees for crosscuts. |
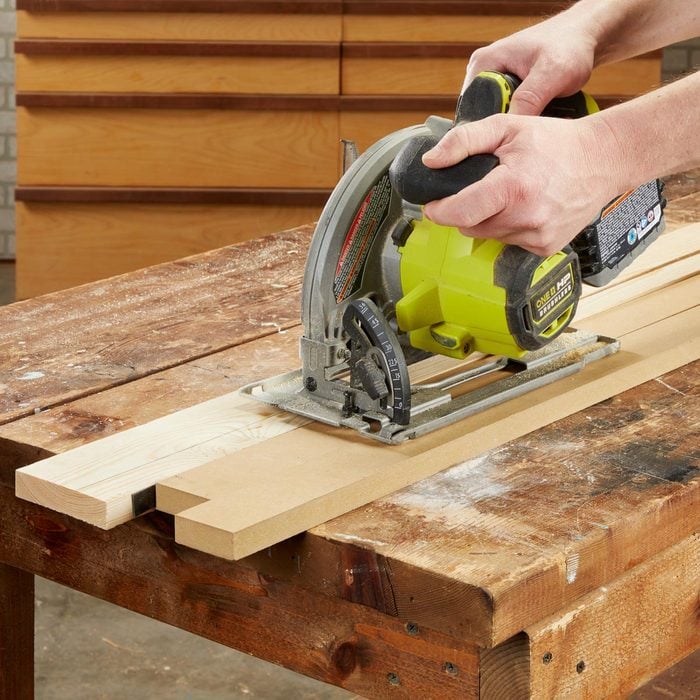
Advanced Cutting Methods
Using a hand saw well means learning some advanced cutting methods. These techniques help you cut wood cleanly and safely. They work great for small projects where precision matters.
Two important cutting methods are crosscutting and ripping. Each method needs a different approach to get the best results.
Crosscutting Tips
Crosscutting means cutting across the wood grain. This type of cut needs a smooth and steady saw motion. Use the saw’s teeth to score the wood before cutting deeply.
Keep the saw at a slight angle, about 45 degrees. Let the saw do the work without forcing it. Start with short strokes to guide the cut, then use longer strokes.
- Mark the cut line clearly with a pencil.
- Use a saw with fine teeth for a smooth finish.
- Clamp the wood to prevent it from moving.
- Hold the saw handle firmly but not too tight.
- Check the cut angle often to stay on track.
Ripping Techniques
Ripping means cutting along the wood grain. It is tougher than crosscutting and needs more power. Use a saw with larger teeth to clear wood chips faster.
Start the cut by angling the saw at about 60 degrees. Push the saw forward with steady force and pull it back gently. Keep the wood steady and follow the marked line closely.
- Use a straight edge to guide the saw for a straight cut.
- Keep the saw teeth sharp for easier cutting.
- Support the wood on both sides of the cut.
- Work in a well-lit area to see the cut line clearly.
- Take breaks if the saw gets stuck or if cutting is hard.
Maintaining Your Hand Saw
Keeping your hand saw in good condition helps it cut smoothly and last longer. Regular care prevents damage and makes small projects easier.
Simple maintenance tasks like sharpening and cleaning keep your saw ready to use. These steps save time and effort in the long run.
Sharpening The Blade
A sharp blade cuts better and makes your work safer. Use a file or sharpening tool to keep the teeth sharp.
Check the blade often and sharpen it if you see dull or damaged teeth. Sharpening keeps your cuts straight and clean.
- Secure the saw in a clamp for stability
- Use a triangular file matching the tooth size
- File each tooth with smooth, even strokes
- Keep the angle consistent during filing
- Remove any burrs after sharpening
Cleaning And Storage
Clean your hand saw after every use. Removing sawdust and sap prevents rust and keeps the blade sharp.
Store the saw in a dry place. Use a protective cover or hang it on a wall to avoid damage.
- Wipe the blade with a dry cloth after use
- Use light oil to prevent rust on the blade
- Keep the saw away from moisture and dirt
- Store the saw where it won’t get knocked or bent
Credit: www.familyhandyman.com
Common Mistakes To Avoid
Using a hand saw for small projects can be simple and effective. Many beginners make mistakes that slow them down or cause injury.
Knowing what to avoid helps you work faster and safer. Learn about common errors and how to prevent them.
Overexerting Force
Pushing too hard on the saw blade can cause problems. It makes cutting harder and can damage the saw or wood.
- Apply steady, even pressure while cutting.
- Let the saw teeth do the work, not your strength.
- Use long, smooth strokes instead of short, choppy ones.
- Stop and check your work if the saw feels stuck.
Ignoring Safety Precautions
Safety is key when using a hand saw. Skipping safety steps can cause injuries or damage.
| Safety Step | Reason to Follow |
|---|---|
| Wear safety glasses | Protect eyes from flying wood chips |
| Use gloves | Prevent cuts and blisters on hands |
| Secure the wood | Stops wood from moving while cutting |
| Check the saw blade | Ensure it is sharp and not damaged |
Finishing Touches For Small Projects
Using a hand saw for small projects takes care and patience. After cutting, the finishing touches make your work look neat and professional. These steps help improve the final result.
Two important finishing steps are sanding the cut edges and checking for accuracy. Both steps ensure your project fits well and feels smooth to the touch.
Sanding Cut Edges
Sanding removes rough spots and splinters left by the saw. Use fine-grit sandpaper for best results. Sand along the edge until it feels smooth and even. This step prevents injury and gives a clean look.
- Choose 120 or 150 grit sandpaper.
- Sand gently along the cut edge.
- Check for splinters and rough spots.
- Repeat sanding until the edge is smooth.
- Wipe off dust with a dry cloth.
Checking For Accuracy
Accuracy is key for small projects to fit together well. Use a ruler or square to check your cuts. Measure twice and look closely for uneven edges or wrong angles.
| Tool | Purpose | How to Use |
| Ruler | Check length | Place along the edge and read measurement |
| Try Square | Check right angles | Align with corner to see if it is 90 degrees |
| Level | Check flatness | Place on surface to see if it is even |
Frequently Asked Questions
How Do I Choose The Right Hand Saw For Small Projects?
Select a hand saw based on the project’s material and size. For small wood projects, a fine-toothed saw ensures clean cuts. Consider blade length and handle comfort. The right saw improves accuracy and safety.
What Is The Best Technique For Using A Hand Saw?
Use steady, even strokes with light pressure. Start with a notch to guide the blade. Keep the saw perpendicular to the wood. Maintain control by gripping the handle firmly but not too tightly.
How Can I Maintain My Hand Saw For Better Performance?
Keep the blade clean and dry to prevent rust. Sharpen teeth regularly with a file. Store the saw in a dry place, preferably in a sheath. Proper maintenance extends the saw’s life and efficiency.
What Safety Tips Should I Follow When Using A Hand Saw?
Always wear safety goggles to protect your eyes. Keep fingers away from the cutting path. Use a stable work surface and clamp the wood securely. Work slowly to avoid slips or mistakes.
Conclusion
Using a hand saw can make small projects easier and more enjoyable. Practice regularly to improve your skills. Always choose the right saw for your task. Maintain your saw well to ensure smooth cuts. Remember to measure carefully before cutting.
Patience is key in achieving precise results. Keep safety in mind by wearing protective gear. A steady hand and clear focus help in making accurate cuts. Hand saws can be your trusty tool for various projects. With these tips, you can handle many tasks confidently and efficiently.
Enjoy your creative projects with your hand saw!