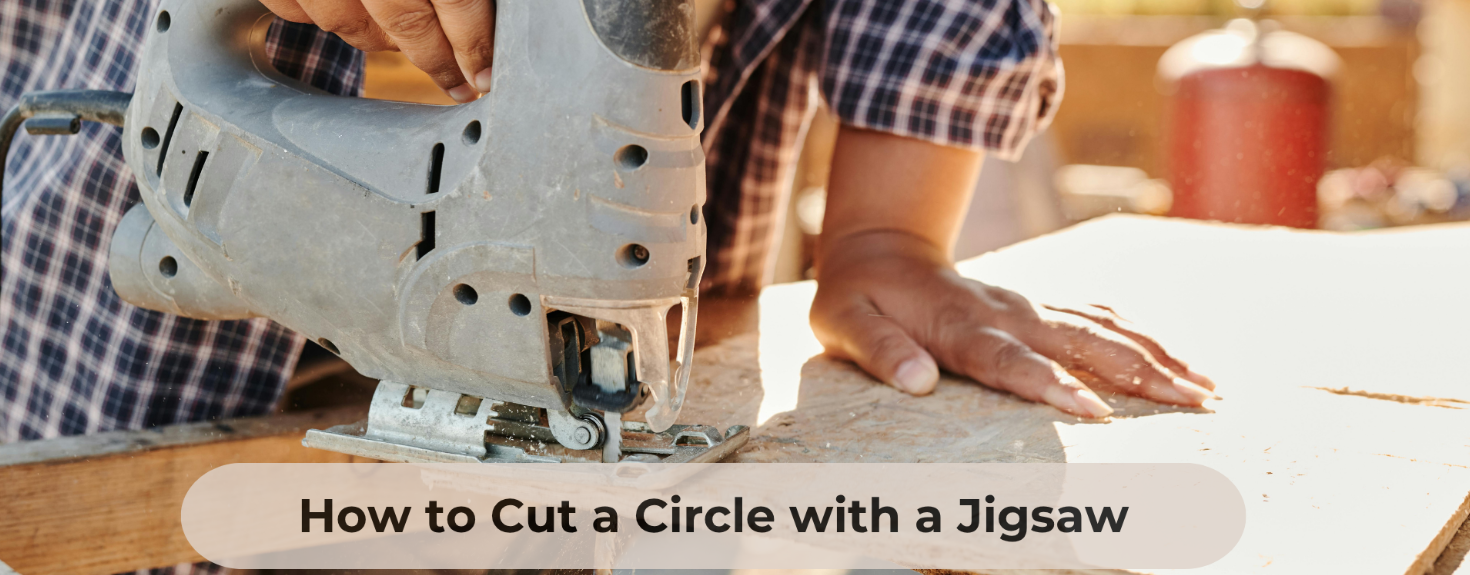
Are you ready to transform your DIY projects with the magic of curved cuts? Using a jigsaw can make this task not only easier but also incredibly fun.
Imagine the satisfaction of crafting those perfect curves with precision and style. Whether you’re a seasoned woodworker or just starting out, mastering curved cuts with a jigsaw can elevate your projects to a whole new level. But before you dive in, it’s crucial to know the right tips and tricks to ensure every cut is smooth and every curve is flawless.
In this guide, we’ll unlock the secrets to using a jigsaw for curved cuts, turning your creative visions into reality effortlessly. Get ready to impress yourself and others with your newfound skills!
Choosing The Right Jigsaw Blade
Using the right jigsaw blade makes curved cuts easier and cleaner. Not all blades cut curves well. You need to pick a blade designed for the job.
Different blades suit different materials and shapes. Choosing carefully saves time and improves your results.
Blade Types For Curved Cuts
Blades for curved cuts are usually narrow and have fine teeth. This helps the blade turn smoothly without binding.
- Scroll blades are thin and flexible, perfect for tight curves.
- Reverse-tooth blades cut on the upstroke, reducing splintering on the top side.
- Specialty curve-cut blades have extra narrow widths for sharp turns.
Material-specific Blades
Choose blades made for the material you cut. The blade must match the hardness and thickness of the material.
| Material | Recommended Blade Type | Blade Material |
| Wood | Scroll or Reverse-Tooth | High Carbon Steel |
| Metal | Fine-Tooth Bi-Metal | Bi-Metal |
| Plastic | Fine-Tooth Blade | High Carbon Steel |
| Laminates | Reverse-Tooth Blade | High Carbon Steel |
Blade Tpi And Its Impact
TPI means teeth per inch. The number of teeth affects how smooth or fast your cut will be.
- Low TPI (6-10) cuts faster but rougher edges.
- Medium TPI (10-14) balances speed and smoothness.
- High TPI (14-20+) cuts slowly but leaves a clean edge.
Preparing Your Workspace
Getting your workspace ready makes curved cuts with a jigsaw safer and easier. A neat and organized area helps you focus on the cut.
Take time to arrange tools and materials. Clear any clutter to avoid distractions or accidents.
Securing The Workpiece
Hold the piece you want to cut firmly in place. This stops it from moving while you work.
- Use clamps to fix the workpiece to your table or bench.
- Make sure the clamps do not block your cutting path.
- If clamps are not available, place heavy objects to keep the piece steady.
- Double-check stability before switching on the jigsaw.
Marking The Cut Line Clearly
Draw your cut line with care. A clear line guides your jigsaw and improves accuracy.
| Tool | Use |
| Pencil | Good for light marks on wood |
| Marker | Works well on dark or rough surfaces |
| Chalk | Easy to see on some materials |
Ensuring Proper Lighting
Bright light helps you see the cut line and jigsaw blade clearly. It reduces mistakes and keeps you safe.
- Use a desk lamp or portable light near your work area.
- Avoid shadows on the cut line by adjusting light angle.
- Natural daylight is best if you can work near a window.
Adjusting Jigsaw Settings
Using a jigsaw for curved cuts requires the right settings. Adjusting the tool helps you cut smoothly and safely.
Changing speed, orbital action, and blade guides improves control. These adjustments make curved cuts cleaner and easier.
Speed Control Tips
Lower speeds work best for curves to keep control. Fast speeds can cause the blade to wander off the line.
Start slow and increase speed if needed. Use slower speed on thick or hard materials for better accuracy.
- Use slow speed for tight curves
- Increase speed for long, gentle curves
- Slow speed reduces blade overheating
Orbital Action Settings
Orbital action moves the blade in a forward and backward motion. This setting changes how the jigsaw cuts through material.
Turn off or lower orbital action for curved cuts. This reduces chipping and keeps the cut line smooth.
- Set orbital action to zero for tight curves
- Low orbital action for gentle curves
- High orbital action for straight cuts on soft wood
Blade Guide Adjustments
Blade guides keep the blade steady and reduce vibration. Adjust them close to the material for better control.
Proper blade guide settings help the blade follow curves without bending or breaking. Check the guides before each cut.
- Adjust blade guide close to material thickness
- Use guides to reduce blade wobble
- Keep guides tight but not too tight to avoid damage

Credit: www.familyhandyman.com
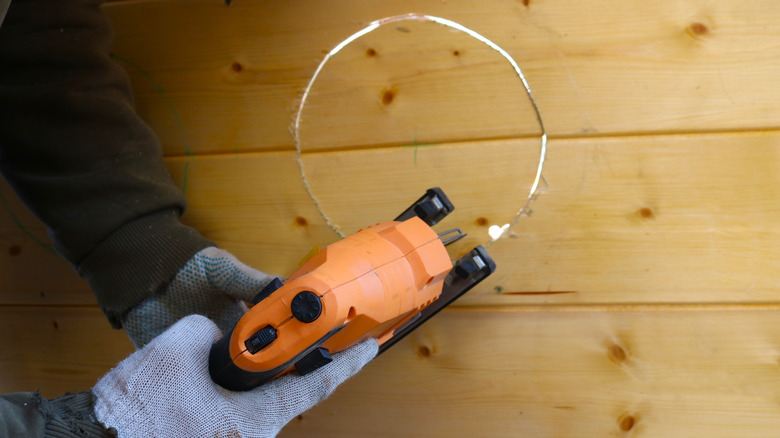
Cutting Techniques For Smooth Curves
Using a jigsaw for curved cuts needs practice and control. Smooth curves require the right approach and steady movements.
This guide covers key tips to help you cut curves cleanly and safely with your jigsaw.
Starting The Cut Correctly
Begin your cut by marking the curve clearly on your workpiece. Use a pencil or tape for better visibility.
- Secure the material firmly to avoid shifting.
- Place the jigsaw blade just outside the line.
- Start the saw at a low speed to gain control.
- Let the blade reach full speed before cutting.
- Follow the marked line gently without forcing the blade.
Maintaining Steady Hand Movement
Keep your hand steady to avoid jagged edges and uneven curves. Smooth motion is key to a clean cut.
| Tip | Reason |
|---|---|
| Hold the jigsaw with both hands | Improves control and reduces vibration |
| Move the saw slowly along the curve | Prevents blade bending and rough edges |
| Keep your eyes on the line | Helps guide the blade accurately |
| Use a firm but relaxed grip | Reduces fatigue during longer cuts |
Managing Tight Radius Turns
Tight curves need special care to avoid breaking the blade or ruining the cut. Take your time and plan ahead.
- Use a fine-toothed blade designed for curves.
- Make relief cuts inside the curve to ease turning.
- Slow down speed before entering sharp turns.
- Lean the jigsaw slightly to follow the curve better.
- Practice on scrap wood to build confidence.
Safety Practices While Cutting
Using a jigsaw for curved cuts needs care and focus. Safety is key to avoid accidents.
Follow simple rules to protect yourself and work safely with your tool.
Using Protective Gear
Always wear safety glasses to protect your eyes from dust and debris. Use ear protection to guard against noise. Wearing gloves can help keep your hands safe from sharp edges.
- Safety glasses or goggles
- Hearing protection like earplugs or earmuffs
- Work gloves with good grip
- A dust mask if cutting creates sawdust
Avoiding Kickback
Kickback happens when the jigsaw blade suddenly jumps back toward you. It can cause injury or damage.
| Cause | How to Prevent |
| Blade binding in wood | Keep blade sharp and use correct blade for material |
| Cutting too fast | Cut slowly and follow the curve steadily |
| Loose workpiece | Clamp workpiece firmly before cutting |
Handling The Jigsaw Safely
Hold the jigsaw firmly with both hands. Keep your fingers clear of the blade path. Always unplug the jigsaw before changing blades or making adjustments.
- Check the blade before each use
- Use a slow speed for curved cuts
- Keep your work area clean and free of clutter
- Never force the tool through the material

Credit: www.youtube.com
Finishing And Refining Curved Cuts
After cutting curves with a jigsaw, the edges often need smoothing. Finishing helps make the cut look clean and professional.
Refining curved cuts improves safety and prepares the wood for painting or sealing. Use simple tools to get smooth edges.
Sanding The Edges
Sanding smooths rough spots left by the jigsaw blade. Use sandpaper with medium grit first, then fine grit for a soft finish.
Wrap sandpaper around a small block or sponge for better control on curves. Move in small circles to avoid flat spots.
- Start with 80 to 120 grit sandpaper
- Finish with 220 grit for smoothness
- Sand both edges and surfaces near the cut
Using Files For Detail Work
Files help reach tight curves and small areas that sandpaper cannot. Use round files for inside curves and flat files for outside curves.
Move the file gently along the curve. Check often to avoid removing too much material or changing the shape.
- Choose file size to match curve radius
- Use smooth, even strokes
- Clean the file teeth regularly to keep it sharp
Applying Sealants Or Paint
Sealants protect wood from moisture and damage. Paint adds color and finishes the look. Apply after sanding and filing.
Use a brush or spray for even coverage. Apply thin coats and let each dry before adding more layers.
- Choose sealants suitable for indoor or outdoor use
- Lightly sand between coats for smoothness
- Wear gloves and work in a ventilated area
Credit: www.housedigest.com
Frequently Asked Questions
What Blade Type Is Best For Curved Jigsaw Cuts?
For curved cuts, use a narrow, fine-toothed blade. It offers better control and smoother curves. Choose blades labeled for curves or scrolling.
How Do I Prevent Splintering On Curved Cuts?
To reduce splintering, use painter’s tape on the cut line. Cut slowly and keep the blade sharp. A zero-clearance insert can also help.
What Speed Setting Is Ideal For Curved Jigsaw Cuts?
Use a medium to slow speed for curved cuts. This increases control and precision. Adjust speed based on material thickness and blade type.
How To Guide The Jigsaw For Smooth Curved Cuts?
Follow the marked curve slowly and steadily. Support the workpiece firmly. Avoid forcing the blade; let the saw do the work.
Conclusion
Using a jigsaw for curved cuts takes patience and practice. Keep your hand steady and follow the line slowly. Choose the right blade for smooth, clean edges. Support your workpiece well to avoid mistakes. Take breaks if the cut feels tricky or tiring.
These tips help you achieve better results every time. Enjoy your woodworking projects with more confidence and ease.