When you pick up a mallet for your woodworking projects, you want to make every strike count. Using a mallet the right way can save your wood from damage and make your work smoother and more precise.
But are you really getting the most out of this simple tool? You’ll discover easy tips that can transform how you handle your mallet, helping you work smarter and protect your materials. Keep reading to unlock tricks that even experienced woodworkers wish they knew sooner.
Your next project will thank you.
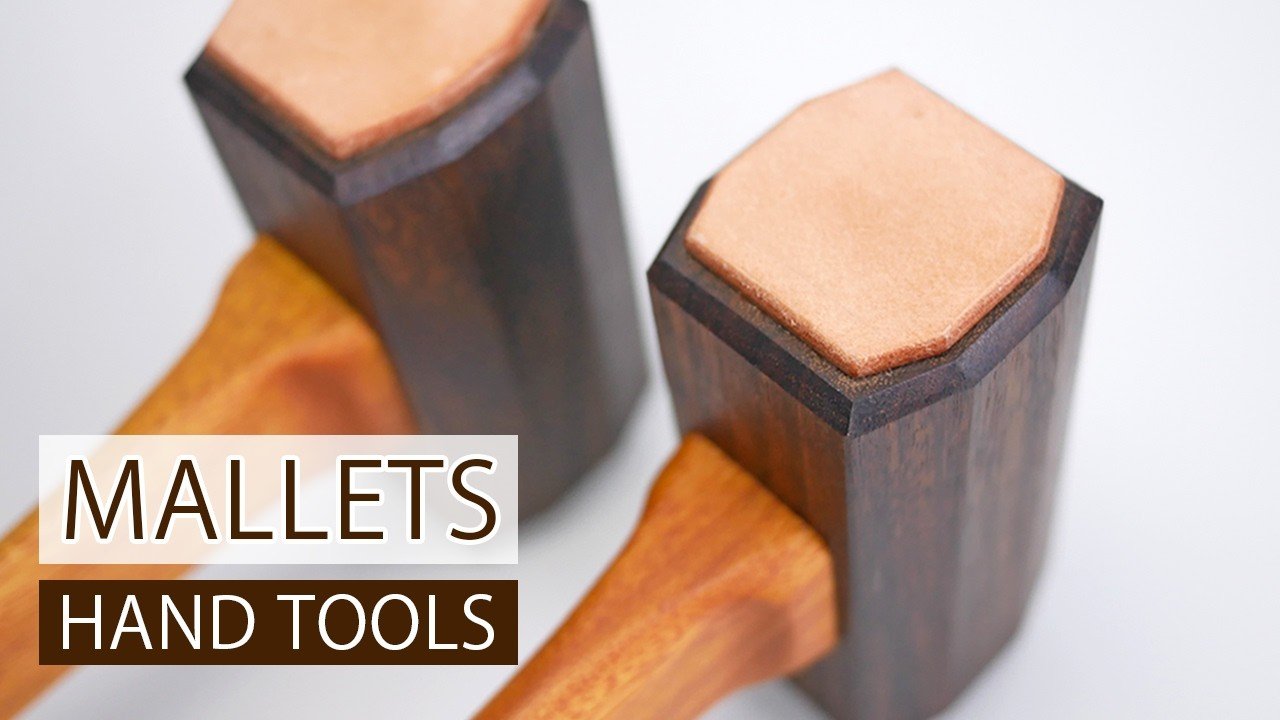
Choosing The Right Mallet
Using the right mallet helps you work safely and precisely. It also protects your wood from damage.
Choosing a mallet depends on the type of woodworking you do. Consider the materials, size, and weight.
Types Of Woodworking Mallets
Woodworking mallets come in many styles. Each type serves different tasks and tools.
- Carpenter’s mallet: square head, good for chisels
- Joiner’s mallet: round head, softer impact
- Dead blow mallet: filled with sand, reduces bounce
- Rawhide mallet: soft, protects delicate surfaces
Material Considerations
Mallets use different materials for heads and handles. Each material affects durability and use.
- Wood heads absorb shock well and are gentle on wood
- Rubber heads reduce marks and give softer hits
- Plastic heads are durable but can be hard on delicate wood
- Handles are usually wood or fiberglass for good grip
Size And Weight Factors
Choose a mallet size and weight that fits your hand and task. Too heavy or too light affects control.
Heavier mallets give more force but tire your arm faster. Smaller mallets are better for fine work.
- Small mallets: good for detailed carving and light taps
- Medium mallets: versatile for most woodworking tasks
- Large mallets: best for heavy chopping or driving large chisels
Proper Grip And Handling
Using a mallet correctly helps protect your wood and tools. A good grip and steady handling make your work safer and neater.
Learning how to hold and swing a mallet improves your control. This lowers the chance of mistakes or injuries.
Hand Positioning Techniques
Place your dominant hand around the mallet handle near the bottom. This gives better leverage for your strikes.
Use your other hand to guide the mallet near the top if extra control is needed. Keep your grip firm but relaxed.
- Hold handle base with dominant hand
- Guide mallet head lightly with other hand
- Keep grip firm but not tight
- Adjust hand position for different tasks
Controlling Swing Force
Start your swing slowly to judge the right force. Use less power for small taps and more for heavy hits.
Keep your wrist flexible. This helps absorb shock and gives smoother hits.
- Begin with light swings
- Increase force as needed
- Keep wrist loose during strikes
- Practice hitting wood scraps for control
Maintaining Balance And Accuracy
Stand with feet shoulder-width apart for good balance. This helps keep your body steady while swinging.
Focus your eyes on the exact spot to hit. This improves accuracy and reduces mistakes.
- Keep feet steady and balanced
- Watch the target carefully
- Swing in a straight, controlled path
- Practice regularly for better aim
Striking Techniques
Using a mallet correctly helps you work safely and accurately. Good striking techniques improve control and reduce mistakes.
Practicing the right way to strike saves your tools and wood from damage. It also makes your work easier and cleaner.
Consistent Impact Points
Always hit the same spot on the mallet face. This keeps your strikes steady and strong. It helps avoid uneven force on your tools.
Focus on the center of the mallet head. Hitting off-center can cause the mallet to twist or slip. This may lead to mistakes or injury.
Using Wrist Vs. Arm Motion
Use your wrist for small, controlled taps. This gives precision for delicate work. Avoid using too much arm motion for fine tasks.
Use your arm for stronger strikes on larger pieces. Swing your arm smoothly and keep your wrist firm. This helps deliver power without losing control.
- Wrist motion for light, precise hits
- Arm motion for heavy, strong blows
- Keep wrist steady during arm swings
Avoiding Damage To Tools And Wood
Never hit metal tools directly with a mallet. Use a wooden or rubber mallet head to protect chisels and other tools. This prevents dents and cracks.
Strike wood gently to avoid splitting or denting. Start with light taps and increase force slowly. Check your work often for damage.
- Use wooden or rubber mallet heads on tools
- Hit wood with controlled force
- Inspect wood for cracks after striking
Credit: ncwoodworker.net
Maintaining Your Mallet
Keeping your mallet in good shape helps it last longer and work better. Regular care protects it from damage and wear.
Simple maintenance tasks can save you money and keep your woodworking safe and efficient.
Cleaning And Storage Tips
Clean your mallet after each use to remove dirt and wood dust. Use a dry cloth or soft brush for best results.
- Wipe the mallet head and handle with a dry cloth.
- Remove any sticky residue gently with mild soap and water.
- Dry the mallet completely before storing it.
- Store your mallet in a dry place away from direct sunlight.
- Avoid leaving it in damp or humid areas.
Repairing Worn Or Damaged Heads
Check your mallet head often for cracks or deep dents. Repair small damages early to prevent bigger problems.
- Sand down small dents and rough spots with fine-grit sandpaper.
- Use wood glue to fix minor cracks and clamp until dry.
- Replace the head if damage is too severe or repair is unsafe.
- Tighten or replace the handle if it becomes loose or cracked.
Extending Mallet Lifespan
Proper care can keep your mallet strong and ready for work. Follow these tips to extend its life.
| Tip | Reason |
| Keep mallet dry | Prevents wood swelling and cracking |
| Store in a cool place | Stops warping and handle damage |
| Regularly inspect head and handle | Finds problems early |
| Use for intended purpose only | Avoids unnecessary damage |
| Apply wood oil occasionally | Keeps wood smooth and strong |
Common Mistakes To Avoid
Using a mallet in woodworking is simple but needs care. Avoiding common errors helps you work better and safer.
This guide covers key mistakes and how to prevent them for good results.
Overstriking And Its Consequences
Hitting too hard or too far can damage your wood and tools. Overstriking leaves dents and can break the mallet handle.
Be sure to strike only the intended surface with control. This keeps your work clean and tools safe.
Using The Wrong Mallet Type
Different woods and tasks need different mallets. Using the wrong type can harm your project or tool.
| Mallet Type | Best For | Not Good For |
| Wooden Mallet | Chisels, gentle tapping | Metal chisels, heavy work |
| Rubber Mallet | Soft materials, delicate parts | Hard wood, nails |
| Rawhide Mallet | Fine furniture work | Heavy striking |
Ignoring Safety Precautions
Safety keeps you injury-free. Many skip simple rules and risk harm.
- Always wear safety glasses to protect your eyes
- Keep your hands clear of the striking area
- Check your mallet for cracks or damage before use
- Work on a stable surface to avoid slips
- Store mallets safely to prevent accidents

Credit: www.youtube.com
Advanced Expert Tricks
Using a mallet well can improve your woodworking projects. These expert tricks help you work smarter and with more control.
Learn how to adjust your mallet and use it in special tasks like joinery and fine carving.
Customizing Mallet Weight
Changing your mallet’s weight helps match the task. A heavier mallet gives more power but less control.
A lighter mallet lets you work gently and with more precision. You can add or remove layers from the head.
- Add thin wood or leather layers to increase weight gradually
- Use lighter woods like pine for less weight
- Try metal inserts for more impact without bulk
- Balance the handle length to keep control
Using Mallets For Joinery
Use a mallet to tap joints together without damage. It helps fit pieces tightly and evenly.
Strike the chisel or wood gently to avoid splitting. Use a mallet with a smooth face for clean hits.
- Tap mortise and tenon joints lightly to check fit
- Use soft-faced mallets to avoid dents on delicate wood
- Hit chisels squarely to keep cuts straight
- Work slowly to prevent joint gaps or cracks
Incorporating Mallets In Fine Carving
Fine carving needs careful control of force. A small mallet helps you tap chisels with precision.
Use mallets with wooden or rubber heads to reduce noise and protect tools during carving.
- Hold the mallet firmly but relaxed for better control
- Tap chisels gently to avoid removing too much wood
- Use different mallet sizes based on carving detail
- Practice steady rhythm to keep carving smooth

Credit: www.msn.com
Frequently Asked Questions
What Type Of Mallet Is Best For Woodworking?
A wooden mallet with a hardwood head is ideal for woodworking. It delivers controlled force without damaging wood surfaces. Rubber mallets suit delicate tasks, while rawhide mallets prevent dents. Choose based on your project’s precision and wood type.
How Should I Hold A Mallet For Best Control?
Grip the mallet handle near the end for maximum leverage. Hold it firmly but relaxed to avoid fatigue. Swing from the elbow, not the wrist, for better accuracy and power. This technique improves control and reduces strain.
Can A Mallet Replace A Hammer In Woodworking?
No, a mallet cannot fully replace a hammer. Mallets deliver softer blows, preventing wood damage. Hammers are better for nails and metal. Use a mallet for chiseling and assembling joints to protect wood integrity.
How Do I Maintain My Woodworking Mallet?
Keep your mallet clean and dry after use. Sand any rough spots on the wooden head to avoid splinters. Occasionally apply linseed oil to wooden handles for durability. Proper care extends mallet life and performance.
Conclusion
Using a mallet in woodworking can enhance your projects. Practice makes perfect. Start with small tasks. Gradually build your skills and confidence. Choose the right mallet for each job. Softwoods and hardwoods need different tools. Ensure a firm grip for better control.
Avoid unnecessary force to prevent damage. Always prioritize safety while working. Wear protective gear and stay focused. With these tips, your woodworking projects will improve. Enjoy the process and creativity. Happy woodworking!