If you’ve ever embarked on a home improvement project, you know how crucial precision is, especially when it comes to cutting molding. Imagine transforming your space with perfect edges and seamless corners.
Sounds appealing, right? That’s where a miter saw becomes your best friend. Whether you’re a seasoned DIY enthusiast or just starting out, learning how to use this tool effectively can make all the difference. With the right tips and techniques, you can achieve professional results without the hefty price tag.
Stick around, and discover how to elevate your woodworking skills and make your next project a stunning success.

Credit: www.familyhandyman.com
Choosing The Right Miter Saw
A miter saw is a key tool for cutting molding accurately. Picking the right saw helps you make clean, precise cuts. This guide explains what to look for in a miter saw for molding projects.
Understanding types, blade choices, and safety features makes your work easier and safer. Read on to learn what fits your needs best.
Types Of Miter Saws
Miter saws come in several types. Each type suits different cutting tasks for molding.
- Standard Miter Saw:Cuts angled crosscuts but does not tilt for bevel cuts.
- Compound Miter Saw:Tilts to cut bevels and angles, good for crown molding.
- Sliding Compound Miter Saw:Has a sliding arm to cut wider boards. Useful for large moldings.
Blade Selection For Molding
Choosing the right blade is key for smooth molding cuts. Blade size and teeth count affect the finish.
| Blade Size | Common Sizes | Best Use |
| 7 1/4 inch | 7 1/4″ | Small moldings and light work |
| 10 inch | 10″ | Most common for molding projects |
| 12 inch | 12″ | Large moldings and thick materials |
| Teeth Count | 60 to 80 teeth | Fine, clean cuts on molding |
Safety Features To Consider
Safety is important with power tools. Look for these features on your miter saw to protect yourself.
- Blade Guard:Covers the blade to prevent accidental contact.
- Electric Brake:Stops the blade quickly after cutting.
- Safety Lock:Prevents the saw from turning on by mistake.
- Clamps or Hold-Downs:Secure molding pieces during cuts.
Preparing The Workspace
Getting your workspace ready is important before using a miter saw. A clean and organized area helps you work safely and accurately.
Take time to set up the space so you can cut molding pieces without trouble or danger.
Setting Up A Stable Work Surface
Use a flat, sturdy surface to place your miter saw. Stability keeps your cuts straight and safe.
Make sure the surface does not wobble or move during cutting. This reduces mistakes and accidents.
- Check the table or stand for firmness
- Use clamps to hold the molding steady
- Clear the area of clutter to avoid slips
Organizing Tools And Materials
Keep all your tools and molding pieces close by. This saves time and helps you stay focused.
Arrange your measuring tape, pencil, clamps, and safety gear neatly before you start cutting.
- Place measuring tools within arm’s reach
- Sort molding pieces by size or type
- Keep safety glasses and ear protection nearby
Ensuring Proper Lighting
Good lighting helps you see cut lines clearly. It reduces errors and keeps you safe.
Use bright overhead lights or portable lamps to light your work area well.
- Check that the light does not cause shadows on the saw
- Position lights to shine directly on the cutting line
- Use extra lamps if the room is dim
Measuring And Marking Molding
Cutting molding with a miter saw needs careful measuring and marking. Accurate marks help the pieces fit well on corners and walls.
Use proper tools and techniques to avoid mistakes. This guide shares tips to measure and mark molding correctly for clean cuts.
Accurate Measurement Techniques
Measure twice and cut once is a good rule for molding. Use a tape measure that is easy to read and a pencil for fine marks.
- Start by measuring the wall length where molding will go.
- Note the exact length, including any angles or corners.
- Double check measurements before marking your molding pieces.
- Use a speed square or combination square to mark straight lines.
- Mark the molding on the edge that will meet the wall or ceiling.
Marking For Inside And Outside Corners
Inside and outside corners need different marking methods. Clear marks show where to set the miter saw angle for each cut.
| Corner Type | Marking Tip |
|---|---|
| Inside Corner | Mark the long point of the molding to cut the inside angle. |
| Outside Corner | Mark the short point of the molding for the outside angle cut. |
Always mark the molding with arrows showing the direction it faces. This helps avoid confusion during cutting.
Labeling Pieces For Assembly
After measuring and marking, label each molding piece. This makes it easy to match cuts and assemble the molding on site.
- Use a pencil to write numbers or letters on the back side of each piece.
- Label inside and outside corner pieces differently.
- Keep labels clear and easy to read during installation.
- Organize pieces in order of installation to save time.
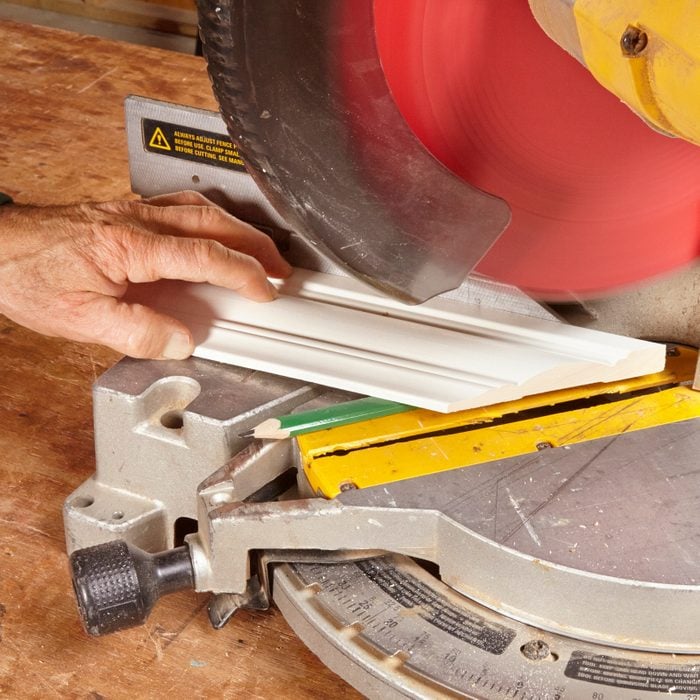
Making Precise Cuts
Cutting molding with a miter saw requires care and accuracy. Precise cuts help the molding fit perfectly on corners and edges.
Using the right techniques ensures clean cuts and reduces waste. Focus on the saw settings and the type of corner you are cutting.
Adjusting The Saw Angle
Set the saw angle carefully before cutting molding. Most molding requires a 45-degree angle for corners. Check the angle gauge on your saw to adjust it.
Use a protractor or angle finder if your saw does not have a clear gauge. Always lock the saw firmly at the angle you choose to avoid movement.
Cutting Inside Vs. Outside Corners
Inside and outside corners need different cut directions. For inside corners, the long point of the cut faces away from the wall. For outside corners, it points toward the wall.
- Inside corner: Cut molding with the saw blade angled toward the fence.
- Outside corner: Cut molding with the saw blade angled away from the fence.
Label the pieces before cutting to avoid mistakes. Double-check each cut to match the corner type.
Dealing With Compound Angles
Compound angles occur when molding fits corners that are not square or have both a bevel and a miter angle. You must adjust both angles on the saw.
First, tilt the saw blade to the bevel angle. Then set the miter angle on the base. Cut slowly and check the fit often.
- Measure the corner angle with an angle finder.
- Calculate the bevel and miter angles needed.
- Adjust the saw bevel and miter settings accordingly.
- Make test cuts on scrap molding before final cuts.
Common Mistakes To Avoid
Using a miter saw for cutting molding can be tricky. Avoiding common errors helps get clean, accurate cuts.
Paying attention to details improves safety and the quality of your work.
Misaligning The Workpiece
Placing the molding incorrectly causes wrong angles or uneven cuts. Always check the alignment before cutting.
Use the saw’s fence and measuring tools to position the molding firmly and straight.
- Mark the cut line clearly on the molding
- Align the line with the saw’s blade
- Double-check the angle setting
- Hold the piece steady before cutting
Cutting Without Clamping
Cutting molding without clamping can cause movement. This leads to inaccurate cuts and risks injury.
Always use clamps or hold-downs to keep the molding fixed during the cut.
- Secure the molding to the saw base
- Use a clamp that fits the molding size
- Check clamps before each cut
- Never hold the molding by hand near the blade
Ignoring Blade Maintenance
Dull or dirty blades cause rough cuts and increase the risk of kickback. Check the blade condition often.
Clean and replace the blade when needed for smooth, safe cutting.
- Inspect the blade before each use
- Remove resin and dust buildup regularly
- Replace the blade if it is dull or damaged
- Use the right blade type for molding material

Credit: www.angi.com
Finishing Touches
Cutting molding with a miter saw is only the first step. The finishing touches make your project look clean and professional. Take time to smooth edges, fit pieces well, and secure them properly.
These steps help your molding fit tightly and look great on your walls. They also make sure the molding stays in place for a long time.
Sanding And Smoothing Edges
After cutting, the edges of molding may be rough or uneven. Use sandpaper or a sanding block to smooth these edges. Sand gently to avoid changing the angle of the cut.
Check the corners by running your hand along the edge. Smooth edges help the molding fit better and look cleaner when painted or stained.
Fitting And Adjusting Pieces
Place the cut pieces against the wall or ceiling before attaching. Check for gaps or uneven joins. Small gaps can be fixed by trimming or sanding the edges.
If pieces do not fit well, adjust the cut angles slightly. Take your time to get tight and clean joints for a better finish.
- Dry fit all pieces before final installation
- Use a utility knife to trim small imperfections
- Re-cut if angles are off by more than a few degrees
Using Adhesives And Fasteners
Secure molding with wood glue and finishing nails. Apply glue to the cut edges for a strong bond. Press pieces firmly in place after applying glue.
Use a nail gun or hammer to drive nails into the molding at an angle. Countersink nails slightly below the surface. Fill holes with wood filler for a smooth finish.
- Apply wood glue for extra hold
- Use finishing nails to keep molding secure
- Fill nail holes with wood filler before painting
Maintaining Your Miter Saw
Keeping your miter saw in good shape helps it work better and last longer. Simple maintenance tasks can prevent problems and keep cuts clean.
Regular care focuses on cleaning, blade upkeep, and safe storage. Follow these tips to keep your tool ready for any project.
Regular Cleaning Tips
Dust and debris can build up and affect your saw’s performance. Clean your miter saw after each use to avoid damage.
- Use a brush to remove sawdust from the blade and table.
- Wipe the surface with a dry cloth to clear dirt and grime.
- Blow out dust from moving parts with compressed air.
- Check the fence and miter scale for buildup and clean gently.
Blade Sharpening And Replacement
A sharp blade cuts cleaner and is safer to use. Dull blades cause rough cuts and can strain the motor.
| Blade Condition | Action |
| Dull or chipped teeth | Sharpen or replace blade |
| Blade rust or damage | Replace blade immediately |
| Uneven cuts | Check blade alignment and sharpen |
Storage And Safety Practices
Store your miter saw in a clean, dry place to prevent rust and damage. Follow safety rules to protect yourself and your tool.
- Unplug the saw before cleaning or storing.
- Cover the saw with a dust cover or cloth.
- Keep the blade locked or use a blade guard.
- Store in a place away from moisture and extreme temperatures.
Credit: www.familyhandyman.com
Frequently Asked Questions
How Do I Set Up A Miter Saw For Molding Cuts?
To set up, ensure your miter saw is on a stable surface. Adjust the bevel and miter angles to match your molding cut requirements. Use a clamp to secure the molding, ensuring accurate and safe cuts every time.
What Safety Tips Should I Follow When Cutting Molding?
Always wear safety goggles and hearing protection. Keep hands clear of the blade and use clamps to secure molding. Make sure the saw blade is sharp and well-maintained for clean cuts and to avoid accidents.
How Do I Measure Molding For Precise Miter Cuts?
Measure the length and angles carefully using a tape measure and protractor. Mark the molding clearly where cuts are needed. Double-check measurements before cutting to ensure the molding fits perfectly in corners.
What Blade Type Is Best For Cutting Molding?
Use a fine-tooth blade designed for wood cutting. A 60-tooth or higher blade ensures smooth, clean cuts on delicate molding without splintering. Avoid dull or damaged blades for best results.
Conclusion
Using a miter saw for cutting molding takes practice and care. Always measure twice and cut once to avoid mistakes. Keep your saw blade sharp for clean cuts. Take your time to line up angles correctly. A steady hand helps make smooth, precise edges.
With these simple tips, your molding projects will look neat and professional. Keep practicing, and your confidence will grow with every cut. Safety matters, so wear protective gear and work slowly. Enjoy the process of creating beautiful trim for your home.