Are you ready to take your DIY projects to the next level? If so, a miter saw might just be your new best friend.
This versatile tool can help you make precise cuts with ease, whether you’re crafting custom furniture or tackling weekend home improvements. But before you dive in, it’s essential to know how to use a miter saw safely and effectively. In this guide, you’ll discover simple yet powerful tips that will not only boost your confidence but also enhance the quality of your work.
Imagine the satisfaction of perfectly angled cuts and seamless assembly, all thanks to mastering your miter saw skills. Let’s unlock the secrets to transforming your DIY dreams into reality—read on to learn how!

Credit: www.youtube.com
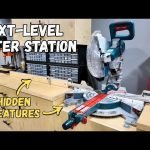
Choosing The Right Miter Saw
A miter saw is useful for many DIY projects. Picking the right one makes your work easier.
Consider the saw type, blade, and safety features before buying. These help you get good results.
Types Of Miter Saws
There are three main types of miter saws. Each type fits different project needs.
- Standard Miter Saw: Cuts at various angles, good for simple tasks.
- Compound Miter Saw: Can tilt to cut angles on wood edges.
- Sliding Compound Miter Saw: Has a sliding arm for wider boards.
Blade Selection Tips
Choose the blade based on the material you cut. Blade size and teeth count matter.
- Smaller teeth cut fine wood smoothly.
- Larger teeth cut fast but rough.
- Use blades for wood, metal, or plastic as needed.
- Keep blades sharp for clean cuts.
Safety Features To Look For
Safety features protect you from accidents. Look for these before choosing a miter saw.
- Blade guard to cover the blade when not cutting.
- Electric brake stops the blade quickly.
- Locking mechanisms keep the saw steady.
- Non-slip base for stable cutting.
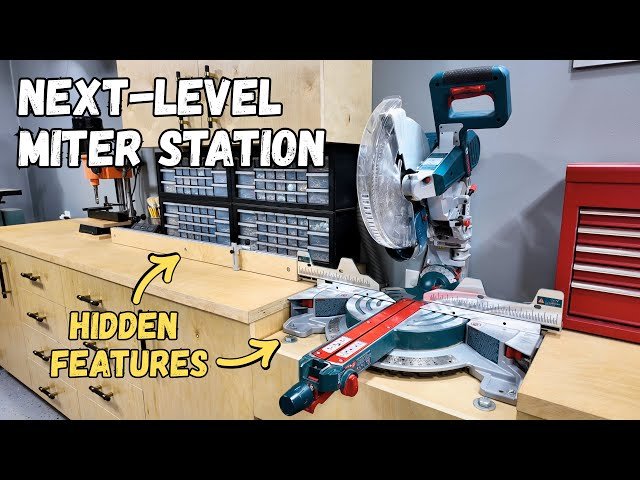
Setting Up Your Workspace
Setting up your workspace is key for safe and efficient cutting. A clean area helps you focus on your project.
Good setup reduces mistakes and keeps tools ready. Let’s explore how to prepare your space well.
Ideal Workbench Setup
Your workbench should be sturdy and at a comfortable height. This helps you control the miter saw better.
Clear enough space around the saw to support long pieces of wood. Keep the surface level to avoid slips.
- Use clamps to hold the wood steady
- Keep the saw fixed or weighted down
- Leave enough room for both hands
- Have a flat surface to rest cut pieces
Proper Lighting And Ventilation
Bright lighting helps you see cut marks clearly. Position lights to avoid shadows on your work area.
Good airflow clears dust and fumes. Open windows or use a fan to keep air moving while you work.
- Use overhead LED lights for bright, even light
- Add task lights focused on the saw blade
- Ventilate to remove dust and wood particles
- Wear a dust mask for extra protection
Organizing Tools And Materials
Keep your tools and materials close to save time. Organize them so you can reach what you need quickly.
Sort materials by size and type. Use bins or shelves to keep everything neat and easy to find.
- Store measuring tools near the saw
- Group screws, nails, and fasteners in containers
- Arrange blades and saw parts in labeled spots
- Keep scrap wood separate from usable pieces
Preparing For Accurate Cuts
Using a miter saw correctly helps you get clean, precise cuts for your DIY projects. Preparing well before cutting is very important.
This guide covers key steps to prepare your saw and materials for the best results.
Measuring And Marking Techniques
Accurate measuring and marking guide your cut and avoid mistakes. Use a tape measure and a pencil to mark the cut line clearly on your wood.
- Measure twice to ensure accuracy
- Mark the cut line with a sharp pencil or marking knife
- Use a square tool to make straight marks across the wood
- Check your marks from different angles before cutting
Adjusting Saw Angles
Set the miter saw angles according to your project needs. The saw can tilt for bevel cuts and rotate for miter cuts.
| Cut Type | Saw Setting |
| Crosscut (straight) | 0° miter, 0° bevel |
| Miter cut | Rotate saw base to desired angle |
| Bevel cut | Tilt saw blade to desired angle |
| Compound cut | Set both miter and bevel angles |
Clamping And Securing Materials
Hold the wood firmly to stop movement during cutting. Use clamps or the saw’s built-in hold-down to keep materials steady.
- Position clamps to avoid the blade path
- Check that the wood does not wobble
- Use a scrap piece under the wood for better grip
- Double-check clamps before starting the cut
Cutting Techniques For Clean Results
Using a miter saw correctly helps you get smooth, clean cuts. Good cutting techniques make your DIY projects look better.
Learn how to make straight, miter, bevel, and combined cuts for precise work. Each method needs careful handling for best results.
Making Straight Cuts
To make straight cuts, align the wood firmly against the saw fence. Keep the blade steady and lower it slowly for a clean cut.
Use clamps to hold the material steady. Avoid pushing the wood during the cut to prevent splintering.
Executing Miter Cuts
Miter cuts are angled cuts across the face of the wood. Set the saw angle before cutting to match your project needs.
- Choose the correct angle on the saw’s miter gauge.
- Hold the wood firmly against the fence.
- Make a slow, steady cut to avoid rough edges.
- Check the angle with a protractor for accuracy.
Performing Bevel Cuts
Bevel cuts tilt the blade to cut the wood’s edge. Adjust the bevel angle on the saw before cutting.
| Bevel Angle | Use |
| 0° | Standard straight cut |
| 15°-30° | Decorative edges |
| 45° | Complex angled joints |
Always support the wood fully and cut smoothly for the best edge finish.
Combining Miter And Bevel Cuts
Some projects need both miter and bevel cuts at the same time. Set both angles carefully on your saw.
Tips for combined cuts:
- Double-check both angles before cutting.
- Use a test piece to check the fit first.
- Make slow, controlled cuts to avoid mistakes.
- Keep your hands clear of the blade path.
Maintaining Your Miter Saw
Keeping your miter saw in good shape helps it work safely and last longer. Simple care steps can prevent many problems.
Regular maintenance keeps your cuts clean and your saw running smoothly. Focus on cleaning, lubrication, and fixing issues early.
Blade Cleaning And Sharpening
Clean blades cut better and last longer. Remove pitch and resin buildup often. Sharpen dull blades to keep cuts smooth.
- Unplug the saw before cleaning.
- Use a soft brush to clear dust and debris.
- Apply blade cleaner to remove sticky residue.
- Sharpen blades using a file or take them to a pro.
- Check blade teeth for damage and replace if needed.
Lubrication And Calibration
Lubricate moving parts to reduce wear. Calibrate your saw to keep angles accurate. This keeps your work precise and safe.
| Maintenance Task | How Often | Tools Needed |
| Lubricate pivot points | Every 3 months | Light machine oil |
| Check bevel and miter angles | Before big projects | Angle gauge or protractor |
| Tighten loose screws | Monthly | Screwdriver or wrench |
Troubleshooting Common Issues
Fix small problems quickly to avoid big repairs. Look for blade wobble, strange noises, and poor cuts.
- Blade wobbles: Check for loose arbor nut or bent blade.
- Noise: Clean and lubricate parts, check motor brushes.
- Inaccurate cuts: Recalibrate angles and check fence alignment.
- Saw won’t start: Inspect power cord and switch.
- Blade won’t lower: Clear debris and check safety lock.

Credit: benchmarkabrasives.com
Safety Tips For Diy Projects
Using a miter saw is common in many DIY projects. It helps you make precise cuts on wood and other materials.
Safety is very important when using a miter saw. Follow these tips to avoid accidents and injuries.
Personal Protective Equipment
Wear the right gear before you start cutting. This gear protects your eyes, ears, and hands from harm.
- Safety goggles shield your eyes from flying debris.
- Ear protection reduces loud noise damage.
- Gloves protect hands from splinters and cuts.
- Wear a dust mask to avoid breathing sawdust.
Safe Operating Practices
Follow safe steps when using the saw. Keep your hands away from the blade at all times.
Make sure the workpiece is firmly clamped. Only cut material that fits the saw’s size limits.
- Check the blade is sharp and clean before use.
- Use the saw’s safety guard and never remove it.
- Stand in a balanced position and do not reach over the blade.
- Turn off the saw and wait for the blade to stop before removing cut pieces.
Handling Power Cord And Dust
Keep the power cord away from the blade and cutting area. Damaged cords can cause shocks or fire.
Use a dust collection system or vacuum to keep the workspace clean. Sawdust can cause slipping and breathing problems.
- Inspect the power cord for cuts or frays before each use.
- Place the cord where it cannot get tangled or caught.
- Clean sawdust regularly to prevent buildup near the blade.
- Wear a dust mask if you cannot remove all dust from the area.
Advanced Techniques To Try
Using a miter saw can be simple, but trying advanced techniques improves your projects. These tips help you cut more complex shapes and work faster.
Learn how to make compound cuts, use stop blocks for many cuts, and add jigs or accessories for better accuracy.
Compound Cuts For Complex Shapes
Compound cuts combine bevel and miter angles in one cut. This is useful for crown molding and angled frames.
Adjust both the saw’s bevel and miter settings before cutting. Take your time to measure carefully and test on scrap wood first.
- Set the miter angle for horizontal rotation
- Set the bevel angle for blade tilt
- Cut slowly to avoid mistakes
- Use scrap wood to check angles
Using Stop Blocks For Repetitive Cuts
Stop blocks help make several cuts of the same length quickly and accurately. They save time and reduce errors.
Clamp a block to your saw’s fence to stop the wood at the exact length. This keeps each cut consistent without measuring every time.
- Measure and mark your desired length
- Clamp a block at that mark on the fence
- Slide wood against the stop block before cutting
- Repeat for each piece without re-measuring
Incorporating Jigs And Accessories
Jigs and accessories improve your miter saw’s performance. They help with tricky cuts and increase safety.
Common accessories include hold-down clamps, extension wings, and angle guides. These tools keep the wood steady and extend support for larger pieces.
- Hold-down clamps stop wood from moving during the cut
- Extension wings support long boards or panels
- Angle guides help line up complex cuts
- Dust collection attachments keep your work area clean

Credit: gemma-global.com
Frequently Asked Questions
What Safety Tips Should I Follow Using A Miter Saw?
Always wear safety goggles and ear protection. Keep hands away from the blade. Secure the material firmly before cutting. Maintain a clean workspace to avoid accidents. Follow the manufacturer’s guidelines for safe operation at all times.
How Do I Choose The Right Miter Saw Blade?
Select a blade based on the material type and thickness. Use fine-toothed blades for smooth cuts on wood. Choose carbide-tipped blades for durability and cleaner cuts. Match blade size with your saw specifications for optimal performance.
What Are The Best Techniques For Accurate Miter Cuts?
Measure twice and mark clearly before cutting. Use the saw’s angle guide for precise bevels. Clamp the workpiece to prevent movement. Make slow, steady cuts to avoid splintering and ensure clean edges.
How Can I Maintain My Miter Saw For Longevity?
Clean the sawdust from the blade and motor regularly. Lubricate moving parts according to the manual. Check blade sharpness and replace dull blades promptly. Store the saw in a dry place to prevent rust.
Conclusion
Using a miter saw can make DIY projects easier and faster. Always follow safety rules to avoid accidents. Take time to measure and mark your cuts clearly. Keep your saw clean and sharp for better results. Practice often to build your confidence and skill.
Enjoy the process and the projects you create. Small steps lead to great improvements. Your miter saw is a helpful tool for many tasks. Keep learning and trying new techniques to improve.