Are you ready to transform your carpentry skills from good to great? The secret might just be in a tool you already own but perhaps don’t use to its full potential: the protractor.
Whether you’re a seasoned carpenter or just getting started, mastering the use of a protractor can be your game-changer. Imagine crafting precise angles and perfect joints with ease—sounds satisfying, right? This guide is packed with practical tips to help you harness the full power of your protractor.
Stick around, and you’ll discover how this simple tool can enhance your precision and efficiency in carpentry projects. Ready to elevate your craftsmanship? Let’s dive in!

Credit: www.mashupmath.com
Choosing The Right Protractor
A protractor is a useful tool for measuring and marking angles in carpentry. Picking the right one helps you work more accurately. It also saves time on your projects.
Different protractors have different features. Some are better for rough work, while others suit fine woodworking. Knowing what to look for makes your choice easier.
Types Of Protractors For Carpentry
Carpenters use various protractors depending on the job. Some measure angles quickly, while others help with precise cuts.
- Standard Protractor:A half-circle tool that measures angles up to 180 degrees. It is simple and good for basic tasks.
- Bevel Protractor:Has a rotating arm to measure and transfer angles. It is useful for checking complex angles.
- Digital Protractor:Shows angle measurements on a small screen. It offers high accuracy and easy reading.
- Combination Square with Protractor:Combines ruler and angle finder. It helps with marking and measuring in one tool.
Material And Durability Factors
Protractors come in different materials. Choosing a durable one is important to last through tough work.
Metal protractors resist damage and stay accurate longer. Plastic ones are lighter but may break easily. Some have rubber grips for better handling.
- Metal:Strong and long-lasting. Good for heavy use.
- Plastic:Lightweight and affordable. Best for light jobs.
- Rubber-coated:Offers better grip and comfort.
- Glass or Acrylic:Clear and precise but fragile.
Preparing Your Workspace
Getting ready to use a protractor for carpentry starts with a clean and organized workspace. A good setup helps you work safely and accurately.
Take time to prepare your area before measuring angles. This reduces mistakes and keeps your tools in good condition.
Setting Up A Stable Surface
Use a flat and steady surface to place your wood and tools. A shaky table can cause wrong angle readings and unsafe work.
- Choose a solid workbench or table that does not wobble.
- Clear the surface of clutter to avoid slips or distractions.
- Use clamps to hold wood pieces firmly in place.
- Check that the surface is level using a spirit level.
Ensuring Proper Lighting
Good lighting helps you see angle marks and protractor numbers clearly. Poor light can lead to errors or eye strain.
| Lighting Type | Best Use |
| Natural Light | Daytime work near windows |
| LED Work Lights | Bright, focused light for detail work |
| Overhead Fluorescent | General lighting for the whole area |
| Portable Lamps | Extra light for tight or dark spots |
Marking Angles Accurately
Using a protractor helps carpenters mark angles with precision. Accurate angle marking ensures pieces fit well together.
Understanding how to align and mark angles carefully improves your carpentry work. Small errors can cause big problems.
Aligning The Protractor Correctly
Place the protractor flat on the wood surface to avoid mistakes. The center hole or point should match the angle’s vertex exactly.
Make sure the baseline of the protractor lines up with the edge of the wood. This alignment keeps the angle measurement true.
- Lay the protractor flat without gaps
- Match the center point to the angle vertex
- Align the baseline with the wood edge
- Hold the protractor steady before marking
Using Pencil Marks For Precision
Use a sharp pencil to mark the angle points clearly. Light pencil marks help you adjust if needed before cutting.
Draw small dots or short lines at the angle edges. Connect these marks with a straightedge for the exact cutting line.
- Use a sharp pencil for fine marks
- Make light marks to allow corrections
- Mark points at the angle edges
- Connect marks with a ruler or straightedge
Measuring Angles On Different Materials
Using a protractor in carpentry helps you measure angles accurately. Different materials need special care for best results.
Knowing how to handle wood, metal, and other materials makes your angle measurements easier and precise.
Wood Surface Tips
Wood surfaces can be rough or smooth. Make sure the protractor lies flat on the wood for correct readings.
Use a pencil to mark angles gently so you do not damage the wood surface. Avoid pressing too hard.
- Clear off dust and debris before measuring
- Hold the protractor firmly to avoid slipping
- Double-check marks for accuracy
- Use a sharp pencil for fine lines
Working With Metal And Other Materials
Metal surfaces are smooth and shiny, which can cause the protractor to slip. Use clamps or tape to hold it steady.
For other materials like plastic or laminate, avoid scratching the surface. Use a soft pencil or non-permanent marker.
- Secure the material before measuring
- Use non-slip mats under the material
- Mark lightly to prevent damage
- Check angle lines under good light
Common Mistakes To Avoid
Using a protractor correctly is key for accurate carpentry work. Many beginners make simple mistakes that lead to wrong measurements.
These errors can cause wasted materials and extra work. Avoid these common mistakes to improve your results.
Misreading The Scale
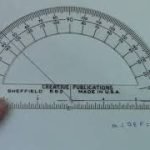
One common mistake is not reading the protractor scale properly. Protractors have two sets of numbers going in opposite directions.
Make sure you start measuring from zero on the correct side. Check twice before marking your angle to avoid errors.
- Identify the zero line on the protractor
- Use the inner or outer scale based on your angle
- Double-check the number where the line meets the scale
Slipping Or Shifting Tools
Moving or slipping tools can cause wrong angle readings. Keep the protractor and pencil steady during use.
Hold the protractor firmly against the workpiece. Avoid moving your hand until you finish marking the angle.
- Place the protractor flat on the surface
- Hold it with one hand firmly
- Mark the angle with a sharp pencil carefully
- Check that the tool does not shift before drawing
Maintaining Your Protractor
A protractor is a useful tool for carpentry projects. Keeping it in good condition helps you get accurate angles every time.
Simple care and regular checks will extend the life of your protractor. This guide covers cleaning, storage, and calibration tips.
Cleaning And Storage
After using your protractor, wipe it clean with a soft cloth. Dirt and sawdust can affect its accuracy.
Store the protractor in a dry place to prevent rust or damage. Keep it in a protective case if possible.
- Use a soft, dry cloth to clean the surface
- Avoid using water or harsh chemicals
- Store in a toolbox or protective case
- Keep away from extreme heat or moisture
Calibration Checks
Check your protractor’s accuracy before important cuts. A small error can cause problems in your project.
Compare your protractor reading with a known angle or a digital angle finder. Adjust if needed or mark any errors.
- Test the protractor on a 90-degree corner
- Use a digital angle tool for comparison
- Note any difference in the readings
- Replace the protractor if it shows large errors
Advanced Techniques For Complex Cuts
Using a protractor helps carpenters make precise angle measurements. This skill is important for complex cuts in woodworking projects.
Advanced techniques combine the protractor with other tools and methods. These approaches improve accuracy and efficiency on tricky cuts.
Combining Protractor With Other Tools
Pairing a protractor with tools like squares, bevel gauges, and miter saws makes cutting easier. Each tool adds precision in different ways.
- Use a combination square to mark straight edges before measuring angles.
- Adjust a bevel gauge to match the protractor angle and transfer it to your workpiece.
- Set miter saw angles using the protractor reading for clean, angled cuts.
- Double-check angles with a digital angle finder for complex joints.
Using Protractors For Compound Angles
Compound angles need two angle measurements on different planes. A protractor helps by measuring one angle at a time accurately.
| Angle Type | Measurement Method |
| Horizontal angle | Measure with the protractor on flat surface |
| Vertical angle | Use bevel gauge set from protractor reading |
| Compound angle | Combine both measurements to set saw blade or tool |

Credit: www.wikihow.com
Credit: mail.sadio.org.ar
Frequently Asked Questions
How Do I Measure Angles Accurately With A Protractor?
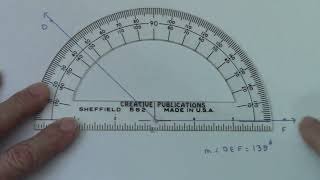
Place the protractor’s center point on the angle’s vertex. Align one side with the zero line. Read the degree where the other side crosses the scale for an accurate angle measurement.
What Type Of Protractor Is Best For Carpentry?
A clear, durable plastic or metal protractor with a 180-degree scale works best. It offers visibility and precision needed for accurate carpentry angle measurements.
How Can I Mark Angles Precisely Using A Protractor?
Align the protractor properly on the workpiece. Use a sharp pencil to mark the exact degree on the wood. Double-check the angle before cutting for precision.
Why Is A Protractor Essential In Carpentry Work?
A protractor ensures precise angle measurements and cuts. It improves the accuracy of joints, frames, and layouts, leading to better-quality carpentry projects.
Conclusion
Using a protractor helps you measure angles accurately in carpentry. Take your time and read the tool clearly. Mark angles carefully to avoid mistakes. Practice often to build confidence and skill. Small errors can affect your project’s fit and finish.
Keep your protractor clean and store it safely. These simple steps make your work easier and more precise. Good measurement leads to better results every time. Try these tips on your next carpentry task. You will notice the difference in your work.