Getting precise measurements can make all the difference in your projects. Whether you’re hanging a picture, building furniture, or doing home repairs, using a tape measure accurately is a skill that saves you time, money, and frustration.
But are you sure you’re getting the most out of your tape measure? Small mistakes can lead to big problems, and that’s why you need to learn the right tips to measure like a pro. Keep reading, and you’ll discover easy tricks that will boost your confidence and help you get flawless results every time.
Credit: www.familyhandyman.com
Choosing The Right Tape Measure
Using a tape measure correctly helps you get accurate measurements. Picking the right tape measure is the first step.
Different projects need different tape measures. Choose one that fits your work and feels comfortable.
Types Of Tape Measures
There are many types of tape measures for various tasks. Each type has features that suit specific jobs.
- Standard tape measures are good for everyday use.
- Steel tape measures are strong and great for long distances.
- Cloth or fiberglass tapes are flexible and used in tailoring.
- Digital tape measures show readings on a screen for easy reading.
Length And Width Considerations
Choose a tape measure with the right length for your projects. Longer tapes measure big areas; shorter ones suit small tasks.
The width of the tape affects how easy it is to read and how stiff it feels. Wider tapes stay straight better for longer measurements.
- Short tapes (up to 12 feet) work well indoors.
- Long tapes (25 feet or more) are good for construction.
- Wider tapes (1 inch or more) are easier to read and hold straight.
- Narrow tapes fit better in tight spaces but can bend easily.
Material And Durability
Tape measures come in different materials. Choose one that lasts and works well in your environment.
Steel tapes are very strong but may rust if wet. Plastic tapes are light but can break more easily.
- Steel tapes resist bending and offer accuracy.
- Fiberglass tapes do not rust and work well outside.
- Plastic-coated tapes last longer and resist damage.
- Look for a sturdy case to protect the tape inside.

Credit: www.creeklinehouse.com
Preparing For Accurate Measurements
Taking accurate measurements with a tape measure starts before you pull it out. Preparing your tools and workspace helps get the best results.
This guide covers key steps to ready yourself for precise measuring.
Clearing The Measuring Surface
Clear the area where you will measure. Remove dust, dirt, and objects that may block or change the tape’s path.
- Wipe the surface clean with a dry cloth.
- Remove loose items like papers or tools.
- Check for bumps or uneven spots that may affect measurement.
- Ensure good lighting to see the tape markings clearly.
Ensuring Tape Measure Calibration
Make sure your tape measure shows correct lengths. An uncalibrated tape can cause errors in your work.
| Check Method | What to Do |
| Compare with a ruler | Align both at zero and check several points |
| Test known lengths | Measure an object with a set length and confirm accuracy |
| Inspect tape condition | Look for stretched or worn tape that may affect readings |
Positioning The Tape Correctly
Place the tape measure so it lies flat and straight. Avoid twists or bends that change the actual length.
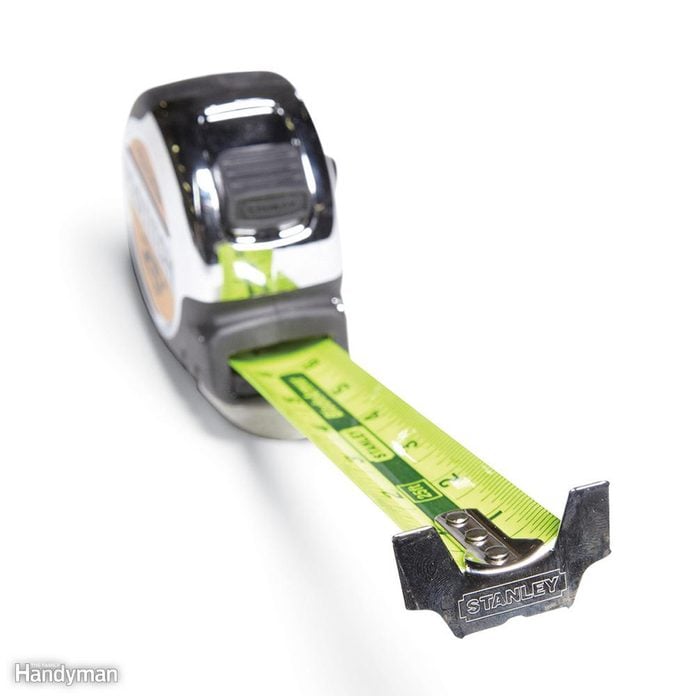
- Hook the tape’s metal end securely to the start point.
- Pull the tape tight but not stretched.
- Keep the tape parallel to the surface you measure.
- Hold the tape steady to prevent slipping or movement.
Techniques For Precise Measuring
Using a tape measure correctly helps you get accurate results. Small mistakes can cause big errors in your work.
Learn simple techniques to measure with more care. This guide covers the most important steps to follow.
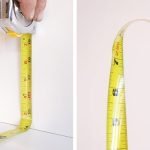
Using The Hook Properly
The metal hook at the tape’s end moves slightly. It adjusts for inside and outside measurements.
When measuring outside edges, hook it over the object’s edge. For inside measurements, push the hook against the surface.
- Check the hook is not bent or loose
- Use the hook’s thickness for inside measurements
- Hook over edges firmly for outside measurements
Keeping The Tape Straight
Keep the tape measure straight for correct readings. A bent or twisted tape can change the length.
Pull the tape tight but not too hard. Avoid slack or bends along the tape’s length.
- Hold the tape firmly at both ends
- Stretch the tape flat and straight
- Use your hand or a tool to keep the tape steady
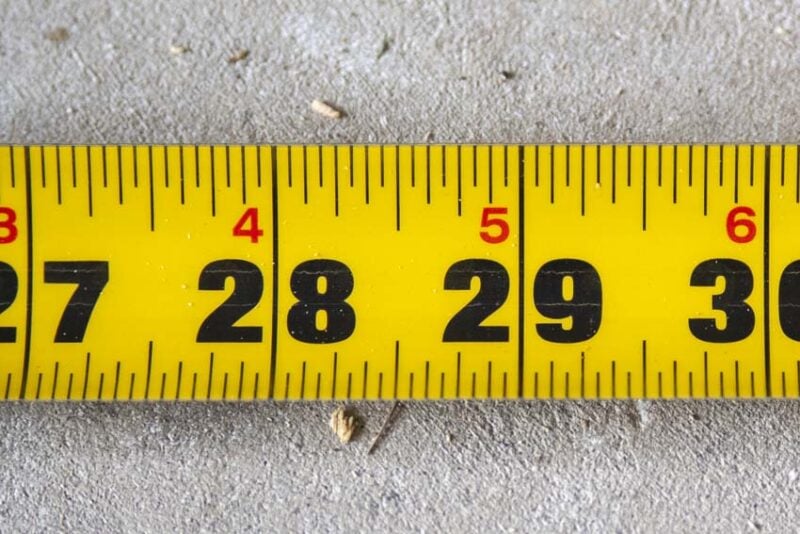
Reading Measurements Correctly
Look at the tape directly from above. Angled views can cause reading errors.
Note the numbers and lines carefully. Use the smallest marks for the most precise reading.
- Read the measurement at the tape’s edge or hook
- Use millimeters or fractions for exact numbers
- Double-check readings before marking or cutting
Common Mistakes To Avoid
Using a tape measure may seem easy, but small errors can cause big problems. Avoiding common mistakes helps you get exact measurements every time.
Below are three frequent errors and tips on how to fix them. Pay attention to details for better results.
Ignoring Tape Sag
Tape sag happens when the tape hangs loosely between two points. This makes the measurement longer than it really is.
- Hold the tape tight and straight.
- Support the tape along its length if possible.
- Avoid measuring long distances without support.
- Use a rigid measuring tool for very long lengths.
Misreading Fractional Marks
Tape measures show inches divided into fractions. It is easy to confuse these if you don’t look closely.
| Fraction | Decimal Equivalent |
| 1/2 | 0.5 |
| 1/4 | 0.25 |
| 1/8 | 0.125 |
| 1/16 | 0.0625 |
Check the tape closely. Use a magnifier if you need to read small marks better.
Overlooking Tape Stretch
Some tapes stretch slightly over time. This adds error to your measurements.
- Do not pull the tape too hard.
- Store the tape properly to avoid damage.
- Replace the tape if it feels loose or too flexible.
Advanced Tips And Tricks
Using a tape measure accurately saves time and reduces mistakes. These tips help you get precise results.
Follow these techniques to improve your measuring skills for tricky jobs and detailed work.
Marking Measurements Accurately
After measuring, mark your points clearly. Use a sharp pencil or fine-tip marker for thin lines.
- Make marks at eye level to avoid errors.
- Use a square tool to draw straight lines from the marks.
- Double-check measurements before marking.
- Mark both ends of a measurement for better alignment.
Measuring Curved Surfaces
Curved surfaces need special care to measure correctly. Stretch the tape tight but do not bend it sharply.
| Tip | Reason |
|---|---|
| Use a flexible tape | It follows curves without kinking |
| Take multiple measurements | Ensures accuracy along different curve points |
| Mark curve points clearly | Helps when transferring measurements |
Using A Second Person For Assistance
Having a helper makes long or tricky measurements easier and more accurate.
- One person holds the tape’s start point firmly.
- The second person stretches the tape to the desired length.
- Both check the reading together before marking.
- Use clear signals to communicate measurements.
Credit: www.protoolreviews.com
Maintaining Your Tape Measure
A tape measure is a useful tool for many tasks. To keep it working well, you need to take good care of it.
Proper maintenance helps you get accurate measurements every time you use it.
Cleaning And Storage Tips
Keep your tape measure clean and dry. Dirt and moisture can damage the tape and make it hard to read.
Store the tape measure in a cool, dry place. Avoid leaving it in direct sunlight or damp areas.
- Wipe the tape with a soft cloth after use
- Use mild soap and water for sticky dirt
- Do not soak the tape in water
- Keep the tape rolled up when not in use
- Store in a toolbox or drawer to avoid damage
Checking For Wear And Tear
Check your tape measure often for signs of damage. A worn tape can give wrong readings.
Look for cracks, bends, or faded numbers on the tape. Also, check if the tape retracts smoothly.
- Inspect the tape blade for cracks or bends
- Ensure the numbers and markings are clear
- Test the locking mechanism for proper function
- Listen for smooth retraction without jerks
When To Replace Your Tape
Replace your tape measure if it does not give correct readings. Safety is important when using tools.
Broken hooks or unreadable markings mean the tape is no longer reliable. Replace it to avoid mistakes.
- Replace if the tape blade is cracked or bent
- Replace if numbers or markings are faded
- Replace if the tape does not lock or retract properly
- Replace if the hook is damaged or missing
Frequently Asked Questions
How Do I Hold A Tape Measure Correctly?
Hold the tape measure firmly with one hand. Use the other hand to pull the blade straight. Avoid bending the tape for accurate readings.
What Is The Best Way To Read Tape Measure Markings?
Read the markings at eye level. Align the edge of the object with the tape’s zero mark. Use the smallest increment for precision.
How Can I Avoid Tape Measure Errors?
Ensure the tape is straight and taut. Avoid slack or twists. Always double-check measurements for accuracy before marking.
When Should I Use The Tape Measure’s Hook?
Use the hook to anchor the tape on edges. It allows accurate inside and outside measurements by gripping securely.
Conclusion
Measuring accurately with a tape measure is essential. These tips can help. Always start at zero and keep the tape straight. Double-check your measurements to avoid errors. Practice makes perfect, so measure often. Understand the tape markings clearly. A steady hand prevents mistakes.
Keep the tape measure clean and well-maintained. This enhances its lifespan. Remember, precision is key in any project. With patience, you’ll measure like a pro. Happy measuring!