If you want your wood projects to look smooth and professional, mastering the use of an orbital sander is key. But using this tool the wrong way can leave scratches or uneven surfaces that ruin your hard work.
You’ll discover simple yet powerful tips to help you get the perfect finish every time. Whether you’re a beginner or just want to improve your technique, these easy steps will make your sanding faster, cleaner, and more effective. Keep reading to unlock the secrets that will transform your woodworking results.
Credit: www.familyhandyman.com
Choosing The Right Orbital Sander
Using an orbital sander makes wood finishing easier and smoother. Picking the right sander helps you get better results faster.
There are many types of orbital sanders. You also need to choose the right grit and think about power and speed. This guide covers those points.
Types Of Orbital Sanders
Orbital sanders come in different types. The main ones are random orbit and finishing sanders. Random orbit sanders move in a circle and an ellipse. This helps avoid swirl marks on wood.
Finishing sanders move in a simple orbit. They work well for light sanding and smooth finishes. Choose a sander type based on your project needs.
Selecting The Correct Grit
- Coarse grits (40-60) remove old paint or rough wood fast.
- Medium grits (80-120) prepare wood for finishing.
- Fine grits (150-220) smooth the wood for final coats.
- Extra fine grits (320 and up) polish the surface.
Start with a coarse grit and move to finer grits. This ensures a smooth and even finish.
Power And Speed Considerations
| Feature | Why It Matters |
| Power (Amps or Watts) | Stronger power handles tough sanding jobs easily. |
| Variable Speed | Adjust speed to match wood type and finish quality. |
| Orbital Size | Larger orbits remove material faster but need control. |
| Weight | Lighter sanders reduce user fatigue. |
Choose a sander with enough power for your project. A variable speed helps control the sanding process. Keep comfort in mind for long use.
Credit: www.familyhandyman.com
Preparing Wood For Sanding
Proper preparation of wood makes sanding easier and more effective. This helps you get a smooth and even finish.
Before using an orbital sander, check the wood surface carefully. Secure the wood so it does not move during sanding.
Cleaning The Surface
Remove dust, dirt, and grease from the wood surface. These can clog the sander and damage the finish.
- Use a brush or vacuum to clear loose debris.
- Wipe the wood with a damp cloth to remove fine dust.
- Let the wood dry completely before sanding.
Checking For Imperfections
Look for cracks, nails, or rough spots on the wood. These can affect the sanding process and final look.
| Imperfection | Action |
| Cracks | Fill with wood filler and let dry |
| Nails or screws | Remove or hammer below surface |
| Rough spots | Smooth with coarse sandpaper first |
Securing The Workpiece
Fix the wood firmly to a stable surface. This prevents movement that can cause uneven sanding or injury.
- Use clamps to hold the wood in place.
- Check that clamps do not block sanding areas.
- Place the wood on a non-slip mat if clamps are not available.
Sanding Techniques For Smooth Finishes
Using an orbital sander correctly helps create smooth wood surfaces. Good sanding techniques reduce scratches and prepare wood for finishing.
Follow key methods to improve your sanding results and protect your workpiece from damage.
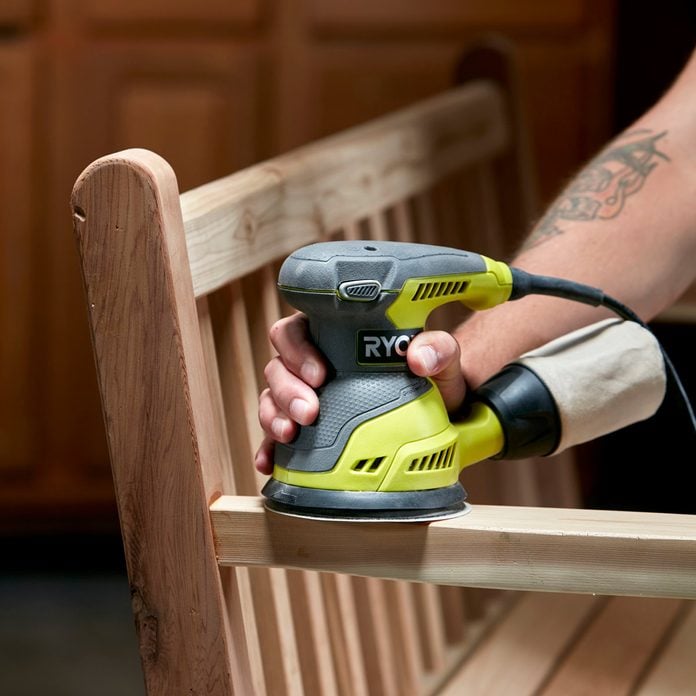
Proper Hand Positioning
Hold the sander firmly but comfortably. Place one hand on the handle and the other on top for control. Keep your wrists straight to avoid strain.
- Grip the sander with both hands
- Keep your arms relaxed
- Do not press too hard with your fingers
- Move your hands steadily over the wood
Maintaining Even Pressure
Apply gentle and consistent pressure. Too much force can cause uneven sanding or swirl marks. Let the sander’s weight do most of the work.
| Pressure Level | Effect on Wood |
| Light | Removes finish evenly without damage |
| Medium | Good for initial rough sanding |
| Heavy | May cause gouges or uneven spots |
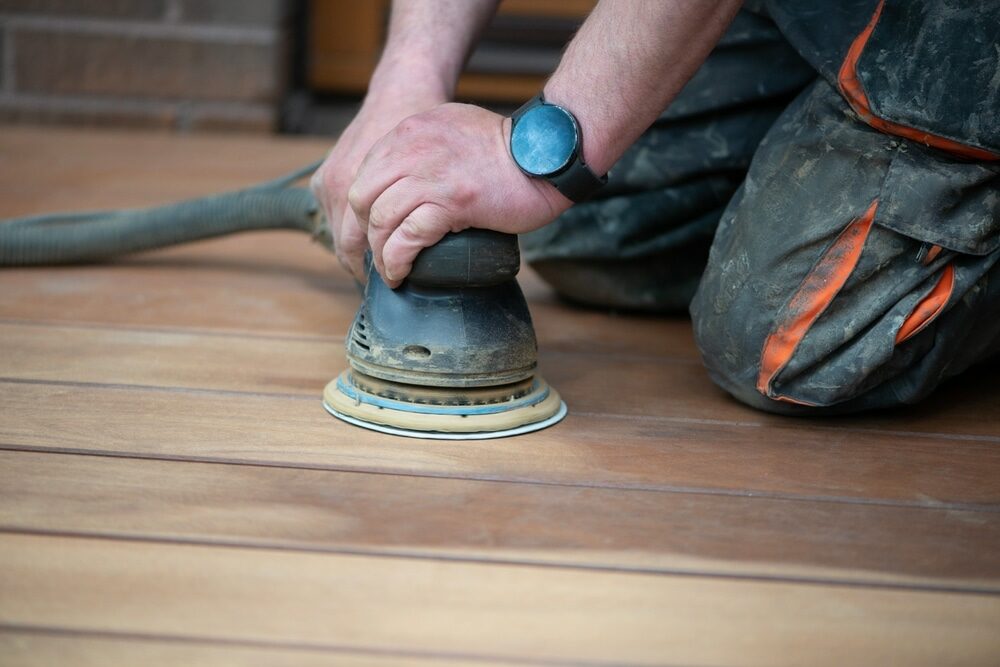
Using Consistent Motion
Move the sander in steady, overlapping passes. Avoid staying in one spot too long. This helps prevent dips and uneven sanding.
- Keep the sander moving at all times
- Overlap each pass by about 50%
- Use circular or back-and-forth motions
- Check your work often for smoothness
Avoiding Common Sanding Mistakes
Using an orbital sander can speed up your woodworking projects. Still, some mistakes can spoil the finish. Avoiding these errors helps you get smooth and even wood surfaces.
Learn tips to prevent swirl marks, avoid over-sanding, and control dust. These simple steps keep your work clean and professional.
Preventing Swirl Marks
Swirl marks are circular scratches caused by improper sanding. To avoid them, keep the sander flat on the wood and move it steadily. Use the right grit sandpaper and change it when worn out.
- Hold the sander evenly against the surface
- Move the sander in slow, overlapping passes
- Use fresh, appropriate grit sandpaper
- Do not press too hard on the sander
Avoiding Over-sanding
Over-sanding removes too much wood and can change your project’s shape. It also wastes time and materials. Watch how long you sand each area and check your progress often.
| Common Cause | How to Avoid |
| Sanding one spot too long | Keep the sander moving constantly |
| Using too coarse grit first | Start with medium grit and finish fine |
| Pressing hard on the sander | Let the sander’s weight do the work |
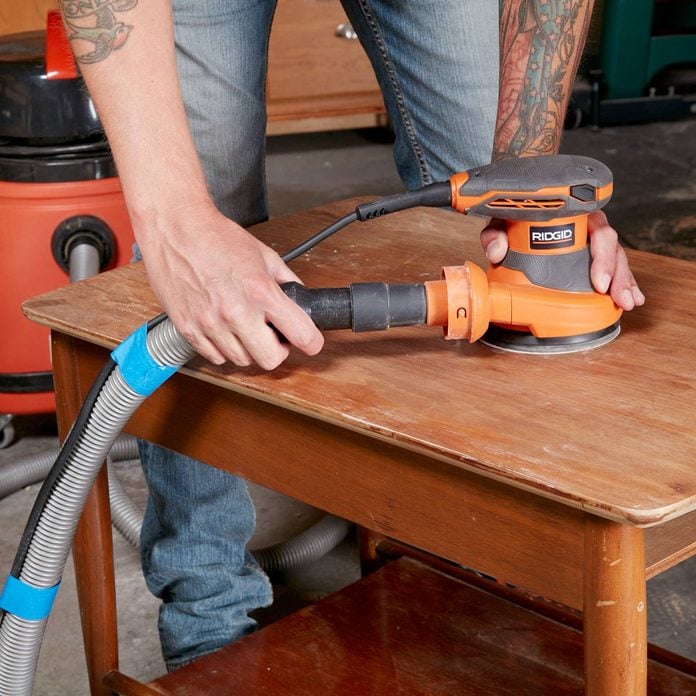
Managing Dust And Debris
Dust and debris can clog your sander and affect the finish. Clean the sander often and work in a well-ventilated space. Use a vacuum or dust bag to catch particles.
- Wear a dust mask to protect your lungs
- Empty the dust bag or container regularly
- Use a vacuum attachment if possible
- Clean the work area after sanding
Finishing Touches After Sanding
After using an orbital sander, the wood surface needs extra care. These finishing touches help the wood look smooth and ready.
Taking time to inspect, clean, and prepare the wood can improve the final result. Follow these steps for a better finish.
Inspecting The Surface
Look closely at the wood after sanding. Check for scratches, uneven spots, or rough areas that need more work.
Use good lighting and run your hand over the surface. Fix any problem areas with fine sandpaper before moving on.
Cleaning Residual Dust
Dust left on wood can spoil the finish. Remove all dust using a soft brush or vacuum with a brush attachment.
Wipe the surface with a damp cloth or tack cloth to pick up tiny dust particles. Let the wood dry if you use a damp cloth.
- Use a soft brush or vacuum first
- Wipe with a tack cloth for fine dust
- Allow wood to dry before finishing
Preparing For Stain Or Finish
Make sure the wood surface is smooth and clean before applying stain or finish. This helps the finish go on evenly.
If needed, lightly sand with very fine sandpaper (320 grit or higher). Remove dust again after this sanding step.
- Check the wood is dry and clean
- Lightly sand with fine grit if needed
- Remove dust completely before finishing
Safety Tips While Using Orbital Sanders
Using an orbital sander can make wood finishing easier and faster. Safety is very important during the process.
Follow these safety tips to protect yourself and get the best results while sanding wood.
Wearing Protective Gear
Always wear the right safety gear before using an orbital sander. This protects you from dust and accidents.
- Wear safety goggles to protect your eyes from dust and debris.
- Use a dust mask or respirator to avoid breathing in fine wood particles.
- Wear ear protection to reduce noise from the sander.
- Use gloves to keep your hands safe and improve grip on the tool.
Proper Ventilation
Good airflow helps remove dust and keeps the air clean while sanding wood. Always work in a well-ventilated area.
| Ventilation Method | Description |
|---|---|
| Open Windows | Allow fresh air to flow and remove dust particles. |
| Use Fans | Help move dust away from your work area. |
| Dust Extraction System | Connect to your sander to capture dust directly at the source. |
Handling The Tool Safely
Hold the sander firmly and keep control at all times. Follow these tips to avoid accidents and damage.
- Check the sander for any damage before use.
- Keep both hands on the tool while sanding.
- Do not wear loose clothing or jewelry that may get caught.
- Turn off the sander and unplug it before changing sandpaper.
- Keep the power cord away from the sanding area.
Credit: mrsander.co.uk
Frequently Asked Questions
How Do I Choose The Right Grit For An Orbital Sander?
Start with coarse grit (60-80) for rough surfaces. Use medium grit (100-150) for smoothing. Finish with fine grit (180-220) for a polished look. Choosing the right grit ensures smooth, even wood finishing without scratches or damage.
What Is The Best Technique For Using An Orbital Sander?
Keep the sander moving in overlapping, circular motions. Avoid applying too much pressure to prevent gouges. Let the sander’s weight do the work. This technique ensures even sanding and a professional wood finish.
How Do I Prevent Swirl Marks When Sanding Wood?
Use fine grit sandpaper and keep the sander moving steadily. Sand with the grain of the wood whenever possible. Avoid staying too long in one spot. These tips minimize swirl marks and create a smooth wood surface.
Can I Use An Orbital Sander On All Wood Types?
Yes, orbital sanders work on most wood types, including hardwood and softwood. Adjust grit and pressure based on wood hardness. Always test on a small area first to ensure the best results without damage.
Conclusion
Using an orbital sander makes wood finishing easier. Follow these tips for great results. Start with the right grit sandpaper. Move the sander in gentle, circular motions. Keep the sander flat on the wood. Don’t press too hard. Regularly check your progress.
Change the sandpaper when it gets worn. Practice makes perfect. With time, your skills will improve. Enjoy the smooth finish on your wood projects. Remember, safety first. Wear a mask and goggles. Clean your workspace after sanding. Happy sanding and crafting!