
Are you tackling a large sanding project and feeling a bit overwhelmed? Using an orbital sander can transform a tedious task into a smooth, efficient process.
Imagine gliding through your work with ease, achieving a flawless finish that you can be proud of. But where do you start? Mastering the art of using an orbital sander on large surfaces can be your secret weapon in achieving professional results.
You’ll discover simple yet powerful tips that can save you time, reduce your effort, and help you achieve the perfect finish. Ready to make your sanding project a success? Let’s dive in and unlock the full potential of your orbital sander!
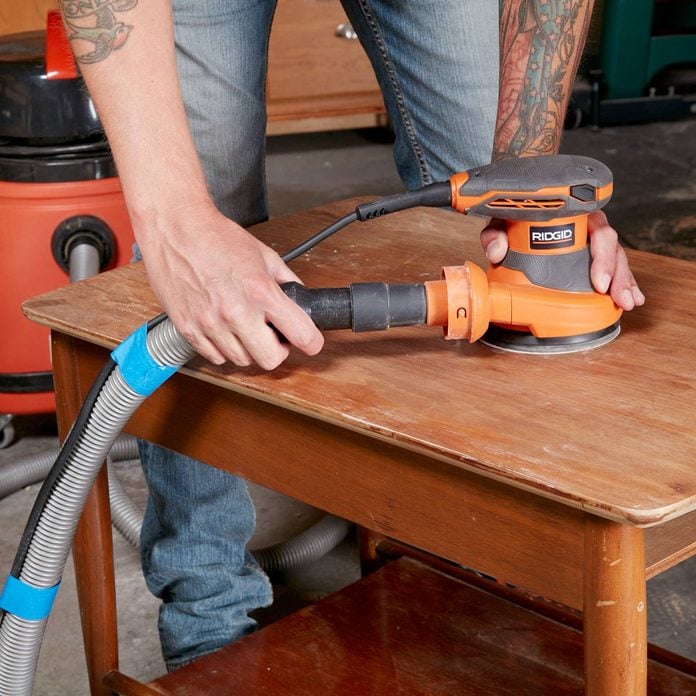
Credit: www.familyhandyman.com
Choosing The Right Orbital Sander
Choosing the right orbital sander is important for large surfaces. The right tool helps you work faster and get smooth results.
There are different types and settings to consider. This guide will help you pick the best sander for your project.
Types Of Orbital Sanders
Orbital sanders come in different styles. Each style works best for certain jobs and surfaces.
Random orbital sanders move in circles and orbits. They reduce swirl marks and are good for large flat areas.
Sheet orbital sanders use a square sanding pad. They are good for corners and edges but cover less surface at once.
- Random Orbital Sander:Best for smooth finishes on big surfaces
- Sheet Orbital Sander:Good for edges and smaller areas
Selecting The Proper Grit
Sanding grit means how rough or fine the sandpaper is. Choosing the right grit helps you finish the surface well.
Start with coarse grit to remove old paint or rough spots. Then use finer grit for smooth finishing.
- Coarse grit (40-60): Removes old finish and rough surfaces
- Medium grit (80-120): Prepares surface for finishing
- Fine grit (150-220): Smooths surface for painting or staining
Power And Speed Settings
Power and speed settings affect how the sander works on your surface. Adjust them to avoid damage.
Higher speed removes material faster but can cause scratches. Lower speed is better for delicate surfaces.
- Use high speed for rough sanding on hard wood
- Use low speed for soft wood or finishing work
- Check the sander’s manual for power limits and speed control
Preparing The Surface
Preparing the surface is important before using an orbital sander. It helps you get smooth and even results.
Cleaning, checking, and securing the workpiece make sanding easier and safer.
Cleaning And Inspecting
Start by cleaning the surface to remove dust and dirt. This prevents scratches during sanding.
Look closely for nails, screws, or cracks. These can damage the sander or cause uneven sanding.
- Use a brush or cloth to clean the surface
- Check for any metal objects sticking out
- Fill cracks or holes before sanding
Removing Old Finish
Remove old paint or varnish to help the sander work better. This also gives a fresh look to the surface.
Use a chemical stripper or a coarse sanding disc to take off the old finish before fine sanding.
- Apply chemical stripper safely if needed
- Use coarse grit sanding discs for tough finishes
- Work in a well-ventilated area
Securing The Workpiece
Fix the workpiece firmly to a stable surface. This stops it from moving and keeps your hands safe.
Clamps or heavy weights work well to hold the item steady during sanding.
- Use clamps to hold the workpiece in place
- Check that it does not wobble
- Keep your workspace clean and organized
Proper Techniques For Large Surfaces
Using an orbital sander on large surfaces needs special care. Proper methods help you get smooth results fast.
Focus on pressure, stroke patterns, and avoiding marks. These tips keep your work even and clean.
Maintaining Even Pressure
Keep steady pressure to avoid uneven sanding. Pressing too hard can damage the surface.
- Hold the sander firmly but gently
- Let the tool’s weight do the work
- Move smoothly over the surface without stopping
- Check often to avoid sanding too deep
Using Overlapping Strokes
Overlap each stroke by about half the sander’s pad size. This method prevents missed spots and uneven areas.
| Stroke Technique | Reason |
|---|---|
| Overlap strokes by 50% | Ensures full surface coverage |
| Move in consistent speed | Prevents rough patches |
| Sand in a random pattern | Avoids visible lines |
Avoiding Swirl Marks
Swirl marks show when the sander moves too fast or stays in one place. Use light pressure and steady motion.
- Do not press too hard
- Keep the sander moving constantly
- Use finer grit sandpaper for finishing
- Clean the sanding pad often
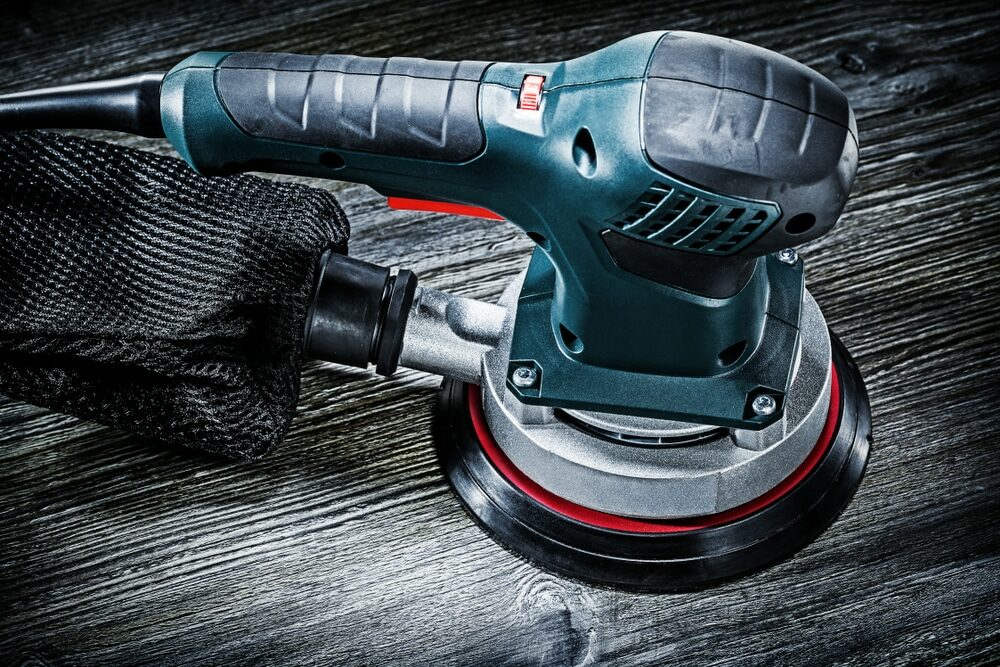
Credit: mrsander.co.uk
Safety Tips And Precautions
Using an orbital sander on large surfaces needs care and attention. Safety is very important to avoid accidents and health risks.
Follow these key tips to protect yourself and keep your workspace safe while sanding.
Wearing Protective Gear
Protective gear helps prevent injuries and health problems from dust and noise. Always wear the right equipment before starting.
- Wear safety goggles to protect your eyes from dust and debris.
- Use a dust mask or respirator to avoid breathing fine particles.
- Put on ear protection like earplugs or earmuffs to reduce noise exposure.
- Wear gloves to protect your hands from vibration and splinters.
- Choose long sleeves and pants to shield your skin from dust.
Ensuring Good Ventilation
Good airflow helps remove dust and fumes from your work area. It keeps the air fresh and lowers health risks.
Tips for Ventilation:
- Open windows and doors to create cross-ventilation.
- Use fans to push dust out of the room.
- Avoid sanding in small, closed spaces without airflow.
- Consider using an air purifier with a HEPA filter.
Handling Dust Collection
Dust from sanding can damage your lungs and make cleanup harder. Use dust collection tools to control it.
| Dust Collection Method | Description | Benefit |
| Built-in Dust Bag | Attached to the sander to catch dust as you work. | Keeps dust contained and reduces airborne particles. |
| Vacuum Attachment | Connects the sander to a shop vacuum for better suction. | Improves dust collection and keeps area cleaner. |
| External Dust Extractor | Large machine that collects dust from multiple tools. | Highly effective for big projects and workshops. |
Maintenance And Care
Taking care of your orbital sander helps it last longer. Regular maintenance keeps it working well on large surfaces.
Simple cleaning and proper storage prevent damage. Replace worn parts to keep sanding smooth and safe.
Cleaning The Sander
Clean the sander after every use to remove dust and debris. Use a soft brush or compressed air to clear vents and moving parts.
- Unplug the tool before cleaning
- Blow out dust from the motor and vents
- Wipe the body with a dry cloth
- Check for dust buildup around the sanding pad
Replacing Sanding Pads
Replace sanding pads when they lose grip or wear down. Using damaged pads reduces sanding quality and can harm the sander.
| Signs to Replace Pads | Effects of Old Pads |
| Worn or torn edges | Uneven sanding surface |
| Loss of adhesive stickiness | Slipping during use |
| Visible damage or cracks | Possible damage to the tool |
Storing The Tool
Store the sander in a dry, cool place to avoid rust and damage. Keep it away from dust and moisture for best results.
- Disconnect the power cord
- Remove sanding pads before storing
- Use a case or cover to protect the sander
- Keep out of reach of children

Credit: willyhomes.com
Frequently Asked Questions
How Do I Prepare Large Surfaces For Orbital Sanding?
Clean the surface thoroughly to remove dust and debris. Fill holes or cracks with wood filler. Ensure the surface is dry and smooth before sanding to achieve the best results.
What Grit Sandpaper Is Best For Large Surfaces?
Start with a coarse grit (60-80) for rough areas. Progress to medium (120-150) and finish with fine grit (180-220) for smoothness. Changing grits ensures an even and polished surface.
How To Avoid Swirl Marks With An Orbital Sander?
Use the right grit sandpaper and keep the sander moving evenly. Avoid pressing too hard, and sand in overlapping circular motions. Regularly check the sanding pad for wear.
Can I Sand Edges And Corners With An Orbital Sander?
Orbital sanders are best for flat surfaces. For edges and corners, use hand sanding or a detail sander. This approach prevents damage and ensures thorough sanding.
Conclusion
Using an orbital sander on large surfaces takes care and patience. Keep the sander moving to avoid uneven spots. Choose the right sandpaper grit for smooth results. Always wear safety gear to protect yourself. Clean the surface after sanding for a fresh look.
Practice these tips to get better with each project. Small steps lead to big improvements in your work. Enjoy the process and see your surfaces shine.