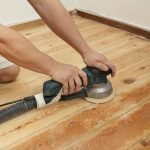
Imagine transforming your worn-out floors into stunning surfaces without breaking a sweat. An orbital sander can be your secret weapon for achieving professional results right in your own home.
But, like any tool, mastering its use requires some savvy tips and tricks. Whether you’re a DIY enthusiast or a homeowner looking to spruce up your space, knowing how to effectively use an orbital sander can save you time, money, and frustration.
This guide is designed to equip you with the essentials you need to sand your floors to perfection. Are you ready to uncover the secrets that will make your floors the envy of the neighborhood? Let’s dive in and discover how you can achieve flawless finishes with ease.
Choosing The Right Orbital Sander
An orbital sander is a useful tool for smoothing floors. Picking the right one makes your work easier and better.
Consider the types, sandpaper grit, and the size of the sander before buying. These factors affect how well the sander works on your floors.
Types Of Orbital Sanders
There are several types of orbital sanders. Each type fits different sanding needs and floor types.
- Random Orbital Sander:Moves in random patterns to reduce swirl marks.
- Finishing Sander:Has a square pad, good for fine sanding and corners.
- Detail Sander:Small and lightweight, fits tight spots and edges.
Selecting The Proper Grit Sandpaper
Sandpaper grit affects how smooth the floor will be. Start with coarse grit and move to fine grit.
| Grit Level | Use |
| 40-60 | Remove old finish and deep scratches |
| 80-120 | Smooth rough surfaces |
| 150-220 | Final sanding for a smooth finish |
Considering Sander Size And Weight
Choose a sander size that fits your floor area. A lightweight sander is easier to handle for long work periods.
- Large sanders cover more area quickly but can be heavy.
- Small sanders are good for detail work and corners.
- Pick a weight that feels comfortable to hold.
Preparing The Floor Surface
Before using an orbital sander on your floors, you must prepare the surface well. Proper preparation helps you get smooth and even results.
Taking time to prepare can also protect your floor and sander from damage. Follow these tips to get ready.
Clearing The Area
Remove all furniture and items from the floor. This clears space and stops anything from blocking your work.
Make sure to also take away rugs, cords, and any other objects. A clean area keeps you safe and your work easy.
Checking For Nails And Debris
Look closely for nails sticking out or debris on the floor. These can damage the sander or cause uneven sanding.
Use a metal detector or run your hand over the floor to find sharp objects. Remove or hammer down nails to keep the surface smooth.
Repairing Floor Imperfections
Fill cracks, holes, and dents with wood filler or putty. Let it dry fully before sanding for the best finish.
Sanding over an uneven floor can cause damage to your tool and leave marks. Fixing these spots first creates a smooth surface.
Safety Precautions
Using an orbital sander on floors needs care. Safety is important to avoid injury and damage.
Follow safety rules to protect yourself and others while sanding floors.
Wearing Protective Gear
Always wear protective gear before starting. It helps protect your body from dust and debris.
Wear a dust mask to stop breathing in small particles. Use goggles to protect your eyes.
- Dust mask or respirator
- Safety goggles or glasses
- Hearing protection like ear plugs
- Gloves to protect your hands
- Work boots or sturdy shoes
Ensuring Proper Ventilation
Good airflow helps remove dust and fumes. Open windows and doors before you start sanding.
Use fans if needed to move air out of the room. This keeps the air fresh and safe to breathe.
- Open windows and doors
- Turn on fans to increase airflow
- Avoid sanding in small closed rooms
- Take breaks to get fresh air
Handling Electrical Safety
Check the sander and cords for damage before use. Do not use if wires are cut or plugs are loose.
Keep cords away from water and sharp objects. Use a grounded outlet to reduce shock risk.
- Inspect cords and plugs for damage
- Use grounded electrical outlets
- Keep cords away from water
- Do not overload electrical circuits
- Turn off and unplug sander when not in use
Credit: mrsander.co.uk
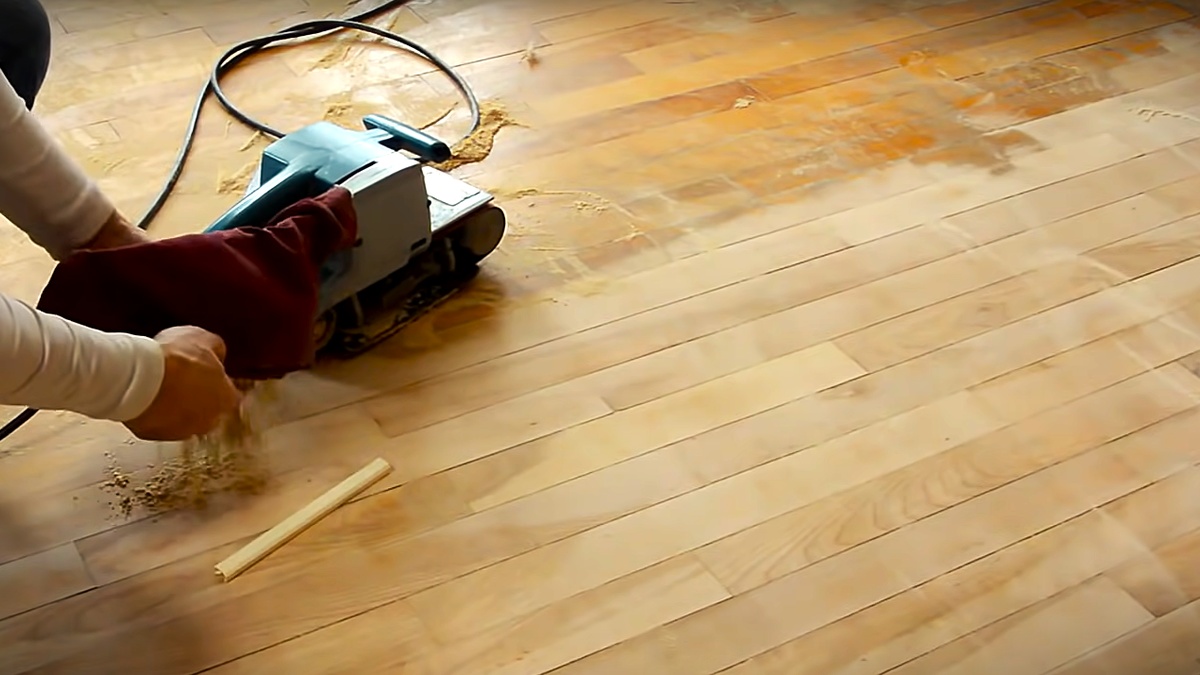
Sanding Techniques For Smooth Results
Using an orbital sander on floors helps create a smooth, even surface. Proper sanding techniques make the job easier and improve the final look.
Focus on the right grit, pressure, and motion for the best results. Avoid mistakes that can damage the floor.
Starting With Coarse Grit
Begin sanding with coarse grit sandpaper to remove old finish and rough spots. This grit quickly levels the surface but leaves scratches that need smoothing later.
After the first sanding, switch to finer grits to refine the floor texture step by step.
Maintaining Even Pressure
Keep steady and even pressure on the sander. Too much force can cause uneven sanding and damage the wood.
- Hold the sander flat against the floor
- Use light to medium pressure for control
- Let the machine do the work, avoid pushing hard
- Move smoothly to avoid gouges
Using Overlapping Strokes
Overlap each sanding pass by about half the width of the pad. This method prevents missed spots and creates a uniform finish.
| Stroke Technique | Purpose |
| Overlap strokes by 50% | Ensures even sanding coverage |
| Move in slow, steady lines | Prevents uneven spots and rough patches |
| Keep consistent speed | Helps avoid swirl marks |
Avoiding Gouges And Swirls
Watch for gouges caused by too much pressure or staying too long in one spot. Swirls happen with fast, erratic movement.
- Keep the sander moving at all times
- Use finer grits for final passes
- Check sandpaper for wear and replace often
- Sand with the grain of the wood if possible
Dealing With Edges And Corners
Using an orbital sander on floors is quick and effective. But edges and corners need extra care.
This guide shows how to handle those tricky spots without damaging the floor.
Using Detail Sanders
Detail sanders are perfect for edges and corners. They have a smaller sanding pad for tight spaces.
- Choose a detail sander with a pointed or triangular pad.
- Work slowly along edges to avoid rounding them off.
- Keep the sander moving to prevent uneven sanding.
- Use fine-grit sandpaper for a smooth finish near walls.
Sanding By Hand When Necessary
Some corners are too tight for any power sander. Sanding by hand works best here.
| Tool | Use | Tip |
| Sandpaper block | Flat edges | Wrap sandpaper tightly for control |
| Hand sanding sponge | Curved corners | Use gentle pressure to avoid marks |
| Small sanding pad | Tight spaces | Change sandpaper often for best results |
Managing Dust And Cleanup
Using an orbital sander on floors creates a lot of dust. Managing this dust helps keep your work area clean. It also protects your lungs and keeps the floor smooth.
Good dust control and cleanup make sanding easier and safer. These tips cover connecting dust systems, cleaning sandpaper, and post-sanding cleanup.
Connecting To Dust Collection Systems
Many orbital sanders have ports to connect to dust collection bags or vacuums. Use this feature to reduce airborne dust. Attach the hose tightly to avoid leaks.
- Check your sander’s dust port size before buying a vacuum hose.
- Use a vacuum with strong suction for best results.
- Empty dust bags or vacuum containers often to keep airflow steady.
- Wear a dust mask even with a dust collection system.
Regularly Cleaning Sandpaper
Sandpaper clogs with dust and debris during use. This reduces its effectiveness and can damage the floor finish. Cleaning sandpaper keeps it working well longer.
- Stop sanding and remove the sandpaper from the sander.
- Use a sandpaper cleaning stick or rubber to rub off dust.
- Tap the sandpaper gently to knock off loose particles.
- Replace sandpaper if it is torn or worn out.
Post-sanding Floor Cleaning
After sanding, clean the floor well to remove all dust. This helps with staining or finishing later. Use the right tools for a thorough clean.
| Cleaning Tool | Use |
| Vacuum Cleaner | Remove large dust and debris from floor surface |
| Microfiber Mop | Pick up fine dust particles left on floor |
| Sticky Roller | Remove stubborn dust in corners or crevices |
Finishing Touches
Using an orbital sander on floors makes them smooth and ready for finishing. The final steps protect your floor and improve its look.
Choosing the right finish, applying sealants or stains, and allowing proper drying time are key to a lasting floor.
Choosing The Right Finish
Pick a finish that fits your floor’s use and style. Some finishes add shine, others protect from water.
Consider how much wear your floor will get. High-traffic areas need tougher finishes.
- Glossy finish shows scratches easily
- Matte finish hides scratches better
- Satin finish gives a soft shine
- Oil-based finishes last longer
Applying Sealants And Stains
Sealants protect floors from damage and moisture. Stains add color and bring out wood grain.
Apply sealants or stains evenly using a brush or cloth. Work in the direction of the wood grain.
- Use thin coats for even coverage
- Let each coat dry before the next
- Wear gloves to protect your hands
- Ventilate the room well
Allowing Proper Drying Time
Drying time is important for a strong finish. Rushing can cause smudges or sticky spots.
Check the product label for drying times. Wait at least a day before walking on the floor.
- Keep the room ventilated
- Avoid dust and dirt during drying
- Use fans to speed drying if needed
- Do not place rugs until fully dry

Credit: romerohardwoodfloor.com
Credit: www.ecohome.net
Frequently Asked Questions
What Grit Sandpaper Is Best For Orbital Sanding Floors?
Use coarse grit (40-60) for old finishes, medium grit (80-120) for smoothing. Finish with fine grit (150-180) for a polished look. Changing grits gradually prevents floor damage and ensures an even surface.
How To Prevent Swirl Marks When Sanding Floors?
Keep the orbital sander moving steadily and avoid staying in one spot. Use finer grit sandpaper for finishing. Proper technique reduces swirl marks and creates a smooth, professional finish on your floor.
Can I Use An Orbital Sander On All Floor Types?
Orbital sanders work well on hardwood and softwood floors. Avoid using them on laminate or vinyl floors, as they can cause damage. Always test a small area first to ensure compatibility and desired results.
How Often Should I Change Sandpaper During Sanding?
Change sandpaper when it becomes clogged or worn out. Fresh sandpaper ensures efficient sanding and prevents uneven surfaces. Regular changes improve sanding speed and final floor quality.
Conclusion
Using an orbital sander on floors takes care and patience. Start with the right grit sandpaper to avoid damage. Keep the sander moving steadily to get smooth results. Always wear safety gear to protect yourself from dust. Clean the floor well before and after sanding.
These simple tips help you achieve a nice finish easily. Practice makes your sanding skills better over time. Enjoy your refreshed floors and a job well done.