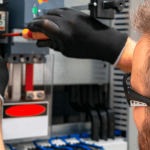
Are you planning a DIY electrical repair project? Before you dive in, there’s one crucial tool you shouldn’t overlook: insulated gloves.
These gloves are your first line of defense against electrical shocks and accidents. But how do you ensure you’re using them correctly to maximize your safety and efficiency? This guide will provide you with essential tips to confidently handle your electrical tasks while keeping your hands safe.
By following these insights, not only will you protect yourself, but you’ll also enhance your skills and confidence in tackling electrical repairs. Stay safe, stay informed, and let’s get started!

Credit: www.familyhandyman.com
Choosing The Right Gloves
Using insulated gloves is important for safety during DIY electrical repairs. Picking the right gloves helps protect you from electric shocks. There are several factors to consider before choosing gloves.
This guide covers types of insulated gloves, materials used, and how to find the right size and fit.
Types Of Insulated Gloves
There are different types of insulated gloves designed for various electrical tasks. Rubber gloves are common and provide good insulation. Leather gloves are often worn over rubber gloves for added protection and durability.
- Class 0 gloves: For low voltage up to 1,000 volts
- Class 1 gloves: For medium voltage up to 7,500 volts
- Class 2 gloves: For higher voltage up to 17,000 volts
- Class 3 gloves: For very high voltage up to 26,500 volts
- Class 4 gloves: For the highest voltage up to 36,000 volts
Material Considerations
Insulated gloves are made mainly from natural or synthetic rubber. Rubber provides the electric insulation you need. Some gloves include cotton lining for comfort and sweat absorption. Leather covers protect the rubber gloves from cuts and punctures.
| Material | Purpose | Benefits |
| Natural Rubber | Main insulation | Flexible and durable |
| Synthetic Rubber | Insulation alternative | Resistant to oils and chemicals |
| Cotton Lining | Inner comfort | Absorbs sweat, adds softness |
| Leather Cover | Outer protection | Guards against cuts and tears |
Sizing And Fit
Proper sizing and fit are essential for safety and comfort. Gloves that are too tight can tear easily. Loose gloves may reduce your control and increase risk. Measure your hand carefully before buying gloves.
- Measure hand circumference around the widest part
- Check glove length to cover the wrist
- Try gloves on to ensure flexibility and comfort
- Choose gloves that allow easy finger movement

Credit: www.indiamart.com
Inspecting Gloves Before Use
Insulated gloves protect you from electrical shocks during DIY repairs. Always check them before starting work. This helps keep you safe and avoid accidents.
Regular inspection finds problems early. You can fix or replace gloves before they fail. Follow these tips for a thorough check.
Checking For Damage
Look carefully for cuts, holes, or cracks on the gloves. Any damage can reduce protection. Check both inside and outside surfaces. Pay attention to seams and edges.
- Check for tears or punctures
- Look for hard or stiff spots
- Inspect discoloration or worn areas
- Examine the cuffs and closures
Testing Flexibility
Good gloves bend without cracks. Test their flexibility by gently bending fingers and palms. Gloves that crack or feel stiff need replacement.
| Test | What to Check | Result |
| Bend fingers | No cracks or stiffness | Pass |
| Flex palm | Material moves smoothly | Pass |
| Stretch glove | No tears or holes appear | Pass |
| Feel surface | Soft and pliable | Pass |
Cleaning And Maintenance
Keep gloves clean to maintain safety. Dirt and oils can damage the material. Clean gloves carefully after each use. Store them in a cool, dry place.
Follow these cleaning tips:
- Use mild soap and water only
- Wipe gloves with a soft cloth
- Avoid harsh chemicals and solvents
- Air dry away from direct sunlight
- Store flat or hanging to keep shape
Proper Wearing Techniques
Using insulated gloves correctly is key for safe electrical repairs. Proper wearing protects you from shocks and injuries. This guide covers how to wear gloves the right way.
Follow these tips to keep your hands safe and your work efficient. Each step helps maintain the gloves’ protective features.
Layering With Leather Protectors
Leather protectors add a strong outer layer to insulated gloves. They protect from cuts, punctures, and abrasion. Always wear leather gloves over insulated gloves for extra safety.
- Choose leather gloves that fit well over insulated gloves.
- Check leather gloves for holes or tears before use.
- Replace leather gloves if they show damage or wear.
- Wear leather protectors every time you handle live wires.
Ensuring Full Coverage
Insulated gloves must cover your hands completely. Make sure no skin or clothing shows between the gloves and sleeves. Full coverage prevents accidental contact with electricity.
| Common Coverage Issues | How to Fix |
| Gloves too short | Use longer gloves or wear glove liners |
| Gap between glove and sleeve | Tuck sleeves inside gloves securely |
| Loose fitting gloves | Choose gloves that fit snugly without tightness |
Avoiding Contamination
Keep gloves clean to maintain insulation quality. Dirt, oil, or chemicals can damage the gloves and reduce protection.
Follow these tips to avoid contamination:
- Wash gloves after use with mild soap and water.
- Dry gloves completely before storing.
- Store gloves away from direct sunlight and heat.
- Inspect gloves for dirt or damage before each use.
- Do not use gloves with visible cracks or holes.
Safe Practices During Repairs
Using insulated gloves helps protect you from electric shocks. Safety is very important during DIY electrical repairs.
Follow safe practices to reduce risks. Always work carefully and stay alert.
De-energizing Circuits
Before starting any repair, turn off the power supply. This stops electricity from flowing to the circuit.
Use a tester to check if the circuit is really off. Do not touch wires until you are sure it is safe.
- Switch off the main breaker or fuse
- Use a voltage tester to confirm no power
- Lock the breaker to prevent accidental switch on
Using Tools With Insulation
Always use tools that have insulated handles. This adds a layer of protection against electrical shock.
Check your tools for damage before use. Replace any tools with cracked or worn insulation.
- Choose screwdrivers and pliers with insulated grips
- Inspect tools for cracks or damage
- Do not use metal tools without insulation
Maintaining Focus And Awareness
Keep your full attention on the repair job. Avoid distractions like phones or loud noises.
Stay calm and work slowly. Double-check your steps to avoid mistakes.
- Work in a well-lit area
- Do not rush the repair
- Take breaks if you feel tired
Storage And Longevity
Insulated gloves protect you during DIY electrical repairs. Proper storage keeps them safe and lasts longer.
Taking care of gloves means checking them often and storing them right. This helps avoid damage and risk.
Ideal Storage Conditions
Store insulated gloves in a cool, dry place. Avoid direct sunlight and heat sources to keep material strong.
Keep gloves away from sharp objects and chemicals. Use a clean storage box or bag to prevent dirt buildup.
- Temperature between 50°F and 80°F (10°C – 27°C)
- Low humidity to prevent mold and mildew
- Away from ozone and electrical equipment
- Separate from oils, solvents, and chemicals
- Stored flat or hanging without folding
Regular Inspection Schedule
Check gloves before every use for cracks, holes, or wear. Damage can reduce protection and cause shocks.
Inspect gloves carefully under good light. Stretch them to find small tears or weak spots.
- Look for cuts, punctures, or cracks
- Feel for stiffness or brittleness
- Check for dirt or chemical stains
- Test flexibility by bending the gloves
- Note any changes from first use
When To Replace Gloves
Replace gloves if you see any damage or if they feel stiff or sticky. Old gloves lose their insulating power.
Follow the manufacturer’s date for replacement, usually every 6 to 12 months. Always replace after heavy use or accidents.
- Visible holes, cuts, or cracks
- Loss of elasticity or stiffness
- Discoloration or chemical stains
- After electrical shock or arc flash
- Past the manufacturer’s expiration date

Credit: www.familyhandyman.com
Frequently Asked Questions
What Voltage Range Do Insulated Gloves Protect Against?
Insulated gloves are rated by voltage classes, usually from 500V to 36,000V. Always check the glove’s rating before use. Ensure the gloves match the electrical work voltage for safe protection against shocks.
How Should I Maintain Insulated Gloves For Diy Repairs?
Inspect gloves for tears or punctures before each use. Clean them with mild soap and water. Store gloves in a cool, dry place away from sunlight to prevent damage and maintain insulation quality.
Can I Reuse Insulated Gloves For Multiple Repairs?
Yes, you can reuse insulated gloves if they remain undamaged and clean. Always perform a thorough inspection before reuse. Replace gloves immediately if any signs of wear or damage appear to ensure safety.
Why Is Glove Sizing Important For Electrical Repairs?
Proper glove sizing ensures comfort and dexterity during repairs. Gloves that are too tight can tear easily, while loose gloves reduce control. Correct size enhances safety and efficiency in electrical DIY tasks.
Conclusion
Using insulated gloves keeps you safe during electrical repairs. Always check gloves for damage before starting work. Clean and store them properly to last longer. Choose the right gloves for the job’s voltage level. Stay alert and follow safety steps every time.
These simple tips protect you from shocks and injuries. Safety is key in every DIY electrical task. Keep these points in mind to work with confidence and care.