Are you ready to take your woodworking skills to the next level? Using a hand planer effectively can transform rough, uneven wood into smooth, professional-quality surfaces.
But if you’re not sure how to get the best results, it can feel frustrating and slow. Don’t worry—this guide will show you simple tips and tricks to master your hand planer quickly. By the end, you’ll be confident and excited to create flawless finishes every time.
Keep reading to unlock the secrets that will make your projects stand out.

Credit: www.familyhandyman.com
Choosing The Right Hand Planer
Choosing the right hand planer makes woodworking easier and safer. It helps you get smooth and even wood surfaces.
Consider the type, blade quality, and comfort when picking a planer. These factors affect your work quality and effort.
Types Of Hand Planers
There are several types of hand planers. Each suits different tasks and skill levels.
- Block Plane:Small and good for trimming edges and small surfaces.
- Jack Plane:Medium size for general smoothing and flattening.
- Jointer Plane:Large and used for straightening long boards.
- Specialty Planes:Designed for specific jobs like rabbeting or molding.
Blade Material And Sharpness
Blade quality affects how clean and easy the cuts are. Sharp blades give better results with less effort.
| Blade Material | Features | Maintenance |
| High-Carbon Steel | Sharp edge, easy to sharpen | Must prevent rust |
| Tool Steel | Very durable, holds edge longer | Harder to sharpen |
| Tungsten Carbide | Lasts longest, stays sharp | Needs special tools to sharpen |
Ergonomics And Weight Considerations
Good ergonomics reduce hand fatigue during long use. Weight affects how easy the planer is to control.
- Choose a planer with comfortable handles for a firm grip.
- Lighter planers are easier to use for beginners.
- Heavier planers help keep a steady cut on hard wood.
- Balance between weight and comfort is important.
Preparing Your Workspace
Setting up your workspace is important before using a hand planer. A clean and organized space helps you work safely and efficiently.
Taking a few minutes to prepare can save time and prevent accidents while planing wood.
Securing The Wood
Always secure the wood firmly before planing. This stops the wood from moving and keeps your work precise.
You can use clamps or a sturdy workbench to hold the wood in place. Make sure it does not shift during planing.
- Use clamps to hold the wood tightly
- Check stability before starting
- Place wood on a flat, stable surface
Clearing The Work Area
Remove any tools or debris around your work area. A clear space helps you move freely and avoid accidents.
Keep only what you need for planing nearby. This keeps your focus on the task and reduces distractions.
- Clear dust and scraps regularly
- Organize your tools neatly
- Keep the floor free of obstacles
Ensuring Proper Lighting
Good lighting lets you see the wood surface clearly. It helps spot rough spots and planing progress.
Use bright lights or natural light if possible. Avoid shadows on your work area for better accuracy.
- Use overhead lights or lamps
- Position lights to reduce shadows
- Work near windows during the day
Setting Up The Hand Planer
Using a hand planer properly starts with setting it up right. Proper setup helps you get smooth and even results.
Focus on adjusting the blade, checking its position, and keeping it sharp. These steps make your work easier.
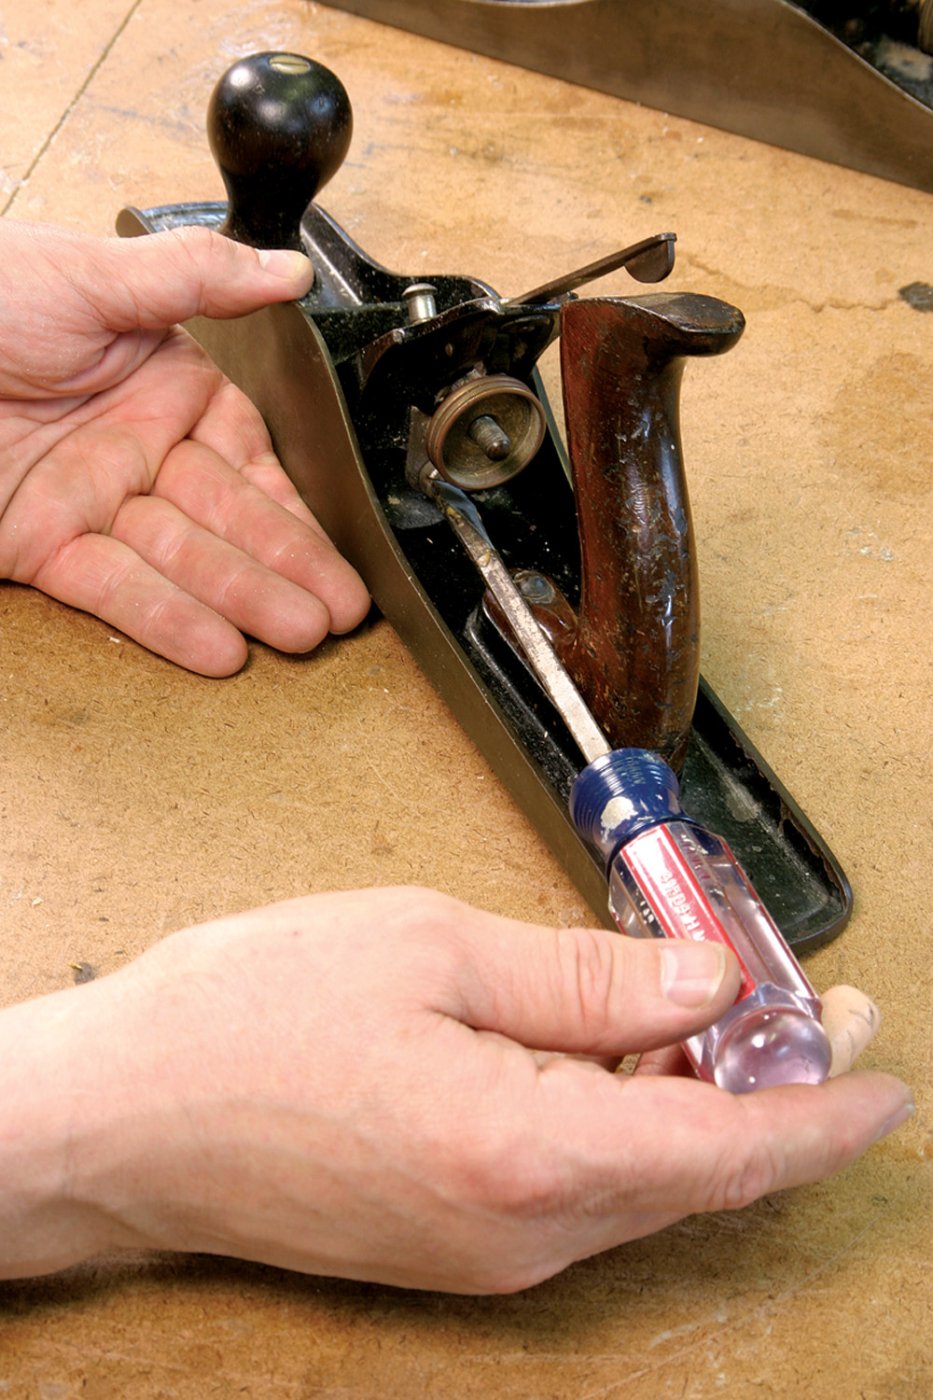
Adjusting The Blade Depth
Set the blade depth to control how much wood you remove. Start with a shallow depth for a smooth finish.
Turn the depth adjustment knob to move the blade forward or backward. Test on scrap wood to find the right depth.
- Turn knob clockwise to increase blade depth
- Turn knob counterclockwise to decrease depth
- Test before planing your project
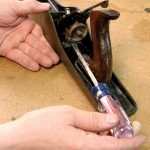
Checking Blade Alignment
Make sure the blade is straight and even with the planer base. Misaligned blades cause uneven cuts and damage wood.
Check the blade edge from the front of the planer. Adjust the blade until it is flush and parallel to the sole plate.
- Remove the blade guard before checking
- Use a ruler or straight edge to check alignment
- Loosen screws to adjust blade position
- Tighten screws securely after adjustment
Maintaining Blade Sharpness
A sharp blade cuts wood cleanly and easily. Dull blades make planing hard and rough.
Sharpen the blade regularly using a sharpening stone or professional service. Clean the blade to remove pitch and resin.
- Check blade sharpness before each use
- Use light oil to protect the blade after sharpening
- Replace the blade if it is chipped or damaged
- Store the planer in a dry place
Techniques For Smooth Planing
Using a hand planer well helps you get a smooth wood surface. It takes practice and focus on some key techniques.
These tips will help you plane evenly and avoid marks or rough spots on your wood.
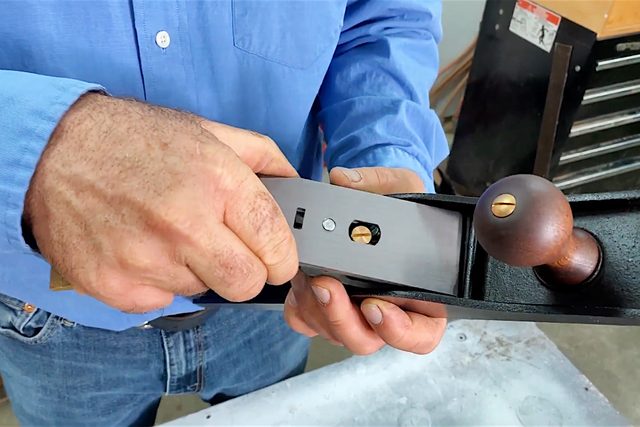
Correct Hand Positioning
Hold the planer firmly with both hands. Place one hand on the front knob and the other on the rear handle.
This grip gives you control and balance. Keep your fingers wrapped around the handles, not just resting.
- Front hand guides the plane
- Rear hand pushes the plane forward
- Keep wrists straight to avoid fatigue
Consistent Pressure Application
Apply steady pressure while planing. Too much pressure can cause deep cuts or uneven surfaces.
Push the planer evenly across the wood, focusing pressure on the front when starting and rear at the end.
- Start with firm pressure on the front knob
- Shift pressure to rear handle as you finish
- Keep pressure even side to side
Planing With The Grain
Always plane in the direction of the wood grain. Planing against the grain can cause tear-out and rough spots.
Look closely at the wood fibers and move the planer along their direction for a smooth finish.
- Identify the grain direction before planing
- Move the plane along the grain fibers
- Stop if tear-out appears, then adjust
Controlling Planer Speed
Move the planer at a steady pace. Moving too fast can leave rough areas and too slow can gouge the wood.
Find a speed that allows the blade to cut smoothly without forcing the tool.
- Push the planer evenly and steadily
- Keep pace slow enough to cut cleanly
- Adjust speed to wood hardness and blade sharpness
Troubleshooting Common Issues
Using a hand planer can be tricky if you face common problems. Fixing these issues helps you get smooth and even wood surfaces.
Below are simple tips for avoiding tear-out, fixing uneven surfaces, and dealing with blade clogs.
Avoiding Tear-out
Tear-out happens when wood fibers lift and break during planing. It makes the surface rough and uneven.
- Plane with the grain, not against it.
- Use sharp blades to cut cleanly.
- Set the blade to take thin shavings.
- Clamp the wood firmly to reduce movement.
- Make a shallow initial cut before deeper passes.
Fixing Uneven Surfaces
Uneven surfaces can appear if the planer is not set correctly or used improperly.
| Cause | Solution |
| Blade depth too deep | Reduce blade depth for lighter cuts |
| Uneven pressure while planing | Apply steady, even pressure |
| Blade dull or damaged | Sharpen or replace blade |
| Wood not secured properly | Clamp wood firmly |
Dealing With Blade Clogs
Blade clogs slow your work and can damage the planer. Dust and wood chips block the blade.
Follow these tips to clear and prevent clogs:
- Turn off and unplug the planer before cleaning.
- Use a brush to remove wood chips and dust from the blade and mouth.
- Check for resin buildup and clean it with a solvent if needed.
- Keep blades sharp to reduce clogging.
- Work with dry wood to prevent sticky clogs.
Maintaining Your Hand Planer
Keeping your hand planer in good shape helps it work better and last longer. Regular care stops problems and keeps the tool safe to use.
Focus on cleaning, sharpening the blade, and proper storage. These steps protect your planer from damage.
Cleaning After Use
Remove wood shavings and dust after each use. This stops buildup that can affect performance.
Use a brush or cloth to clean the body and blade area. Avoid water to prevent rust.
- Brush off wood dust and chips
- Wipe metal parts with a dry cloth
- Do not soak the planer in water
- Use compressed air for hard-to-reach spots
Regular Blade Sharpening
Dull blades make planing harder and rougher. Keep blades sharp to get smooth cuts and less effort.
Check the blade often. Use a sharpening stone or file to maintain a clean edge. Follow the original angle of the blade.
- Remove the blade carefully before sharpening
- Sharpen both sides evenly
- Test the blade on scrap wood
- Replace the blade if it is damaged or too worn
Storage Tips
Store your hand planer in a dry place to stop rust and damage. Avoid damp or dusty areas.
Keep the blade covered or retracted for safety. Use a toolbox or storage case if possible.
- Store in a dry, clean area
- Keep the blade protected or inside the planer
- Use a case or toolbox to avoid dust
- Check the planer before use after storage
Advanced Tips For Precision
Using a hand planer well takes skill and care. Small adjustments can make big differences in your work.
These tips help you get precise results with your hand planer every time.
Using A Straightedge Guide
A straightedge guide keeps your planer moving in a straight line. This helps avoid uneven cuts and dips.
Clamp the guide firmly to the wood edge. Run the planer along it for smooth, flat surfaces.
- Use a metal or wooden straightedge
- Check the guide is perfectly straight before clamping
- Move the planer slowly and evenly
- Keep the planer blade sharp for best results
Fine-tuning For Joinery
Hand planers can adjust wood pieces for tight joints. Small shavings help fit parts perfectly.
Work slowly and test the fit often. Remove little wood at a time for control.
- Use light passes for delicate edges
- Focus on high spots or uneven areas
- Check the joint angle with a square
- Sand lightly after planing for smooth contact
Combining Hand Planing With Power Tools
Power tools remove large amounts of wood fast. Hand planers finish and refine the surface.
Start with a power planer or sander. Follow with a hand planer for smooth, precise results.
- Use power tools for rough shaping
- Switch to hand planers for fine tuning
- Check flatness and smoothness between steps
- Keep blades sharp on both tools

Credit: www.popularwoodworking.com
Credit: www.familyhandyman.com
Frequently Asked Questions
What Is The Best Technique For Using A Hand Planer?
Use smooth, even strokes while applying consistent pressure. Always plane with the grain to avoid tear-out. Adjust the blade depth according to the material thickness. Maintain a steady pace for a clean, flat surface.
How Do I Adjust The Blade On A Hand Planer?
Loosen the blade locking mechanism carefully. Adjust the blade depth using the depth adjustment knob. Ensure the blade is parallel to the sole for even cutting. Tighten the lock securely after adjustment.
How To Avoid Tear-out When Hand Planing Wood?
Always plane in the direction of the wood grain. Use a sharp blade to reduce splintering. Take shallow cuts rather than deep ones. Sand the surface lightly after planing for a smooth finish.
What Safety Tips Should I Follow Using A Hand Planer?
Wear safety goggles to protect your eyes from chips. Keep fingers clear of the blade path. Secure the wood piece firmly before planing. Work on a stable surface to avoid slips or accidents.
Conclusion
Mastering a hand planer requires practice and patience. With these simple tips, you can achieve smooth, precise surfaces. Remember to maintain your tool regularly. A sharp blade makes a big difference. Always work with the wood grain. This prevents tear-outs and ensures a clean finish.
Adjust the depth for best results. Start with small adjustments and test often. Safety should never be overlooked. Wear protective gear to safeguard your hands and eyes. With consistent effort, using a hand planer becomes second nature. Happy woodworking and enjoy the satisfaction of your handiwork!