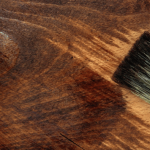
When you look at a beautifully finished wooden piece, you might wonder how it got that smooth, rich look. The secret lies in the wood finishing techniques you choose.
These methods don’t just protect your wood—they bring out its natural beauty and make your project stand out. Whether you’re a beginner or have some experience, understanding the right finishing steps can transform your work from ordinary to stunning. Ready to discover how to give your wood the perfect finish?
Keep reading, and you’ll learn tips that make your creations last longer and look amazing.
Credit: www.familyhandyman.com
Choosing The Right Finish
Wood finishing protects and beautifies wood surfaces. Picking the right finish helps wood last longer.
Different finishes suit different wood types and uses. Understanding options improves your results.
Types Of Wood Finishes
There are many wood finishes. Each gives a unique look and protection level.
- Oil finishes soak into wood and bring out natural grain.
- Varnishes create a hard, shiny surface for protection.
- Lacquers dry fast and offer a smooth, glossy look.
- Shellac is natural and adds warm color and shine.
- Polyurethane is tough and resists water and scratches.
Matching Finish To Wood Type
Softwoods and hardwoods absorb finishes differently. Match the finish to the wood’s traits.
Oils work well on open-grain woods like oak. Polyurethane fits close-grain woods like maple better.
- Softwoods: Use penetrating oils or varnishes for better protection.
- Hardwoods: Use polyurethanes or lacquers for smooth finishes.
- Exotic woods: Test finishes on a scrap piece first.
Finish Durability Factors
Durability depends on finish type, wood use, and environment. Some finishes last longer outdoors.
Consider how much wear and moisture the wood will face before choosing a finish.
- Oil finishes need regular reapplication.
- Polyurethane and varnishes resist scratches and water well.
- Lacquers can chip but dry quickly for fast projects.
- Shellac is less durable but easy to repair.
Preparing Wood For Finishing
Preparing wood before finishing is very important. It helps the finish stick better and look nice.
Good preparation includes sanding, cleaning, and fixing any damage on the wood surface.
Sanding Tips And Tools
Sanding smooths the wood and opens its pores for a better finish. Use the right tools and grit for best results.
Start with coarse sandpaper and move to finer grits. Sand along the wood grain to avoid scratches.
- Use sanding blocks or electric sanders for even pressure
- Begin with 80-120 grit sandpaper for rough surfaces
- Finish with 220 grit sandpaper for smoothness
- Replace sandpaper when it gets clogged
Cleaning And Dust Removal
Remove all dust after sanding. Dust can ruin the finish and cause bumps.
Use a vacuum or tack cloth to clean the surface. Wipe the wood with a damp cloth if needed.
- Vacuum the wood surface and surrounding area
- Use tack cloth to pick up fine dust
- Wipe with a damp cloth and let dry before finishing
Repairing Imperfections
Fill cracks, holes, or dents to create a smooth surface. Imperfections show through finishes if left untreated.
Use wood filler or putty for small repairs. Sand the repaired spots until they match the wood surface.
- Choose filler color close to the wood
- Apply filler with a putty knife
- Let the filler dry completely
- Sand the area smooth before finishing
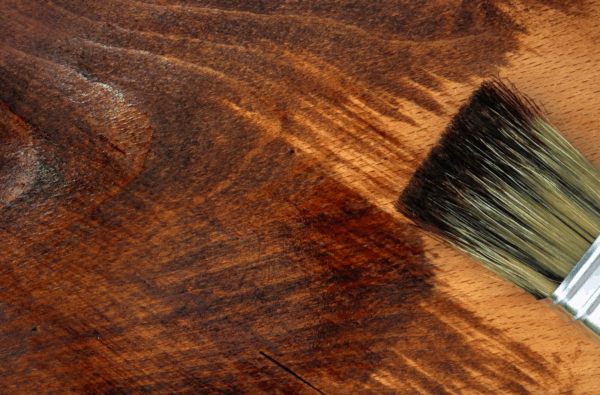
Applying Stains And Dyes
Wood finishing can change the look of any project. Stains and dyes add color while showing the wood grain.
Using the right method helps the color last longer and look smooth. Learn how to pick colors and apply them well.
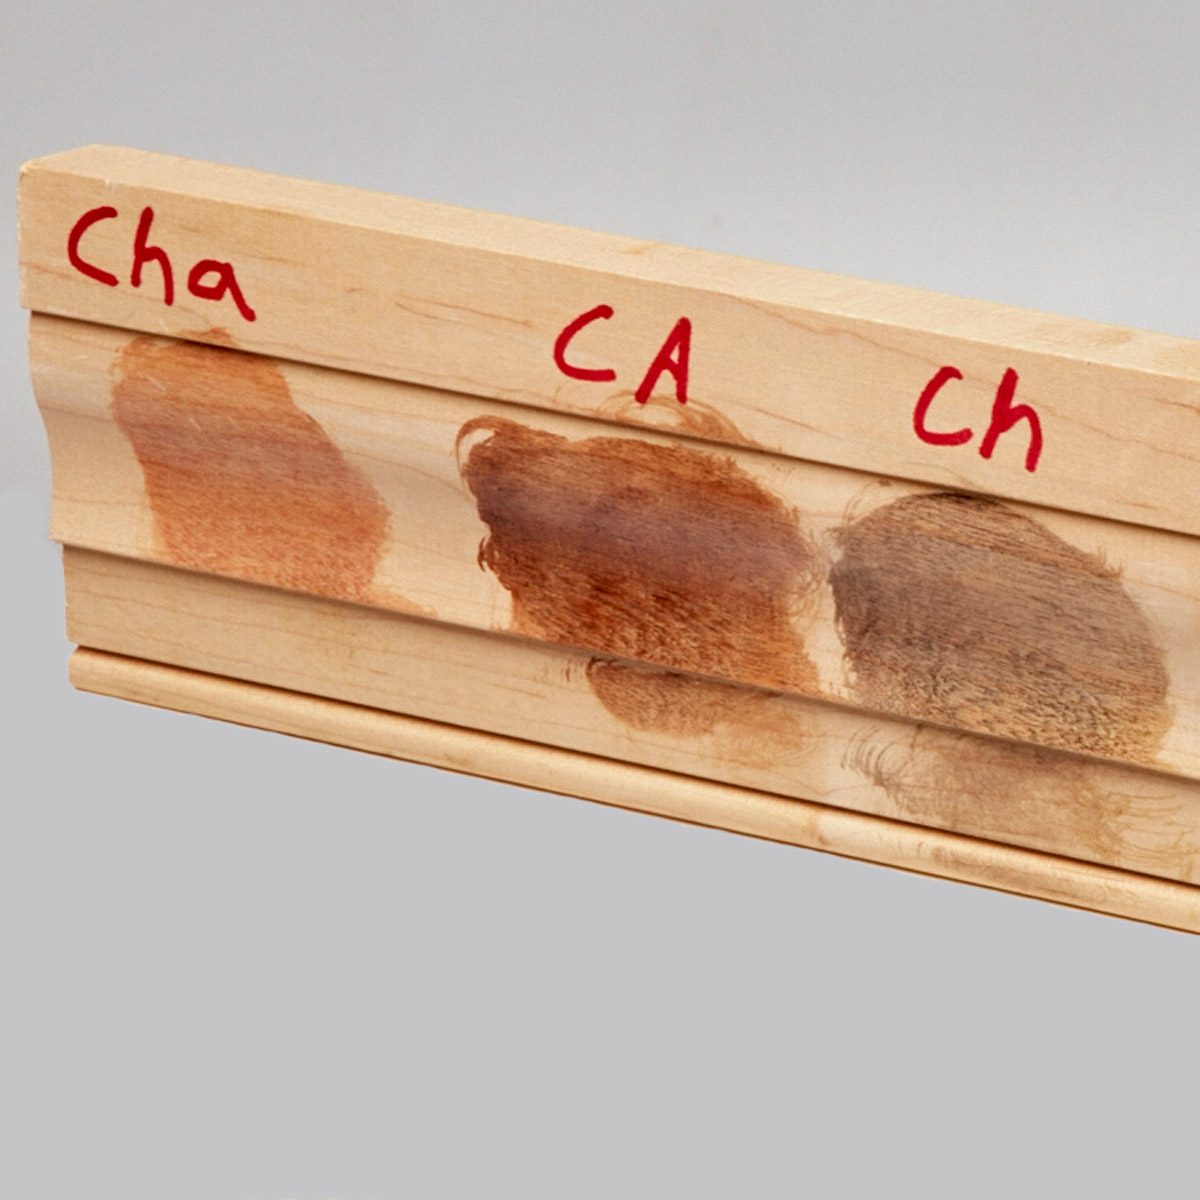
Selecting Stain Colors
Choose stain colors based on the wood type and the room’s style. Light stains highlight natural grain. Dark stains add richness.
- Test colors on scrap wood first
- Pick colors that match furniture or decor
- Consider using clear finishes over stains
- Use dyes for brighter or unusual colors
Techniques For Even Application
Apply stain evenly to avoid blotches or streaks. Use the right tools and follow a steady motion.
| Tool | Use | Tip |
| Brush | Apply stain in the grain direction | Use soft bristles for smooth finish |
| Cloth | Wipe excess stain gently | Use lint-free cloths |
| Sponge | Apply dyes evenly | Work quickly to avoid marks |
Layering For Depth
Layering stains and dyes adds depth and richness to wood color. Allow each coat to dry before adding the next.
- Start with a light base coat
- Add darker coats to deepen color
- Sand lightly between coats for smoothness
- Finish with a clear sealer to protect layers
Credit: www.hastiles.com
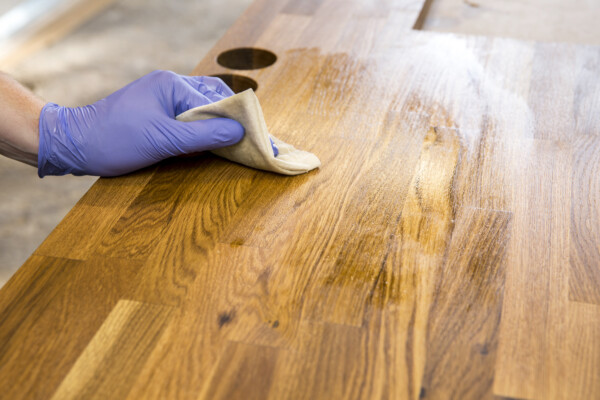
Sealing And Protecting Wood
Sealing wood helps keep it safe from moisture, dirt, and damage. It also makes wood last longer and look better.
Protecting wood is key to keeping furniture and floors in good shape. This guide explains how to seal and protect wood well.
Choosing Sealers
Pick a sealer based on the wood type and where it will be used. Some sealers work better indoors, others outdoors.
Common sealers include varnish, polyurethane, lacquer, and shellac. Each offers different levels of protection and finish.
- Varnish: Good for outdoor use, protects from water and sun
- Polyurethane: Durable, resists scratches and heat
- Lacquer: Dries fast, gives a shiny finish
- Shellac: Natural, easy to apply, not very water-resistant
Application Methods
You can apply sealers using brushes, spray guns, or cloths. Choose the method that fits your project size and type.
Brushes work well for small jobs and detailed areas. Sprayers cover large surfaces quickly. Cloths are good for wiping on thin coats.
- Brush: Use smooth strokes and avoid drips
- Spray: Hold the gun evenly and keep moving
- Cloth: Apply thin layers and rub gently
Drying And Curing Times
Drying time is how long it takes for the sealer to feel dry to touch. Curing time means the sealer is fully hard and ready.
These times vary by sealer type, temperature, and humidity. Always follow the instructions on the product label.
| Sealer Type | Drying Time | Curing Time |
|---|---|---|
| Varnish | 4 to 6 hours | 7 to 30 days |
| Polyurethane | 2 to 4 hours | 7 days |
| Lacquer | 30 minutes to 1 hour | 24 to 48 hours |
| Shellac | 30 minutes to 1 hour | 1 to 3 days |
Using Varnishes And Lacquers
Wood finishing makes wood surfaces look good and last longer. Varnishes and lacquers are popular choices for finishing wood.
Both protect wood but work in different ways. Knowing their differences helps you pick the right finish for your project.
Differences Between Varnish And Lacquer
Varnish dries slowly and forms a hard, thick coat on wood. It protects well from water and sunlight.
Lacquer dries fast and creates a thin, smooth layer. It gives a shiny look but is less tough against heat and chemicals.
- Varnish is thicker and takes longer to dry
- Lacquer dries quickly and is thinner
- Varnish is better for outdoor use
- Lacquer gives a high gloss finish
Spraying Vs Brushing
Brushing is easy and works well for small areas. It lets you control the amount of finish on wood.
Spraying covers large areas fast and gives a smooth coat. It needs more tools and a clean space to avoid dust.
- Brushing is simple and good for detail work
- Spraying is quick and smooth for big projects
- Brushing may leave brush marks
- Spraying needs safety gear and ventilation
Achieving A Smooth Finish
Sand the wood surface before applying any finish. Use fine-grit sandpaper to remove rough spots.
Apply thin coats and let each dry completely. Lightly sand between coats to avoid bumps and get a smooth look.
- Start sanding with medium grit, finish with fine grit
- Use a clean brush or spray gun for even layers
- Apply multiple thin coats instead of one thick coat
- Sand lightly between coats with very fine sandpaper
Enhancing With Specialty Finishes
Specialty finishes add beauty and protection to wood surfaces. They bring out the natural character of the wood. Using the right finish changes the look and feel of your wood projects.
This guide covers three popular techniques. Oil finishes give a natural look. Waxing adds softness and shine. Distressing and antiquing create aged effects.
Oil Finishes For Natural Look
Oil finishes soak deep into the wood. They protect and highlight the grain. Oils like tung and linseed give a warm, natural appearance. They do not leave a thick surface layer.
Applying oil is simple. Use a cloth to rub the oil in. Let it sit, then wipe off the excess. Repeat for a richer finish. Oil finishes dry slowly but last well.
Waxing Techniques
Wax adds a soft, smooth feel to wood. It also gives a low shine and some water resistance. Wax works best over sealed or oiled surfaces. You can use paste or liquid waxes.
- Clean the wood before waxing
- Apply a thin layer with a soft cloth
- Let the wax dry for 10 to 15 minutes
- Buff the surface with a clean cloth to shine
- Repeat for a deeper finish
Distressing And Antiquing
Distressing and antiquing give wood an aged look. These techniques add character and charm. Use light sanding, dents, or paint layers to create wear. Antiquing glazes add color depth.
| Technique | Effect | Tools Needed |
| Light Sanding | Softens edges and smooths surface | Fine sandpaper |
| Dents and Marks | Creates worn, used look | Hammer, nails, chains |
| Antiquing Glaze | Adds color depth and shadow | Brush, glaze, rag |
Troubleshooting Common Issues
Wood finishing often faces small problems that affect the final look. Fixing these issues quickly keeps your project smooth and clean.
This guide covers simple ways to handle bubbles, uneven color, and dust in your wood finish.
Fixing Bubbles And Blisters
Bubbles or blisters can appear under the finish if air or moisture gets trapped. These flaws ruin the smooth surface you want.
- Lightly sand the affected area with fine-grit sandpaper.
- Wipe the dust away with a tack cloth.
- Apply a thin coat of finish evenly to avoid trapping air.
- Allow enough drying time between coats.
- Keep the workspace free of dust and moisture.
Dealing With Uneven Color
Uneven color happens when stain or finish absorbs differently on the wood. This creates patchy areas and changes the wood’s look.
| Problem | Cause | Solution |
| Dark spots | Excess stain or finish in one area | Wipe off extra stain quickly; sand lightly |
| Light spots | Uneven sanding or old finish left | Sand evenly before staining; remove old finish |
| Patchy finish | Wood grain absorbs unevenly | Use wood conditioner before staining |
Removing Dust Nibs
Dust nibs are tiny bumps caused by dust sticking to the wet finish. They make the surface rough and less shiny.
To remove dust nibs:
- Wait until the finish is fully dry.
- Use very fine sandpaper or steel wool to smooth the surface.
- Clean the area with a tack cloth to remove sanding dust.
- Apply another thin coat of finish to restore shine.

Credit: mylands.com
Maintaining Finished Wood
Finished wood adds beauty and warmth to any space. Keeping it in good shape takes regular care. Simple habits help preserve its shine and strength.
Cleaning, reapplying finishes, and fixing damage keep wood looking its best. Follow easy tips to protect your wood surfaces for years.
Cleaning Tips
Clean finished wood gently to avoid damage. Use soft cloths and mild cleaners. Avoid harsh chemicals that can strip finishes.
- Dust often with a dry microfiber cloth
- Use a damp cloth for sticky spots
- Apply wood-safe cleaner sparingly
- Dry wood surfaces quickly after cleaning
- Never soak wood with water
Periodic Reapplication
Wood finishes wear down over time. Reapplying finish protects the wood and keeps it shiny. Follow the product directions for best results.
| Finish Type | Reapplication Frequency | Notes |
| Oil Finish | Every 6 to 12 months | Apply thin coats and let dry fully |
| Wax Finish | Every 3 to 6 months | Buff after application for shine |
| Varnish or Polyurethane | Every 2 to 5 years | Lightly sand before reapplication |
Repairing Wear And Tear
Small scratches and dents can be fixed quickly. Use the right tools and products to match your wood finish.
- Lightly sand the damaged area with fine-grit sandpaper
- Apply matching wood stain or finish touch-up marker
- Let it dry and apply a protective top coat if needed
- For deep scratches, fill with wood filler before staining
Frequently Asked Questions
What Are The Basic Wood Finishing Techniques?
Basic wood finishing techniques include sanding, staining, sealing, and applying varnish or lacquer. These steps enhance wood’s appearance and protect it from damage. Proper preparation and application ensure a smooth, durable finish that highlights the wood’s natural beauty.
How Do I Choose The Right Wood Finish?
Choose a wood finish based on the wood type, usage, and desired look. Consider oil finishes for natural tones, polyurethane for durability, and wax for a soft sheen. Always test finishes on scrap wood before applying to your project.
What Is The Difference Between Staining And Sealing?
Staining adds color to wood by penetrating its surface, enhancing its grain. Sealing protects wood from moisture and wear, creating a barrier. Both can be used together for color and protection, depending on the project requirements.
How Long Does Wood Finishing Take To Dry?
Drying times vary by finish type and environmental conditions. Oil finishes can take 6-24 hours, while polyurethane may take 2-4 hours per coat. Proper ventilation and temperature speed up drying and ensure a quality finish.
Conclusion
Wood finishing enhances beauty and protects surfaces. Choose the right technique. It depends on your project needs and style preferences. Varnish adds a glossy touch. Stain highlights natural grain. Oil finish offers a warm appearance. Wax gives a soft sheen.
Each method provides a unique look. Experiment to find your favorite. Ensure a clean, smooth surface for best results. Patience is key for a flawless finish. Enjoy the process and take your time. Your wood pieces will shine with care.
Happy crafting and finishing!