Are you ready to give your wooden furniture a fresh, smooth look? Sanding is the key step that can transform old, worn-out pieces into stunning highlights of your home.
But if you don’t do it right, you might end up with scratches, uneven surfaces, or wasted time. You’ll discover simple, effective tips that make sanding easier and help you get professional results every time. Keep reading to unlock the secrets that will save you effort and bring out the true beauty of your wood!
Credit: www.ecohome.net
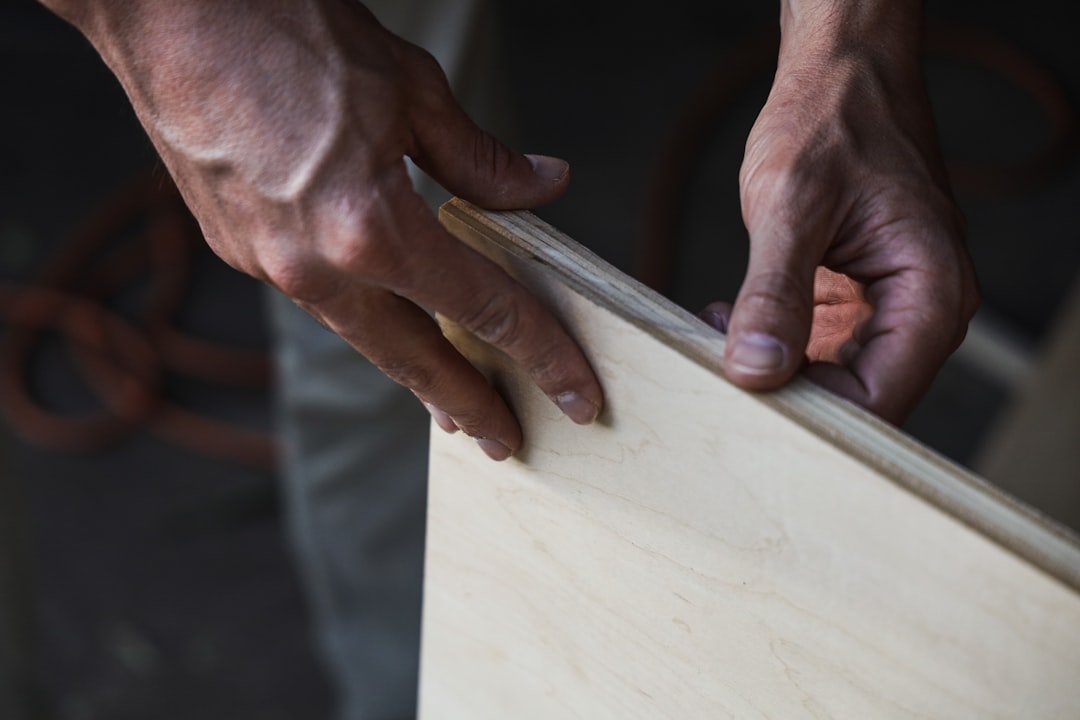
Choosing The Right Sandpaper
Sanding wooden furniture is key for a smooth finish. Picking the right sandpaper helps you work faster and cleaner.
Knowing the grit and material of sandpaper improves your results. It also protects your wood from damage.
Grit Levels And Their Uses
Sandpaper grit shows how coarse or fine it is. Lower numbers mean rougher grit. Higher numbers mean finer grit.
- Coarse grit (40-60): Remove old paint or deep scratches.
- Medium grit (80-120): Smooth surfaces and shape edges.
- Fine grit (150-180): Prepare wood for finishing.
- Very fine grit (220-400): Final smoothing before polish.
Types Of Sandpaper Materials
| Material | Best For | Durability |
|---|---|---|
| Aluminum Oxide | Wood and metal sanding | Long-lasting |
| Garnet | Fine wood finishing | Moderate |
| Silicon Carbide | Wet sanding and metal | Very durable |
| Ceramic | Heavy-duty sanding | Highly durable |
Preparing The Furniture
Preparing wooden furniture is key before sanding. Good preparation helps you get a smooth and even surface.
Taking time to clean and protect the area makes the work easier and safer.
Cleaning And Removing Old Finish
Start by cleaning the furniture well. Remove dust, dirt, and grease with a damp cloth.
Use a chemical stripper or sandpaper to take off old paint or varnish. This helps the new finish stick better.
- Wear gloves and work in a ventilated space
- Apply stripper evenly and wait as directed
- Scrape off softened finish gently
- Sand rough areas with medium grit sandpaper
Protecting Surrounding Areas
Cover floors and nearby furniture to keep them safe. Sanding creates dust that can settle everywhere.
Use drop cloths or old sheets. Tape plastic around delicate items for extra protection.
- Lay drop cloths under and around your work area
- Seal off doorways with plastic sheeting
- Wear a dust mask and goggles for safety
- Keep tools and materials organized to avoid spills
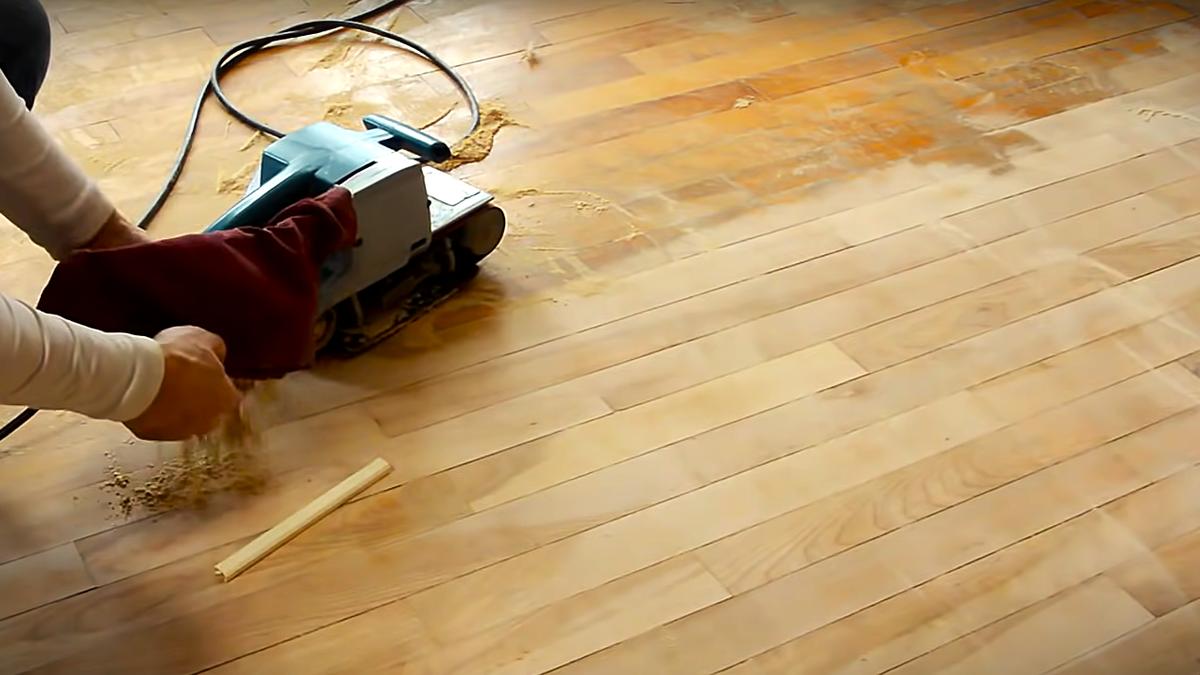
Sanding Techniques
Sanding wooden furniture smooths the surface and removes old finishes. It helps prepare wood for painting or staining.
Choosing the right sanding method improves the final look and saves time. Use safe and proper techniques for best results.
Hand Sanding Tips
Hand sanding gives you control on detailed areas and corners. Use the right sandpaper grit for each stage.
- Start with coarse grit to remove old finish
- Use medium grit to smooth rough spots
- Finish with fine grit for a smooth surface
- Sand in small, circular motions for evenness
- Wear a dust mask to avoid inhaling dust
Using Power Sanders Safely
Power sanders speed up the sanding process but need careful handling. Keep the tool moving to avoid damage.
| Safety Tip | Reason |
|---|---|
| Wear safety goggles | Protect eyes from flying dust and debris |
| Use dust extraction or vacuum | Reduce airborne dust for cleaner air |
| Keep sander flat on surface | Prevent gouges or uneven sanding |
| Start with medium grit sandpaper | Balance between removal and finish |
| Unplug sander when changing sandpaper | Avoid accidental start and injury |
Sanding With The Grain
Sanding along the wood grain keeps the surface smooth and prevents scratches. Always check the grain direction before starting.
- Look closely to identify the wood grain pattern
- Move sandpaper in the same direction as the grain
- Avoid sanding against the grain to reduce marks
- Use light pressure to keep the wood surface even
- Wipe dust often to see your progress clearly

Credit: www.bobvila.com
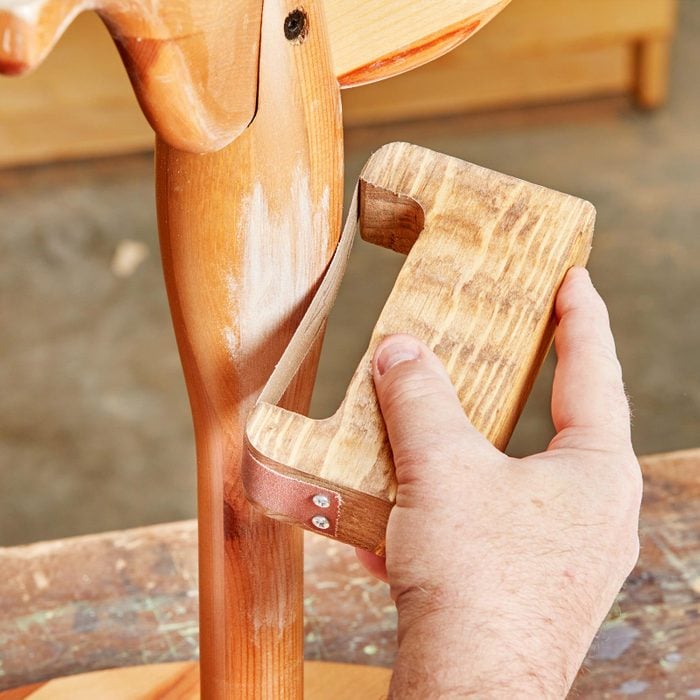
Dealing With Difficult Areas
Sanding wooden furniture can be tricky. Some spots need special care.
Difficult areas like corners and carved details need gentle and careful sanding.
Corners And Edges
Corners and edges are easy to damage if you sand too hard. Use light pressure.
Fold sandpaper to fit the corner. Sand slowly and check often to avoid rounding.
- Use a sanding sponge for better control
- Try sanding blocks wrapped with sandpaper
- Sand with the grain to keep edges sharp
Intricate Carvings And Details
Carvings and small details need gentle sanding to keep their shape.
Use small tools like sanding sticks or folded sandpaper for tight spaces.
- Work slowly to avoid sanding away details
- Use fine-grit sandpaper for a smooth finish
- Try a soft brush with fine sandpaper for curved areas
Progressing Through Grits
Sanding wooden furniture requires using different grits of sandpaper. Each grit level helps smooth the surface step by step. Starting with coarse grits and moving to fine ones gives the best finish.
Knowing when to change grits saves time and prevents damage. This guide explains how to progress through grits for a smooth wood surface.
Starting Coarse And Moving Fine
Begin sanding with coarse grit sandpaper to remove old finishes or rough spots. Coarse grits are usually 60 to 80 grit. They shape the wood but leave scratches.
- Use 60 or 80 grit for heavy sanding and paint removal
- Switch to 100 or 120 grit to smooth the scratches from coarse sanding
- Finish with 150 to 220 grit for a fine, smooth surface ready for finishing
Always sand in the direction of the wood grain to avoid deep scratches. Take your time with each grit before moving to the next finer one.
When To Change Grits
Change to a finer grit when the surface looks evenly smooth and scratches from the previous grit disappear. Skipping grits can cause rough spots.
| Current Grit | Signs to Change | Next Grit |
|---|---|---|
| 60-80 (Coarse) | Rough surface with deep scratches | 100-120 (Medium) |
| 100-120 (Medium) | Scratches from coarse grit fade | 150-180 (Fine) |
| 150-180 (Fine) | Surface feels smooth and even | 220 or higher (Extra Fine) |
| 220+ (Extra Fine) | Surface is ready for finishing | Stop sanding |
Dust Management
Sanding wooden furniture creates a lot of dust. Managing this dust is important for a clean workspace and your health.
Good dust management helps you finish projects faster and reduces cleanup time.
Effective Dust Removal
Use tools and methods that capture dust as you sand. This stops it from spreading in the air and on surfaces.
- Attach a vacuum to your sander if possible.
- Use a damp cloth to wipe dust off the furniture between sanding passes.
- Place a drop cloth or plastic sheet under your work area to catch falling dust.
- Clean your workspace regularly with a vacuum or wet mop.
- Use an air purifier to reduce airborne dust particles.
Health And Safety Tips
Wood dust can irritate your eyes, skin, and lungs. Protect yourself with the right safety gear.
| Safety Item | Purpose | Tips |
| Dust Mask or Respirator | Protect lungs from dust | Choose masks rated for fine particles |
| Safety Glasses | Protect eyes from dust and debris | Wear snug-fitting glasses |
| Gloves | Protect skin from irritation | Use gloves suitable for woodworking |
| Ventilation | Keep fresh air flowing | Work near open windows or use fans |
Preparing For Finishing
Sanding wooden furniture smooths the surface and readies it for finishing. Proper preparation helps the finish stick and look even.
Take time to inspect and seal the wood before applying paint or stain. This prevents flaws and improves durability.
Final Surface Inspection
Check the surface for scratches, dents, or dust after sanding. Use good lighting to spot uneven areas and rough spots.
- Run your hand over the surface to feel for rough patches.
- Look for sanding marks that need extra smoothing.
- Remove all dust with a tack cloth or vacuum.
- Fill small holes or cracks with wood filler if needed.
- Allow filler to dry completely before sanding again.
Applying Sealers And Primers
Sealers and primers protect the wood and improve finish adhesion. They also help create a uniform color and texture.
| Type | Purpose | Application Tip |
| Wood Sealer | Blocks moisture and tannins | Apply thin, even coats with a brush |
| Primer | Prepares surface for paint | Sand lightly after drying for smooth finish |
| Gel Stain Primer | Enhances color depth | Use on open-grain woods like oak |
Credit: www.familyhandyman.com
Frequently Asked Questions
What Grit Sandpaper Is Best For Wooden Furniture?
Start with coarse grit (80-120) to remove old finish. Use medium grit (150-180) for smoothing. Finish with fine grit (220+) for a smooth surface ready to stain or paint.
How Do I Avoid Scratches When Sanding Wood?
Always sand with the grain to prevent scratches. Use finer grit sandpaper as you progress. Clean dust between sanding stages to avoid rough patches.
Can I Sand Wooden Furniture Without Power Tools?
Yes, hand sanding works well for small or delicate areas. Use a sanding block for even pressure. Power tools speed up the process but aren’t necessary.
How Do I Prepare Wooden Furniture Before Sanding?
Remove all hardware and clean the surface from dirt. Repair dents or holes with wood filler. Let the filler dry fully before sanding to ensure smoothness.
Conclusion
Sanding wooden furniture requires patience and attention. Start with coarse sandpaper for rough surfaces. Gradually switch to finer grits for smoothness. Always sand along the wood grain to avoid scratches. Clean dust off frequently to see progress. Use a damp cloth for final cleaning.
Proper sanding enhances the wood’s natural beauty. It also prepares the surface for staining or painting. Remember, practice improves your sanding skills. With these tips, your furniture can look refreshed and beautiful. Enjoy the process and admire your work. Your efforts will definitely pay off!