
Marking wood accurately can make all the difference between a perfect project and one that needs redoing. If you want your cuts and measurements to be spot-on every time, you need the right tips and tricks.
Imagine saving time, avoiding costly mistakes, and feeling confident in your woodworking skills. This article will show you simple, practical ways to mark wood with precision. Keep reading to discover how you can improve your accuracy and take your woodworking to the next level.
Choosing The Right Tools
Marking wood accurately is the first step to good woodworking. Picking the right tools helps you make clean and precise marks. This guide covers important tools to help you mark wood well.
Using proper instruments makes your work faster and reduces mistakes. Learn about essential marking tools, benefits of sharp pencils, and how to use marking gauges well.
Essential Marking Instruments
There are several tools made for marking wood. Each tool has a special job and helps you mark lines, points, or edges. Choosing the right instrument depends on the task and wood type.
- Marking knives – cut clean lines with sharp edges.
- Carpenter’s pencils – draw thick, visible lines on rough surfaces.
- Marking gauges – scribe parallel lines from edges.
- Combination squares – measure and mark angles and straight lines.
- Scratch awls – mark points or start holes for drilling.
Benefits Of Sharp Pencils And Markers
Sharp pencils and markers make fine, clear lines that guide your cuts. Blunt tips cause thick or fuzzy lines. This leads to inaccurate cuts and wasted wood.
| Tool | Benefit | Tip |
|---|---|---|
| Sharp Pencil | Draws thin, precise lines | Keep a sharpener close by |
| Fine Marker | Leaves bold, visible marks | Use on dark wood for contrast |
| Dull Pencil | Lines are thick and unclear | Sharpen before use |
Using Marking Gauges Effectively
Marking gauges help you draw straight, parallel lines from the wood edge. They improve accuracy in joinery and cutting.
- Set the gauge to the desired measurement.
- Hold the wood firmly on a stable surface.
- Place the gauge’s fence against the wood edge.
- Slide the marking pin or knife along the wood, keeping steady pressure.
- Check the line for clarity and adjust if needed.
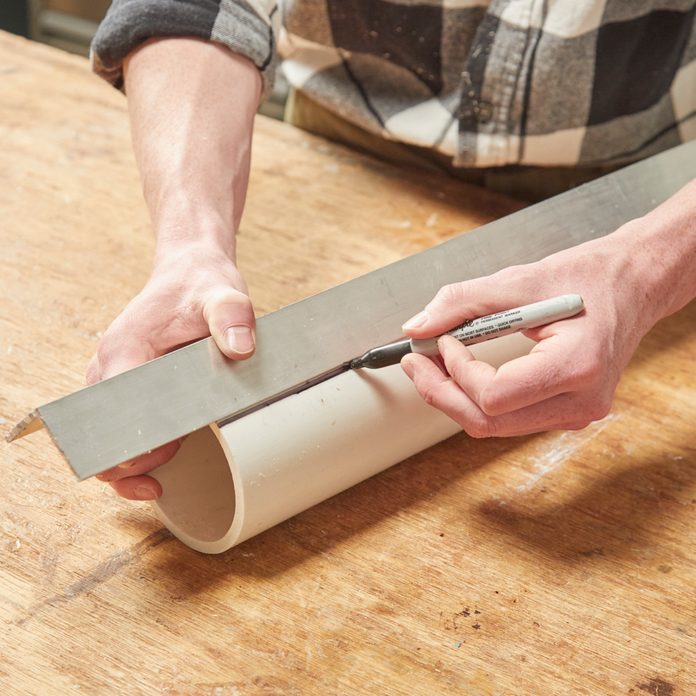
Credit: www.familyhandyman.com
Preparing The Wood Surface
Marking wood accurately starts with a clean and smooth surface. Dirt and roughness can cause errors in your measurements.
Preparing the wood well helps you make precise marks and cuts. Let’s explore how to get the wood ready.
Cleaning And Smoothing Techniques
Remove dust, dirt, and old finishes before marking. Use a soft brush or cloth to clean the surface. Sand the wood lightly with fine-grit sandpaper to smooth rough areas.
- Brush off loose debris
- Wipe with a damp cloth and let dry
- Sand lightly with 220-grit sandpaper
- Remove sanding dust with a tack cloth
Avoiding Surface Imperfections
Surface flaws can distort your marks. Check for knots, cracks, and dents. Avoid marking over these spots. If you must, mark around imperfections or choose a different piece of wood.
| Imperfection | Effect on Marking | Tip |
| Knots | Uneven surface | Mark around them |
| Cracks | Lines may split | Skip that area |
| Dents | False depth | Smooth or avoid |
Selecting Grain Direction
Wood grain affects how your pencil or knife moves. Marking along the grain gives cleaner lines. Marking across grain can cause splinters and rough edges. Check the wood grain direction before you start.
Tip:Hold your marking tool gently and follow the grain lines. This helps keep marks clear and reduces tearing.
Techniques For Precise Marking
Marking wood accurately is key for a clean, professional finish. Using the right tools and methods helps you avoid mistakes. This guide covers three useful techniques for precise marking.
Each method focuses on improving your control and accuracy. Try these tips to make your woodworking projects better and easier.
Using A Combination Square
A combination square helps you mark straight and square lines quickly. It combines a ruler and a head that can be adjusted for different angles. Set the head at 90 degrees for right angles or 45 degrees for miters.
- Place the head firmly against the wood edge.
- Hold the ruler tight to avoid slipping.
- Use a sharp pencil to mark the line along the ruler edge.
- Double-check measurements before marking.
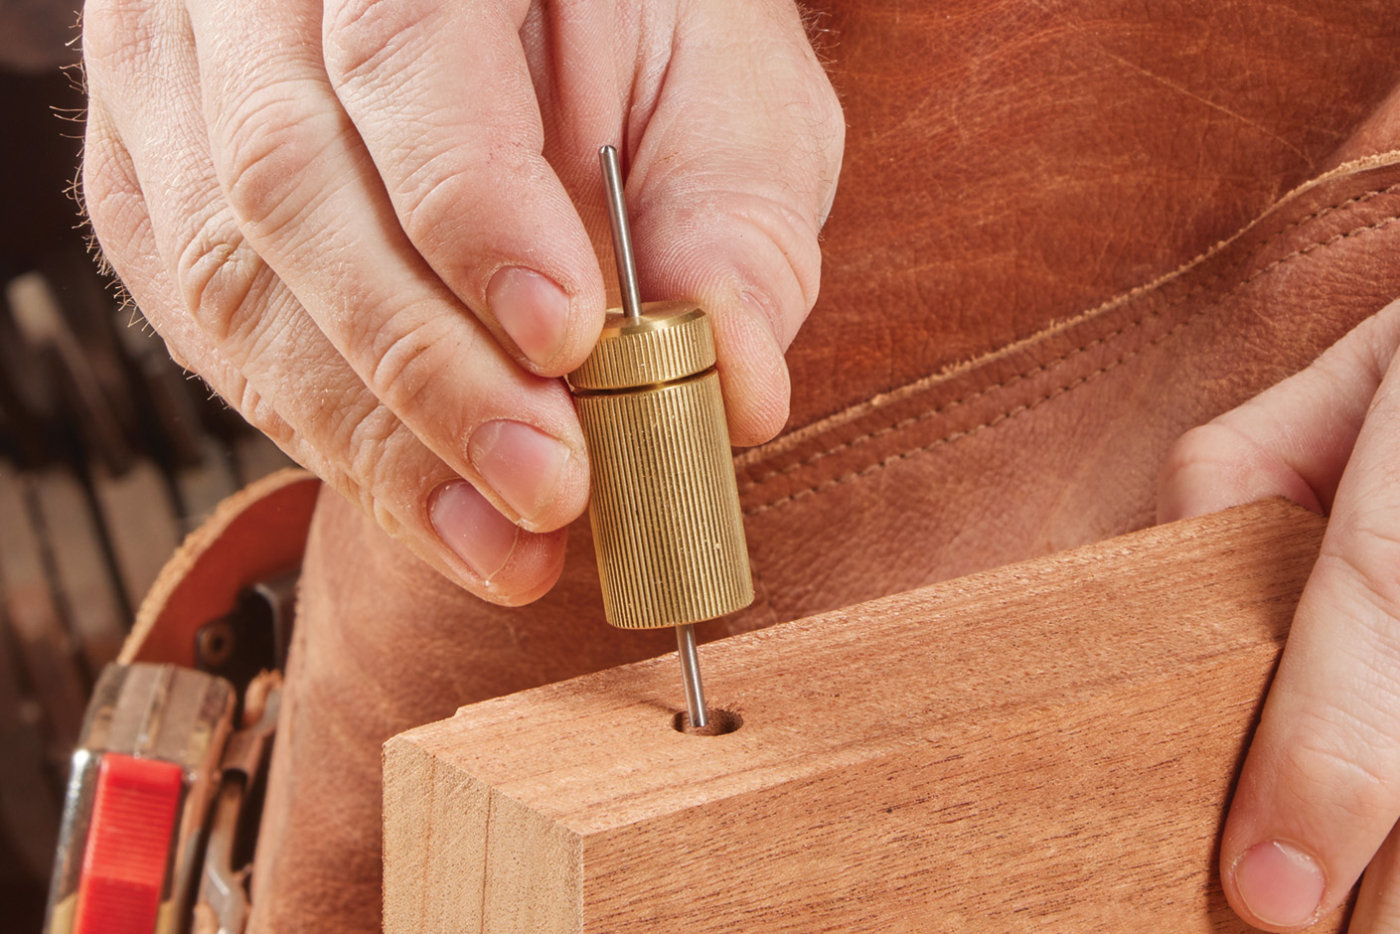
Employing A Marking Knife
A marking knife gives very fine and clear lines. It scores the wood surface, which helps guide saws or chisels. Use a sharp blade and steady hand for best results.
| Tip | Reason |
|---|---|
| Hold the knife like a pen | Improves control and precision |
| Score just enough pressure | Prevents deep cuts or wood splintering |
| Cut along a straightedge | Ensures a clean, straight line |
| Sharpen blade before use | Creates sharper, clearer marks |
Transferring Measurements Accurately
Transferring measurements from a ruler or template to wood must be exact. Small errors add up and cause parts to not fit correctly. Use careful techniques to keep accuracy.
- Use a sharp pencil or marking knife for thin lines.
- Mark reference points before drawing full lines.
- Double-check each measurement with a ruler or tape.
- Clamp templates firmly to the wood to avoid shifting.
- Measure twice, mark once to reduce mistakes.
Credit: www.popularwoodworking.com
Tips For Consistent Measurements
Measuring wood accurately is important for good results. Consistent measurements help avoid mistakes.
Use simple habits to keep your measurements steady every time you mark wood.
Double-checking Dimensions
Always measure twice before marking. This reduces errors and saves wood from waste.
Check your measurements against your plans or drawings to be sure they match perfectly.
Using Stop Blocks
Stop blocks help you mark the same length repeatedly. They attach to your saw or workbench.
- Set a stop block at the desired length
- Slide the wood against the block to mark
- Repeat for multiple pieces without re-measuring
Maintaining Tool Calibration
Check your measuring tools regularly. Tools that are off can cause wrong marks and cuts.
Calibrate rulers, squares, and tape measures to keep them accurate over time.
Advanced Marking Tricks
Marking wood accurately is key to making strong and precise joints. Advanced marking tricks help improve your woodworking skills. These methods save time and reduce mistakes on complex projects.
Using the right tools and techniques makes a big difference. This guide covers marking for complex joints, using templates and patterns, and adding digital measuring tools to your workflow.
Marking For Complex Joints
Complex joints need careful marking to fit perfectly. Use marking knives instead of pencils for sharper lines. Mark reference lines on both pieces before cutting.
- Score the wood surface lightly before marking.
- Use a combination square to keep lines straight and square.
- Mark both mating parts with matching symbols or letters.
- Double-check measurements before cutting.
Using Templates And Patterns
Templates and patterns help repeat the same shape accurately. You can make templates from thin plywood or plastic. Clamp templates firmly to the workpiece before tracing.
| Template Material | Best Use | Care Tips |
|---|---|---|
| Thin Plywood | General shapes and curves | Smooth edges; avoid warping |
| Plastic Sheets | Durable, repeatable shapes | Clean after use; store flat |
| Cardboard | Quick, temporary patterns | Replace often; not water resistant |
Incorporating Digital Measuring Tools
Digital tools increase marking accuracy by reducing human error. Laser measures and digital calipers give precise readings. Use apps that store measurements for complex projects.
- Calibrate digital tools before use.
- Use laser guides to draw straight lines quickly.
- Save measurements in digital notes or apps.
- Compare digital readings with manual checks.
Common Mistakes To Avoid
Marking wood accurately is key for good woodworking. Avoiding common mistakes saves time and materials. Careful marking ensures better cuts and joints.
Many woodworkers rush or overlook small details. These errors can cause problems in the final product. Learn what to watch out for to improve your work.
Overlooking Tool Wear
Using worn tools can lead to unclear or wrong marks. Blunt pencils, dull knives, or worn marking gauges make lines hard to see. This causes mistakes during cutting or assembly.
- Check pencil points regularly and sharpen often.
- Replace or sharpen marking knives before they dull.
- Inspect marking gauges for worn tips or damaged parts.
- Keep tools clean to maintain sharpness and accuracy.
Rushing The Marking Process
Speeding through marking leads to errors. Quick marks may be uneven or misplaced. Slowing down helps you measure carefully and mark straight lines.
Tips for Accurate Marking:
- Double-check all measurements before marking.
- Use a sharp pencil or knife for clean lines.
- Hold your marking tool steady and use a straight edge.
- Mark lightly first, then darken if needed.
Ignoring Wood Movement
Wood changes size with moisture and temperature. Ignoring this causes marks to be wrong over time. Parts may not fit if wood shrinks or swells.
| Wood Movement Factor | Effect on Marking |
| Moisture changes | Marks may stretch or shrink |
| Seasonal humidity | Joints can become loose or tight |
| Wood grain direction | Movement is greater across the grain |
| Wood species | Some woods move more than others |

Credit: www.familyhandyman.com
Frequently Asked Questions
How Do I Mark Wood For Precise Cuts?
Use a sharp pencil or marking knife for clean lines. Measure twice to avoid errors and use a ruler or square for straight marks.
What Tools Help Mark Wood Accurately?
A combination square, marking gauge, and fine pencil improve precision. These tools guide straight lines and consistent measurements on wood.
Why Is Marking Wood Accurately Important?
Accurate marking ensures precise cuts and fits. It reduces material waste and improves the overall quality of woodworking projects.
How Can I Avoid Smudging Marks On Wood?
Use a sharp pencil and avoid heavy pressure. Mark lightly and handle wood carefully to keep lines clear and visible.
Conclusion
Accurate wood marking enhances craftsmanship and project success. Use clear measurements. Double-check marks to ensure precision. Choose the right tools for each task. A sharp pencil or marking knife works wonders. Maintain focus to avoid mistakes. Practice consistency for better results.
These tips build skill and confidence. Over time, accuracy becomes second nature. Quality projects begin with accurate markings. Happy woodworking!
