
When you’re working with wood, marking drill points accurately can make all the difference between a perfect project and a frustrating mess. If you’ve ever struggled with misaligned holes or uneven spacing, you know how costly even a small mistake can be.
What if you could save time, avoid errors, and get professional results every time you pick up your drill? You’ll discover simple, effective tips that help you mark drill points precisely and confidently. Keep reading, and you’ll never have to guess where to drill again.
Choosing The Right Tools
Marking drill points on wood needs the right tools for accuracy. Using proper tools saves time and effort.
Good marking tools help you drill holes in the right spot. This keeps your project neat and strong.
Essential Marking Tools
You need a few basic tools to mark drill points well. A ruler or tape measure helps measure exact locations.
A combination square or carpenter’s square lets you mark right angles easily. These tools make your marks straight.
- Ruler or tape measure for length
- Combination square for angles
- Marking gauge for consistent marks
Benefits Of Using A Center Punch
A center punch makes a small dent where you want to drill. This dent keeps the drill bit from slipping.
Using a center punch improves accuracy and makes drilling easier. It also protects the wood surface.
- Prevents drill bit from wandering
- Helps start holes in exact spots
- Reduces wood splintering around holes
Selecting The Best Pencil Or Marker
Choose a pencil or marker that shows clearly on wood. A sharp pencil gives fine, accurate marks.
Use a carpenter’s pencil or mechanical pencil for better control. Avoid thick markers that hide small details.
- Sharp carpenter’s pencil for clear thin lines
- Mechanical pencil for precision
- Use light pressure to avoid deep marks
Preparing The Wood Surface
Marking drill points on wood needs a clean, smooth surface. Proper preparation helps accurate drilling and prevents mistakes.
Start by inspecting the wood for dirt and rough spots. Cleaning and smoothing the surface makes your markings clear and precise.
Cleaning And Smoothing The Surface
Remove dust, dirt, and oils before marking drill points. Use a soft cloth to wipe the area clean. Sand rough patches lightly with fine-grit sandpaper.
- Use a dry cloth to dust off loose particles
- Apply a mild wood cleaner for sticky spots
- Sand with 180-220 grit sandpaper for smoothness
- Wipe off sanding dust before marking
Avoiding Common Surface Issues
Uneven surfaces cause inaccurate markings and drill slips. Avoid knots, cracks, and oily patches. Check the wood for defects before starting.
| Issue | Effect on Marking | How to Fix |
| Knots | Hard to mark and drill | Choose clear wood or fill knots |
| Cracks | Marks may split or shift | Sand edges smooth or avoid area |
| Oily patches | Ink or pencil may not stick | Clean with mild detergent |
| Rough grain | Imprecise markings | Sand smooth with fine paper |
Measuring And Marking Techniques
Marking drill points on wood needs careful measuring and marking. This helps you drill in the right spot every time.
Using simple tools and clear techniques makes your work accurate. This guide covers easy ways to measure and mark drill points.
Using A Ruler Or Tape Measure
A ruler or tape measure is the first tool for marking drill points. Measure the distance from the wood edge to the drill spot carefully.
Hold the tool steady and mark the point with a pencil. Double-check the measurement before drilling.
- Place the ruler flat on the wood surface
- Measure from the edge or a known reference point
- Mark lightly to avoid mistakes
- Re-measure to confirm the mark
Marking With A Square Or Template
A square helps make right-angle marks on wood. It keeps your drill points aligned and straight.
Templates are useful for repeating the same drill points on many pieces. Use a template to trace marks quickly and accurately.
- Use a carpenter’s square to check corners
- Align the square with the wood edge
- Draw lines to cross at the drill point
- Place templates firmly and trace marks
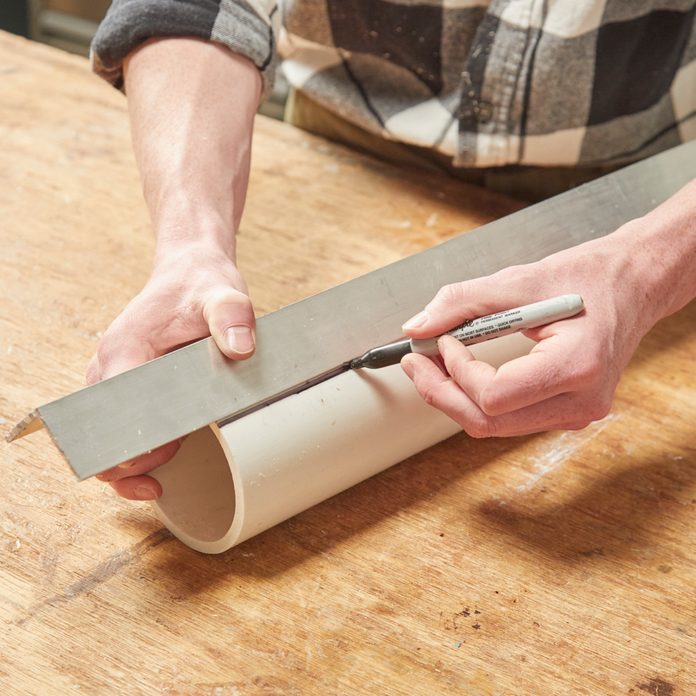
Creating Accurate Reference Points
Reference points help you mark drill spots consistently. Use edges, corners, or previous marks as guides.
Measure all points from these references for better accuracy. This reduces errors and keeps your project neat.
- Pick a fixed edge or corner as your zero point
- Measure all drill points from this reference
- Mark the reference clearly before measuring
- Check alignment between points before drilling
Credit: www.popularwoodworking.com
Ensuring Drill Point Precision
Marking drill points on wood needs care to avoid mistakes. Accurate marks help the drill bit start in the right spot.
Using simple tools and careful checks can improve drill point precision. This saves time and prevents damage.
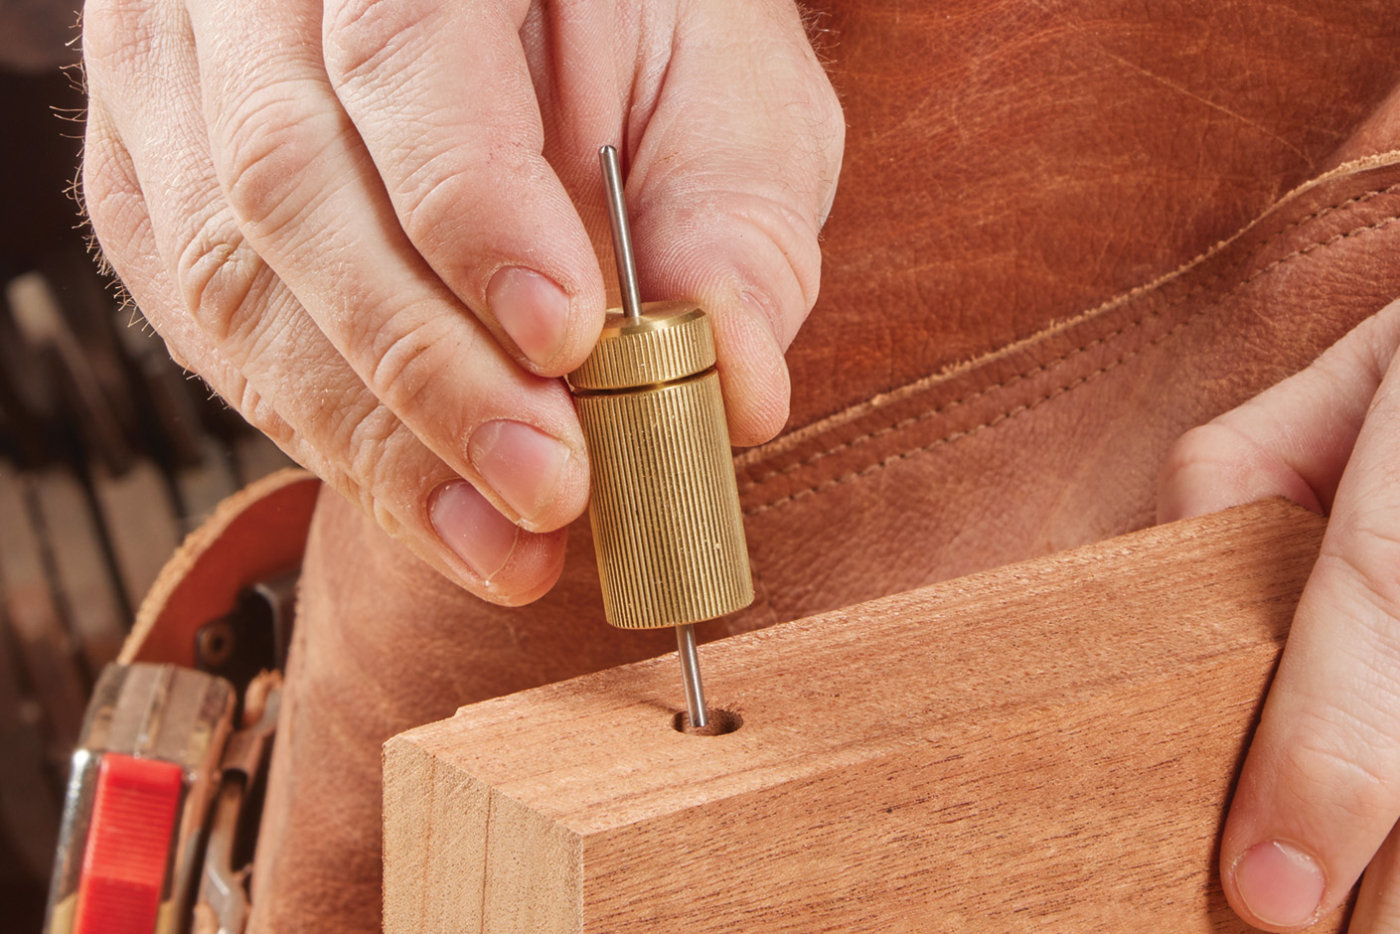
Center Punching For Drill Accuracy
Center punching leaves a small dent at the drill point. This guides the drill bit and stops it from slipping.
Use a center punch and a hammer to make a clear, shallow mark. This helps the drill start exactly where you want.
Using A Nail Or Awl For Small Points
A nail or awl works well for marking tiny drill points. Push the tool gently into the wood to make a fine mark.
- Hold the nail or awl steady
- Press lightly to avoid deep holes
- Use a ruler to place the mark precisely
- Make several small marks for better accuracy
Double-checking Measurements
Double-check all measurements before drilling. This reduces errors and keeps your project neat.
| Check | How to Verify |
| Distance Between Points | Use a tape measure or ruler |
| Mark Location | Compare with your plan or drawing |
| Drill Angle | Use a square or protractor |
| Tool Condition | Inspect drill bits and marking tools |
Tips For Drilling Straight And Clean Holes
Drilling straight and clean holes in wood is important for strong joints and a neat finish. Marking drill points correctly helps guide the drill bit and prevents mistakes.
Use simple techniques to keep your drill steady and avoid splintering the wood around the hole. This guide shares useful tips for better drilling results.
Clamping The Wood Securely
Hold the wood firmly to stop it from moving during drilling. Use clamps to keep the piece steady on your work surface. This reduces errors and helps keep the hole straight.
Clamping also prevents the wood from spinning or slipping, which can damage your drill bit or ruin the project.
Starting With A Pilot Hole
Begin with a small pilot hole to guide the larger drill bit. This makes it easier to drill straight and reduces wood splitting. The pilot hole acts as a starting point for accuracy.
- Use a drill bit smaller than your final size
- Drill slowly to avoid slipping
- Check alignment before drilling deeper
Maintaining Drill Stability
Keep the drill steady and perpendicular to the wood surface. Hold the drill with both hands for better control. Avoid pushing too hard; let the drill bit do the work.
Moving slowly and evenly helps create clean holes without rough edges or tear-out. Using a drill guide or jig can improve stability and accuracy.
Credit: www.familyhandyman.com
Common Mistakes To Avoid
Marking drill points on wood seems easy but many make simple errors. These mistakes can cause inaccurate holes and wasted materials.
Knowing what to avoid helps you drill clean, precise holes. Focus on careful marking for the best results.
Misaligned Markings
Marking points that are off-center causes holes to be crooked. This makes assembly difficult and weakens joints.
Check your measurements twice and use a square or ruler. Align your marks carefully before drilling.
- Use a pencil for fine, clear marks
- Double-check alignment with a square tool
- Mark points lightly at first, then darken
Marking On Rough Surfaces
Rough wood surfaces make marks hard to see and less accurate. The pencil or marker may skip over bumps.
Smooth the surface with sandpaper before marking. This helps create clear, precise drill points.
- Sand rough areas lightly before marking
- Wipe dust off after sanding
- Use sharp pencils or fine markers for better marks
Using Incorrect Tools
Wrong tools make marking less accurate. Thick markers or dull pencils create large marks that confuse drill placement.
Use sharp, fine-point pencils or marking knives for small, precise points. Avoid tools that make thick or uneven lines.
- Choose a sharp pencil or marking knife
- Avoid thick markers for drill points
- Keep your marking tools clean and sharp
Advanced Marking Methods
Marking drill points on wood accurately saves time and reduces mistakes. Advanced tools help improve precision beyond basic measuring techniques.
This guide explains how to use laser guides and digital measuring tools for better drilling results.
Using Laser Guides
Laser guides project a clear line or dot on the wood surface. This helps to align drill bits exactly where holes are needed.
- Set up the laser guide on a stable surface or clamp it to the wood.
- Adjust the laser until the dot matches the desired drill point.
- Use the laser line to mark multiple points in a straight line.
- Check the laser alignment before drilling to avoid errors.
Employing Digital Measuring Tools
Digital measuring tools provide exact distances and angles for marking drill points. These tools reduce human error and speed up the process.
| Tool | Function | Benefit |
| Digital Tape Measure | Measures length precisely | Quick and accurate readings |
| Digital Angle Finder | Measures angles for angled drilling | Ensures correct drill angle |
| Laser Distance Meter | Measures long distances | Easy marking on large wood pieces |
:max_bytes(150000):strip_icc()/tech17-ba05a18a2b934aff90a1d475bebb2468.jpg)
Credit: www.woodmagazine.com
Frequently Asked Questions
How Do I Accurately Mark Drill Points On Wood?
Use a pencil and a sharp awl or nail to mark drill points. Measure carefully and double-check positions before marking. This ensures precise drilling and avoids mistakes.
What Tools Help Mark Drill Points Clearly On Wood?
A sharp pencil, awl, or center punch works best for marking drill points. These tools create clear, visible indentations that guide the drill bit accurately.
How Can I Avoid Wood Splitting When Drilling?
Pre-drill a small pilot hole before the main drilling. Use sharp drill bits and avoid excessive pressure to prevent wood splitting around the drill points.
Why Is Measuring Twice Important Before Marking Drill Points?
Measuring twice helps ensure drill points are in the correct position. It reduces errors, saves time, and prevents damage to the wood during drilling.
Conclusion
Marking drill points on wood requires precision and patience. Use simple tools like pencils or awls. Always double-check measurements for accuracy. This prevents mistakes and ensures a perfect fit. Practice makes you better over time. Keep your tools sharp and ready.
Choose the right drill bit for the task. Proper lighting helps see marks clearly. Take your time to avoid errors. Follow these tips for successful woodworking projects. Happy drilling!
