Are you confident that your electrical systems are safe and reliable? Electrical insulation testing techniques play a crucial role in making sure your equipment runs smoothly without unexpected failures.
Understanding these methods can help you spot problems early, prevent costly downtime, and protect your valuable assets. You’ll discover simple yet effective ways to test insulation and keep your electrical systems in top shape. Keep reading to learn how these techniques can save you time, money, and stress.

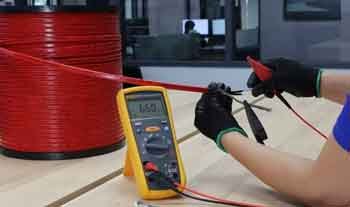
Credit: vitrek.com
Importance Of Electrical Insulation Testing
Electrical insulation testing checks if wires and devices are safe to use. It helps find problems before they cause damage.
This testing is important for homes, factories, and machines. It keeps people safe and prevents power failures.
Ensures Safety
Insulation testing finds breaks or weak spots in electrical parts. These issues can cause shocks or fires.
Testing helps protect workers and users by making sure equipment works safely.
Prevents Equipment Damage
Bad insulation can cause machines to fail or get damaged. Testing helps catch these problems early.
Fixing insulation issues saves money by avoiding big repairs or replacements.
Improves System Reliability
Regular insulation testing keeps electrical systems working well. It reduces unexpected breakdowns.
Reliable systems mean less downtime and better performance in homes and industries.
Meets Legal And Industry Standards
Many laws require insulation testing for electrical safety. Companies must follow these rules to avoid fines.
Testing also helps meet industry standards for quality and safety.
Detects Moisture And Contamination
Insulation testing can find water or dirt inside electrical parts. These can cause short circuits.
Early detection helps clean or dry the equipment before damage occurs.
Common Insulation Testing Methods
Electrical insulation testing helps find problems in wires and equipment. It checks if the insulation can stop electricity from leaking.
Different tests give different information about the insulation quality. These tests help keep electrical systems safe and working well.
Megger Testing
Megger testing uses a special tool called a megohmmeter. It sends a high voltage through insulation and measures resistance. High resistance means good insulation, while low resistance shows damage.
Dielectric Absorption Ratio
This test measures how insulation absorbs electrical charge over time. It compares resistance values at two time points. A higher ratio means better insulation quality.
- Measure resistance at 30 seconds
- Measure resistance at 60 seconds
- Calculate ratio: resistance at 60s ÷ resistance at 30s
Polarization Index
The polarization index uses resistance values over ten minutes. It shows insulation condition more clearly than short tests. Low values can mean moisture or dirt inside insulation.
| Time | Resistance Reading |
| 1 minute | R1 |
| 10 minutes | R10 |
| Polarization Index | R10 ÷ R1 |
Step Voltage Test
The step voltage test applies increasing voltage steps to insulation. It checks how insulation reacts to each voltage level. This test finds weak spots before full breakdown happens.
- Apply low voltage and record readings
- Increase voltage in steps
- Observe changes in insulation resistance
- Stop if insulation fails or reaches max voltage
Advanced Testing Techniques
Electrical insulation testing helps find problems in cables and equipment. Advanced techniques give more detailed results. They help keep electrical systems safe and reliable.
These methods detect small faults early. They prevent serious failures and extend equipment life.
Partial Discharge Measurement
Partial discharge (PD) happens when small electrical sparks occur inside insulation. These sparks can damage insulation over time. Measuring PD helps find weak spots before they fail.
PD measurement uses sensors to detect electrical signals from discharges. It shows the location and size of defects. This testing is useful for transformers, cables, and switchgear.
Tan Delta Testing
Tan Delta testing measures the insulation’s ability to resist electrical current. It checks for moisture, dirt, or damage in the insulation. A higher Tan Delta value means worse insulation quality.
This test applies a low voltage and measures power loss in insulation. It helps predict failures and schedule maintenance for motors and cables.
High-potential (hi-pot) Testing
Hi-Pot testing applies high voltage to insulation. It checks if the insulation can handle high stress without breaking down. This test ensures safety before equipment use.
Hi-Pot is common for new cables and electrical devices. It detects weak insulation and manufacturing faults.
Testing Equipment And Tools
Electrical insulation testing uses special tools to check if wires and devices are safe. These tools help find problems before accidents happen.
Using the right equipment makes testing faster and more accurate. Each tool has a specific job in measuring insulation quality.
Insulation Resistance Tester (megohmmeter)
The insulation resistance tester, also called a megohmmeter, measures how well insulation resists electric current. It applies a high voltage to the insulation and checks resistance.
This tool shows if insulation is weak or damaged. High resistance means good insulation, while low resistance can mean a problem.
High-potential (hi-pot) Tester
Hi-Pot testers apply high voltage to check if insulation can handle stress without breaking down. It tests the insulation’s strength under load.
If the insulation fails, the tester detects leakage current or short circuits. This helps find weak spots before failure.
Dielectric Breakdown Tester
This tester applies increasing voltage until insulation breaks down. It measures the exact voltage level when the insulation fails.
Knowing this voltage helps engineers select materials that can handle real-world conditions safely.
Partial Discharge Detector
Partial discharge detectors find small electrical sparks inside insulation. These sparks can cause damage over time.
The tool detects and locates these discharges before they cause bigger problems.
Insulation Power Factor Tester
This tester measures the power factor or dissipation factor of insulation. It shows how much energy the insulation wastes.
A high power factor means poor insulation quality and possible moisture or dirt inside.
Multimeter
A multimeter measures voltage, current, and resistance in electrical circuits. It helps check basic insulation conditions.
Although not as specialized, it is useful for quick checks and troubleshooting.
Thermal Imaging Camera
This camera shows heat patterns on electrical equipment. Hot spots can indicate poor insulation or faults.
It helps find problems without touching live parts, improving safety during inspections.
Safety Precautions During Testing
Electrical insulation testing helps check if insulation is working well. Testing can be risky without safety steps.
Follow safety rules to avoid shocks and damage. Always prepare and use proper tools.
Wear Proper Personal Protective Equipment
Always wear safety gear before testing. Use insulated gloves and safety glasses to protect yourself.
Wear shoes with rubber soles to avoid electric shocks. Use flame-resistant clothing if needed.
- Insulated gloves
- Safety glasses
- Rubber-soled shoes
- Flame-resistant clothing
Disconnect Power Before Testing
Turn off all power sources before starting tests. This prevents accidental electric shocks.
Use lockout and tagout procedures to keep power off. Double-check with a voltage tester before work.
- Switch off all power
- Apply lockout/tagout devices
- Verify with voltage tester
Use Correct Testing Equipment
Use tools made for electrical insulation testing. Check if equipment is in good condition before use.
Follow the user manual to operate devices safely. Avoid using damaged cables or meters.
- Approved insulation testers
- Well-maintained tools
- Proper operation instructions
- Inspect cables and meters
Keep Testing Area Clear
Make sure the work area is clean and dry. Remove any metal or wet objects that cause danger.
Keep bystanders away during testing. Use warning signs if needed to mark the area.
- Clear the testing space
- Remove metal and wet items
- Keep others at a safe distance
- Use warning signs
Follow Proper Testing Procedures
Read and follow all testing steps carefully. Do not rush or skip any part of the test.
Record results accurately and stop if you see unsafe signs. Report any problems immediately.
- Follow all test instructions
- Do not skip steps
- Watch for unsafe signs
- Report issues right away

Credit: demikspower.com
Interpreting Test Results
Electrical insulation testing checks the quality of insulating materials. The results tell us if the insulation is safe and working well.
Understanding test results helps find problems early. This prevents damage and ensures electrical systems run smoothly.
Insulation Resistance Values
High resistance shows good insulation. Low resistance may mean dirt, moisture, or damage.
Polarization Index (pi)
PI compares resistance at 10 minutes to resistance at 1 minute. A higher PI means better insulation quality.
- PI above 2: Excellent condition
- PI between 1 and 2: Acceptable condition
- PI below 1: Poor condition, needs attention
Dielectric Absorption Ratio (dar)
DAR compares resistance at 60 seconds to resistance at 30 seconds. It shows insulation cleanliness and dryness.
Leakage Current Analysis
Leakage current indicates insulation faults. Higher current means more damage or contamination.
| Leakage Current (microamps) | Condition |
| 0 – 50 | Good |
| 51 – 200 | Moderate |
| > 200 | Poor, needs repair |
Temperature Effects On Results
Higher temperatures lower insulation resistance. Always note test temperature for correct result interpretation.
Use correction charts or formulas to adjust resistance values based on temperature. This gives a true picture of insulation health.
Common Challenges And Troubleshooting
Electrical insulation testing ensures safety and reliability of electrical systems. It helps find weak spots and prevent failures.
Testing can face many challenges that affect accuracy and results. Knowing how to fix these issues is important for good testing.
Moisture And Contamination
Moisture or dirt on insulation can cause wrong test readings. Wet or dirty surfaces lower insulation resistance values.
Cleaning the surface and drying the insulation before testing helps get correct results. Use dry cloths or warm air.
- Wipe insulation clean before testing
- Dry damp parts using heat or air
- Test in dry weather if possible
Incorrect Test Voltage
Using too high or too low test voltage can give false results. High voltage may damage insulation. Low voltage may not detect faults.
Follow the manufacturer’s recommended voltage for testing. Check test equipment settings before use.
- Refer to equipment manuals for voltage levels
- Adjust test voltage based on insulation type
- Double-check settings before starting test
Temperature Effects
Insulation resistance changes with temperature. Cold insulation shows higher resistance, warm insulation lower resistance.
Note the temperature during testing. Compare results to standard temperature values or apply correction factors.
- Record insulation temperature during tests
- Use correction charts for temperature differences
- Test at stable temperatures when possible
Poor Test Connections
Loose or dirty test leads cause bad contact and wrong readings. Connections with high resistance affect test accuracy.
Check and clean test leads regularly. Make sure connections are tight and secure during testing.
- Inspect test leads for damage or dirt
- Tighten all connections firmly
- Replace worn out or broken leads
Interference From Nearby Equipment
Nearby electrical devices can cause interference during insulation testing. This can lead to unstable or fluctuating results.
Turn off other equipment nearby if possible. Use shielded cables and keep test leads away from power lines.
- Switch off nearby electrical machines
- Use shielded or twisted test cables
- Keep test leads away from power cables
Incorrect interpretation can cause wrong decisions. Insulation resistance values vary by equipment and age.
Compare results with previous tests and standards. Look for trends, not just single values.
- Keep records of past test results
- Use industry standards for reference
- Watch for sudden drops or changes
Maintenance Strategies Post-testing
Electrical insulation testing helps find problems before they cause failures. After testing, proper maintenance keeps equipment safe and working well.
Following good maintenance strategies after testing can extend the life of electrical systems. It reduces the risk of breakdowns and costly repairs.
Regular Cleaning Of Insulation Surfaces
Dirt and dust on insulation can cause electrical faults. Clean surfaces after testing to remove any debris or moisture.
- Use soft brushes or cloths to avoid damage
- Remove all dust, grease, and moisture
- Check for signs of wear during cleaning
Timely Repair Of Detected Faults
Insulation testing may reveal cracks or breaks. Fix these issues quickly to prevent electrical failures.
Use appropriate materials and techniques for repairs. Follow manufacturer guidelines for best results.
Scheduled Re-testing And Monitoring
Plan regular insulation tests to track condition over time. This helps detect new problems early.
- Set test intervals based on equipment type
- Keep records of all test results
- Compare data to spot changes in insulation quality
Environmental Control And Protection
Protect insulation from harmful conditions like moisture, heat, and chemicals. These factors weaken insulation over time.
Use covers, enclosures, or coatings to shield insulation. Maintain stable temperature and humidity around electrical equipment.
Proper Documentation And Record Keeping
Keep detailed records of all insulation tests and maintenance work. This helps track equipment health and plan future actions.
- Record test dates and results accurately
- Note any repairs or changes made
- Use records to improve maintenance schedules

Credit: www.megger.com
Frequently Asked Questions
What Is Electrical Insulation Testing?
Electrical insulation testing measures the resistance of insulating materials. It ensures safety and prevents electrical faults. Common methods include the megger test and polarization index. Testing helps detect deterioration, moisture, or contamination in insulation.
Why Is Insulation Resistance Important?
Insulation resistance prevents current leakage and short circuits. It ensures electrical equipment reliability and safety. High resistance indicates good insulation, reducing fire and shock risks. Regular testing maintains system efficiency and prolongs equipment life.
How Often Should Insulation Tests Be Conducted?
Insulation tests frequency depends on equipment type and environment. Generally, tests occur annually or during maintenance. Critical systems may require more frequent checks. Regular testing helps identify early insulation failures and avoid unexpected breakdowns.
What Tools Are Used For Insulation Testing?
Common tools include insulation resistance testers (megohmmeters) and hipot testers. These devices apply voltage and measure resistance. They are portable, easy to use, and provide accurate readings. Selecting the right tool depends on the test voltage and equipment.
Conclusion
Electrical insulation testing ensures safety and reliability. Regular checks prevent failures. They protect equipment from damage and maintain efficiency. Various methods suit different needs and conditions. Understanding these techniques aids in choosing the right one. Consistent testing promotes long-term performance and safety.
It minimizes risks and costly repairs. Always prioritize quality tools and professional guidance. A good testing routine keeps systems running smoothly. Stay informed and proactive for best results.
