Are you ready to take your woodworking skills to the next level? Mastering the art of the mortise and tenon joint can elevate your projects from good to exceptional.
But before you pick up your tools, it’s crucial to get your markings just right. Accurate marking is the foundation of a strong joint and can make all the difference in the quality of your work. Imagine the satisfaction of perfectly fitting pieces, and the frustration you’ll avoid by preventing costly mistakes.
In this guide, you’ll discover simple yet effective tips to ensure your mortise and tenon markings are precise, saving you both time and headaches. Stick around to learn how to achieve seamless joints that will impress even the most discerning eyes.
Essential Tools For Marking
Marking wood correctly is key to making precise mortise and tenon joints. Using the right tools helps you achieve clean lines and accurate cuts. It saves time and reduces mistakes in woodworking projects.
In this guide, you will learn about three important tools for marking wood. Each tool has a specific role that makes your work easier and more exact.
Choosing The Right Marking Gauge
A marking gauge helps you draw parallel lines to the edge of your wood. It is useful for marking the depth of your mortise and the length of your tenon. Pick a gauge with a sharp pin or knife for clear lines.
- Wooden or metal body for durability
- Adjustable fence for different wood thickness
- Sharp marking pin or knife for clean lines
- Easy-to-read scale for precise settings
Using Sharp Pencils And Markers
Sharp pencils or fine markers give you clear marks on wood. Mechanical pencils keep a steady line width. Use a pencil with hard lead to avoid smudging. Markers should have fine tips and waterproof ink.
| Tool | Best Use | Tips |
| Hard Pencil (2H or harder) | Fine lines on soft or hard wood | Sharpen often for accuracy |
| Mechanical Pencil | Consistent line width | Use 0.5 mm lead for detail |
| Fine Tip Marker | Bold marks on rough surfaces | Choose waterproof ink |
Employing Combination Squares
Combination squares help check angles and measure depth. They are great for marking 90-degree lines and ensuring your cuts are straight. Use the ruler to measure tenon length and mortise depth.
Tips for using combination squares:
- Lock the ruler firmly before marking
- Use the square edge to guide your pencil
- Double-check measurements for accuracy
- Keep the tool clean and free of rust
Preparing Wood For Accurate Marks
Accurate marking is key for strong mortise and tenon joints. Preparing the wood properly makes marking easier and more precise. Careful preparation helps avoid mistakes and waste.
Before marking, take time to smooth and check the wood. This ensures your marks match the wood’s true shape and size.
Smoothing The Surface
A smooth surface helps your marking tools glide evenly. Rough or splintered wood can cause inaccurate lines and rough cuts.
- Use fine-grit sandpaper to smooth the wood faces.
- Sand along the grain to avoid scratches.
- Remove all dust and debris before marking.
- Check for any raised grain after sanding and lightly resand.
Checking For Warps And Twists
Wood that is warped or twisted will give false measurements. Check each piece to make sure it is flat and true before marking.
| Check Method | What to Look For |
| Straight Edge | Gaps under the edge show warps |
| Try Square | Misalignment at corners shows twists |
| Visual Inspection | Look for curves or bends along the length |
Marking The Mortise
Marking the mortise correctly is very important for a strong joint. It helps you cut the right size hole for the tenon to fit.
Clear and accurate marks guide your tools and reduce mistakes during cutting. Take your time with this step.
Setting The Gauge For Depth
Use a marking gauge to set the depth of the mortise. This tool helps you make even lines on the wood.
Adjust the gauge to the exact depth you want for the mortise. This prevents cutting too deep or too shallow.
- Lock the gauge firmly to keep the depth steady
- Run the gauge along the wood edge to score a clear line
- Mark all sides of the mortise area for accuracy
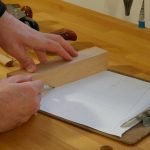
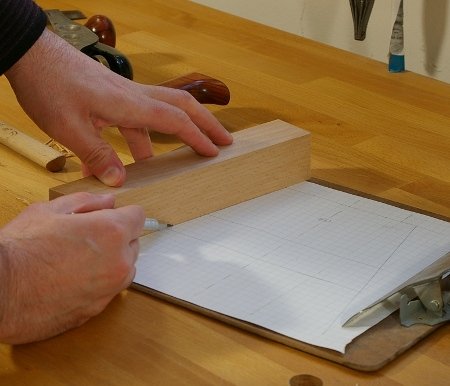
Transferring Measurements Precisely
Measure the mortise size carefully from the tenon piece. Use a ruler or caliper for exact numbers.
Transfer these measurements to the mortise wood with a sharp pencil or marking knife. Make small, neat marks.
- Mark the width and length clearly on the wood face
- Use a square to draw straight, right-angle lines
- Double-check measurements before cutting

Credit: www.youtube.com
Marking The Tenon
Marking the tenon correctly is important for a strong mortise and tenon joint. Clear marks guide your cutting and shaping. This helps the tenon fit well into the mortise.
Use sharp pencils or marking knives for precise lines. Always mark on the right face of the wood. This keeps your measurements accurate throughout the process.
Aligning Tenon Shoulders
Align the tenon shoulders carefully to fit flush against the mortise piece. Shoulders support the joint and keep it strong. Poor alignment can weaken the joint and cause gaps.
Mark the shoulder lines clearly before cutting. Use a square to make sure the lines are at right angles. Check that both shoulders are even and match the mortise depth.
- Use a marking gauge for consistent shoulder lines
- Double-check shoulder width matches mortise opening
- Cut just outside the lines for a clean fit after trimming
Ensuring Symmetry And Fit
Symmetry helps the tenon fit tightly and look neat. Measure all sides of the tenon to keep it even. Uneven tenons cause loose or tight joints.
Use calipers or a ruler to check thickness and width at several points. Mark any adjustments clearly. Test fit the tenon in the mortise often as you work.
- Measure twice before cutting
- Keep tenon edges straight and smooth
- Trim small amounts for a perfect fit
Common Mistakes To Avoid
Marking wood for mortise and tenon joints needs care. Small errors can cause poor fits and weak joints.
This guide points out common mistakes to avoid for better woodworking results.
Overmarking And Confusing Lines
Too many marks make it hard to see the right cut lines. Confusing lines slow down your work and cause errors.
- Use a sharp pencil for clear lines
- Mark only the necessary lines
- Erase or wipe off old marks before new ones
- Use different colors or thicknesses for different marks
- Label marks with simple notes if needed
Ignoring Grain Direction
Grain direction affects the strength and appearance of your joint. Ignoring it can cause cracks and weak joints.
| Grain Direction | Effect on Joint |
| Parallel to Tenon | Strong and less likely to split |
| Across the Tenon | Higher risk of cracking and breakage |
| Mixed Directions | Difficult to fit and may weaken joint |
Tips For Maintaining Precision
Marking wood accurately is very important for mortise and tenon joints. Precision helps the joint fit tightly and hold well.
Using the right methods keeps your measurements exact and reduces mistakes. Small errors can cause big problems later.
Double-checking Measurements
Always measure twice before marking the wood. This simple habit can stop many errors and save time.
Use a reliable ruler or measuring tape. Check both the length and width of the pieces carefully.
- Measure from a fixed point on the wood
- Compare your marks with the plan or drawing
- Use a square tool to check right angles
- Mark lightly at first, then darken the lines
Using Clamps For Stability
Clamps hold wood steady while you mark it. This stops the wood from moving and keeps your lines accurate.
Use clamps that fit your wood size. Position them so they do not block your marking area.
- Choose clamps that keep the wood flat and firm
- Check that the wood does not shift when clamped
- Use more clamps for longer or thinner pieces
- Remove clamps only after marking is complete
Advanced Techniques
Marking wood for mortise and tenon joints takes skill and precision. Advanced methods help improve accuracy and speed.
Using tools like templates, jigs, and digital devices can make your work more consistent and professional.
Using Templates And Jigs
Templates and jigs guide your marking tools to create exact shapes. They reduce mistakes and save time on repeated cuts.
- Templates made from plywood help trace shapes for tenons.
- A jig clamps to the wood for steady marking of mortises.
- Custom jigs can match specific joint sizes for fast work.
- Use a marking gauge on jigs for consistent line depth.
- Check and adjust templates regularly for wear and tear.
Incorporating Digital Tools
Digital tools add precision by measuring and marking with exact data. They reduce human error in complex layouts.
| Tool | Use | Benefit |
| Digital Caliper | Measure wood thickness and length | High accuracy in dimensions |
| Laser Level | Project straight lines on wood | Perfectly straight mortise marks |
| CAD Software | Design joint plans on computer | Visualize and adjust before cutting |
| Digital Marking Gauge | Set and mark exact line depth | Uniform tenon shoulders and cheeks |

Credit: www.amazon.in

Credit: www.bigsandwoodworking.com
Frequently Asked Questions
How Do You Mark Wood For Mortise And Tenon Joints?
Use a marking gauge to scribe precise lines on the wood. Mark both the mortise and tenon sides clearly for accurate alignment during assembly.
What Tools Are Best For Marking Mortise And Tenon Joints?
A marking gauge, pencil, and square are essential. These tools ensure straight, clean lines and consistent measurements for precise joint fitting.
Why Is Accurate Marking Important For Mortise And Tenon Joints?
Accurate marking ensures tight-fitting joints, which increase strength and stability. It also reduces wood waste and prevents rework during assembly.
Can I Use A Pencil Instead Of A Marking Knife?
Yes, but a marking knife offers cleaner, more precise lines. Pencils can lead to less accuracy and potential misalignment during cutting.
Conclusion
Marking wood for mortise and tenon takes care and focus. Use clear lines and steady tools to get it right. Double-check your measurements before cutting. Small mistakes can cause big problems later. Practice helps build confidence and skill. Keep your workspace clean and organized.
These tips make your woodworking more precise and enjoyable. Take your time and enjoy the process. Your joints will fit better, and your projects will last longer. Simple steps lead to strong, neat results every time.