Are you ready to add a personal touch to your metal projects? Engraving metal with a rotary tool can unlock a world of creative possibilities.
Whether you’re a DIY enthusiast looking to customize your tools or an artist aiming to craft intricate designs, mastering this skill can elevate your work to the next level. Imagine transforming a plain piece of metal into a stunning piece of art that reflects your unique style.
In this guide, you’ll discover everything you need to know about operating a rotary tool for engraving metal. With the right techniques, you can achieve professional-looking results that will leave everyone in awe. Let’s dive into the exciting world of metal engraving and unleash your creative potential!
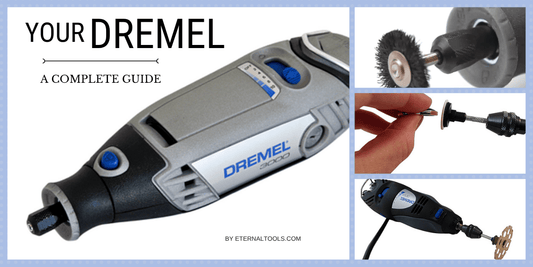
Choosing The Right Rotary Tool
Using a rotary tool for engraving metal needs the right equipment. Picking a good rotary tool helps you work better and safer.
This guide explains the types of rotary tools, needed attachments, and what to look for in power and speed.
Types Of Rotary Tools
Rotary tools come in many styles. Some are small and light, while others are larger and more powerful.
Pick a tool that fits your engraving needs and comfort level.
- Corded rotary tools offer constant power for long projects.
- Cordless rotary tools give more freedom but need charging.
- Variable speed tools help control engraving depth and detail.
- Compact models are easier to handle for detailed work.
Essential Attachments For Engraving
Attachments change how your rotary tool works on metal. Use the right bits for clean and precise engraving.
Common attachments include grinding stones, diamond tips, and carbide burrs.
- Diamond tips: Best for fine details and hard metals.
- Carbide burrs: Good for removing large areas quickly.
- Grinding stones: Useful for shaping and smoothing edges.
- Polishing wheels: Help finish the metal surface after engraving.
Power And Speed Considerations
Power affects how well your rotary tool cuts into metal. Speed controls the detail and finish of your engraving.
Choose a tool with adjustable speed to match the metal type and engraving style.
- Higher power tools cut through tough metals easily.
- Lower speeds prevent overheating and damage to delicate work.
- Variable speed lets you start slow and increase as needed.
- Check the tool’s RPM range before buying.
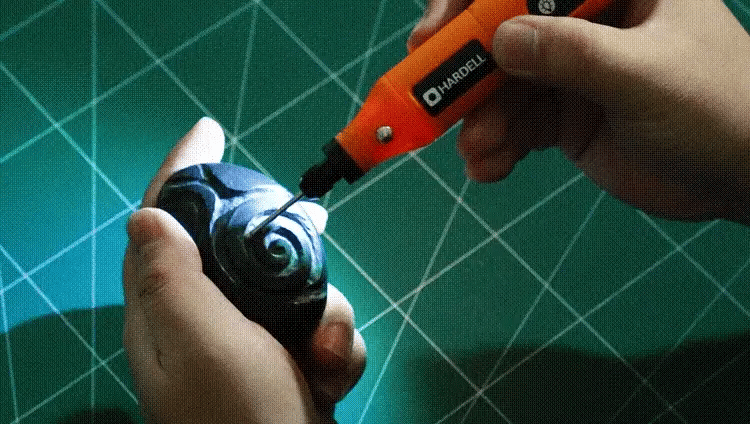
Credit: hardell.com
Preparing Your Workspace
Before using a rotary tool for engraving metal, prepare your workspace carefully. A clean and organized area helps you work safely and efficiently.
Setting up the right environment reduces distractions and keeps your tools within easy reach.
Setting Up A Stable Surface
Use a sturdy table or workbench to hold your metal piece and rotary tool. A stable surface prevents slips and mistakes during engraving.
- Choose a flat, heavy-duty table that does not wobble.
- Place a non-slip mat or rubber pad on the surface.
- Secure the metal piece with clamps or a vise.
- Keep your rotary tool’s cord away from the working area.
Safety Gear Essentials
Protect yourself by wearing the right safety gear before starting engraving. This gear reduces risks from flying metal dust and debris.
| Gear | Purpose |
| Safety Glasses | Protect eyes from metal particles |
| Dust Mask | Prevent breathing in fine dust |
| Ear Protection | Reduce noise from the rotary tool |
| Gloves | Shield hands from sharp edges and heat |
Lighting And Ventilation Tips
Good lighting helps you see fine details while engraving. Proper ventilation clears dust and fumes from your workspace.
- Use bright LED lamps focused on your work area.
- Work near a window or use a fan to improve airflow.
- Avoid closed spaces to reduce dust buildup.
Metal Selection And Preparation
Engraving metal with a rotary tool needs good preparation. Picking the right metal and getting it ready helps your work look clean and lasts longer.
This guide covers which metals work best and how to clean, mark, and hold your metal before engraving.
Best Metals For Engraving
Some metals are easier to engrave and show details better. Choose a metal that fits your project and tool power.
- Aluminum: Soft and easy to engrave, ideal for beginners.
- Brass: Offers good contrast and a bright finish.
- Stainless Steel: Strong and durable but needs more power.
- Copper: Engraves well and has a rich color.
- Gold and Silver: Used for fine jewelry engraving.
Cleaning And Marking The Metal
Clean metal helps the rotary tool work smoothly. Marking your design clearly guides your engraving.
| Cleaning Step | Method |
| Remove dirt and grease | Use rubbing alcohol or soap and water |
| Dry the metal | Wipe with a clean cloth |
| Mark the design | Use a fine-tip permanent marker or stencil |
Securing The Workpiece
Hold the metal firmly to avoid slips. A stable workpiece makes engraving safer and more precise.
- Use a vise with soft jaws to protect the metal surface.
- Clamp the metal on a flat, sturdy surface.
- Place rubber pads between the clamp and metal to prevent scratches.
- Make sure the area around the metal is clear for tool movement.

Credit: www.youtube.com
Engraving Techniques
Engraving metal with a rotary tool requires steady hands and good technique. Learning how to handle the tool well can improve your results.
This guide covers key tips on holding the tool, basic strokes, and ways to add depth and texture.
Holding And Controlling The Tool
Hold the rotary tool like a pen for better control. Keep your grip firm but not too tight to avoid fatigue.
- Use your index finger and thumb to guide the tool
- Rest your hand lightly on the work surface for stability
- Keep your wrist relaxed to allow smooth movements
- Adjust speed settings depending on the metal type
Basic Engraving Strokes
Start with simple strokes to outline your design. Practice straight, curved, and circular lines to build skill.
- Draw light lines to mark the design
- Deepen lines gradually by passing the tool over multiple times
- Use slow, steady movements for clean edges
- Lift the tool between strokes to avoid unwanted marks
Creating Depth And Texture
Vary the pressure and speed to add depth to your engraving. Use different tips for texture effects.
| Technique | Effect | Tool Tip |
|---|---|---|
| Light pressure | Shallow, fine lines | Fine point bit |
| Heavy pressure | Deep grooves | Carbide cutter |
| Cross-hatching | Textured shading | Needle point |
| Dotting | Patterned texture | Ball-shaped bit |
Troubleshooting Common Issues
Engraving metal with a rotary tool needs care and attention. Sometimes problems like vibration or overheating can happen. Fixing these issues helps you work better and safer.
Below are tips on how to handle common troubles. Follow them to keep your tool working well and your project on track.
Handling Tool Vibration
Too much vibration makes engraving hard and can cause mistakes. It can also tire your hand quickly. Check the tool and the bit before starting. Make sure the bit is tight and not bent.
- Use the right bit for metal engraving.
- Hold the tool firmly but do not grip too hard.
- Replace worn or damaged bits immediately.
- Try using a vibration-dampening glove or pad.
- Keep the tool speed steady and not too high.
Avoiding Overheating
Rotary tools can get hot fast, especially when engraving metal. Overheating may damage the tool and the metal surface. Keep the tool cool to avoid problems.
| Cause | Effect | Prevention |
| Using high speed for too long | Tool and bit get very hot | Take breaks and lower speed |
| Applying too much pressure | Metal heats up and warps | Use light, steady pressure |
| Poor ventilation or dusty work area | Tool motor overheats | Work in a clean, open space |
Dealing With Slips And Mistakes
Slip-ups can ruin fine details in metal engraving. Stay calm and correct mistakes carefully to save your work.
- Stop engraving immediately if you slip.
- Use fine sandpaper or a metal file to smooth errors.
- Practice on scrap metal before starting your project.
- Keep your hands steady and rest if tired.
- Use magnification tools for better control.
Finishing And Maintenance
After engraving metal with a rotary tool, finishing and maintenance keep your work and tool in good shape. Proper care improves the look of your engraving and the life of your tool.
This guide covers cleaning engraved metal, polishing tips, and maintaining your rotary tool for best results.
Cleaning Engraved Metal
Remove dust and debris from the engraved metal to reveal fine details. Use soft brushes and gentle cleaners to avoid damage.
- Use a soft-bristle brush to clear dust from grooves.
- Apply mild soap with water on a soft cloth for dirt.
- Dry the metal with a clean, lint-free cloth.
- Avoid harsh chemicals that can discolor the metal.
- For deep cleaning, use a small amount of rubbing alcohol on a cotton swab.
Polishing Tips
Polishing highlights the engraving and gives the metal a smooth finish. Use the right tools and polish for your metal type.
| Metal Type | Recommended Polish | Polishing Tool |
| Aluminum | Non-abrasive metal polish | Soft cloth or felt wheel |
| Steel | Fine abrasive polish | Buffing wheel or soft brush |
| Brass | Brass polish cream | Soft cloth |
| Copper | Copper cleaner | Soft cotton cloth |
Maintaining Your Rotary Tool
Keep your rotary tool clean and in good condition for smooth engraving. Regular maintenance prevents breakdowns and keeps performance high.
- Unplug the tool before cleaning or maintenance.
- Wipe the exterior with a dry cloth after use.
- Check and replace worn-out bits regularly.
- Keep vents clear of dust and debris.
- Lubricate moving parts as instructed by the manufacturer.
- Store the tool in a dry, dust-free place.

Credit: www.iars.co.in
Frequently Asked Questions
What Safety Gear Is Essential For Rotary Tool Engraving?
Always wear safety glasses to protect your eyes from debris. Use gloves for hand protection. A dust mask prevents inhaling fine particles. Ensure good ventilation in your workspace to reduce dust accumulation.
Which Rotary Tool Speed Is Best For Metal Engraving?
Use a moderate speed between 15,000 to 25,000 RPM. Too high speed can cause tool damage or overheating. Adjust speed based on metal hardness for precise and clean engraving.
What Types Of Bits Work Best For Metal Engraving?
Carbide and diamond-tipped bits are ideal for engraving metal. They offer durability and precision. Use fine-point bits for detailed work and broader bits for larger areas.
How Do You Maintain A Rotary Tool For Longevity?
Clean the tool after each use to remove dust and metal shavings. Lubricate moving parts as recommended. Store in a dry place to prevent rust and damage.
Conclusion
Operating a rotary tool for metal engraving takes practice and care. Start with the right bits and a steady hand. Keep your work area clean and wear safety gear. Take your time and work slowly to avoid mistakes. Small, smooth movements give the best results.
Remember, patience helps you improve each time. Enjoy the process and watch your designs come to life. With simple steps, engraving metal becomes easy and fun. Keep practicing, and your skills will grow.
