
Are you ready to tackle your next woodworking project but unsure how to use a circular saw effectively on plywood? You’re not alone.
Many DIY enthusiasts face challenges when working with this versatile tool. But mastering the art of using a circular saw can open up endless possibilities for your projects, allowing you to create precise cuts and seamless finishes. Imagine the satisfaction of crafting beautiful furniture or home decor pieces with your own hands.
With the right techniques, you can transform sheets of plywood into stunning creations. Our guide is here to empower you, providing step-by-step instructions that will boost your confidence and skills. Don’t let the fear of making mistakes hold you back. Dive into this article to discover practical tips and expert advice that will make your plywood projects a breeze. You’ll learn how to handle your circular saw like a pro, ensuring safety and precision every step of the way. Get ready to unlock your creative potential!

Credit: www.findbuytool.com
Choosing The Right Circular Saw
Using a circular saw is a key skill for cutting plywood. Picking the right saw helps you work safely and accurately. Different saws fit different plywood projects.
It is important to know which saw blade and size work best. Power also affects how well the saw cuts through plywood. This guide helps you choose the right circular saw.
Blade Types For Plywood
The blade type changes how clean and smooth your plywood cuts are. Blades with more teeth give smoother cuts. Fewer teeth cut faster but rougher.
Choose a blade designed for plywood or fine woodwork. Look for blades with thin kerfs to reduce wood waste and splintering.
- High-tooth-count blades (60+ teeth) for smooth cuts
- Combination blades for general use
- Thin-kerf blades to reduce splinters
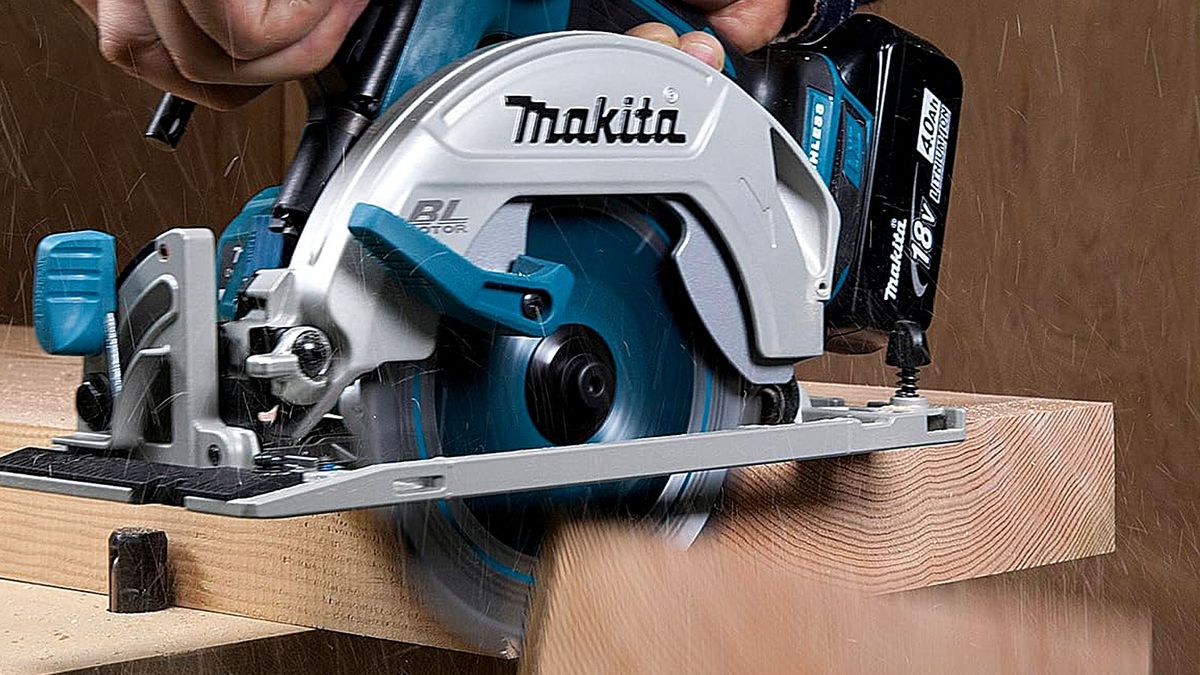
Power And Size Considerations
Power affects how easily the saw cuts plywood. More power means cleaner cuts on thick sheets. Less powerful saws work for thin plywood.
The size of the saw blade also matters. Bigger blades cut deeper plywood in one pass. Smaller blades are lighter and easier to control.
- 7-1/4 inch blades suit most plywood cuts
- Higher amps (15+) help with thicker plywood
- Lighter saws are good for detailed or long cuts
Credit: www.familyhandyman.com
Preparing Your Workspace
Before using a circular saw for plywood projects, set up a safe and organized workspace. A good workspace helps you work faster and avoid accidents.
Keep your area clean and clear of clutter. This way, you can move freely and focus on your cutting tasks.
Safety Gear Essentials
Wear the right safety gear to protect yourself from flying debris and loud noises. This gear keeps you safe during cutting.
- Safety glasses to protect your eyes
- Hearing protection like earplugs or earmuffs
- Dust mask to avoid breathing sawdust
- Work gloves for hand protection
- Closed-toe shoes to protect your feet
Setting Up A Stable Cutting Area
Make sure your cutting area is steady and flat. Use a workbench or saw horses to hold the plywood safely while cutting.
| Item | Purpose | Tips |
| Workbench | Stable surface to place plywood | Check for wobbling before cutting |
| Saw Horses | Supports plywood on both ends | Use clamps to hold plywood firmly |
| Clamps | Hold plywood steady during cutting | Place clamps near cutting line |
| Clear Floor Space | Allows free movement and reduces trips | Remove tools and debris around area |
Marking And Measuring Plywood
Measuring and marking plywood is the first step in any project. Accurate marks help you make clean, precise cuts with your circular saw.
Taking time to measure carefully saves wood and reduces mistakes. Use the right tools for best results.
Accurate Measuring Techniques
Use a tape measure that is easy to read and not worn out. Start measuring from the plywood edge or a fixed point.
Mark your measurements clearly with a pencil. Double-check your numbers before marking the cut line.
- Measure twice to avoid errors
- Mark lightly first, then darken the line
- Use a square to make sure lines are straight
Using Straightedges And Guides
Straightedges help you draw long, straight lines on plywood. Use a ruler or a straight piece of wood as your guide.
Clamping a straightedge to the plywood keeps it steady. This guide helps your circular saw cut in a straight line.
- Place the straightedge along your marked line
- Clamp it tightly to avoid movement
- Run the saw blade along the straightedge for a clean cut
Credit: www.homebuilding.co.uk
Adjusting The Saw Settings
Using a circular saw for plywood requires setting it correctly. Adjusting the saw helps make clean and safe cuts.
Focus on the depth, angle, and blade speed before starting your project. These settings affect the quality of your work.
Depth And Angle Adjustments
Set the blade depth so it just clears the plywood thickness. Too deep cuts waste energy and increase tear-out.
Adjust the angle for beveled cuts. Most circular saws have a bevel gauge to help set angles between 0° and 45°.
- Check plywood thickness before setting blade depth
- Blade should extend about 1/8 inch below plywood
- Use bevel gauge to set angle precisely
- Tilt saw base plate to desired angle for bevel cuts
Blade Speed Tips
Set the blade speed according to plywood type and thickness. Higher speed cuts cleaner but can cause burn marks.
Use slower speed for thicker plywood to avoid overheating. Keep the saw moving steadily to prevent blade damage.
- High speed for thin plywood and delicate cuts
- Lower speed for thick or hardwood plywood
- Keep saw moving at a steady pace
- Stop and clean blade if it overheats
Cutting Techniques For Clean Edges
Cutting plywood with a circular saw can be tricky. Clean edges need careful technique and steady hands. This guide covers key ways to get smooth, precise cuts.
Understanding how to start your cut right and keep a steady pace makes a big difference. Follow these tips for better results on your plywood projects.
Starting The Cut Smoothly
Starting the cut properly helps avoid splintering and rough edges. Make sure your saw blade lines up with the cut mark before turning it on.
- Secure the plywood firmly on a flat surface
- Mark your cut line clearly with a pencil
- Align the saw blade with the line before powering on
- Turn on the saw and let it reach full speed
- Begin cutting slowly to guide the blade smoothly into the wood
Maintaining A Steady Pace
Keep a steady, even speed during the cut. Moving too fast or too slow can cause rough edges or burn marks.
| Speed | Effect on Cut |
| Too Fast | May cause splintering or blade kickback |
| Too Slow | Can burn wood and dull blade |
| Steady Pace | Produces clean, smooth edges |
Preventing Tear-out And Splintering
Cutting plywood with a circular saw can cause tear-out and splintering. These issues happen when the saw blade pulls wood fibers up or breaks them unevenly. You can use simple techniques to get clean, smooth cuts.
Two effective ways to reduce tear-out are scoring the cut line and using painter’s tape. These methods protect the wood surface and help the saw blade cut cleanly.
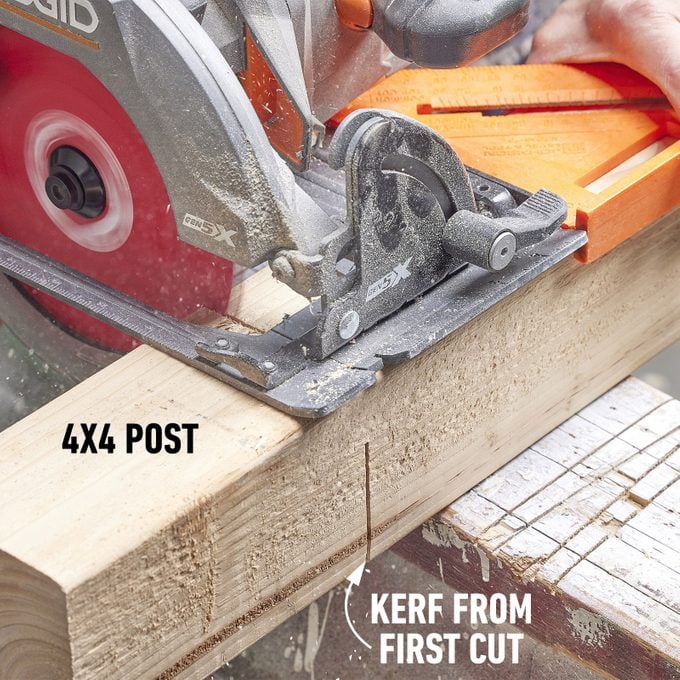
Scoring The Cut Line
Scoring means making a shallow cut along your cut line before cutting the full depth. This cuts the top wood fibers cleanly and limits splintering.
- Use a utility knife with a sharp blade.
- Draw a straight line where you want to cut.
- Run the knife along the line, pressing firmly but not too deep.
- Make several passes to score the surface fully.
- After scoring, cut with your circular saw carefully.
Using Painter’s Tape
Painter’s tape can protect the plywood surface and reduce tear-out. Apply tape over your cut line before cutting.
| Painter’s Tape Tips | Why It Helps |
|---|---|
| Apply tape along the entire cut line | Protects the wood fibers from splintering |
| Press tape firmly to stick well | Prevents the tape from lifting during the cut |
| Cut directly through the tape and wood | Supports the edges and reduces tear-out |
| Remove tape carefully after cutting | Keeps the cut edge clean and smooth |
Handling Common Challenges
Using a circular saw for plywood projects can be tricky at times. Some challenges can slow down your work or affect your cuts.
This guide covers two common problems and how to handle them safely and effectively.
Dealing With Warped Plywood
Warped plywood can cause uneven cuts and damage your saw blade. It is important to secure the plywood well before cutting.
- Place the plywood on a flat surface to check for warps.
- Use clamps to hold down the highest points firmly.
- Add scrap wood pieces under low spots to level the board.
- Cut slowly to avoid bending the plywood during the cut.
- Check the blade alignment to reduce tear-out.
Managing Long Cuts
Long cuts require steady control to keep the line straight. Using guides helps you make accurate cuts every time.
| Tip | Reason |
| Use a straight edge guide | Keeps the saw on track |
| Mark your cut line clearly | Helps you follow the line precisely |
| Clamp guide securely | Prevents movement during cutting |
| Cut at a steady pace | Reduces splintering and rough edges |
| Support plywood ends | Prevents sagging and binding |
Post-cut Finishing Tips
After cutting plywood with a circular saw, finishing the edges is important. This makes your project look neat and lasts longer.
Good finishing also helps avoid splinters and protects the wood from damage.
Sanding Edges
Sanding smooths the cut edges and removes rough spots or splinters. Use medium to fine-grit sandpaper for best results.
Sand along the edge, not across the grain, to keep the wood fibers intact.
- Start with 120-grit sandpaper for rough edges
- Finish with 220-grit for a smooth surface
- Use a sanding block for even pressure
- Wear a dust mask to avoid breathing wood dust
Sealing And Protecting
Sealing plywood edges protects the wood from moisture and wear. It also improves the look of your project.
Apply a wood sealer, varnish, or paint to keep the edges safe and clean.
- Choose a sealer suitable for plywood
- Use a brush or cloth for even coating
- Let the first coat dry fully before applying the next
- Apply at least two coats for best protection
Frequently Asked Questions
What Blade Is Best For Cutting Plywood With A Circular Saw?
A fine-toothed carbide blade with at least 60 teeth is best for plywood. It ensures smooth, clean cuts and reduces splintering.
How Do I Prevent Plywood From Splintering When Cutting?
Use painter’s tape along the cut line and cut with the good side down. Also, make slow, steady cuts for cleaner edges.
What Safety Gear Should I Wear When Using A Circular Saw?
Always wear safety goggles, ear protection, and a dust mask. Gloves and sturdy footwear are also recommended for extra safety.
How Deep Should I Set The Circular Saw Blade For Plywood?
Set the blade depth about 1/4 inch deeper than the plywood thickness. This ensures a clean cut without cutting into your work surface.
Conclusion
Using a circular saw can make plywood projects easier and faster. Always measure twice and cut once to avoid mistakes. Keep your hands steady and follow safety rules. Choose the right blade for clean, smooth cuts. Practice on scrap wood before starting your main project.
With patience and care, your plywood work will look great. Enjoy building with confidence and skill.
