
Are you ready to transform your furniture projects with ease and precision? Using an orbital sander can be your secret weapon to achieving that smooth, flawless finish you’ve always dreamed of.
But like any tool, there are tricks to mastering it. Imagine the satisfaction of seeing your old, worn-out furniture pieces brought back to life, or your new projects gleaming with perfection. You’ll uncover essential tips for using an orbital sander effectively, ensuring your furniture projects not only look professional but also last longer.
Stick around, and discover how you can turn ordinary pieces into extraordinary works of art with just a few simple techniques. Your next masterpiece is just a read away!
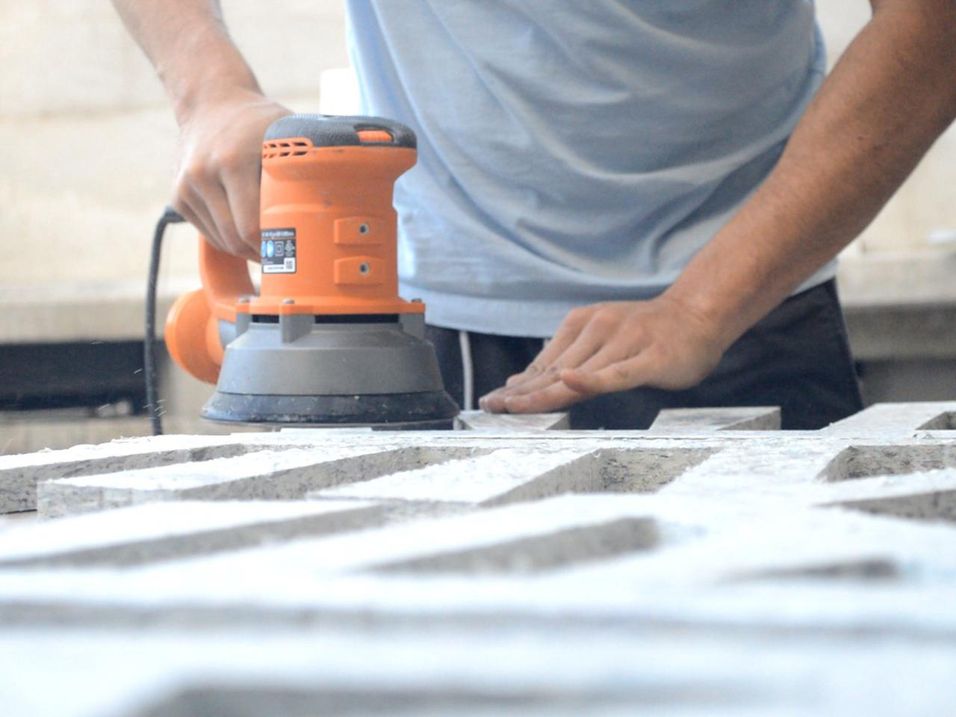
Credit: community.preciousplastic.com
Choosing The Right Orbital Sander
Using an orbital sander can make your furniture projects smooth and even. Picking the right sander helps you work faster and get better results.
There are different types of orbital sanders and grit sizes. Knowing these will help you choose the best tools for your project.
Types Of Orbital Sanders
Orbital sanders come in a few types. Each type fits different sanding jobs on furniture.
- Random Orbital Sander:Moves in random orbits to prevent swirl marks. Good for fine finishing.
- Finishing Sander:Has a square or rectangular pad. Best for smooth finishes on flat surfaces.
- Detail Sander:Small and pointed. Perfect for tight corners and edges.
Selecting The Correct Grit
Grit size on sandpaper decides how rough or smooth the sanding will be. Pick the right grit for each stage of your work.
| Grit Size | Use |
| 40–60 | Remove old paint or rough wood |
| 80–120 | Smooth rough surfaces and edges |
| 150–180 | Prepare wood for finishing |
| 220 and up | Final sanding before stain or paint |
Credit: www.familyhandyman.com
Preparing Furniture For Sanding
Before using an orbital sander on furniture, you must prepare the surface properly. Good preparation helps you get smooth and even results.
Cleaning and inspecting the furniture reveals any damage or dirt that could affect sanding. Removing the old finish makes sanding easier and more effective.
Cleaning And Inspecting Surface
Start by wiping the furniture with a damp cloth to remove dust and dirt. Check for cracks, loose parts, or nails that stick out. Fix these issues before sanding.
- Use a soft brush to clean corners and crevices
- Look for scratches or dents that need repair
- Ensure all screws and nails are secure
- Remove any stickers or labels
Removing Old Finish
Old paint, varnish, or stain can block the sander or cause uneven results. Removing these finishes helps the sander work better and prevents damage.
| Type of Finish | Recommended Removal Method |
| Paint | Use a chemical stripper or heat gun |
| Varnish | Sand lightly with medium grit sandpaper first |
| Stain | Clean surface, then sand with fine grit sandpaper |
Sanding Techniques
Using an orbital sander on furniture needs care and skill. Good sanding helps your furniture look smooth and even.
Follow simple techniques to get the best results. Learn how to hold the tool and move it correctly.
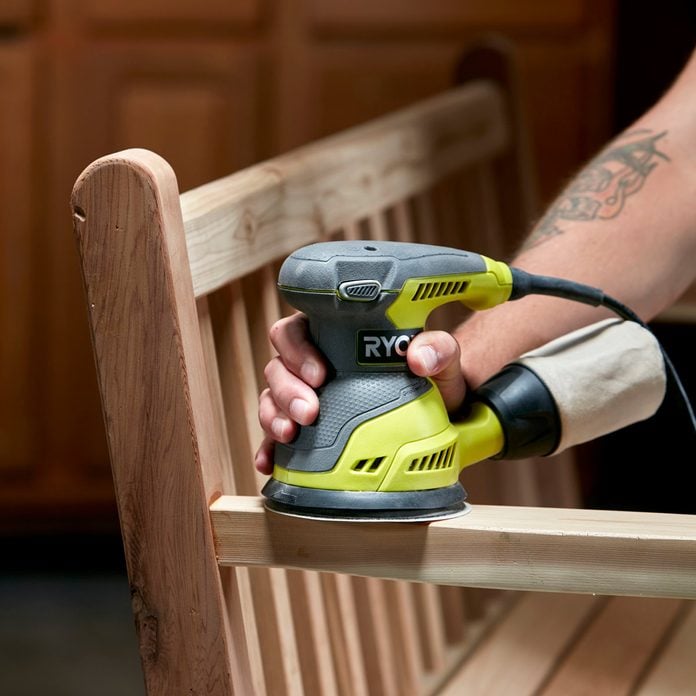
Proper Hand Placement
Hold the orbital sander with both hands for control. One hand should grip the handle firmly. The other hand supports the front or side.
- Keep your grip steady but not too tight
- Place your hands so you can move the sander smoothly
- Avoid putting your fingers near the sanding pad
Maintaining Even Pressure
Apply the same pressure across the sanding surface. Too much pressure can cause uneven spots or damage the wood.
| Pressure Level | Effect |
|---|---|
| Light | Smooth finish, slow sanding |
| Moderate | Best balance of speed and finish |
| Heavy | May damage wood or uneven surface |
Sanding With The Grain
Always sand in the direction of the wood grain. This prevents scratches and gives a better finish.
- Look closely to see the grain direction
- Move the sander smoothly along the grain
- Do not sand across the grain to avoid marks
Credit: www.familyhandyman.com
Avoiding Common Mistakes
Using an orbital sander on furniture can save time and effort. It also helps create smooth surfaces for painting or staining.
Many people make simple mistakes that damage the wood or ruin the finish. Avoid these errors to get the best results.
Preventing Swirl Marks
Swirl marks happen when the sander moves unevenly or the sandpaper clogs. These marks show up as circular scratches on the wood.
To prevent swirl marks, keep the sander flat on the surface. Do not press too hard. Change sandpaper often to avoid clogging.
- Use fine grit sandpaper for the final pass
- Move the sander in smooth, overlapping strokes
- Keep the sander flat, not tilted
- Replace sandpaper when it gets clogged or worn
Avoiding Over-sanding
Over-sanding removes too much wood and can damage the furniture shape. It also makes the surface uneven and rough.
Check your work often and stop sanding once the surface feels smooth. Use light pressure and let the sander do the work.
- Sand in short intervals and check the surface
- Use finer grit sandpaper as you finish
- Do not press hard on the sander
- Focus on problem areas, not the whole piece at once
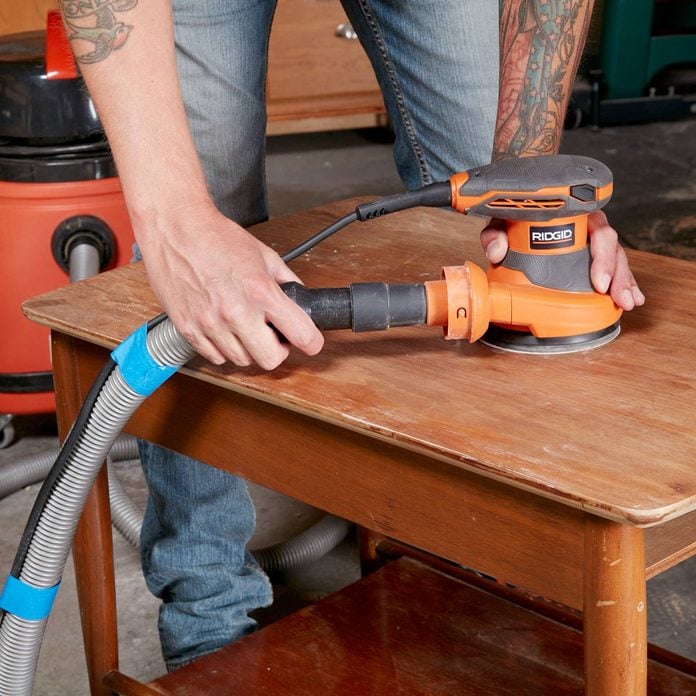
Managing Dust And Debris
Sanding creates a lot of dust that can make a mess and harm your health. Dust also clogs sandpaper and reduces sanding quality.
Use a dust collection system or vacuum while sanding. Wear a mask to protect your lungs. Clean the work area often.
- Attach a vacuum or dust collector to the sander
- Wear a dust mask or respirator
- Wipe or vacuum dust off the furniture between sanding passes
- Work in a well-ventilated area
Finishing Touches
Using an orbital sander on furniture can create a smooth surface. The finishing touches improve the look and feel of your project.
Pay attention to the last steps after sanding. They prepare your furniture for staining or painting.
Final Sanding Steps
After the main sanding, switch to a finer grit sandpaper. This removes scratches and smooths the surface.
Sand lightly and evenly. Avoid pressing too hard to keep the surface flat.
- Use 220-grit sandpaper for the last sanding
- Sand along the wood grain
- Check for rough spots and sand again if needed
Cleaning After Sanding
Remove all dust before finishing your furniture. Dust can cause rough paint or stain finishes.
Use a vacuum or a tack cloth to clean the surface well. Make sure to clean corners and edges.
- Vacuum the furniture surface and surrounding area
- Wipe with a damp cloth to catch fine dust
- Use a tack cloth for a final dust pick-up
Preparing For Stain Or Paint
Make sure the surface is dry and dust-free before applying stain or paint. This helps the finish stick well.
Test the stain or paint on a small hidden area first. This shows how the wood will look after finishing.
- Check that wood is clean and dry
- Use a conditioner if staining soft woods
- Apply stain or paint evenly with a brush or cloth
Frequently Asked Questions
What Grit Sandpaper Is Best For Orbital Sanding Furniture?
Start with 80-120 grit for rough surfaces. Use 180-220 grit for smoothing. Finer grits help achieve a polished finish on wood furniture.
How Do I Avoid Swirl Marks With An Orbital Sander?
Keep the sander moving constantly and don’t press too hard. Use fine grit sandpaper and sand in the wood grain direction to minimize swirl marks.
Can Orbital Sanders Damage Delicate Furniture Surfaces?
Yes, excessive pressure or coarse grit can cause damage. Use light pressure and fine grit for delicate surfaces to prevent gouges or scratches.
How Do I Prepare Furniture For Finishing After Sanding?
Remove all dust with a tack cloth or vacuum. Inspect for smoothness and apply a wood conditioner before staining or painting for best results.
Conclusion
Using an orbital sander makes furniture projects smoother and faster. Keep a steady hand and use the right sandpaper grit. Always move the sander evenly to avoid marks. Take breaks to check your progress often. Clean the dust to see the real finish.
Practice these tips to improve your sanding skills. Enjoy the process and your better furniture results. Simple steps lead to great-looking woodwork every time.
