
Are you looking to achieve perfectly smooth surfaces without spending hours sanding by hand? Using an orbital sander can make your work faster, easier, and more precise.
But if you’re unsure how to handle this powerful tool, you might end up with uneven finishes or damage to your project. In this guide, you’ll learn simple, step-by-step tips to master your orbital sander and get professional-quality results every time.
Keep reading to discover the secrets that will transform your sanding experience and bring out the best in your surfaces.
Choosing The Right Orbital Sander
Using an orbital sander helps smooth surfaces quickly and evenly. Picking the right sander makes your work easier and gives better results.
This guide explains important points to consider before buying or using an orbital sander. Focus on the types, sandpaper grit, power, and speed settings.
Types Of Orbital Sanders
There are several types of orbital sanders. Each type fits different jobs and materials.
- Random Orbital Sanders:Move in random orbits to reduce swirl marks. Good for fine finishing.
- Finishing Sanders:Use a square or rectangular pad. Ideal for corners and edges.
- Detail Sanders:Small and light for tight spots and small projects.
Selecting Sandpaper Grit
Sandpaper grit affects how smooth your surface becomes. Lower grit means rougher paper for heavy sanding. Higher grit means finer paper for finishing.
| Grit Number | Use |
| 40-60 | Remove old paint or rough wood |
| 80-120 | General sanding and shaping |
| 150-220 | Final smoothing before finishing |
Power And Speed Settings
Power and speed affect how fast the sander works and the finish quality. Choose a sander with adjustable speed for better control.
Tips for power and speed:
- Use lower speed for delicate materials to avoid damage.
- Higher speed suits hard woods and quick sanding.
- Check the sander’s wattage or amp rating for power strength.
- Match speed and grit to get smooth, even surfaces.
Preparing The Surface
Before using an orbital sander, you must prepare the surface well. This helps to get smooth and even results.
Proper preparation saves time and prevents damage to the material you are working on.
Cleaning And Inspecting The Area
Start by cleaning the surface to remove dust, dirt, and grease. Use a cloth or brush to clear the area. Check for nails, screws, or staples that may damage the sander.
- Wipe the surface with a damp cloth
- Remove any loose debris with a brush
- Look closely for sharp objects or damage
- Fix or remove any nails or screws found
Securing The Workpiece
Keep the workpiece stable before sanding. Use clamps or a vise to hold it firmly. This stops the item from moving and helps you sand evenly.
- Use clamps suitable for the size of your workpiece
- Place soft padding between clamps and workpiece to avoid marks
- Check the stability before you start sanding
Marking Problem Spots
Mark rough or uneven areas on the surface. Use a pencil or chalk to highlight these spots. This guides you to focus sanding where it is needed most.
| Mark Type | Use |
| Pencil | Good for light marks on wood |
| Chalk | Works well on darker surfaces |
| Tape | Use to outline edges or boundaries |
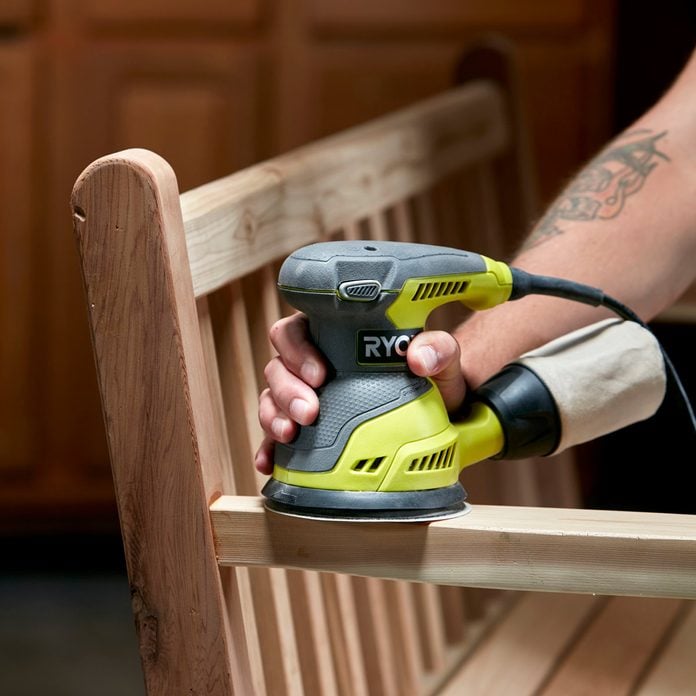
Safe Handling Techniques
Using an orbital sander safely protects you and improves your work quality. Good handling reduces accidents and damage to surfaces.
Learn how to hold, start, stop, and avoid errors with the sander for smooth and safe sanding.
Proper Grip And Posture
Hold the sander firmly with both hands. Keep your fingers away from moving parts. Stand with your feet shoulder-width apart for balance.
- Use a light, steady grip to guide the sander.
- Keep your body relaxed to avoid fatigue.
- Do not lean too hard on the sander to prevent gouges.
- Wear safety glasses and a dust mask to protect yourself.
Starting And Stopping The Sander
Always start the sander before it touches the surface. This avoids scratches and uneven sanding. When finished, lift the sander off the workpiece before turning it off.
- Plug in and hold the sander firmly.
- Press the power button to start the motor.
- Wait for the sander to reach full speed.
- Gently lower it onto the surface to sand.
- Lift the sander when done before switching it off.
Avoiding Common Mistakes
| Common Mistake | How to Avoid It |
|---|---|
| Pressing too hard | Use light pressure to let the sander do the work. |
| Not moving the sander | Keep the sander moving to avoid uneven spots. |
| Using worn sandpaper | Replace sandpaper often for best results. |
| Ignoring safety gear | Always wear eye and dust protection. |
Credit: www.familyhandyman.com
Sanding Methods For Smooth Results
Using an orbital sander correctly makes your surfaces smooth and even. It is important to use the right sanding methods for the best results.
Focus on how you move the sander and how much pressure you apply. These details help avoid uneven spots and scratches.
Using Circular Motions
Move the sander in small circular motions across the surface. This helps cover the area evenly and prevents deep marks.
Keep the motions steady and overlapping to avoid missing spots. Let the sander do the work without rushing.
Maintaining Consistent Pressure
Apply steady pressure while sanding. Pressing too hard can damage the surface or wear out the sandpaper quickly.
Hold the sander firmly but gently. Consistent pressure ensures smooth and uniform sanding across the whole area.
- Light pressure for soft materials
- Medium pressure for most wood surfaces
- Avoid heavy pressure to prevent gouges
Working With The Grain
Always sand in the direction of the wood grain. This reduces scratches and keeps the finish natural.
If you sand across the grain, the surface may look rough and uneven. Follow the grain lines for the smoothest results.
Finishing Touches
Using an orbital sander can make your surfaces smooth and even. Finishing touches help make the work look clean and professional.
These final steps improve the surface quality and prepare it for painting or staining.
Checking For Evenness
After sanding, look closely at the surface under good light. Check for rough spots, bumps, or uneven areas.
Run your hand over the surface to feel for any imperfections you might miss with your eyes.
Switching To Finer Grits
Start with coarse grit sandpaper to remove rough parts. Then, switch to finer grits to smooth the surface.
Use grits like 120, then 220 for a soft and even finish. This step reduces scratches and prepares the surface for painting.
- Begin with 80 or 100 grit for rough sanding
- Move to 120 grit for medium smoothing
- Finish with 220 grit for fine smoothing
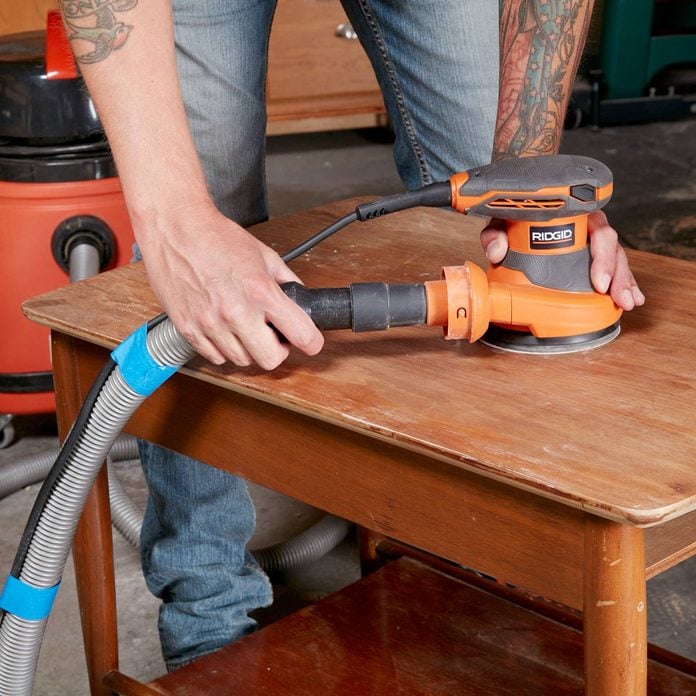
Cleaning After Sanding
Remove dust and debris after sanding. Dust can ruin paint or stain finishes.
Use a vacuum, tack cloth, or a damp cloth to clean the surface well before the next step.

Credit: 100things2do.ca
Maintaining Your Orbital Sander
Taking care of your orbital sander helps it last longer. Regular maintenance keeps it working smoothly.
Cleaning, replacing parts, and proper storage are key steps in maintenance. These tasks prevent damage.
Cleaning The Tool
Clean your orbital sander after each use. Dust and debris can build up and cause problems.
Use a brush or compressed air to remove dust from vents and moving parts. Wipe the outer surface with a dry cloth.
- Unplug the sander before cleaning
- Remove dust from vents and motor areas
- Clean the sanding pad surface
- Wipe the body with a dry cloth
Replacing Pads And Sandpaper
Replace worn sanding pads and sandpaper often. Old pads or paper reduce sanding quality.
Check the pad for cracks or tears. Remove the old sandpaper carefully and attach new sheets firmly.
- Inspect pads before each use
- Remove damaged or worn pads
- Attach new sandpaper evenly
- Use the correct grit for your project
Storage Tips
Store your orbital sander in a dry place. Avoid damp or dusty areas to protect it from damage.
Keep it in a case or cover it with a cloth. This prevents dust buildup and keeps parts clean.
- Unplug and clean before storing
- Keep in a dry, cool place
- Use a protective case or cover
- Store away from heavy objects
Credit: www.familyhandyman.com
Frequently Asked Questions
What Is An Orbital Sander Used For?
An orbital sander is used for smoothing surfaces and removing paint or varnish. It uses a sanding pad that moves in a circular motion. This motion ensures an even and smooth finish. It’s ideal for woodworking, furniture refinishing, and surface preparation.
How Do You Operate An Orbital Sander?
To operate an orbital sander, hold it firmly and turn it on. Gently move it across the surface in slow, overlapping strokes. Keep it flat and apply light pressure for best results. Always follow the grain of the wood for a smoother finish.
What Safety Precautions Should Be Taken?
Always wear safety goggles and a dust mask while using an orbital sander. Ensure the work area is well-ventilated. Secure the material you’re sanding to prevent movement. Keep fingers clear of the sanding pad and unplug the sander when changing the sandpaper.
Can Orbital Sanders Be Used On Metal?
Yes, orbital sanders can be used on metal surfaces. They are effective for removing rust, paint, or preparing the surface for painting. Use appropriate sandpaper grit for metal. Start with coarser grits and finish with finer ones for a smoother surface.
Conclusion
Using an orbital sander makes smoothing surfaces easier and faster. Always keep the sander moving to avoid marks. Choose the right sandpaper grit for the best results. Wear safety gear to protect your eyes and lungs. Practice on a scrap piece before starting your project.
With care and patience, your surfaces will look smooth and clean. This tool helps create a nice finish for wood, metal, or paint. Take your time and enjoy the process of sanding well.
