
Imagine transforming an old piece of furniture into a stunning centerpiece for your home. With the right tools, it’s easier than you think.
One tool that can make a big difference in your DIY projects is an orbital sander. It’s the secret weapon for achieving that professional-looking finish on your furniture. Are you curious about how it works and how you can use it to breathe new life into your furniture?
This guide is here to help. Whether you’re a seasoned DIY enthusiast or a beginner eager to start, understanding how to use an orbital sander can elevate your skills. You’ll discover tips and tricks that will make your sanding jobs easier and more effective. Don’t miss out on the chance to master this essential tool. Keep reading to unlock the potential of your projects and create furniture that you’ll be proud to show off.
Choosing The Right Orbital Sander
Using an orbital sander makes finishing furniture easier and smoother. Picking the right one helps you get good results and saves time.
This guide covers types of orbital sanders, key features to look for, and how to select the right sanding grit.
Types Of Orbital Sanders
There are mainly three types of orbital sanders. Each works best for different tasks and surfaces.
- Finishing Sander:Small and lightweight, good for fine sanding on flat surfaces.
- Random Orbital Sander:Moves in random orbits to reduce swirl marks. Works on curves and flat areas.
- Detail Sander:Has a pointed tip to reach tight corners and edges.
Key Features To Consider
| Feature | Why It Matters |
|---|---|
| Power | Higher power sands faster and handles tough materials. |
| Speed Settings | Variable speed helps control finish on different woods. |
| Dust Collection | Keeps the work area clean and improves visibility. |
| Ergonomics | Comfortable grip reduces fatigue during long use. |
| Pad Size | Smaller pads work on tight spots; larger pads cover more area fast. |
Selecting The Appropriate Grit
Choosing the right sandpaper grit affects how smooth your furniture will be. Start with coarse grit to remove rough spots. Then use finer grits to finish and polish the surface.
- Coarse grits (40-60) remove old finishes and rough wood.
- Medium grits (80-120) smooth the surface and remove scratches.
- Fine grits (150-220) prepare the wood for staining or painting.
- Extra fine grits (above 220) are for final polishing and very smooth finishes.
Credit: dengarden.com
Preparing Furniture For Sanding
Preparing furniture for sanding is important for a smooth finish. Good preparation helps the sander work better.
Start by cleaning and checking the furniture carefully. Remove any old finish before sanding.
Cleaning And Inspecting The Surface
Clean the furniture to remove dirt and dust. Use a soft cloth or brush for this job.
Look closely for scratches, dents, or loose parts. Fix any problems before sanding.
- Remove all dust and dirt
- Check for damage or loose joints
- Mark rough areas that need extra attention
Removing Old Finish
Remove old paint or varnish to help the new finish stick. Use a chemical stripper or sandpaper.
Work in small sections and wear gloves for safety. Scrape off softened finish carefully.
- Apply stripper evenly with a brush
- Wait the time suggested on the product label
- Scrape off old finish gently
- Clean residue with a damp cloth
Setting Up A Safe Workspace
Choose a well-ventilated area to work in. Good airflow helps remove dust and fumes.
Clear the space of clutter to avoid accidents. Use protective gear like masks and goggles.
- Work outside or near an open window
- Wear a dust mask and safety goggles
- Keep tools and materials organized
- Use drop cloths to protect floors
Sanding Techniques For Smooth Finish
Using an orbital sander can help make furniture smooth and ready for finishing. Sanding well removes rough spots and old paint. It also prepares the wood for stain or paint.
Good sanding takes care and the right technique. This guide explains how to handle the sander and work with the wood.
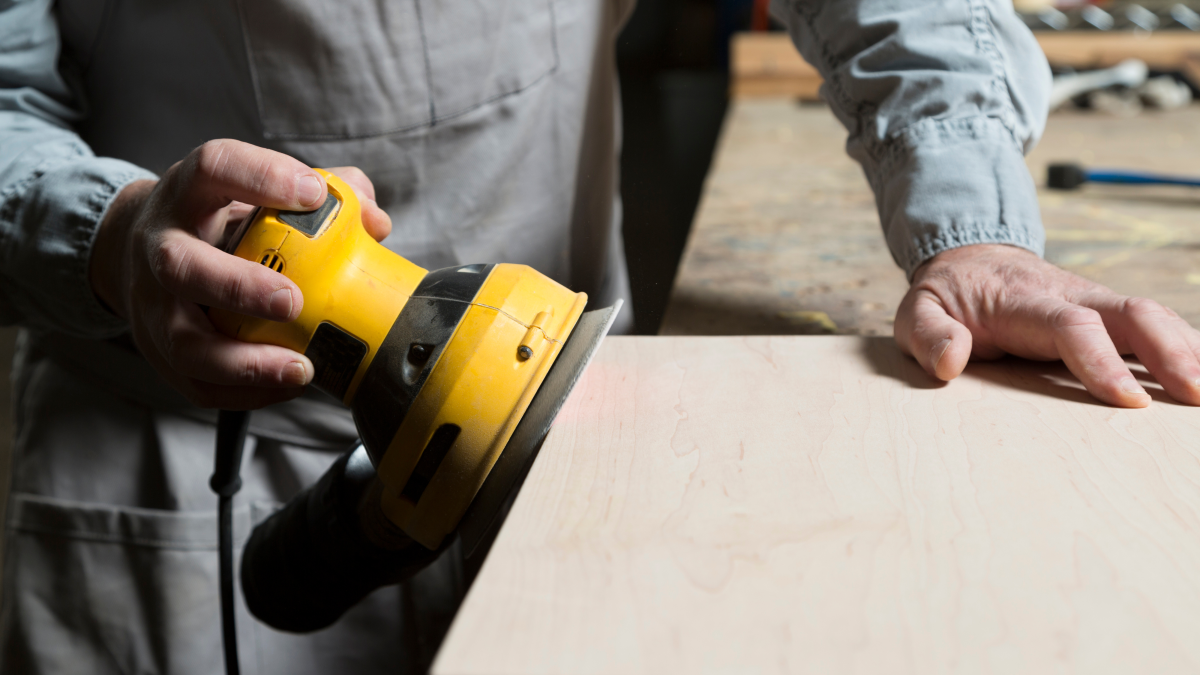
Proper Handling And Movement
Hold the sander firmly but not too tight. Keep it flat on the wood surface. Move it in small circles or slow, even motions.
Do not press the sander down hard. Let the machine do the work. Move the sander steadily to avoid uneven spots.
- Hold the sander with both hands
- Keep the base flat on the wood
- Move in slow circular or back-and-forth motions
- Avoid staying too long in one spot
Maintaining Even Pressure
Apply light and even pressure while sanding. Pressing too hard can cause deep scratches. It also wears the sandpaper too fast.
Keep your hands relaxed and let the sander glide. Even pressure helps get a smooth and level surface.
- Use light pressure, not force
- Keep pressure consistent across the surface
- Check the wood often for smoothness
- Replace sandpaper when worn out
Working With The Grain
Sanding along the wood grain prevents scratches. Sanding against the grain can leave marks that show after finishing.
Follow the wood fibers carefully. This helps create a natural, smooth look for your furniture.
- Identify the direction of the wood grain
- Move the sander along the grain lines
- Avoid circular sanding patterns on flat surfaces
- Use finer sandpaper for the final pass
Dealing With Common Challenges
Using an orbital sander for furniture finishing is helpful but can bring some challenges. These problems can affect the final look of your furniture.
Knowing how to handle these issues will make your sanding smoother and your furniture look better.
Avoiding Swirl Marks
Swirl marks appear when the sander leaves circular scratches on the wood surface. They can ruin a smooth finish and make the wood look rough.
To avoid swirl marks, keep the sander moving at all times. Do not press too hard on the sander, and use the correct grit sandpaper for your project.
- Use a finer grit sandpaper for finishing passes
- Keep the sander flat and moving in steady motions
- Do not stop the sander while it is on the wood
- Check the sandpaper regularly and replace it when worn
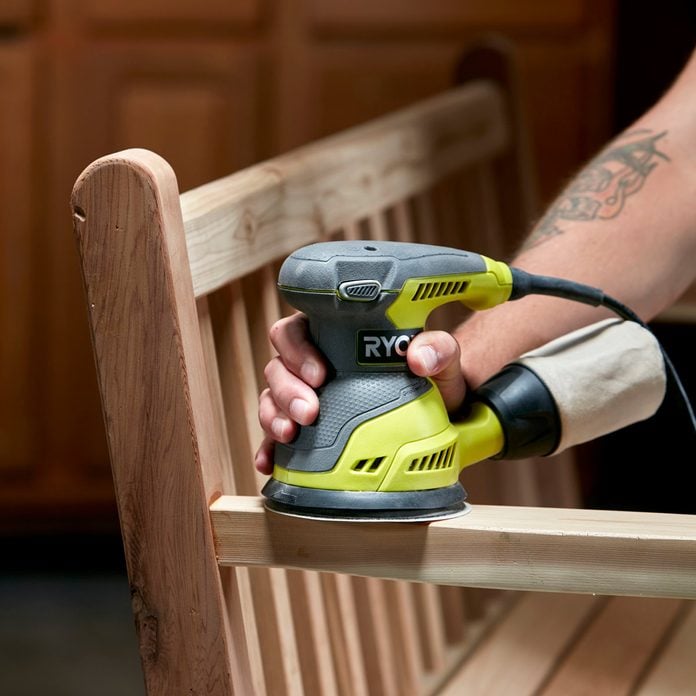
Handling Edges And Corners
Edges and corners are tricky because the sander’s round shape can remove too much material or cause damage. Careful sanding prevents uneven spots.
Use light pressure and move the sander quickly over edges. For tight corners, hand sanding with sandpaper is better to keep control.
- Sand edges lightly to avoid rounding them too much
- Use a sanding block or hand sand small corners
- Check edges often to keep their shape
- Use a finer grit to smooth edges after rough sanding
Fixing Sanding Mistakes
Sanding mistakes like deep scratches or uneven spots can happen. Fixing them quickly keeps your project on track.
To fix mistakes, sand the area again with a coarser grit first. Then use finer grit sandpaper to blend the surface smoothly.
- Identify the mistake area before sanding
- Use coarser grit to remove deep scratches
- Follow with finer grit to smooth the surface
- Wipe dust away to check your work often
Post-sanding Steps
After using an orbital sander on your furniture, some important tasks remain. These steps help prepare the surface for the next finish.
Following these steps ensures a smooth, clean surface that accepts paint or stain well.
Cleaning Dust Residue
Sanding leaves fine dust on the furniture. This dust can affect how paint or stain sticks to the wood.
Use a vacuum or a soft brush to remove most dust. Then, wipe the surface with a tack cloth or damp cloth.
- Vacuum the surface gently to pick up loose dust
- Use a tack cloth to remove fine particles
- Wipe with a damp cloth and let dry before finishing
Inspecting The Surface
Look closely at the wood after cleaning. Check for scratches, dents, or uneven areas.
Light sanding may be needed on rough spots. Make sure the surface feels smooth to touch.
- Run your hand over the surface to feel rough patches
- Look for leftover sanding marks or deep scratches
- Sand these areas lightly with fine-grit sandpaper
Preparing For Staining Or Painting
Before applying stain or paint, ensure the wood is dry and clean. Moisture can cause finish problems.
Use a primer if you plan to paint. For staining, test on a small spot to check color and absorption.
- Make sure the surface is completely dry
- Apply primer for a smooth paint finish
- Test stain on a hidden area before full application
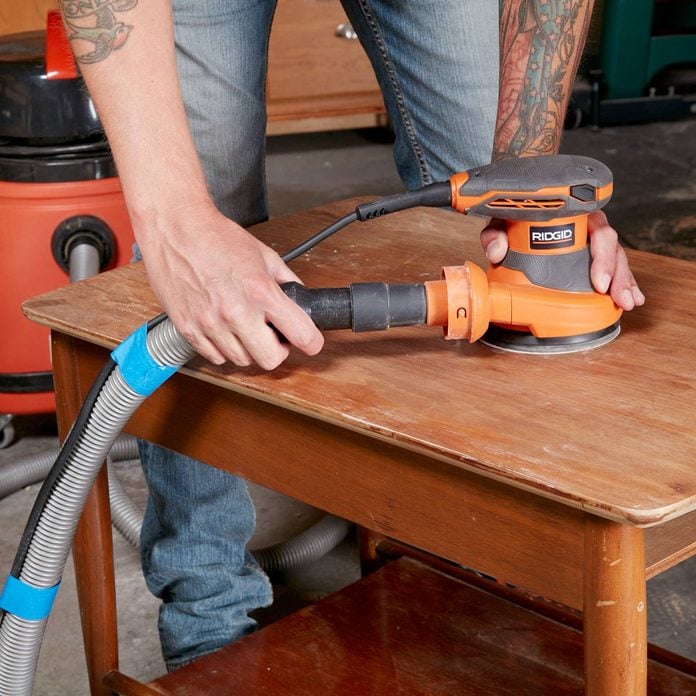
Credit: www.familyhandyman.com
Safety Tips For Orbital Sanding
Using an orbital sander can make furniture finishing easier and smoother. Safety is key to avoid injuries and accidents while sanding.
Follow simple safety tips to protect yourself and work efficiently with your orbital sander.
Using Protective Gear
Wear the right protective gear every time you use an orbital sander. This helps protect your eyes, lungs, and skin.
- Wear safety goggles to protect your eyes from dust and debris.
- Use a dust mask or respirator to avoid breathing in fine dust.
- Wear ear protection to reduce noise from the sander.
- Use gloves to protect your hands from rough surfaces and vibration.
- Wear long sleeves and pants to shield your skin from dust and splinters.
Ensuring Proper Ventilation
Good airflow helps clear dust and fumes from the work area. This keeps the air safe to breathe.
Open windows and doors or use fans to create a steady breeze. Avoid sanding in small, closed spaces without ventilation.
Handling Electrical Equipment Safely
Check your sander and cords for damage before use. Damaged parts can cause electric shocks or fires.
| Safety Tip | What to Do |
| Inspect Power Cord | Look for cuts, frays, or exposed wires |
| Use Grounded Outlets | Plug into outlets with proper grounding |
| Keep Cords Dry | Avoid working in wet or damp areas |
| Unplug When Not in Use | Disconnect before changing pads or cleaning |
| Use a GFCI Outlet | Protect against electric shock in damp locations |
Credit: www.familyhandyman.com
Frequently Asked Questions
What Is The Best Grit For Orbital Sander On Furniture?
Start with 80-120 grit sandpaper for rough surfaces. Use 180-220 grit for finishing. This ensures smooth, even results without damaging wood.
How Do I Prevent Swirl Marks With An Orbital Sander?
Use fine grit sandpaper and keep the sander moving evenly. Avoid pressing too hard. Proper technique reduces swirl marks and enhances finish quality.
Can An Orbital Sander Be Used On All Furniture Types?
Yes, orbital sanders work well on wood, metal, and painted surfaces. Adjust grit and pressure based on material to avoid damage and achieve smooth finishes.
How Often Should I Change Orbital Sander Sandpaper?
Change sandpaper when it clogs or loses abrasiveness. Frequent replacement keeps sanding efficient and protects your furniture from uneven sanding.
Conclusion
Using an orbital sander makes furniture finishing easier and faster. It helps smooth surfaces and remove old paint or stains. Choose the right sandpaper grit for each step. Move the sander evenly to avoid marks. Always wear safety gear to protect your eyes and lungs.
Practice on scrap wood before working on your project. With patience and care, your furniture will look clean and polished. Keep your sander clean and store it properly after use. Enjoy the satisfaction of well-finished furniture every time.
