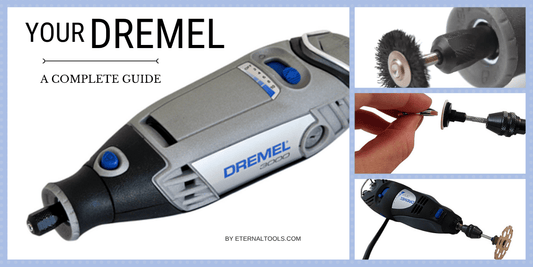
Is your rotary tool acting up right when you need it most? Don’t let a small problem turn into a big frustration.
You can save time and money by fixing it yourself. This guide will walk you through simple, clear steps to repair your rotary tool with confidence. Whether it’s a loose part, a worn-out bit, or a motor that’s lost power, you’ll find easy solutions that anyone can follow.
Ready to get your tool working like new again? Let’s dive in.
Common Rotary Tool Issues
Rotary tools are handy for many tasks. They can cut, grind, and polish materials.
Sometimes these tools stop working well. Knowing common problems helps fix them fast.
Power Problems
Rotary tools may fail to turn on or lose power during use. This problem stops work suddenly.
Power issues often come from loose wires or a bad switch. The power cord might also be damaged.
- Check if the tool is plugged in correctly
- Inspect the power cord for cuts or frays
- Test the switch for proper function
- Look for loose internal connections
Overheating Causes
Rotary tools can get very hot if used too long. Overheating may cause the tool to stop working.
Clogged vents or worn brushes can cause heat build-up. Lack of breaks during use also raises temperature.
- Clean air vents regularly
- Replace worn motor brushes
- Allow the tool to rest during long jobs
- Use the right speed for the task
Unusual Noises
Strange sounds like grinding or rattling can mean a problem inside the tool. These noises show parts may be damaged.
Loose bearings, broken gears, or debris inside the tool cause noise. Ignoring sounds can cause bigger damage.
- Check for loose parts inside the tool
- Clean out dust and debris
- Lubricate moving parts if needed
- Replace damaged gears or bearings
Speed Fluctuations
Rotary tools should run at a steady speed. Fluctuating speed makes work uneven and hard to control.
Speed problems can come from worn brushes or a bad speed control dial. Loose wiring can also cause this issue.
- Inspect motor brushes for wear
- Test the speed control switch
- Check wiring connections
- Clean and maintain the tool regularly
Essential Repair Tools
Fixing rotary tools needs the right set of tools and parts. Using proper gear helps you repair safely and quickly.
This guide covers the basic tool kit, replacement parts, and safety gear needed for rotary tool repairs.
Basic Tool Kit
A solid tool kit makes repairs easier and more precise. These tools help you open, fix, and test your rotary tool parts.
- Screwdrivers (flathead and Phillips) for screws
- Pliers to hold small parts firmly
- Allen wrenches for hex screws
- Wire cutters to trim wires
- Multimeter for electrical testing
- Small hammer for gentle tapping
- Cleaning brushes to remove dust
Replacement Parts
Having spare parts ready speeds up repairs. Knowing which parts wear out often helps you stock the right items.
| Part | Purpose | Signs to Replace |
|---|---|---|
| Carbon Brushes | Conduct electricity to the motor | Sparking, reduced power, noise |
| Bearings | Allow smooth rotation | Grinding sound, wobbling |
| Collets | Hold drill bits or accessories | Loose grip or slipping bits |
| Power Cord | Supplies electricity to the tool | Frayed wires or no power |
Safety Gear
Safety gear protects you from injuries during repairs. Always wear the right equipment to stay safe.
- Safety goggles to protect eyes from dust and debris
- Gloves to guard hands against cuts and burns
- Dust mask to avoid inhaling fine particles
- Ear protection if working with loud tools
Diagnosing Problems
Rotary tools can stop working for many reasons. Finding the exact problem helps you fix them fast.
This guide covers how to check your rotary tool carefully. You will learn how to spot issues step by step.
Visual Inspection Tips
Look at the tool carefully for signs of damage. Check if parts are broken or worn out.
Look for loose screws, cracked plastic, or burnt marks. These signs show where problems may be.
- Check the power cord for cuts or frays
- Look at the tool’s body for cracks or dents
- Inspect the switch for damage or dirt
- See if the attachments spin freely
Testing Electrical Components
Use a multimeter to check the tool’s electrical parts. This helps find broken wires or bad switches.
Test the power cord, switch, and motor windings. Make sure electricity flows properly through each part.
- Set the multimeter to continuity mode
- Test the power cord for breaks
- Check the switch by toggling it on and off
- Measure motor windings for resistance
- Look for any unusual readings or open circuits
Checking Mechanical Parts
Mechanical parts like bearings and shafts can wear out or get stuck. Check these parts for smooth movement.
Remove covers if needed to see inside. Look for dirt, broken parts, or signs of wear that block movement.
- Spin the shaft by hand to feel for roughness
- Check bearings for noise or grinding
- Look for loose or missing screws
- Clean any dust or debris inside the tool
Fixing Power Issues
Rotary tools often stop working due to power problems. Fixing these issues can save money and time. This guide helps you check common parts that cause power failures.
By inspecting power cords, brushes, and switches, you can find faults and repair them. Follow the simple steps below for each part.
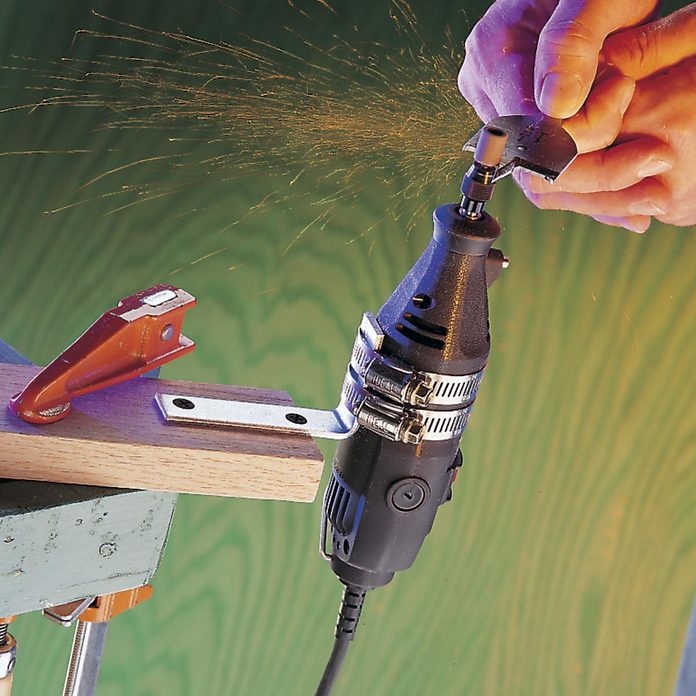
Repairing Power Cords
Power cords can break or wear out, causing your tool to lose power. Check the cord for cuts, frays, or loose connections.
- Unplug the tool before inspection.
- Look for visible damage along the entire cord.
- Use a multimeter to test for continuity.
- Replace the cord if you find breaks or no continuity.
Replacing Brushes
Brushes wear down with use and cause poor contact. Replacing worn brushes restores power and performance.
| Symptom | Cause | Solution |
| Tool cuts out often | Worn brushes | Replace brushes |
| Sparks inside tool | Damaged brushes | Replace brushes |
| Low power output | Brushes too short | Replace brushes |
Inspecting Switches
Faulty switches can stop the tool from turning on. Test the switch with a multimeter to check if it works.
To test a switch:
- Unplug the tool.
- Remove the switch from the tool.
- Use a multimeter set to continuity mode.
- Press the switch and see if the meter shows a connection.
- If no connection, replace the switch.
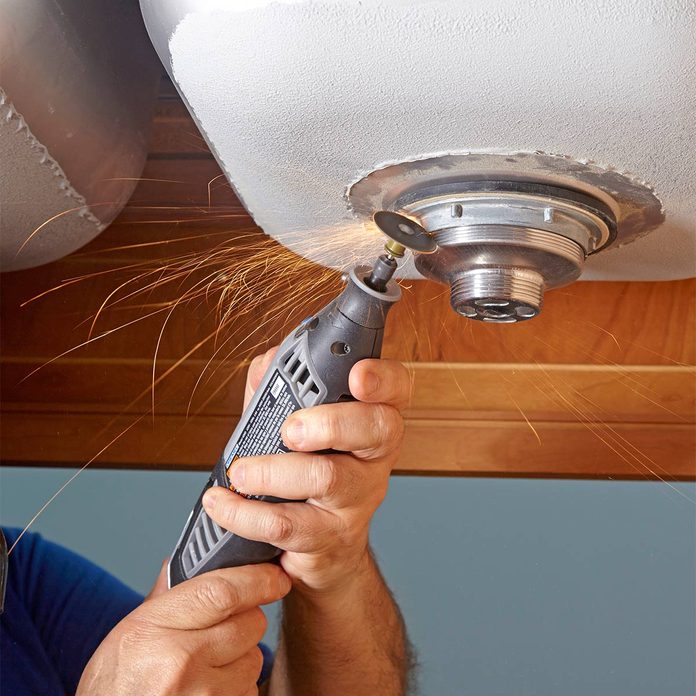
Resolving Overheating
Overheating is a common issue in rotary tools. It can cause damage and reduce the tool’s lifespan.
Fixing overheating helps your tool run smoothly and safely. Below are key ways to resolve this problem.
Cleaning Air Vents
Air vents allow heat to escape from the tool. Dust and debris can block these vents and cause overheating.
- Turn off and unplug the tool before cleaning.
- Use a small brush or compressed air to clear the vents.
- Make sure vents are fully dry and free of dust.
- Clean vents regularly to prevent buildup.
Lubricating Bearings
Bearings help parts move smoothly. Lack of lubrication can cause friction and heat.
| Type of Bearing | Recommended Lubricant | Lubrication Frequency |
| Ball Bearings | Light machine oil | Every 3 months |
| Needle Bearings | Grease | Every 6 months |
| Bushing Bearings | Graphite powder | Every 4 months |
Use the right lubricant and apply it carefully. Avoid over-lubricating as it may attract dust.
Improving Ventilation
Good airflow helps cool the rotary tool during use. Poor ventilation raises the temperature quickly.
Try these tips to improve ventilation:
- Use the tool in a well-ventilated area.
- Avoid covering the tool with cloth or other materials.
- Take breaks during long use to let the tool cool down.
- Check that internal fan blades are clean and working properly.
Credit: www.familyhandyman.com
Addressing Noise And Vibration
Rotary tools can make noise and vibrate during use. This can affect your work and comfort. Fixing these issues helps your tool work better.
Noise and vibration often come from loose parts, worn bearings, or unbalanced attachments. Checking these areas can reduce problems.
Tightening Loose Parts
Loose parts cause shaking and strange sounds. Check screws, nuts, and bolts on your rotary tool. Tighten any that feel loose.
Use the correct screwdriver or wrench. Do not overtighten to avoid damage. Regular checks keep your tool steady and quiet.
- Turn off and unplug the tool first
- Inspect all visible fasteners
- Use proper tools to tighten parts
- Check attachments like collets and guards
Replacing Worn Bearings
Bearings help the tool spin smoothly. Worn bearings cause noise and vibration. Replace them to restore smooth operation.
Remove the old bearings carefully. Buy exact replacements from trusted sources. Grease new bearings before installing them to reduce friction.
- Unplug the tool before starting
- Remove housing to access bearings
- Use bearing pullers if needed
- Clean the area before installing new bearings
- Test tool after replacement
Balancing Attachments
Unbalanced attachments cause strong vibration. Check sanding discs, cutting wheels, and grinding stones for balance.
Replace damaged or uneven attachments. You can also add small weights to balance some tools. Proper balance reduces wear and noise.
- Inspect attachments for cracks or chips
- Spin attachments by hand to feel wobble
- Use balancing kits if available
- Store attachments properly to avoid damage
Maintaining Speed Control
Rotary tools work best when their speed is right for the task. Keeping speed control accurate helps you work safely and efficiently.
Speed control needs regular checks and repairs. This guide covers how to calibrate, repair, and replace parts to keep your tool steady.
Calibrating Speed Settings
Calibration means setting the speed control to match the dial or digital readout. This helps the tool run at the speed you choose.
- Turn the tool on and set it to a low speed.
- Use a tachometer to check the actual speed.
- Adjust the dial or control until the speed matches the setting.
- Repeat for medium and high speeds.
- Write down the settings for future checks.
Repairing Speed Controllers
Speed controllers can fail due to worn parts or loose wiring. Fixing them can bring your tool back to life.
| Common Issue | Fix |
| Loose connections | Secure wires and connectors |
| Dirty contacts | Clean with electrical contact cleaner |
| Damaged potentiometer | Replace the potentiometer |
| Burned circuit board | Replace or repair the board |
Replacing Faulty Components
Some parts wear out and need replacement. Using the right parts keeps your speed control working well.
Here are common parts to replace:
- Speed control knob
- Potentiometer
- Wiring harness
- Speed control circuit board
Preventive Care Tips
Taking care of your rotary tools helps them last longer and work better. Simple steps can stop problems before they start.
Follow these tips to keep your tools in good shape and avoid costly repairs.
Regular Cleaning Schedule
Cleaning your rotary tool after each use removes dust and debris. This prevents buildup that can harm the motor and moving parts.
- Use a soft brush to clean vents and crevices.
- Wipe the exterior with a dry cloth.
- Remove and clean attachments separately.
- Blow compressed air into hard-to-reach areas.
- Check the tool’s manual for cleaning instructions.
Proper Storage Practices
Store rotary tools in a dry, cool place. This protects them from moisture and dust, which can cause rust and damage.
| Storage Tip | Why It Matters |
| Keep tool in case or box | Prevents dust and physical damage |
| Avoid damp areas | Stops rust and corrosion |
| Organize accessories separately | Prevents loss and damage |
| Store away from direct sunlight | Protects plastic parts from fading |
Routine Inspections
Check your rotary tool regularly to spot problems early. This helps avoid bigger repairs and unsafe use.
- Inspect power cords for cuts or damage.
- Check attachments for wear and tightness.
- Look for unusual noise or vibration when running.
- Test switches and controls for proper function.
- Lubricate moving parts if the manual suggests it.
When To Seek Professional Help
Rotary tools are useful for many projects. Sometimes, fixing them yourself is easy. Other times, the repair is too hard or risky.
Knowing when to ask a professional can save time and keep you safe. This guide explains key moments to get expert help.
Complex Electrical Repairs
Rotary tools have small motors and wires inside. Electrical problems can be hard to find and fix. Incorrect repairs may cause shocks or fires.
Professional technicians have the tools and skills to handle electrical issues safely. They can test parts and replace wires properly.
Severe Mechanical Damage
When your rotary tool has broken gears, cracked parts, or bent shafts, the damage may be severe. Fixing these problems needs special tools and knowledge.
Trying to repair severe mechanical damage without skill can worsen the problem. A professional can assess and fix the tool correctly.
Warranty And Service Options
Check your rotary tool’s warranty before fixing it yourself. Some repairs done by you may void the warranty. Professionals can keep your warranty valid.
Authorized service centers offer repairs covered by warranty. They use original parts and follow manufacturer rules.
- Verify warranty terms before repair
- Use authorized service centers when possible
- Keep receipts and service records

Credit: www.amazon.com
Credit: www.familyhandyman.com
Frequently Asked Questions
How Do I Fix A Rotary Tool That Won’t Start?
If your rotary tool won’t start, check the power source and connections. Ensure that the power cord is intact and securely plugged in. Inspect the switch and motor for any signs of damage or wear. If issues persist, consult the manufacturer’s manual or consider professional repair services.
What Causes Rotary Tool Overheating?
Overheating often results from prolonged use or blocked ventilation. Ensure that the tool’s vents are clear from dust and debris. Avoid using the tool continuously for long periods. Let it cool down between uses to prevent overheating. If overheating persists, it may indicate an internal issue needing professional attention.
Why Is My Rotary Tool Vibrating Excessively?
Excessive vibration can be caused by worn-out bearings or misaligned components. Check for loose attachments and tighten them securely. Inspect the tool’s bearings and replace them if worn out. If the vibration continues, consider consulting a professional for further inspection and repair.
How Do I Maintain My Rotary Tool?
Regular maintenance ensures longevity. Clean the tool after each use, removing dust and debris from vents and attachments. Lubricate moving parts as recommended in the user manual. Store the tool in a dry, cool place. Regularly inspect for wear and replace any damaged components promptly.
Conclusion
Repairing rotary tools saves money and extends their life. Small fixes can bring big improvements. Keep your tool clean and check parts often. Use the right steps to avoid damage. Practice safe handling during every repair. This guide helps you fix common problems fast.
Stay patient and work carefully for best results. Your rotary tool will serve you well if cared for properly.