Are you tired of your sanding projects taking longer than they should? Do you find yourself frustrated with sanding belts that seem to wear out too quickly?
You’re not alone. Many DIY enthusiasts and professionals alike face the same challenges. Replacing sanding belts might seem like a daunting task, but it doesn’t have to be. Imagine the satisfaction of a perfectly sanded surface, achieved with ease and efficiency.
In this guide, you’ll discover simple, step-by-step instructions to change your sanding belts effortlessly. Say goodbye to wasted time and hello to smoother, more professional finishes. Ready to transform your sanding experience? Let’s dive in and unlock the secrets to mastering this essential skill.
Choosing The Right Sanding Belt
Replacing sanding belts is key to good work. Picking the right belt helps you finish your project well.
There are many types of belts. Knowing which one to use saves time and effort.
Types Of Sanding Belts
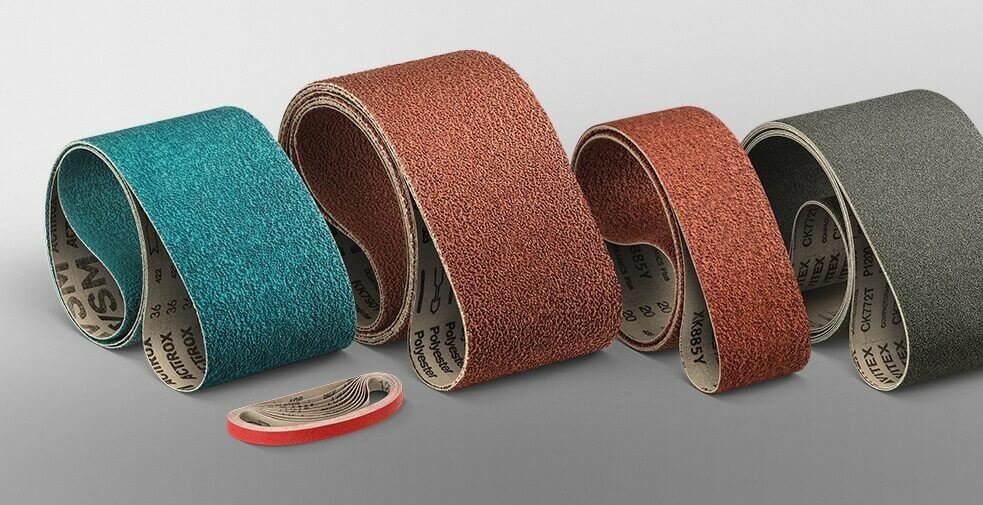
Sanding belts come in different materials. Each type works best on certain tasks.
- Aluminum Oxide: Good for wood and metal
- Garnet: Best for fine wood sanding
- Ceramic: Lasts longer on hard metals
- Zirconia Alumina: Great for fast material removal
Grain Sizes And Their Uses
Sanding belts have different grain sizes. The size affects how smooth or rough the surface will be.
- Coarse (40-60 grit): Removes a lot fast, good for shaping
- Medium (80-120 grit): Smooths surfaces after coarse sanding
- Fine (150-220 grit): Prepares surface for finishing
- Very Fine (240+ grit): Used for final polishing
Material Compatibility
Choose a sanding belt that matches the material you work on. This helps avoid damage to both belt and workpiece.
- Wood: Use aluminum oxide or garnet belts
- Metal: Ceramic or zirconia belts work best
- Plastic: Fine grits prevent melting or scratches
- Painted surfaces: Use fine grits carefully to avoid damage

Credit: 100things2do.ca
Tools Needed For Replacement
Replacing sanding belts is a simple task if you have the right tools. Using proper tools helps you work faster and safer.
This guide covers the basic tools needed to change sanding belts. Knowing these tools prepares you for the job.
Essential Tools
You need a few basic tools to replace sanding belts correctly. These tools help you remove old belts and install new ones.
- Allen wrench or hex key for loosening screws
- Screwdriver for adjusting tension or covers
- Pliers to hold or pull parts if needed
- New sanding belt of the correct size
- Cleaning brush to remove dust and debris
Having these tools ready makes the replacement smooth and quick.
Safety Gear
Safety gear protects you during the belt replacement. It reduces the risk of injury from sharp edges and dust.
- Safety glasses to protect your eyes from dust
- Work gloves to protect your hands from cuts
- Dust mask to avoid breathing fine particles
- Ear protection if working in noisy areas
Always wear safety gear before starting the replacement process.
Preparing The Sander
Replacing sanding belts is safer when you prepare the sander properly. This guide covers the first important steps.
Make sure the sander is ready before you start removing the old belt. Safety is key.
Power Off And Unplug
Always turn off the sander before handling it. Unplug it from the power source to avoid accidents.
- Switch off the sander using the power button.
- Unplug the power cord from the wall socket.
- Wait a few seconds to ensure the sander fully stops.
Removing The Old Belt
Take off the old sanding belt carefully to avoid damage or injury. Follow these steps for a smooth removal.
| Action | Details |
|---|---|
| Locate the belt release lever | This lever loosens the belt tension. |
| Press or pull the lever | Release the belt tension to free the belt. |
| Slide the belt off | Remove the belt from the rollers gently. |
| Inspect the rollers | Check rollers for wear or debris before new belt. |

Credit: www.familyhandyman.com
Installing The New Belt
Replacing sanding belts is key to keeping your sander working well. Installing the new belt correctly helps avoid problems.
Make sure you follow the right steps to fit the belt and adjust it properly. This keeps the belt tight and running smoothly.
Aligning The Belt Correctly
Place the new sanding belt on the rollers. Check that the belt is centered on both rollers before you start tightening.
A belt that is off-center can slip or wear unevenly. Make small adjustments until the belt runs straight and smooth.
- Ensure the belt edges line up with the rollers
- Move the belt side to side to find the center
- Use the tracking knob to keep the belt aligned
Tension Adjustment Tips
Proper tension keeps the belt tight but not too tight. A loose belt can slip; a tight belt can damage the sander.
Adjust the tension slowly. Test the belt by pressing lightly on it. It should feel firm but stretch a little.
- Turn the tension lever or knob in small steps
- Check belt tension by pressing the center gently
- Stop tightening if the belt feels very hard to press
- Make sure the belt stays aligned after tensioning
Testing And Final Adjustments
After replacing sanding belts, test the sander to ensure it runs smoothly. Check for belt alignment and tension before use.
Make final adjustments to the sander settings for safe and effective operation.
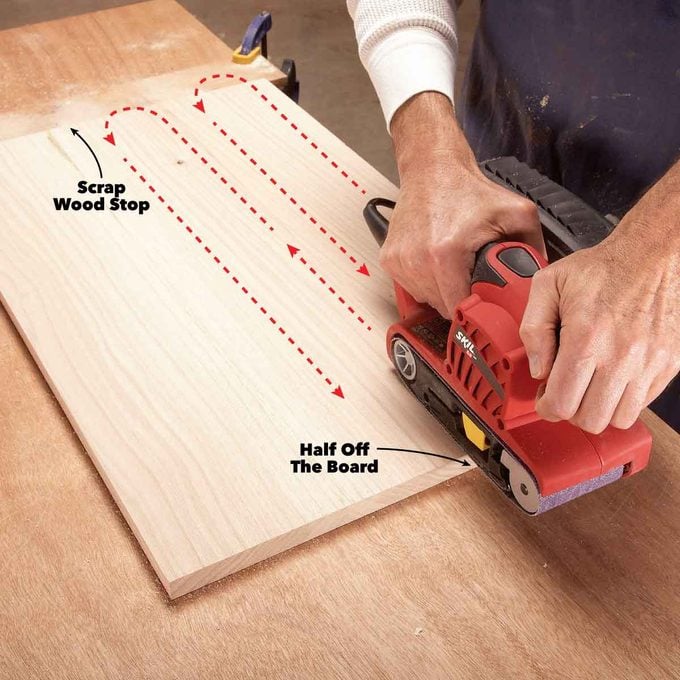
Running The Sander Safely
Start the sander at a low speed to confirm the belt moves evenly. Keep hands clear of the belt while it is running.
- Wear safety goggles and a dust mask
- Secure the workpiece firmly before sanding
- Keep the sander on a flat surface during operation
- Do not force the sander; let the belt do the work
Troubleshooting Common Issues
If the belt slips or wanders off the rollers, check the tension and tracking adjustments. Make sure the belt is installed correctly.
| Issue | Possible Cause | Solution |
| Belt slips | Loose tension | Tighten the tension knob |
| Belt wanders | Improper tracking | Adjust the tracking knob |
| Excessive vibration | Worn rollers or motor | Inspect and replace parts if needed |
| Burn marks on wood | Too much pressure | Reduce sanding pressure |
Maintaining Your Sanding Belts
Keeping your sanding belts in good shape helps them last longer. Proper care also improves sanding results.
Regular maintenance stops damage and saves you money. Follow simple steps to clean and store your belts well.
Cleaning Techniques
Clean sanding belts after use to remove dust and debris. This keeps the belt surface effective for sanding.
Use a sanding belt cleaner or a rubber cleaning block. Lightly rub the belt to lift stuck particles.
- Remove loose dust with compressed air or a soft brush
- Use a rubber cleaning block to clear clogged grit
- Avoid water or harsh chemicals that damage the belt
- Clean belts after every use for best results
Storage Suggestions
Store sanding belts in a cool, dry place away from sunlight. Heat and moisture can weaken the belt adhesive.
Keep belts flat or hung on a peg to avoid creases or damage. Do not fold or bend belts sharply.
- Store belts in a sealed container or plastic bag
- Avoid places with high humidity or temperature changes
- Keep belts away from oils, solvents, or chemicals
- Organize belts by grit size for easy selection
Credit: www.familyhandyman.com
Frequently Asked Questions
How Do I Replace A Sanding Belt Safely?
First, unplug the sander to avoid accidents. Release the tension lever to remove the old belt. Slide on the new belt aligned with the rollers. Re-engage the tension and check the belt’s tracking before use.
When Should I Change My Sanding Belt?
Change the sanding belt when it becomes worn, torn, or clogged. A worn belt reduces sanding efficiency and can damage your workpiece. Regular replacement ensures smooth, consistent sanding results.
What Size Sanding Belt Do I Need?
Check your sander’s manual or label for the correct belt size. Using the right size ensures proper fit and optimal performance. Belts come in various lengths and widths, so measure carefully.
How Do I Track A Sanding Belt Correctly?
Turn on the sander and observe the belt’s position. Use the tracking knob to center the belt on the rollers. Proper tracking prevents slipping and uneven sanding.
Conclusion
Replacing sanding belts is simple with the right steps. Always check the belt size before starting. Keep your sander clean and ready to use. Changing belts often keeps your work smooth and fast. Practice helps you get better and quicker.
Remember safety first—wear gloves and eye protection. Now, you can handle sanding belt changes with ease. This skill saves time and improves your projects. Try it yourself and see the difference.