Have you ever noticed your power screwdriver not performing as efficiently as it once did? Over time, dirt, dust, and debris can accumulate, causing your tool to underperform or even break down.
But there’s good news: with a little care and maintenance, you can keep your power screwdriver in peak condition. You’ll discover easy-to-follow steps to clean your power screwdriver, ensuring it lasts longer and works better. Plus, you’ll save money by avoiding unnecessary repairs or replacements.
Ready to unlock the full potential of your tool? Let’s dive into the essential cleaning techniques every screwdriver owner should know!
Tools And Materials Needed
Cleaning your power screwdriver keeps it working well and lasts longer. You need the right tools and materials to clean it safely.
This guide covers the essential cleaning supplies and safety gear you should have before you start.
Essential Cleaning Supplies
Use basic cleaning supplies to remove dust, dirt, and grease from your power screwdriver. These supplies help keep the tool in good shape.
- Soft cloths or microfiber towels for wiping
- Small brush or old toothbrush for tight spots
- Compressed air can to blow out dust
- Mild detergent or soap for cleaning surfaces
- Isopropyl alcohol for disinfecting and removing grease
- Lubricant oil to keep moving parts smooth
Safety Gear
Wear safety gear to protect yourself while cleaning your power screwdriver. This prevents injury and keeps you safe.
- Safety goggles to protect your eyes from dust and debris
- Gloves to keep your hands clean and safe from chemicals
- Mask to avoid inhaling dust or fumes

Credit: www.reddit.com
Preparing The Screwdriver
Cleaning a power screwdriver starts with proper preparation. This step helps protect the tool and makes cleaning easier.
Focus first on unplugging the device and removing the battery. Then, carefully disassemble key parts for thorough cleaning.
Unplugging And Removing Battery
Always unplug the screwdriver from any power source before cleaning. If it uses a battery, remove the battery pack to avoid accidents.
- Turn off the screwdriver if it has a switch.
- Unplug the power cord from the wall socket.
- Locate the battery release button or latch.
- Press the release and gently pull out the battery pack.
- Store the battery in a safe, dry place.
Disassembling Key Parts
Remove parts like the bit, chuck, and guard to clean them separately. This prevents damage and cleans hard-to-reach areas.
| Part | How to Remove |
|---|---|
| Bit | Pull or unscrew the bit from the chuck. |
| Chuck | Loosen the chuck by turning it counterclockwise. Some models may require a tool. |
| Guard | Unscrew or unclip the guard, if your model has one. |
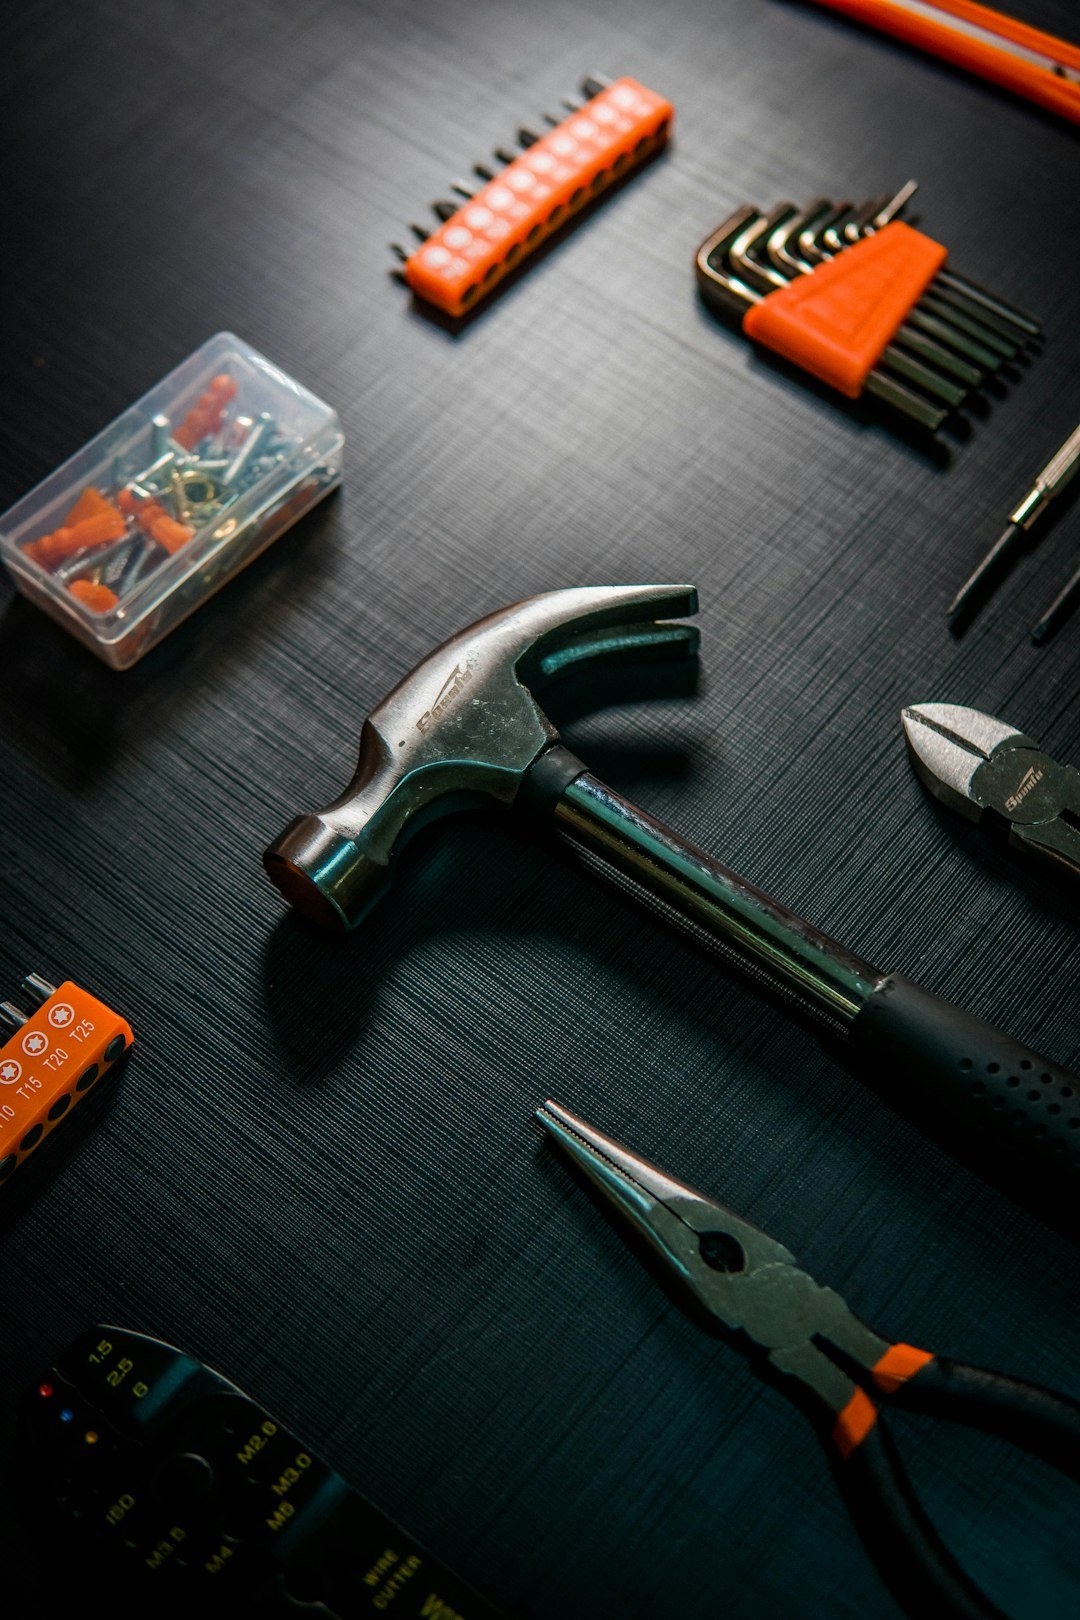
Cleaning The Exterior
Keeping your power screwdriver clean helps it work better and last longer. Dirt and dust can cause problems if left on the tool.
Focus on the outside of the screwdriver. Cleaning the exterior is simple and keeps your tool safe from damage.
Wiping Down The Body
Use a soft cloth to wipe the outside of the screwdriver. This removes dirt and sticky spots that build up during use.
Damp the cloth slightly with water or mild soap if needed. Avoid soaking the tool or using harsh chemicals that can harm the plastic and metal parts.
Removing Dust And Debris
Dust and small debris can get into crevices and vents. Use a small brush or compressed air to clean these hard-to-reach areas.
Be gentle to avoid pushing dirt further inside. Regularly cleaning vents keeps the motor cool and working well.
- Use a soft brush for tight spots
- Blow out dust with compressed air
- Check vents and buttons carefully
Credit: www.walmart.ca
Cleaning The Chuck And Bit Holder
Power screwdrivers need regular cleaning to work well. The chuck and bit holder often collect dust and grime. Cleaning them helps keep the tool safe and efficient.
This guide shows how to clean these parts carefully. Follow the steps to avoid damage and keep your screwdriver in good shape.
Removing Bits Safely
Always remove bits before cleaning. This prevents injury and stops dirt from spreading inside the tool. Use gentle methods to avoid breaking the bits or chuck.
- Turn off and unplug the screwdriver.
- Hold the chuck firmly and rotate it to loosen the bit.
- Pull the bit straight out without forcing it.
- Inspect bits for damage before cleaning or reuse.
- Store bits in a dry place after removal.
Clearing Dirt And Rust
Dirt and rust reduce the chuck’s grip and can damage the bit holder. Clean these areas carefully using suitable tools and solutions.
| Material | Cleaning Method | Notes |
|---|---|---|
| Chuck Surface | Wipe with a dry cloth or brush dirt off | Avoid water inside the chuck |
| Rust Spots | Use fine steel wool or a rust remover | Apply gently to prevent scratches |
| Bit Holder | Clean with a cotton swab dipped in rubbing alcohol | Remove grease and grime |
After cleaning, dry all parts well. Lubricate the chuck lightly to keep it moving smoothly. Regular cleaning keeps your screwdriver ready for use.
Lubricating Moving Parts
Keeping your power screwdriver’s moving parts lubricated helps it run smoothly. Lubrication reduces wear and tear. It also stops rust and damage.
Regular lubrication extends the tool’s life. It keeps the screwdriver working well for many uses.
Choosing The Right Lubricant
Select a lubricant made for power tools or small machines. Avoid thick oils that can gum up parts. Thin oils or light grease work best.
Check if the lubricant resists dust and dirt. This keeps the moving parts clean and protected. Use only a small amount to avoid mess.
- Light machine oil
- Silicone-based lubricant
- Specialized power tool grease
Applying Lubrication Properly
Clean the screwdriver before adding lubricant. Remove dust and old oil with a dry cloth. This helps the new lubricant work better.
Apply lubricant sparingly to moving parts like gears and joints. Avoid getting oil on the motor or electrical parts. Wipe off extra lubricant to prevent dirt buildup.
- Use a small brush or dropper for precise application
- Rotate parts to spread lubricant evenly
- Let the tool sit for a few minutes before use

Credit: manuals.plus
Maintaining The Motor And Internal Components
Cleaning power screwdrivers is key to keeping them working well. The motor and inside parts need regular care. This helps your tool last longer and work smoothly.
Take time to check the motor and internal parts often. Dirt and wear can cause damage if you ignore them. Proper cleaning keeps everything running right.
Checking For Wear And Tear
Look inside your power screwdriver for worn parts. Check brushes, gears, and wires for damage. Replace parts that look old or broken to avoid bigger problems.
Wear signs include sparks, strange noises, or loss of power. Catching these early saves you money and keeps your tool safe.
- Inspect motor brushes for wear or cracks
- Check gears for chips or uneven wear
- Look at wires for frays or loose connections
- Listen for unusual sounds during use
- Notice if the tool loses power or runs slow
Cleaning Ventilation Areas
Ventilation holes help cool the motor inside the screwdriver. Dust and dirt can block these holes. Clean them regularly to stop overheating.
Use a soft brush or compressed air to clear vents. Do not use water or liquids. This keeps air flowing and the motor cool.
- Turn off and unplug the tool before cleaning
- Use a soft brush to remove dust from vents
- Blow out dust with compressed air carefully
- Avoid liquids near electrical parts
- Keep vents clear to prevent motor overheating
Reassembling And Testing
After cleaning your power screwdriver, it is important to put all parts back together carefully. Proper reassembly ensures the tool works well and lasts longer.
Once reassembled, testing the screwdriver helps confirm it runs smoothly and safely. This step prevents damage and keeps you safe during use.
Putting Parts Back Together
Start by placing the cleaned parts in the order you removed them. Align each piece correctly to avoid damage.
Use the correct screws and tighten them firmly but not too tight. Loose parts can cause the tool to malfunction.
- Insert the motor and gearbox carefully
- Attach the casing and secure all screws
- Reconnect the battery or power source
- Check for any leftover parts or debris
Running Performance Checks
Turn on the power screwdriver and listen for strange noises. Smooth sounds mean parts fit well and work properly.
Test the screwdriver by driving a few screws into wood or other material. Check if it runs without stopping or slowing down.
- Check the speed and power of the tool
- Make sure the screwdriver bit spins straight
- Watch for overheating or unusual vibrations
- Stop use if you notice any problems
Regular Maintenance Tips
Power screwdrivers need regular cleaning to work well. Dirt and dust can cause problems.
Keeping your tool clean helps it last longer and stay safe to use.
Scheduling Cleanings
Set a regular time to clean your power screwdriver. This stops dirt from building up.
Cleaning after every few uses keeps the tool running smoothly. Check the tool for dust or grease.
- Wipe the outside with a dry cloth
- Use compressed air to clear vents
- Remove bits and clean the chuck area
- Check for loose or worn parts
Proper Storage Practices
Store power screwdrivers in a dry place to avoid rust and damage. Keep them away from dust and moisture.
Use a case or toolbox to protect the tool. Avoid leaving it where it can fall or get stepped on.
- Keep the tool in its original case if possible
- Store in a cool, dry area
- Keep batteries separate if not using the tool for a long time
- Place tools on shelves or racks to avoid floor damage
Frequently Asked Questions
How Often Should I Clean My Power Screwdriver?
Clean your power screwdriver after every few uses. Regular cleaning prevents dust and debris buildup, ensuring optimal performance and longevity of the tool.
What Materials Do I Need To Clean Power Screwdrivers?
Use a soft cloth, compressed air, and mild detergent. Avoid harsh chemicals to prevent damage. Proper tools help maintain your screwdriver’s efficiency.
Can I Use Water To Clean Power Screwdrivers?
Avoid using water directly on power screwdrivers. Moisture can damage electrical components. Instead, use a damp cloth for wiping and dry immediately.
How Do I Clean The Screwdriver Bits Effectively?
Remove bits and soak them in mild soapy water. Use a brush to remove dirt, then dry thoroughly before reattaching to prevent rust.
Conclusion
Cleaning power screwdrivers keeps them working well and lasting long. Regular care stops dirt and dust from causing damage. Use simple tools and follow safety steps every time. Wipe parts gently and avoid water inside the motor. Check for worn-out bits and replace them quickly.
A clean tool makes your work easier and safer. Keep your power screwdriver ready for every project by cleaning it often. Small efforts lead to big savings and fewer repairs. Take care of your tools, and they will take care of you.