Are you struggling with loose connections or unreliable wiring? Knowing how to properly crimp coaxial and electrical terminals can make all the difference in your projects.
Whether you’re fixing a cable at home or working on a bigger electrical job, the right crimping technique ensures a strong, safe, and lasting connection. In this guide, you’ll discover simple, step-by-step tips that anyone can follow—no special skills needed.
Ready to save time, avoid costly mistakes, and boost your confidence with every wire you handle? Keep reading and learn how to crimp like a pro.
Credit: www.vevor.com
Types Of Terminals
Terminals connect wires to devices or cables. They ensure a strong electrical connection.
There are many types of terminals. This guide covers coaxial and electrical terminals.
Coaxial Terminals
Coaxial terminals attach coax cable to devices. They keep signal quality high and prevent interference.
- BNC connectors:Used in video and radio equipment. Twist lock for secure fit.
- F connectors:Common in cable TV and satellite. Screw-on type for strong hold.
- N connectors:Used in radio and antennas. Threaded for durability.
- RCA connectors:Often used for audio and video signals. Push-on style.
Electrical Terminals
Electrical terminals connect wires in circuits. They come in many shapes and sizes.
| Terminal Type | Description | Use |
| Ring Terminal | Wire end forms a ring shape | Bolted connections |
| Spade Terminal | Flat, forked shape | Quick connect/disconnect |
| Butt Connector | Cylindrical sleeve to join wires | Wire splicing |
| Quick Disconnect | Flat tab for fast connection | Switches and relays |
| Blade Terminal | Flat blade inserted into connector | Automotive wiring |
Tools And Materials Needed
Crimping coaxial and electrical terminals requires the right tools. Using proper tools ensures strong and safe connections.
This guide covers the main tools and materials you need before starting the crimping process.
Crimping Tools
Crimping tools help join terminals to wires by squeezing them tightly. They come in different types for various connectors.
Using the correct crimping tool prevents damage and ensures a good electrical connection.
- Ratchet crimpers lock in place to apply even pressure
- Manual crimpers are simple and affordable for light use
- Coaxial crimpers are shaped for round connectors
Wire Strippers
Wire strippers remove the insulation from wires without cutting the metal inside. They come with different notch sizes for various wire gauges.
Good wire strippers help prepare wires properly for crimping by exposing the right length of conductor.
- Adjustable wire strippers fit multiple wire sizes
- Automatic strippers speed up the process
- Precision strippers prevent wire damage
Connectors And Terminals
Connectors and terminals link wires to devices or other wires. Choose the right type for your project and wire size.
Types include ring terminals, spade terminals, and coaxial connectors. Each type fits different uses and wire sizes.
- Ring terminals secure wires to screws or studs
- Spade terminals allow quick disconnect
- Coaxial connectors join coax cables for signals
Preparing The Wire
Preparing the wire is an important part of crimping coaxial and electrical terminals. You must get the wire ready before attaching the terminal. This helps make a strong connection.
Two key steps in preparation are stripping the insulation and cleaning the wire. These steps make sure the wire fits well and connects properly.
Stripping The Insulation
Stripping the insulation means removing the outer plastic layer from the wire. This exposes the metal inside. Use a wire stripper tool to do this carefully.
Cut only the amount of insulation needed. Removing too much can cause shorts. Removing too little stops a good connection.
- Choose the right size slot on the wire stripper
- Place the wire in the slot and squeeze the handles
- Pull the insulation off gently without damaging the wire strands
Cleaning The Wire
Cleaning the wire removes dirt, oil, and oxidation. This helps the crimp connect tightly. Use a clean cloth or small brush for cleaning.
For stubborn grime, use a bit of rubbing alcohol on the cloth. Let the wire dry before crimping. Clean wires make better electrical connections.
- Wipe the wire strands with a clean cloth
- Use rubbing alcohol for tough dirt
- Allow the wire to dry fully

Credit: tyclon.com
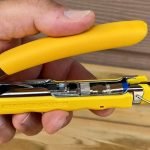
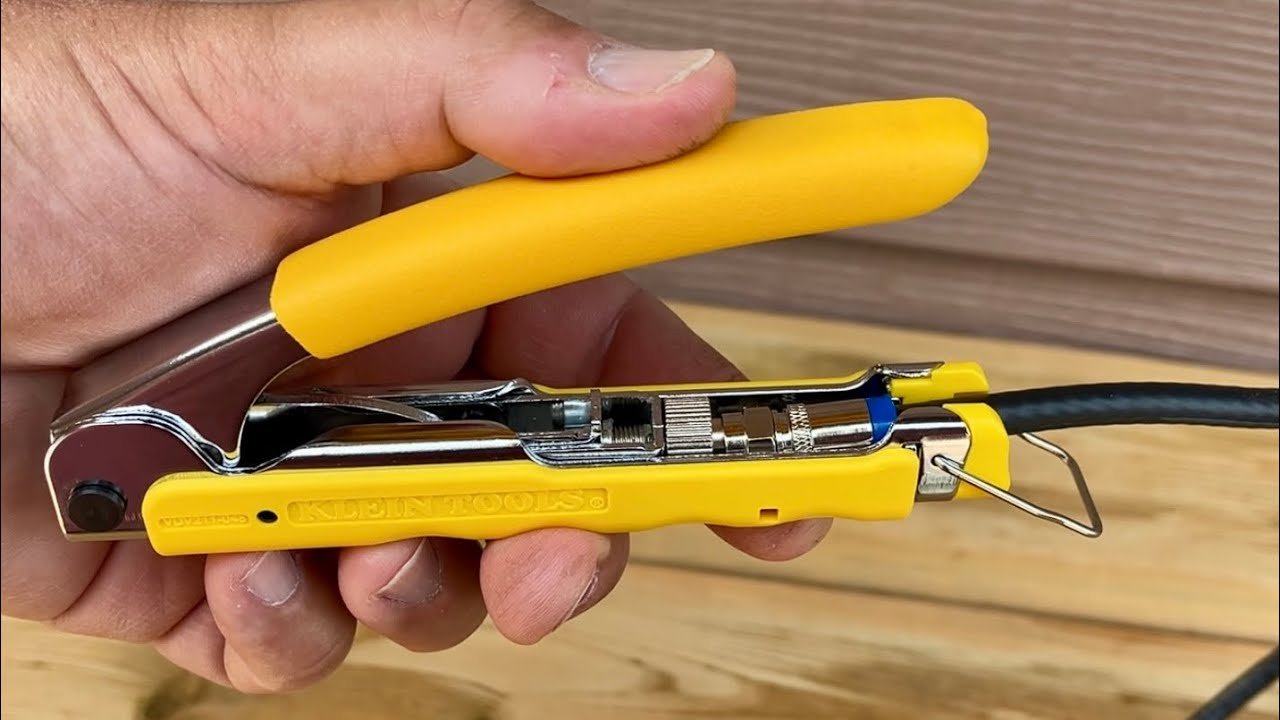
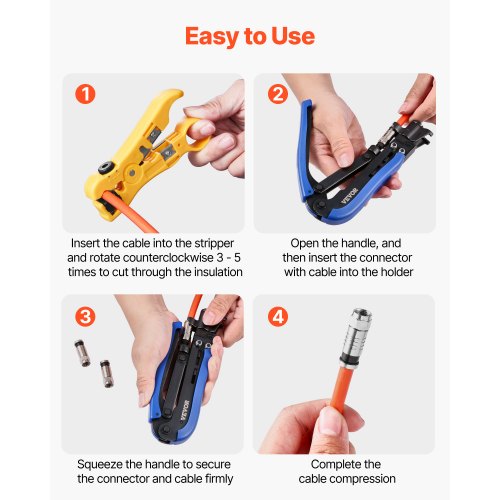
Crimping Coaxial Terminals
Crimping coaxial terminals is key for a strong, reliable cable connection. It ensures good signal quality and prevents cable damage.
Using the right tools and proper technique helps you finish the job safely and efficiently.
Positioning The Connector
First, strip the coaxial cable to the correct length. Then slide the connector onto the cable carefully. The center conductor should stick out slightly from the connector.
- Remove the outer jacket without cutting the shield.
- Fold back the braided shield neatly over the jacket.
- Insert the cable into the connector until it stops.
- Check that the dielectric is flush with the connector inside.
Using The Crimping Tool
Choose a crimping tool that fits your connector size. Position the connector in the tool’s correct die slot. Apply firm pressure to crimp the connector to the cable.
| Tool Part | Purpose |
| Die Slot | Holds the connector for crimping |
| Handle | Provides leverage for pressing |
| Release Mechanism | Opens the tool after crimping |
Checking The Connection
After crimping, check the connection carefully. Make sure the connector is tight and the cable does not pull out. The center conductor should be centered and not bent.
- Pull gently on the cable to test the grip.
- Inspect the crimp for even pressure marks.
- Check that no wires are loose or exposed.
- Use a cable tester if available to confirm signal quality.
Crimping Electrical Terminals
Crimping electrical terminals is a common method to connect wires securely. It ensures a strong electrical connection and prevents wire damage.
Using the right tools and technique is important to make a safe and lasting connection. This guide explains key steps for crimping electrical terminals.
Selecting The Correct Terminal
Choose a terminal that fits the wire size and type. A proper fit ensures good conductivity and mechanical strength.
- Check the wire gauge and pick a terminal rated for that size.
- Match the terminal material with the wire, usually copper or aluminum.
- Use insulated terminals for added protection against short circuits.
- Confirm the terminal style suits the connection type, like ring, spade, or butt connectors.
Inserting The Wire
Strip the wire insulation carefully without cutting the wire strands. Insert the bare wire fully into the terminal barrel.
| Wire Gauge | Strip Length (mm) | Terminal Barrel Size |
| 18 AWG | 6 | 1.5 mm |
| 16 AWG | 7 | 2.0 mm |
| 14 AWG | 8 | 2.5 mm |
| 12 AWG | 10 | 3.0 mm |
Applying The Crimp
Use a crimping tool designed for electrical terminals. Position the terminal in the correct slot and squeeze the handles firmly.
- Place the terminal in the tool’s appropriate die.
- Insert the wire fully into the terminal barrel.
- Squeeze the crimper handles until the tool completes the crimp.
- Check for a tight hold by gently pulling the wire.
- Inspect the crimp for any cracks or loose strands.

Credit: www.youtube.com
Common Mistakes To Avoid
Crimping coaxial and electrical terminals needs care and skill. Avoid mistakes to make strong connections.
This guide shows common errors and how to prevent them for better results.
Incorrect Wire Stripping
Stripping wire wrong can cause weak or unsafe connections. Remove too much insulation or nick the wire strands.
Cutting wire strands makes the terminal loose and unreliable.
- Strip only the needed length of insulation
- Avoid cutting or damaging wire strands
- Use the correct wire stripper size
- Check that wire strands are clean and untangled
Improper Crimping Pressure
Crimping with too much pressure can crush the terminal. Too little pressure makes it loose.
Either case leads to poor electrical contact and possible failure.
- Use steady, firm pressure for a tight crimp
- Do not squeeze the tool too hard or too soft
- Test the crimp by gently pulling the wire
- Practice on spare terminals to find the right pressure
Using Wrong Tools
Using incorrect tools damages terminals and wires. It lowers connection quality.
Each terminal type needs a specific crimping tool for best results.
- Match crimp tool to terminal type and size
- Avoid pliers or general tools for crimping
- Use wire strippers designed for the wire gauge
- Keep tools clean and well-maintained
Testing The Crimped Connection
Testing the crimped connection ensures it is safe and works correctly. You need to check both the physical look and the electrical performance.
Doing these tests helps avoid connection failures and electrical problems later on.
Visual Inspection
Look closely at the crimped terminal to find any visible defects. A good crimp should be tight and clean without damage.
- The crimp should not have cracks or bends.
- Check for proper wire insertion into the terminal.
- Make sure the insulation is not cut or damaged.
- Look for uniform compression around the wire.
- The terminal should not move or twist easily on the wire.
Electrical Testing Methods
Electrical tests check the connection’s ability to carry current without resistance or failure. These tests help confirm good electrical contact.
| Test Type | Purpose | How to Perform |
|---|---|---|
| Continuity Test | Check if current flows through the crimp | Use a multimeter to test resistance; it should be very low |
| Pull Test | Measure mechanical strength of the crimp | Pull the wire gently and see if it stays attached |
| Voltage Drop Test | Detect resistance causing power loss | Apply voltage and measure drop across the crimp |
Tips For Durable Connections
Making strong connections with coaxial and electrical terminals is important. Good connections last longer and work better.
This guide shares simple tips for durable crimps. Follow these to avoid loose or weak links.
Choosing Quality Materials
Start with the right terminals and wires. Use materials made for your specific job.
- Pick terminals that fit your wire size exactly.
- Choose wires with good insulation and copper cores.
- Use tools made for coaxial or electrical crimps.
- Buy from trusted brands to ensure quality.
Regular Maintenance
Check your connections often to keep them working well. Clean and tighten crimps as needed.
| Maintenance Task | Frequency | Purpose |
| Inspect crimps | Monthly | Find loose or damaged terminals |
| Clean terminals | Every 3 months | Remove dirt and corrosion |
| Tighten connections | As needed | Ensure firm contact |
| Replace damaged parts | Immediately | Prevent failure |
Frequently Asked Questions
What Tools Are Needed To Crimp Coaxial Terminals?
To crimp coaxial terminals, you need a coaxial cable stripper, a quality crimping tool, and the correct terminal connectors. These tools ensure a secure, reliable connection by properly compressing the terminal onto the cable. Using the right tools prevents signal loss and damage.
How Do You Prepare Cables For Crimping?
Strip the cable jacket carefully without damaging the inner conductor. Remove the appropriate insulation length, exposing the wire and shield. Ensure the terminal fits the exposed sections properly for a tight, secure crimp. Proper preparation improves connection strength and signal quality.
Can Electrical Terminals Be Reused After Crimping?
No, electrical terminals are generally single-use. Reusing them can cause poor connections and increase resistance. Always use a new terminal for each crimp to ensure safety and reliable electrical conductivity. Proper crimping ensures long-lasting and safe connections.
How To Ensure A Strong Crimp Connection?
Use the correct crimping tool and terminal size for your cable. Apply firm, even pressure while crimping without over-tightening. Inspect the connection for secure fit and no loose wires. Proper technique prevents connection failure and maintains signal integrity.
Conclusion
Crimping coaxial and electrical terminals isn’t hard. Follow the steps carefully. Practice makes perfect. Use the right tools for best results. Safety should be your top priority. Double-check your connections for reliability. This ensures smooth operation. With patience, you can achieve secure crimps.
Avoid rushing to prevent mistakes. Remember, a good crimp lasts long. Proper crimping enhances performance and reduces issues. Keep practicing to improve your skills. Soon, crimping will feel easy. Happy crimping!