If you want your electrical connections to last and work safely, knowing how to crimp terminals securely is a must. A poor crimp can cause loose wires, sparks, or even equipment failure.
But don’t worry—this guide will show you simple, step-by-step tips to make sure every crimp you do is strong and reliable. By the end, you’ll have the confidence to handle your wiring projects like a pro. Ready to improve your skills and avoid costly mistakes?
Let’s get started!
Choosing The Right Terminal
Choosing the right terminal is important for a strong connection. The correct terminal helps prevent electrical problems and keeps wires secure.
Terminals come in many types, materials, and sizes. Picking the right one makes crimping easier and safer.
Types Of Terminals
There are many terminal types for different uses. Each type works best with certain wires and tools.
- Ring terminals fit around a screw or bolt for strong holds.
- Spade terminals slide under screws for quick connections.
- Butt connectors join two wires end to end.
- Blade terminals plug into matching connectors easily.
Material Considerations
Terminals are made from different metals. The right metal helps resist rust and carry current well.
Copper is common and conducts electricity well. Tin plating stops corrosion and improves life span.
- Choose copper for good electrical flow.
- Tin plating protects against moisture and rust.
- Brass offers strength but less conductivity.
- Aluminum terminals need special care to avoid corrosion.
Size And Compatibility
Match terminal size to wire gauge for a tight crimp. The wrong size can cause loose or weak connections.
Check terminal specs for wire size and crimp tool compatibility. Proper fit keeps wires safe from damage.
| Wire Gauge (AWG) | Terminal Size | Common Use |
|---|---|---|
| 22-18 | Small | Thin wires in electronics |
| 16-14 | Medium | Automotive wiring |
| 12-10 | Large | Heavy-duty appliances |

Credit: lifetimelightingsystems.com
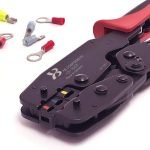
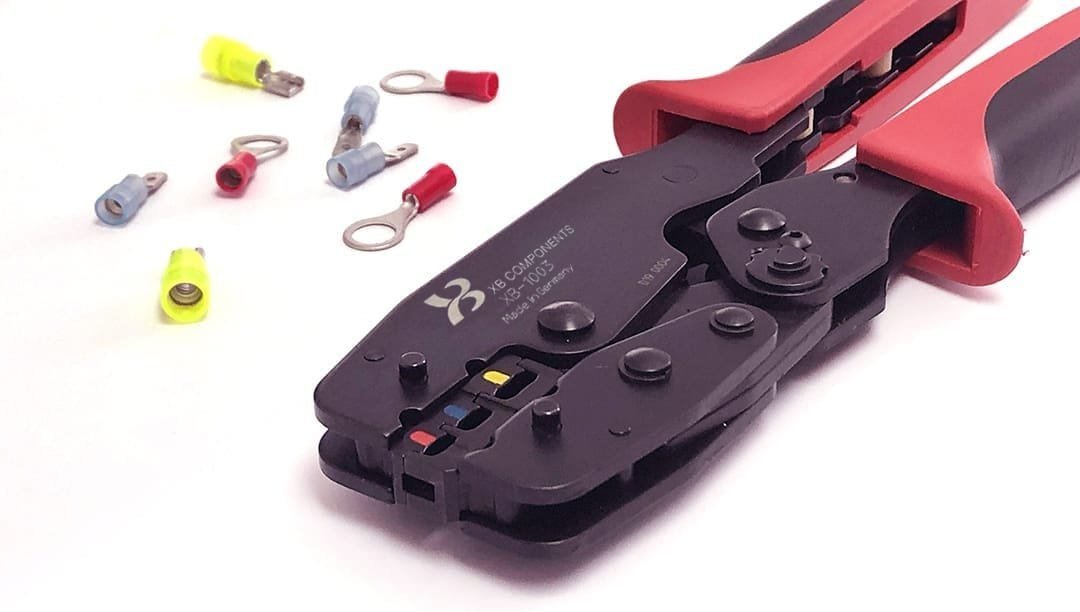
Selecting Proper Tools
Using the right tools is key for crimping terminals securely. The correct tool helps create a strong connection and prevents wire damage.
Choosing tools that fit your terminal type and wire size makes the crimping process easier and safer.
Crimping Tool Varieties
There are many crimping tools for different jobs. Some common types include:
- Manual hand crimpers for small wires and terminals
- Ratchet crimpers that ensure full compression
- Hydraulic crimpers for heavy-duty cables
- Battery-powered crimpers for quick, cordless use
Tool Quality And Maintenance
Good quality tools last longer and provide better crimps. Check for smooth handles and sharp dies.
| Maintenance Tip | Reason |
| Clean dies after use | Remove debris and prevent rust |
| Lubricate moving parts | Keep tool operating smoothly |
| Store in dry place | Protect from moisture damage |
| Inspect before use | Catch wear or damage early |
Using Dies Correctly
Dies shape the crimp to fit the terminal and wire. Using the right die is important for secure connections.
Follow these tips to use dies properly:
- Match the die size to your terminal and wire gauge.
- Place the terminal fully into the die cavity.
- Apply steady pressure until the crimp is complete.
- Check the crimp for tightness and no wire strands sticking out.
Preparing The Wire
Preparing the wire is an important step to crimp terminals securely. Proper preparation helps make a strong connection and prevents damage.
This guide explains how to strip insulation, avoid wire damage, and twist wires correctly before crimping.
Stripping Wire Insulation
Remove the insulation carefully without cutting the wire strands. Use a proper wire stripper tool for best results.
- Select the right size hole on the wire stripper for your wire gauge.
- Place the wire in the stripper and squeeze gently.
- Pull off the insulation without twisting the wire.
- Check the wire ends for any cut strands and trim if needed.
Avoiding Wire Damage
Wire damage reduces electrical flow and weakens the connection. Handle wires gently to keep strands intact.
| Common Damage Type | How to Avoid |
| Cut Strands | Use correct wire stripper size and avoid twisting |
| Crushed Wire | Do not use pliers or scissors to strip insulation |
| Excessive Bending | Bend wires gently near the terminal |
Wire Twisting Techniques
Twisting wire strands before crimping helps keep them together and creates a stronger bond.
- Hold the wire strands at the end with your fingers.
- Twist strands clockwise using pliers or your fingers.
- Make a tight, even twist without over-twisting.
- Check that strands do not spread apart after twisting.

Credit: www.youtube.com
Crimping Process Steps
Crimping terminals securely is essential for a strong electrical connection. It prevents wires from coming loose or causing faults.
This guide explains the key steps to crimp terminals correctly and safely for reliable results.
Positioning The Terminal
Place the terminal on the wire so the conductor fits fully inside. The metal part of the terminal must cover the wire strands completely.
- Strip the wire insulation to the right length.
- Insert the wire into the terminal barrel.
- Make sure no strands are outside the terminal.
- Hold the terminal steady before crimping.
Applying Correct Pressure
Use a crimping tool designed for your terminal type. Apply even pressure to secure the wire without damage.
| Tool Type | Pressure Needed | Effect of Incorrect Pressure |
|---|---|---|
| Handheld Crimper | Firm squeeze | Loose crimp or wire damage |
| Hydraulic Crimper | Controlled high force | Crushes terminal if too strong |
| Ratchet Crimper | Consistent pressure | Incomplete crimp if released early |
Verifying The Crimp
Check the crimp to ensure it is tight and secure. A good crimp holds the wire firmly without slipping or damage.
- Pull lightly on the wire to test grip.
- Inspect the crimp for cracks or deformation.
- Make sure the terminal is not loose on the wire.
- Use a gauge or tester if available.
Testing Crimped Connections
Testing crimped connections ensures they are strong and safe. Proper tests help avoid loose wires and failures.
Use simple checks to confirm the connection holds well and conducts electricity properly. Visual checks catch obvious problems.
Pull Test Methods
Pull tests measure the strength of a crimped connection. Pull the wire gently but firmly to check if it slips out.
A strong crimp will hold the wire without movement. If the wire pulls free, the crimp is weak and needs fixing.
- Use your hand to pull the wire for small connections
- Use a pull tester tool for precise force measurement
- Repeat tests on several crimps for consistency
Electrical Continuity Checks
Continuity tests ensure the wire conducts electricity through the crimp. Use a multimeter set to continuity mode.
Touch probes to each end of the crimped connection. A beep or low resistance means the connection is good.
- Check each wire after crimping
- Repeat test if the connection seems weak
- Fix or redo crimps if no continuity is found
Visual Inspection Tips
Look closely at each crimp to spot problems. A good crimp has no gaps or loose strands outside the terminal.
Check that the wire insulation is not trapped inside the crimp. The metal should wrap tightly around the wire.
- The crimp should look clean and even
- No exposed wire strands should be visible
- The terminal should not be bent or damaged
Common Mistakes To Avoid
Crimping terminals is a key skill for secure electrical connections. Mistakes can cause weak links or damage wires.
Knowing what to avoid helps you make strong, safe crimps every time.
Over-crimping Issues
Over-crimping happens when you squeeze the terminal too hard. This can crush the wire inside.
It may break wire strands or damage insulation, leading to poor connections or shorts.
- Wire strands can snap or break
- Terminal metal may crack or deform
- Insulation may get pinched or torn
- Connection may become brittle and fail
Under-crimping Risks
Under-crimping means not pressing the terminal enough. The wire can slip out easily.
This causes loose connections, which create heat and electrical resistance.
- Wire may pull out during use
- Connection can spark or overheat
- Signal loss or power drop occurs
- Risk of electrical fires increases
Using Wrong Terminals Or Tools
Using the wrong size or type of terminal weakens your connection. The same goes for tools.
Incorrect tools can deform terminals or not crimp properly, causing failures.
- Terminals must fit wire size exactly
- Use crimp tools designed for your terminals
- Avoid pliers or improper devices
- Wrong tools cause uneven or loose crimps
Enhancing Durability
Crimp terminals need to last long under tough conditions. Proper techniques help keep electrical connections strong and safe.
Using the right materials and storage methods protects terminals from damage and wear. This guide covers key ways to boost terminal durability.
Heat Shrink Tubing Use
Heat shrink tubing covers the crimped terminal to protect it. It seals out dirt, water, and mechanical stress. Shrink tubing also helps keep the wire secure.
- Cut tubing to fit over the crimp and wire.
- Slide tubing on before crimping the terminal.
- Use a heat gun to shrink tubing tightly around the terminal.
- Check that the tubing fully covers exposed metal parts.
Corrosion Prevention
Corrosion can weaken the terminal and cause bad connections. Protect terminals to keep them free from rust and oxidation.
| Method | Benefit |
|---|---|
| Use corrosion-resistant terminals | Lasts longer in harsh environments |
| Apply dielectric grease | Blocks moisture and air |
| Seal connections with heat shrink tubing | Stops water and dirt from reaching metal |
| Regularly inspect and clean terminals | Prevents buildup of corrosive materials |
Proper Storage Of Terminals
Store terminals in a dry, cool place to avoid damage before use. Good storage keeps terminals ready and reliable.
- Keep terminals in sealed containers or bags.
- Label storage containers for easy access.
- Separate different terminal sizes to prevent mix-ups.
- Avoid exposure to moisture and dust.

Credit: www.oreillyauto.com
Frequently Asked Questions
What Tools Are Needed For Crimping Terminals Securely?
You need a quality crimping tool, wire stripper, and the correct terminal size. These tools ensure a strong, safe connection.
How Do I Choose The Right Terminal For Crimping?
Select terminals matching wire gauge and application. Proper fit prevents loose connections and electrical failures.
What Is The Step-by-step Process To Crimp Terminals?
Strip wire insulation, insert wire into terminal, position in crimper, then squeeze firmly. Check for tightness and secure fit.
How Can I Avoid Common Crimping Mistakes?
Avoid over or under stripping wires, use correct tools, and ensure terminals fit wire size. Test connections for reliability.
Conclusion
Securing terminals with a crimp is simple. Just follow the steps outlined. Choose the right tools and connectors. Ensure wires are stripped correctly. Crimp firmly without damaging. Test connections for firmness. Proper technique prevents electrical issues. Practice makes perfect. With time, you’ll crimp confidently.
Safe and secure connections are crucial. They enhance reliability in electrical systems. This guide provides the basics. Now, you’re ready to crimp terminals securely. Happy crimping!