Are you ready to tackle your next home improvement project with confidence? Cutting drywall might seem like a daunting task, but with the right techniques, you can achieve a precise fit that enhances the beauty and functionality of your space.
Imagine the satisfaction of perfectly fitted drywall panels that seamlessly integrate with your room’s design. In this guide, we’ll reveal the secrets to cutting drywall like a pro, helping you avoid common pitfalls and ensuring your project goes smoothly. Stay with us, and discover how mastering this skill can save you time, reduce waste, and elevate your DIY game to a whole new level.
Tools Needed For Drywall Cutting
Cutting drywall accurately needs the right tools. Using proper tools helps you get clean cuts and fit pieces well.
This guide covers the main tools needed for drywall cutting. It includes cutting tools, measuring devices, and safety gear.
Essential Cutting Tools
Good cutting tools make drywall cutting easier and more precise. Choose tools that suit the size and shape of your cuts.
- Utility knife with sharp blades for scoring drywall
- Drywall saw for cutting curves and openings
- T-square or drywall square to guide straight cuts
- Keyhole saw for small holes and shapes
- Rasp for smoothing rough edges after cutting
Measuring And Marking Tools
Accurate measuring and marking are key to precise drywall fitting. Use tools that make this simple and clear.
- Tape measure to get exact dimensions
- Pencil or drywall marker for clear lines
- Level to ensure markings are straight
- Combination square for marking right angles
Safety Equipment
Protect yourself while cutting drywall. Dust and sharp tools can cause injuries or breathing problems.
- Safety goggles to protect your eyes from dust and debris
- Dust mask or respirator to avoid breathing drywall dust
- Gloves to protect your hands from cuts and scrapes
- Long sleeves to shield your skin from dust and irritation

Credit: remoteestimation.us
Preparing The Drywall For Cutting
Cutting drywall properly starts with good preparation. You need to measure the space carefully and mark your cut lines clearly. This makes fitting the drywall easier and cleaner.
Taking time to prepare will save you from mistakes and wasted material. Use the right tools and double-check your measurements before cutting.
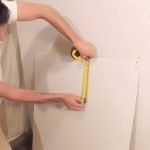
Measuring The Space Accurately
Measure the height and width of the wall or ceiling space where the drywall will go. Use a tape measure and write down your numbers.
- Start at one end and stretch the tape measure to the other end.
- Measure both height and width if needed.
- Check for any irregular shapes or obstacles.
- Record all measurements clearly on paper.
- Measure twice to avoid errors.
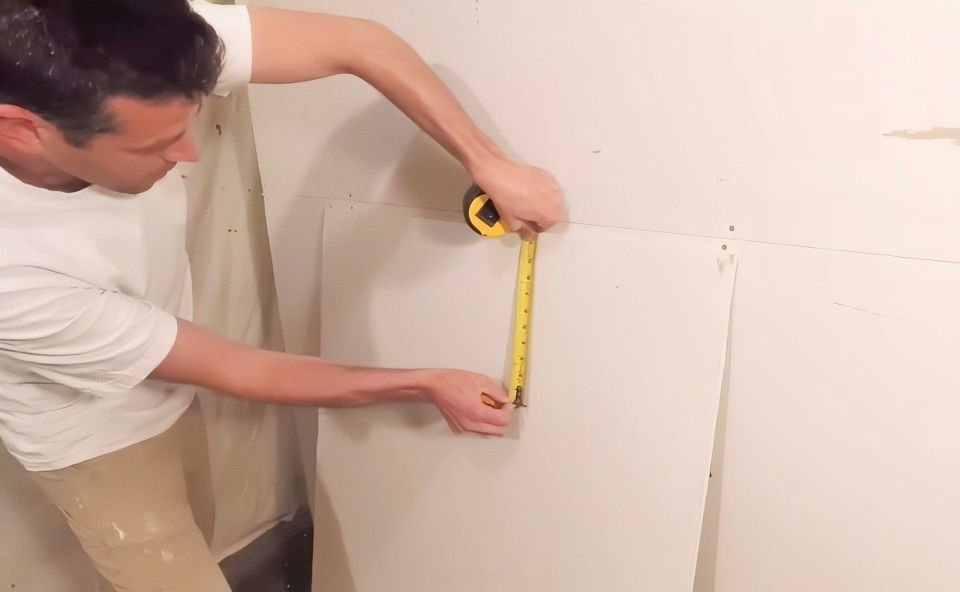
Marking Cut Lines Clearly
Mark the cut lines on the drywall before cutting. Use a pencil and a straight edge to make clear, straight lines.
| Tool | Purpose |
|---|---|
| Pencil | Mark cut lines lightly on drywall surface |
| T-Square or Straight Edge | Draw straight, accurate lines for cuts |
| Measuring Tape | Confirm measurements before marking |
| Level | Check horizontal or vertical alignment |
Double-check the marks and measurements before starting your cut. Clear lines help you cut straight and fit the drywall perfectly.
Cutting Techniques For Clean Edges
Cutting drywall correctly helps you get a neat fit. Clean edges make installation easier and reduce sanding work.
Using the right tools and methods ensures your cuts are precise. This guide covers common drywall cutting techniques.
Scoring And Snap Method
This method works best for straight cuts. Score the drywall paper surface deeply with a utility knife along a straight edge.
After scoring, snap the drywall by applying pressure on the back. Then cut the paper on the opposite side to finish the cut.
- Place a straight edge on the drywall where you want to cut.
- Score the paper surface using a sharp utility knife.
- Snap the drywall board along the scored line by bending it down.
- Cut the backing paper to separate the piece fully.
Using A Utility Knife
A utility knife is essential for drywall cutting. Keep the blade sharp for clean cuts and less effort.
Use the knife to score the drywall surface lightly at first. Then press deeper on the second pass to cut through the paper.
| Blade Condition | Cut Quality | Safety |
| Sharp | Clean, precise | Lower risk of slips |
| Dull | Ragged, uneven | Higher risk of accidents |
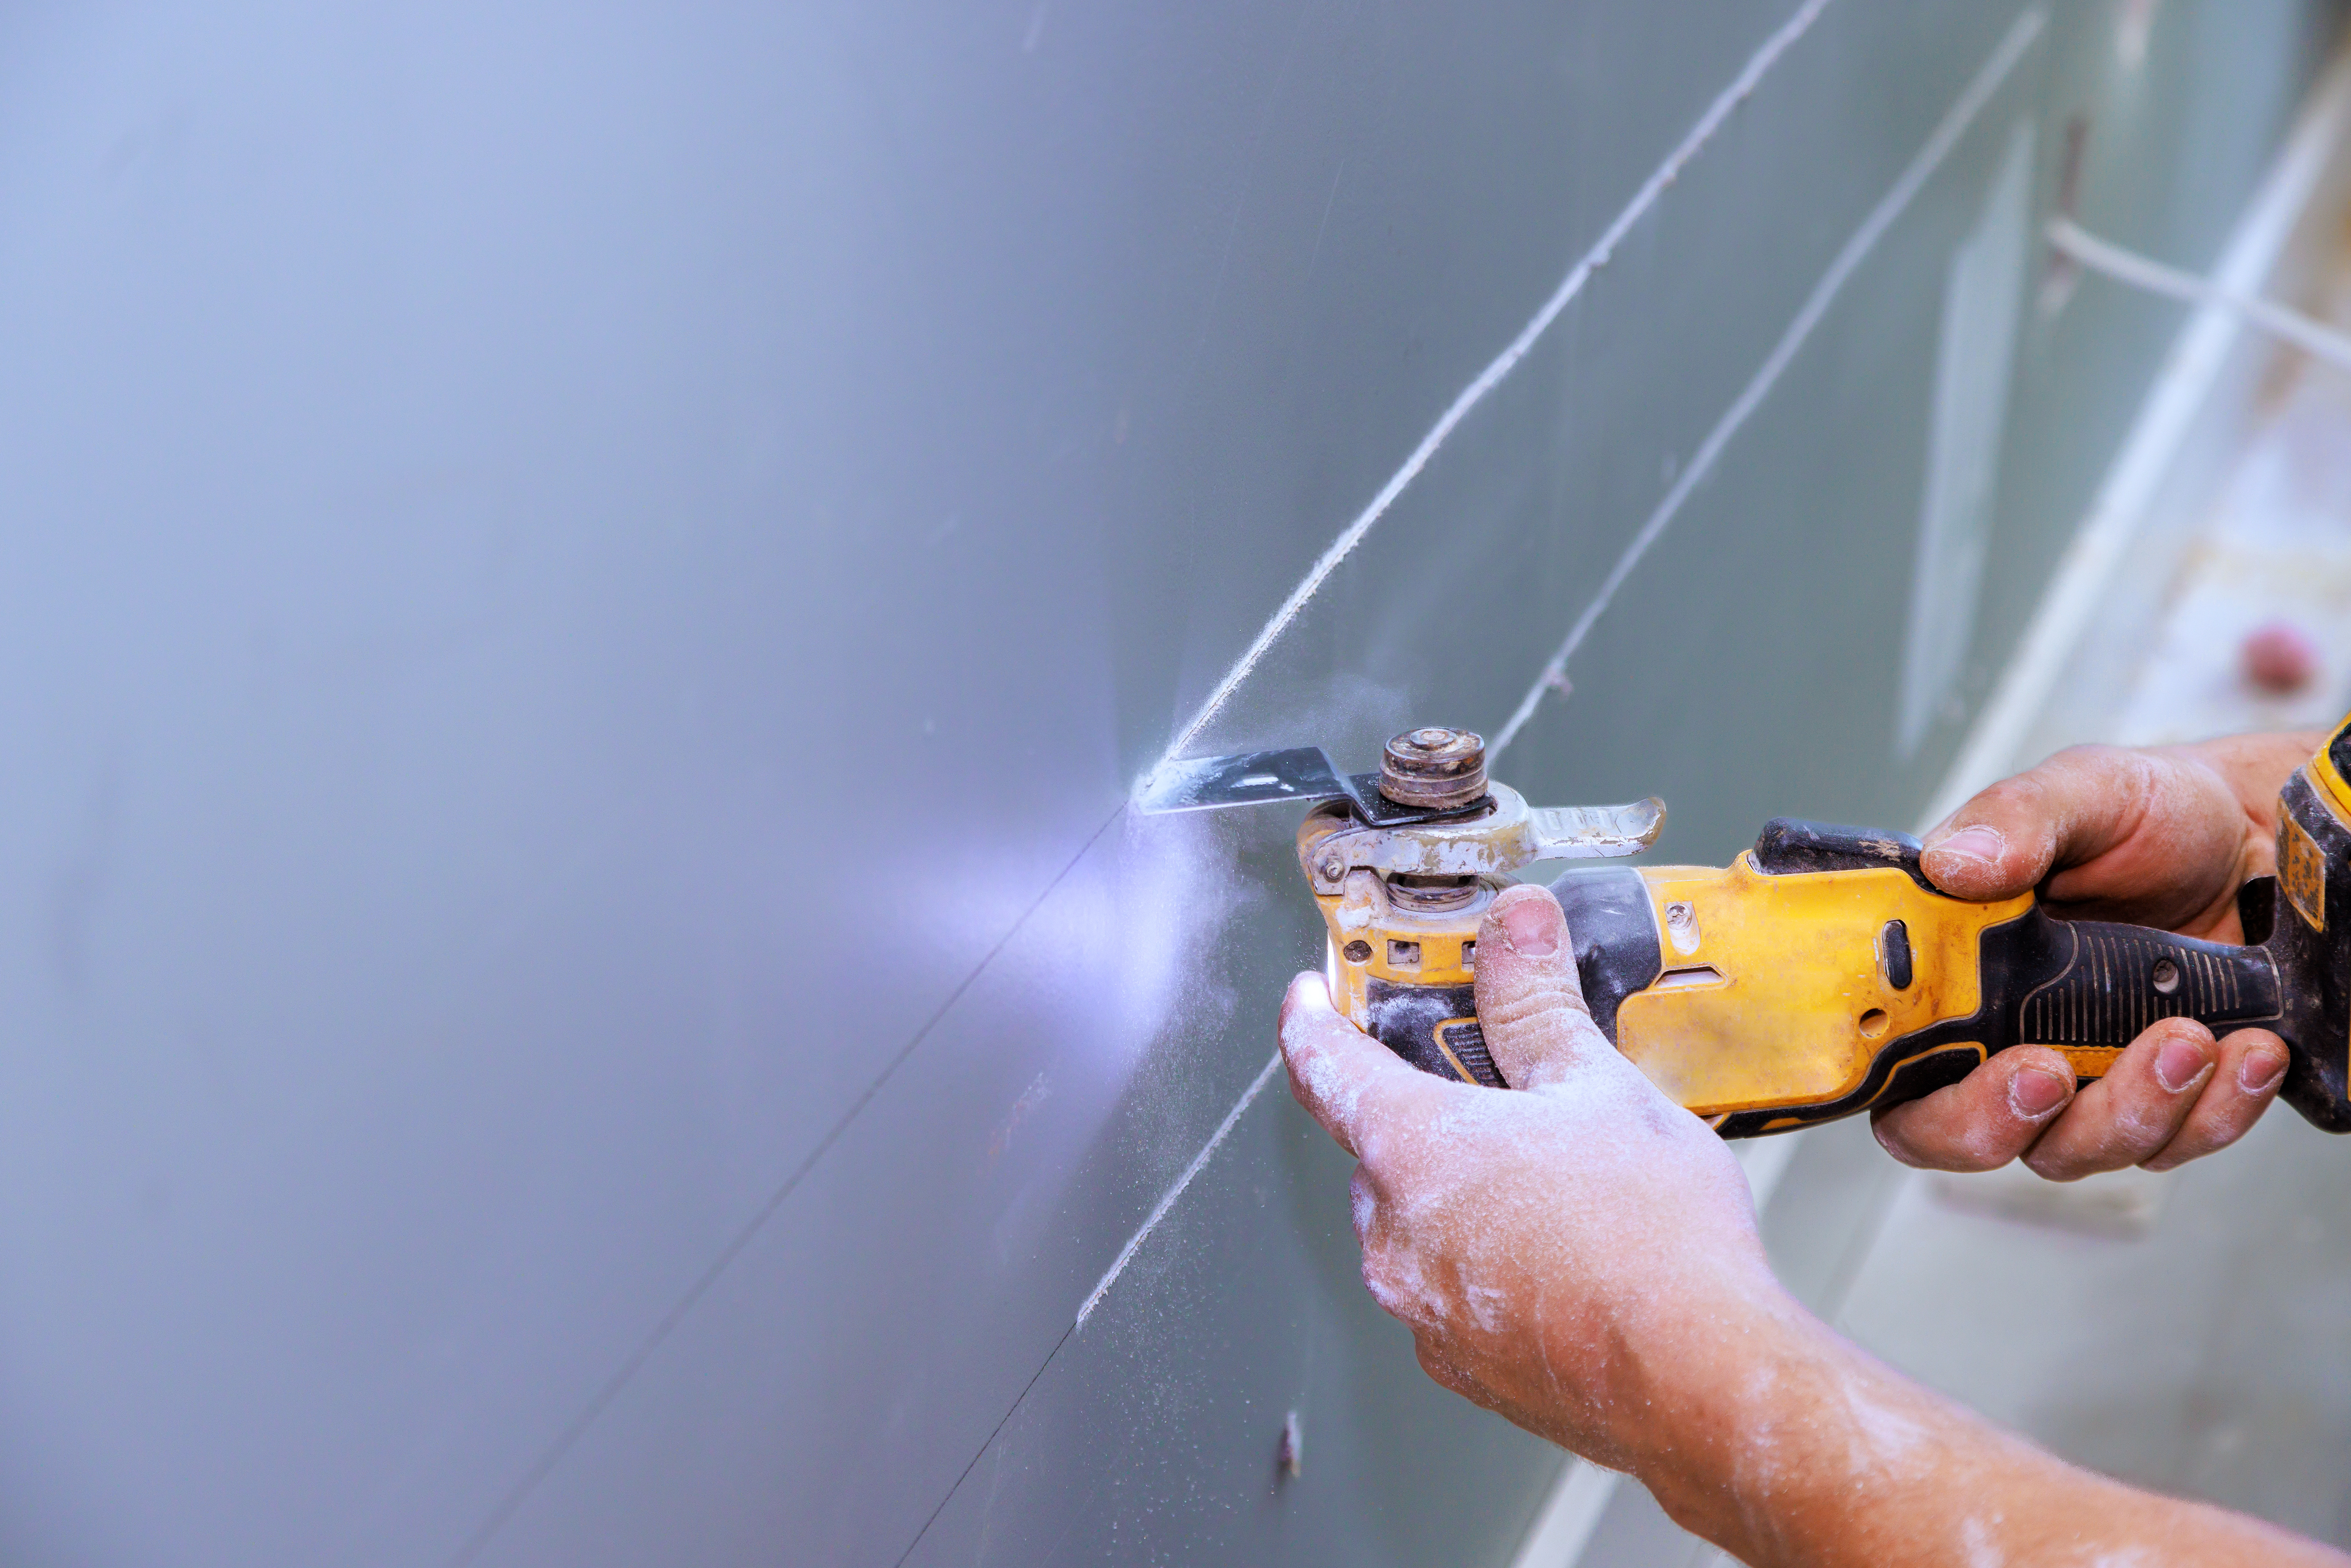
Cutting Curves And Openings
Curved cuts and openings need more care. Use a drywall saw or jab saw for these shapes.
Draw the shape on the drywall first. Cut slowly along the line to avoid breaking the paper.
- Mark the curve or opening clearly with a pencil.
- Use a drywall or jab saw to cut inside the shape.
- Cut small sections at a time for better control.
- Finish edges with sanding if needed for smoothness.
Credit: www.howarth-timber.co.uk
Handling Corners And Odd Shapes
Cutting drywall to fit around corners and odd shapes needs care. You must measure and cut precisely for a good fit.
Using the right tools and techniques helps you avoid gaps and cracks. This guide focuses on tricky spots like electrical boxes and pipes.
Fitting Around Electrical Boxes
Measure the electrical box size and mark it on the drywall. Use a pencil and ruler to draw the shape clearly.
Cut the hole with a drywall saw or rotary tool. Cut slowly to keep the edges clean and exact for a snug fit.
- Measure the box width and height.
- Mark the shape on drywall.
- Cut carefully inside the lines.
- Test fit and trim if needed.
Cutting For Pipes And Fixtures
Mark the pipe or fixture location on the drywall panel. Use a compass or circle cutter for round cuts.
Cut slowly and check often to avoid making the hole too big. A tight fit keeps the drywall strong around pipes.
- Mark pipe center and radius.
- Use circle cutter or keyhole saw.
- Make small test cuts first.
- Adjust size as needed for a firm fit.
Tips To Avoid Common Mistakes
Cutting drywall can be tricky if you do not plan carefully. Mistakes cause wasted material and extra work.
Use simple tips to cut drywall accurately. This saves time and helps your project look professional.
Preventing Cracks And Breaks
Drywall is fragile and can crack if cut wrong. Use a sharp blade to avoid rough edges and breaks.
Cut gently and support the drywall on a flat surface. Do not force the blade or push too hard.
- Score the drywall deeply with a utility knife before snapping
- Use a straight edge to guide your cuts
- Hold the drywall firmly to prevent bending
- Replace dull blades often for clean cuts
Ensuring Straight Cuts
Straight cuts help the drywall fit well on walls or ceilings. Measure twice to mark your cut line clearly.
Use a metal ruler or drywall T-square to guide your blade. Keep the knife steady and follow the line.
- Mark the cut line with a pencil before cutting
- Use a long straight edge for guidance
- Cut slowly and carefully along the line
- Check your work often to stay on track
Finishing Touches For Perfect Fit
Cutting drywall is only part of the job. The finishing touches help the drywall fit perfectly in place.
This guide covers key steps to smooth edges and test the fit before installation. These steps save time and improve results.
Sanding Edges Smooth
After cutting drywall, the edges can be rough or uneven. Sanding makes the edges smooth and easier to join.
Use a sanding block or sandpaper with medium grit. Sand gently along the edges to remove bumps and splinters.
- Hold the drywall piece steady before sanding
- Sand all cut edges evenly
- Check edges with your hand to ensure smoothness
- Wipe dust off before fitting the drywall
Test Fitting Before Installation
Before attaching drywall, place it in the opening to check the fit. This avoids mistakes and extra work later.
Look for gaps or tight spots. Mark any areas that need trimming or sanding. Make small adjustments and test again.
- Place drywall gently in the frame
- Check all edges for gaps
- Mark tight spots with a pencil
- Trim or sand marked areas
- Repeat fitting until the piece sits flush

Credit: www.familyhandyman.com
Frequently Asked Questions
How Do You Measure Drywall For A Precise Cut?
Measure the wall or ceiling area accurately using a tape measure. Mark the drywall with a pencil and a straightedge for clean lines. Double-check measurements before cutting to ensure a perfect fit.
What Tools Are Best For Cutting Drywall Precisely?
Use a utility knife for straight cuts and a drywall saw for curves. A T-square helps guide straight lines. Sharp blades ensure clean edges and reduce drywall damage.
How To Avoid Cracking Drywall During Cutting?
Score the drywall surface lightly with a utility knife first. Avoid applying excessive pressure. Cut slowly and steadily to prevent cracks and chips along the edges.
Can You Cut Drywall Without A Saw?
Yes, a sharp utility knife can cut drywall by scoring and snapping. This method is clean and effective for straight cuts without power tools.
Conclusion
Cutting drywall with care ensures a neat and strong fit. Use the right tools and measure twice before cutting. Take your time to score and snap for clean edges. Clean cuts make installation easier and reduce waste. Practice makes your cuts more accurate and smooth.
Following these steps helps your project look professional. Drywall fitting becomes less stressful with simple techniques. Keep safety in mind and work steadily for best results. Precision in cutting saves time and effort later. Your walls will look better with careful drywall work.