If you want smooth, professional-looking finishes on your woodworking projects, knowing how to operate a belt sander correctly is a game-changer. Using this powerful tool the right way saves you time and effort while preventing costly mistakes.
Whether you’re a beginner or have some experience, this guide will help you handle your belt sander with confidence and precision. Keep reading, and you’ll discover simple tips that make your sanding safer, faster, and more effective every time.
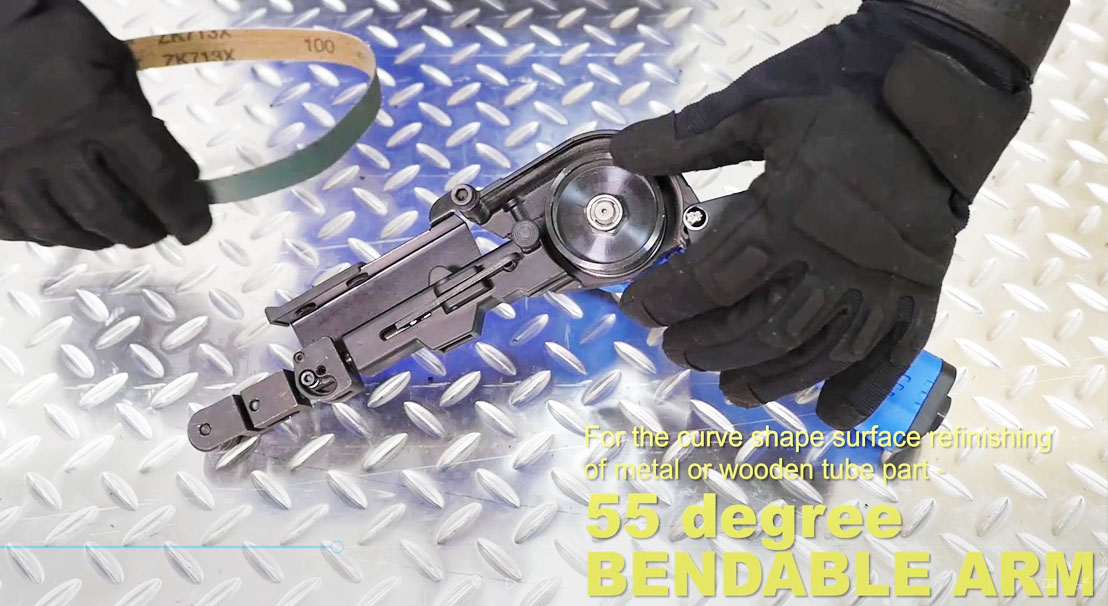
Credit: www.sumake.com
Choosing The Right Belt Sander
A belt sander is a useful tool for smoothing wood and other materials. Picking the right one makes your work easier and better.
This guide explains how to select the right belt sander for your needs. It covers types, grit, power, and size.
Types Of Belt Sanders
There are several types of belt sanders. Each fits different tasks and skill levels.
- Handheld Belt Sanders:Portable and good for small jobs.
- Stationary Belt Sanders:Fixed on a workbench for precise work.
- Wide Belt Sanders:Used for large surfaces and heavy sanding.
Selecting The Proper Belt Grit
Belt grit affects how smooth or rough the sanding will be. Choose grit based on your project.
| Grit Size | Use |
| 40-60 | Removing paint or rough shaping |
| 80-100 | Smoothing wood and removing small defects |
| 120-150 | Final sanding before finishing |
Power And Size Considerations
Power and size affect how well the sander performs and how easy it is to control.
- Higher power means faster sanding but can be harder to handle.
- Smaller sanders work well for tight spaces and detailed work.
- Larger sanders cover big areas quickly but need careful control.
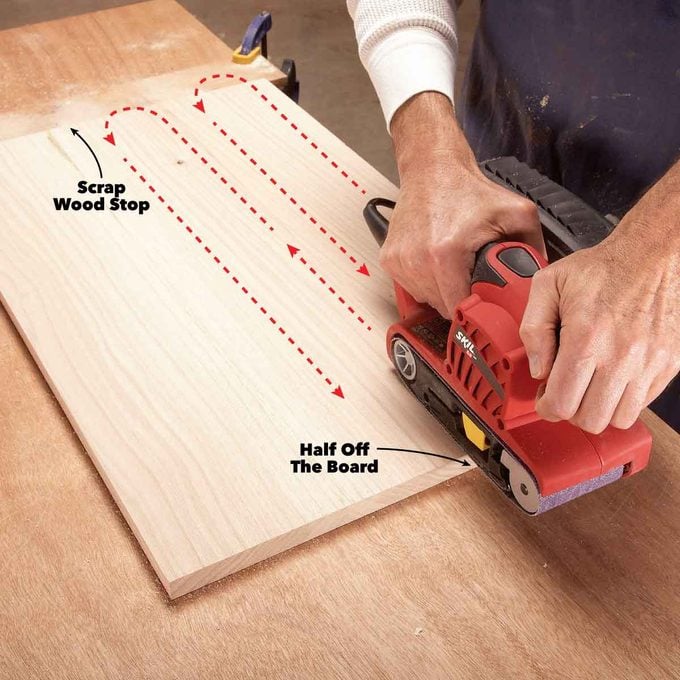
Credit: www.familyhandyman.com
Preparing Your Workspace
Setting up your workspace is important before using a belt sander. A clean and safe area helps you work better and avoid accidents.
Take time to prepare everything so you can focus on sanding without distractions.
Clearing The Work Area
Remove any clutter or obstacles near your workbench. This keeps the space safe and gives you room to move freely.
Keep tools and materials organized and away from the sander’s path to avoid damage or injury.
- Clear off dust, scraps, and debris
- Store loose tools in a box or drawer
- Keep cords untangled and out of the way
- Make sure the floor is dry and clean
Ensuring Proper Lighting
Good lighting helps you see your work clearly. It reduces mistakes and improves sanding quality.
Use bright, even light sources to avoid shadows on your material.
- Use overhead lights or lamps focused on the work area
- Choose daylight bulbs for natural color view
- Avoid glare that can hide details
Setting Up Dust Collection
Belt sanders create a lot of dust that can harm your lungs and make a mess. Set up dust collection before starting.
Use a vacuum or dust bag attachment to catch dust at the source.
- Connect a shop vacuum to the sander’s dust port
- Check that the dust bag is empty and secure
- Wear a dust mask for extra protection
- Keep the area well-ventilated
Personal Safety Measures
Using a belt sander requires care to avoid injuries. Personal safety measures protect you during work.
Focus on wearing the right gear and handling tools safely. Follow safety rules to keep yourself safe.
Essential Protective Gear
Wear safety glasses to protect your eyes from dust and flying particles. Use ear protection to guard your hearing from loud noise.
- Safety glasses or goggles
- Hearing protection like earplugs or earmuffs
- Dust mask or respirator
- Protective gloves for hand safety
- Closed-toe shoes with good grip
Safe Clothing And Accessories
Wear tight-fitting clothes to prevent fabric from catching in the sander. Avoid loose jewelry and tie back long hair.
| Clothing Item | Safety Tip |
| Shirts | Use fitted shirts without loose sleeves |
| Pants | Wear durable pants without frayed edges |
| Jewelry | Remove rings, bracelets, and necklaces |
| Hair | Tie back long hair securely |
| Shoes | Wear sturdy, closed-toe shoes |
Handling Electrical Safety
Inspect the power cord for damage before use. Use a grounded outlet and avoid wet conditions to reduce shock risk.
- Check the cord for cuts or frays
- Plug the sander into a grounded outlet
- Keep the sander and power cord away from water
- Unplug the tool before changing belts or cleaning
- Do not force the sander to work faster than it can
Operating The Belt Sander
Using a belt sander correctly makes your work safe and effective. It helps you smooth surfaces fast and with control.
Follow simple steps to handle the tool well and avoid mistakes or injuries.
Starting And Stopping Techniques
Always start the belt sander before touching the workpiece. This prevents gouges and uneven sanding.
To stop, lift the sander off the surface first, then turn off the power. Wait until the belt stops completely.
- Turn on the sander away from the work
- Let the sander reach full speed
- Place it gently on the surface
- Lift before switching off
- Wait for the belt to stop moving
Correct Hand Positioning
Hold the belt sander firmly with both hands. One hand should grip the front handle and the other the rear handle.
This grip keeps the tool steady and helps you guide it smoothly across the work surface.
- Front hand controls direction
- Rear hand controls power and balance
- Keep hands clear of the sanding belt
- Keep a comfortable and natural grip
Controlling Speed And Pressure
Use moderate pressure to let the belt do the work. Pressing too hard can damage the surface or the tool.
Adjust the speed if your sander has settings. Slower speeds work well on delicate materials.
- Apply light, even pressure
- Do not force the sander forward
- Use higher speed for tough materials
- Lower speed for fine or soft surfaces
Achieving Precision And Finish
Using a belt sander well helps you get smooth, even surfaces. Careful control and steady hands are key.
This guide shows how to operate a belt sander to reach precise results and a clean finish.
Maintaining Consistent Movement
Keep the sander moving at a steady pace. Stop in one spot for too long, and you risk uneven sanding.
- Hold the sander firmly but not too tight.
- Move it evenly along the surface.
- Keep a steady speed to avoid rough patches.
- Guide the sander with smooth, controlled motions.
Avoiding Gouges And Uneven Surfaces
Gouges damage your work and make sanding uneven. Prevent them by controlling pressure and angle.
| Common Cause | How to Avoid |
| Too much pressure | Use light, even pressure |
| Stopping too long in one spot | Keep the sander moving |
| Incorrect angle | Hold the sander flat on surface |
| Damaged sanding belt | Replace belt when worn |
Final Touches And Inspection
Check your work after sanding. Look for rough spots or uneven areas and smooth them out.
Follow this list to finish properly:
- Turn off the sander and clean dust from the surface.
- Run your hand gently over the area to feel for roughness.
- Use finer grit sandpaper for a smoother finish if needed.
- Inspect the edges and corners carefully.
Maintenance And Troubleshooting
Keeping your belt sander in good shape helps it work well and last longer. Regular maintenance stops problems before they start.
Troubleshooting helps you fix issues quickly. Knowing simple fixes saves time and money.
Replacing And Tracking Belts
Replace the sanding belt if it is worn out or torn. Always use the correct size belt for your sander.
Tracking keeps the belt centered during use. Adjust the tracking knob to prevent the belt from slipping off.
- Turn off and unplug the sander before replacing the belt.
- Release the belt tension lever to remove the old belt.
- Place the new belt on the rollers in the correct direction.
- Tighten the tension lever to secure the belt.
- Turn on the sander and adjust the tracking knob slowly.
- Stop when the belt runs smoothly in the center.
Cleaning And Lubrication
Clean dust and debris from your belt sander after each use. This keeps parts working well and prevents damage.
Lubricate moving parts as the manual suggests. Use the right oil or grease to avoid problems.
- Use compressed air to blow out dust from vents and rollers.
- Wipe the exterior with a dry cloth to remove residue.
- Apply lubricant to the belt rollers and bearings carefully.
- Do not over-lubricate to avoid attracting more dust.
- Check the manual for recommended cleaning and lubrication intervals.
Common Issues And Fixes
Belt sanders can face issues like belt slipping, uneven sanding, or motor problems. Fix these quickly to avoid bigger damage.
Use simple steps to solve common problems and keep your sander running smoothly.
- Belt slips:Tighten the belt tension and check for worn belts.
- Belt moves off track:Adjust the tracking knob until the belt centers.
- Uneven sanding:Replace the belt or check if the sanding surface is clean.
- Motor won’t start:Check power supply and clean dust from motor vents.
- Burn marks on wood:Use a slower feed rate and check belt condition.

Credit: www.sumake.com
Frequently Asked Questions
How Do I Start Using A Belt Sander Safely?
Always wear protective gear and check the sander’s condition. Secure your workpiece firmly. Start the sander before contacting the surface to avoid gouging or uneven sanding.
What Grit Belt Should I Use First?
Begin with a coarse grit like 60 or 80 to remove material quickly. Progress to finer grits for a smooth finish. Choose grit based on the wood type and sanding goal.
How Can I Avoid Uneven Sanding Marks?
Keep the sander moving steadily in the direction of the grain. Avoid pressing too hard or staying too long in one spot. Use consistent, overlapping passes for an even surface.
How Do I Maintain My Belt Sander For Longevity?
Clean the sander regularly and check the belt tension. Replace worn belts immediately. Store in a dry place and avoid dust buildup inside the motor housing.
Conclusion
Mastering the use of a belt sander takes practice. Safety is key. Always wear goggles and gloves. Keep your workspace clean and organized. Remember to check the sander for any damage before use. Start with a lower grit belt for rough surfaces.
Gradually move to a finer grit for smooth finishes. Always sand in the direction of the wood grain. This prevents scratches. Keep a steady hand to avoid gouges. Regular maintenance ensures the sander works well. Follow these tips, and you’ll achieve great results.
Happy sanding!
