Are you tired of digging through messy drawers or cluttered workbenches every time you need a tool? Setting up a pegboard for your hand tools can completely change the way you work.
Imagine having every hammer, screwdriver, and wrench right where you need them—easy to find and ready to use. In this guide, you’ll learn simple steps to create an organized, efficient workspace that saves you time and frustration. Keep reading, and you’ll discover how a few smart moves can turn your tool storage into a game-changer.

Credit: www.youtube.com
Choosing The Right Pegboard
Setting up a pegboard for your hand tools helps keep your workspace neat. Choosing the right pegboard is important for durability and function.
Consider the material, size, thickness, color, and finish. These factors affect how well your pegboard will hold tools and fit your space.
Material Options
Pegboards come in different materials. Each has its own strength and look. Choose a material that fits your tools and environment.
- Wood: Classic look, strong but can warp in moisture.
- MDF (Medium Density Fiberboard): Smooth surface, affordable, less durable than wood.
- Metal: Very strong and durable, good for heavy tools.
- Plastic: Lightweight and resistant to moisture, but less sturdy.
Size And Thickness
Pick a pegboard size that fits your workspace and tool collection. Bigger boards hold more tools but need more wall space.
Thickness matters for strength. Thicker boards hold heavier tools without bending or breaking.
- Standard sizes: 2×4 feet, 4×8 feet, or custom sizes.
- Common thickness: 1/4 inch to 1/2 inch.
- Thicker boards support heavier hooks and tools.
Color And Finish
Choose a color that matches your workspace style. Light colors make it easier to see tools and holes.
Finish protects the pegboard from damage. A smooth finish helps tools slide on and off hooks easily.
- Painted pegboards resist dirt and moisture.
- Natural wood finish looks warm but may need sealing.
- Glossy finish is easier to clean but can reflect light.
Gathering Necessary Tools And Supplies
Setting up a pegboard for your hand tools starts with gathering the right supplies. Having everything ready makes the process smooth and organized.
This guide covers the main items you need, including mounting hardware, support materials, and tool hooks.
Mounting Hardware
You need the right mounting hardware to secure your pegboard safely on the wall. Choose hardware that matches your wall type and can hold the weight of your tools.
- Screws suitable for drywall, wood, or concrete
- Wall anchors or toggle bolts for added support
- Washers to prevent screw heads from pulling through
- A drill and drill bits matching the screw size
Support Materials
Support materials keep the pegboard stable and create space behind it for hooks. These materials help prevent damage to the wall and make tool access easier.
| Material | Purpose |
| Wooden furring strips | Raise pegboard off the wall for hook clearance |
| Shims | Level uneven walls before mounting |
| Spirit level | Ensure pegboard is straight |
| Measuring tape | Mark mounting points accurately |
Tool Hooks And Accessories
Tool hooks and accessories hold your hand tools in place. Select hooks that fit the size and shape of your tools for easy access.
- Standard pegboard hooks for hammers, pliers, and screwdrivers
- Specialty hooks for wrenches, tape measures, and scissors
- Bins or baskets for small parts and fasteners
- Magnetic strips for metal tools
- Tool holders for drills or power tools
Preparing The Wall Space
Setting up a pegboard for hand tools starts with preparing the wall space. A well-prepared wall makes the pegboard strong and easy to use.
Take time to choose the right spot and check the wall condition. This helps your pegboard hold tools safely.
Selecting The Location
Pick a wall area that is easy to reach and has enough space. Avoid places near water or heavy traffic.
Choose a spot where light is good. This helps you see tools clearly. Make sure the wall is flat and dry.
Measuring And Marking
Measure the wall space to fit the pegboard size. Mark where the top and sides of the pegboard will go.
Use a pencil and level to draw straight lines. Accurate marks help keep the pegboard even and secure.
- Measure width and height of pegboard
- Mark corners on the wall
- Use level to draw horizontal and vertical lines
Checking For Studs
Studs are wooden or metal supports inside the wall. Mounting the pegboard on studs makes it stronger.
Use a stud finder or knock on the wall to find studs. Mark their position on your measuring lines.
- Use a stud finder tool
- Tap wall to hear solid spots
- Mark stud locations with pencil
Installing The Pegboard
Setting up a pegboard for hand tools helps keep your workspace organized. A proper installation makes it easy to hang and find your tools quickly.
This guide covers how to install the pegboard securely on your wall. Follow these steps to create a strong and stable setup.
Mounting Frame Setup
Start by building a mounting frame to hold the pegboard away from the wall. The frame creates space for peg hooks to fit behind the board.
Use wooden strips that are about 1 inch thick and fit the size of your pegboard. Attach these strips to the wall studs for a strong frame.
- Measure the pegboard width and height
- Cut wooden strips to match the pegboard edges
- Find wall studs with a stud finder
- Screw the strips firmly into the studs
- Make sure the frame is level and flush
Securing The Pegboard
Place the pegboard onto the mounting frame carefully. Align it so the holes line up and the board is flush with the frame.
Use screws with washers to fasten the pegboard to the wooden frame. This keeps the board stable and prevents it from warping.
- Position pegboard on the frame
- Use screws with washers for support
- Screw through pegboard into the frame every 12 inches
- Do not overtighten screws to avoid damage
Ensuring Stability
Check that the pegboard does not wobble or bend after installation. Stability is important for holding heavy tools safely.
If needed, add extra supports behind the board. You can also add corner braces to keep everything firm.
- Test the pegboard by gently pressing on different spots
- Add more screws if the board moves
- Install corner braces for extra strength
- Ensure all screws are tight but not overdone
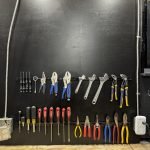
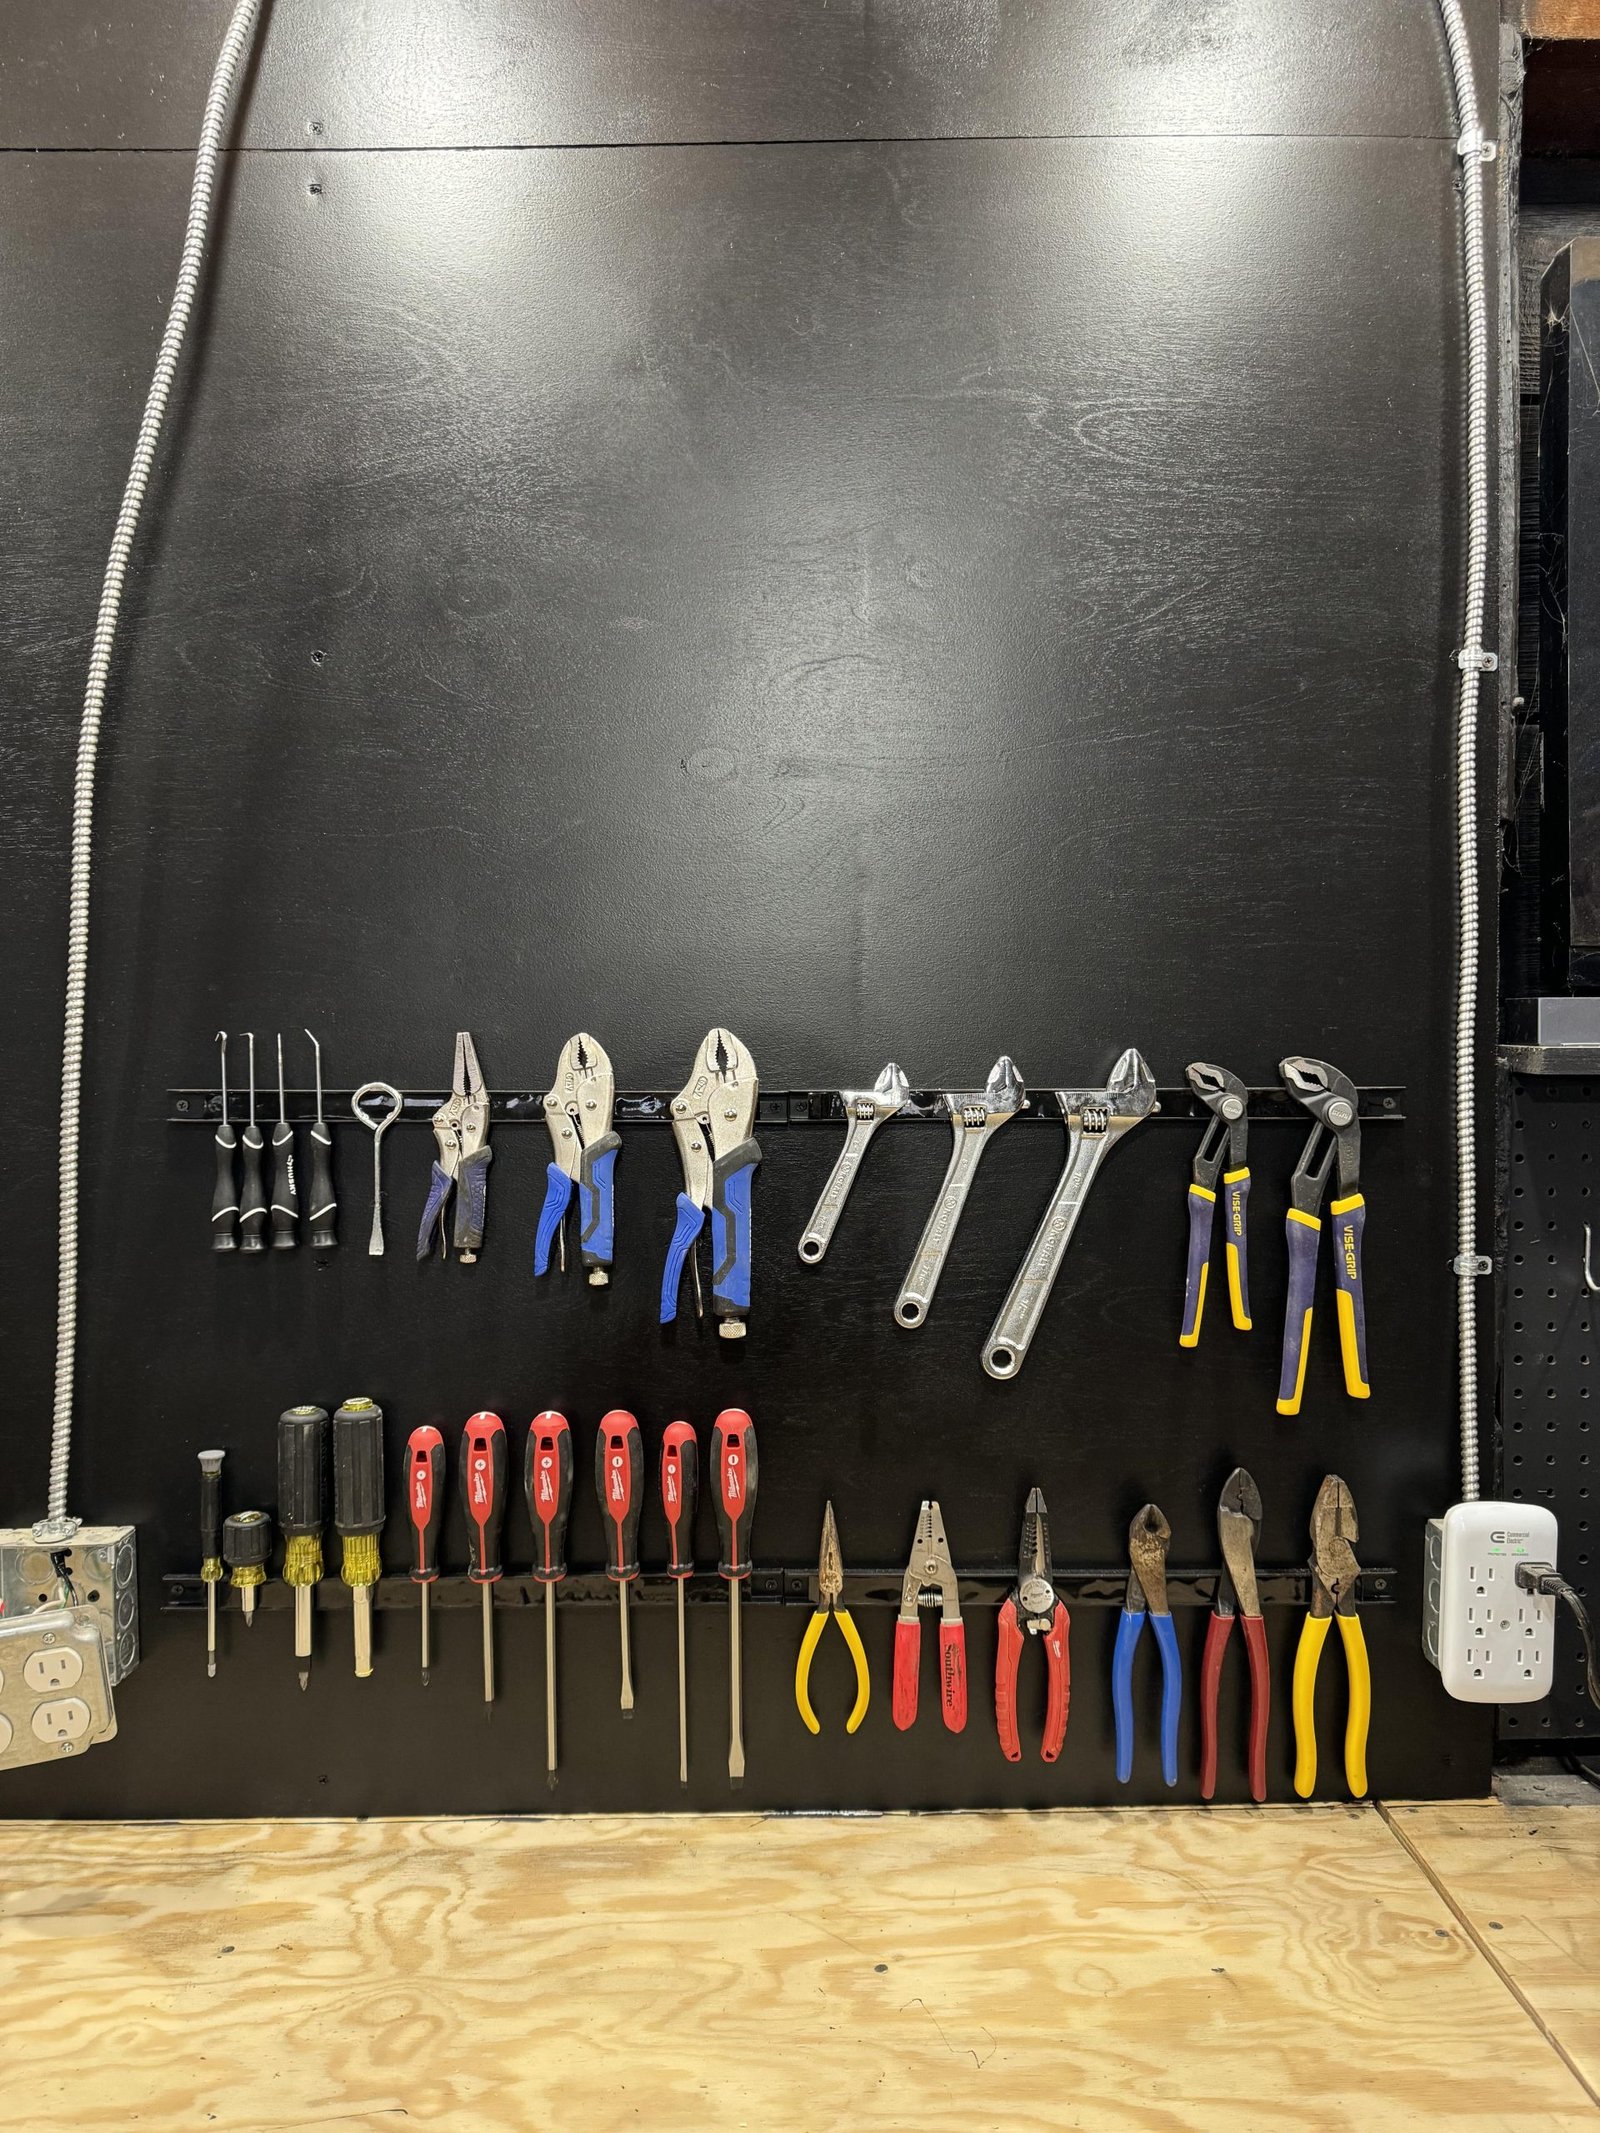
Organizing Hand Tools
Keeping hand tools organized helps you find them quickly. A pegboard is a great way to keep tools tidy and visible.
Setting up a pegboard lets you arrange tools neatly and saves space in your workshop.
Grouping By Type
Group similar tools together on the pegboard. This makes it easy to spot the tool you need.
For example, hang all screwdrivers in one area and all wrenches in another.
- Hammers with hammers
- Pliers with pliers
- Measuring tools in one spot
- Cutting tools grouped together
Arranging For Accessibility
Place the most used tools at eye level. This saves time and effort when reaching for them.
Keep heavy tools lower and lighter ones higher to avoid accidents.
- Frequently used tools in front
- Rarely used tools in less accessible spots
- Leave space for easy removal
- Arrange tools by size for neatness
Labeling Sections
Label each section on the pegboard. Labels help you and others find tools fast.
You can use simple tags or printed labels for clarity.
- Use clear and readable fonts
- Place labels above or below tool groups
- Color code labels for quick recognition
- Update labels if you change the layout
Adding Custom Features
Customizing your pegboard makes tool storage easier and more efficient. Adding features like magnetic strips, small bins, and better lighting helps keep tools visible and organized.
These upgrades save time and reduce clutter in your workspace. You can tailor your pegboard to fit the tools you use most.
Magnetic Strips
Magnetic strips attach easily to your pegboard. They hold metal tools like screwdrivers, pliers, and wrenches. This keeps tools within reach and prevents them from falling.
Choose strong magnets that can hold heavier tools. Place strips at different heights to fit various tool sizes.
Small Bins And Holders
Small bins and holders add extra storage for tiny parts and accessories. Use them for nails, screws, drill bits, and other small items. This keeps your workspace tidy and tools easy to find.
- Plastic bins with labels help sort items quickly.
- Stackable bins save space on your pegboard.
- Hooks and holders keep larger items off the work surface.
- Clear containers let you see contents at a glance.
Lighting Enhancements
Good lighting improves visibility around your pegboard. Adding LED strips or small spotlights shows tools clearly. It reduces eye strain and speeds up your work.
| Lighting Type | Benefits | Placement Tips |
|---|---|---|
| LED Strip Lights | Even, bright light | Attach along top edge |
| Spotlights | Focus on work area | Mount overhead or side |
| Clip-on Lamps | Adjustable direction | Clip where needed |
Maintaining And Updating Your Pegboard
Keeping your pegboard clean and organized helps you find tools fast. Regular care makes your workspace neat.
Updating your pegboard keeps it useful as your tool collection grows or changes. Small changes make a big difference.
Regular Cleaning
Dust and dirt can build up on your pegboard and tools. Clean it often to keep everything visible and easy to use.
Use a soft cloth or brush to remove dust. Wipe the tools with a damp cloth to prevent rust.
- Remove all tools before cleaning
- Use mild soap and water for sticky spots
- Dry the pegboard and tools well before replacing them
Rearranging Tools
Move tools around to fit your work habits. Keep the most used tools within easy reach.
Try grouping similar tools together. This makes it faster to find what you need.
- Place frequently used tools at eye level
- Group hand tools like hammers and screwdrivers
- Use hooks and holders for different tool sizes
Expanding Storage
Add more pegboard panels to increase your storage space. This helps when you buy new tools.
Use baskets or shelves on the pegboard for small items. These keep things from falling off.
- Attach extra pegboard sections side by side
- Install small shelves for screws and nails
- Use magnetic strips for metal tools

Credit: www.reddit.com

Credit: www.reddit.com
Frequently Asked Questions
What Tools Do I Need To Install A Pegboard?
To install a pegboard, you’ll need a drill, level, screws, and wall anchors. These basic tools ensure your pegboard is securely mounted. Also, consider using a stud finder for added stability. With these tools, setting up your pegboard becomes a straightforward task, ensuring a neat and organized workspace.
How Do I Choose The Right Pegboard Size?
Choose a pegboard size based on your available wall space and tool collection. Measure your wall area carefully, ensuring the pegboard fits. Consider your tool quantity and size for optimal organization. A larger pegboard offers more flexibility for future tool additions, enhancing your workspace’s efficiency and accessibility.
Can I Paint My Pegboard For Customization?
Yes, you can paint your pegboard to match your workspace. Use a primer and spray paint for best results. Painting allows you to customize the pegboard to fit your aesthetic. Ensure the paint is dry before hanging tools to avoid any damage or mess.
How Do I Organize Tools On A Pegboard?
Organize tools by grouping similar items together for easy access. Use hooks and bins for efficient storage. Arrange frequently used tools at eye level for convenience. Regularly reassess your setup to ensure it’s effective and meets your needs. This organization maximizes space and improves workflow.
Conclusion
Setting up a pegboard for hand tools keeps your workspace neat and easy to use. Choose the right spot and hang your tools where you can reach them fast. Use hooks and holders that fit each tool well. Keep your pegboard tidy by putting tools back after each job.
This simple setup saves time and reduces mess. Start organizing today and enjoy a cleaner, more efficient work area.