Have you ever found yourself in the middle of a project, only to waste precious time searching for your sanding blocks? If your answer is yes, you’re not alone.
Organizing your tools can feel like a never-ending battle, but it doesn’t have to be. Imagine a workspace where your sanding blocks are always within arm’s reach, neatly stored and easy to find. Doesn’t that sound like a dream? The good news is that it’s entirely possible with a few simple strategies.
You’ll discover how to store sanding blocks efficiently, making your DIY projects smoother and more enjoyable. Stay with us, because the solution to your cluttered chaos is just a few paragraphs away.
Credit: www.etsy.com
Choosing The Right Storage
Storing sanding blocks properly saves space and keeps them ready to use. Picking the right storage method can protect your blocks from damage.
Different storage options fit different workspaces. Think about your space and how often you use sanding blocks before choosing.
Selecting Containers
Containers keep sanding blocks clean and organized. Choose containers that fit the size and shape of your blocks.
- Clear plastic bins let you see the blocks inside.
- Stackable containers save space on shelves.
- Containers with lids protect blocks from dust and moisture.
- Label each container to find blocks quickly.
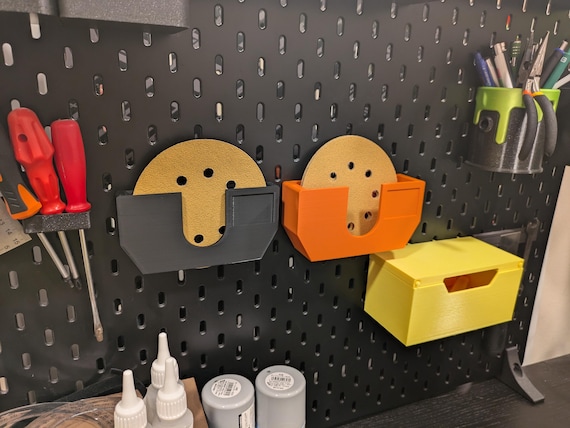
Using Wall-mounted Solutions
Wall-mounted storage frees up workspace and keeps blocks within reach. Hooks, racks, or pegboards work well for this.
| Wall Solution | Benefit |
|---|---|
| Pegboard with hooks | Adjustable and easy to add more hooks |
| Mounted racks | Keeps blocks visible and accessible |
| Magnetic strips | Quick grab and release for blocks with metal parts |
Incorporating Drawer Organizers
Drawer organizers divide drawers into sections to keep sanding blocks neat. They prevent blocks from rubbing against each other.
- Use small compartments for different block types.
- Choose organizers that fit your drawer size.
- Label each section for quick identification.
- Keep frequently used blocks in front for easy access.
Preparing Sanding Blocks
Properly storing sanding blocks helps keep them useful longer. Preparing them before storage is key to maintaining their quality.
This guide covers cleaning sanding blocks and labeling them for easy access later.
Cleaning Before Storage
Remove dust and debris from sanding blocks to keep them effective. Clean blocks dry better and last longer.
- Tap the block gently to knock off loose dust.
- Use a soft brush to remove stuck particles.
- For foam blocks, rinse lightly with water and air dry fully.
- Avoid using harsh chemicals that can damage the surface.
Labeling For Easy Access
Label sanding blocks to find the right grit quickly. Clear labels save time and avoid confusion.
| Label Type | Purpose | Example |
| Permanent Marker | Write grit number on block edges | 80, 120, 220 |
| Sticky Tags | Attach to blocks or storage containers | Coarse, Medium, Fine |
| Color Coding | Use colors to mark grit ranges | Red for coarse, green for medium |
Space-saving Techniques
Keeping sanding blocks organized saves space and time. A tidy workspace helps you find tools quickly. Using smart storage ideas fits more blocks in less room.
Try different ways to stack and group your sanding blocks. Use vertical space to keep blocks off your work surface. Group by grit size to speed up your work.
Stacking Methods
Stack sanding blocks flat to save drawer or shelf space. Keep blocks of the same size in neat piles. Use separators or thin boards between stacks to avoid damage.
- Place blocks flat, one on top of another
- Use cardboard or wood sheets between stacks
- Limit stack height to avoid crushing
- Label stacks for easy identification
Utilizing Vertical Space
Vertical storage frees up horizontal room. Hang sanding blocks or store them in vertical containers. Use pegboards or wall-mounted racks for easy access.
| Storage Type | Benefit |
| Pegboard Hooks | Easy to see and grab blocks |
| Vertical Bins | Keeps blocks upright and organized |
| Wall Racks | Saves workbench surface space |
Grouping By Grit Size
Sorting sanding blocks by grit size speeds up your work. Keep similar grit blocks together to avoid confusion. Use labeled containers or dividers for neat grouping.
Try using a small container with compartments for each grit size. This method keeps blocks separated and easy to reach. Label each section clearly.
- Coarse grit (40-60)
- Medium grit (80-120)
- Fine grit (150-220)
- Extra fine grit (240+)

Credit: fastplus.eu
Diy Storage Ideas
Keeping sanding blocks organized helps save space and time. Good storage protects them from damage.
Try simple DIY ideas to store your sanding blocks efficiently. Use things you already have at home.
Repurposing Household Items
You can reuse common household items to store sanding blocks. This saves money and reduces waste.
Items like old shoe boxes, ice cube trays, or muffin tins work well. They keep blocks separated and easy to find.
- Use a shoe box with dividers for different block sizes
- Ice cube trays hold small sanding blocks neatly
- Muffin tins store blocks and keep them visible
- Old jars or containers protect blocks from dust
Crafting Custom Holders
Making your own sanding block holders lets you fit your space perfectly. Use wood, cardboard, or plastic sheets.
Create slots or compartments sized for your blocks. Label each section to find blocks quickly.
- Cut wood boards with grooves to hold blocks upright
- Use sturdy cardboard to build a stackable organizer
- Attach Velcro strips inside a box for block storage
- Paint or decorate holders for easy identification
Maintaining Organized Storage
Keeping sanding blocks stored properly saves space and time. Organized storage helps you find blocks quickly.
It also protects the blocks, so they last longer and work better for your projects.
Regular Inspection
Check your sanding blocks often to spot damage or dirt. Clean blocks work more efficiently.
- Look for cracks or worn surfaces.
- Remove dust and debris after each use.
- Keep blocks dry to avoid mold or damage.
- Separate blocks by grit size for easy access.
Replacing Worn Blocks
Replace sanding blocks when they lose their shape or grit. Using worn blocks reduces the quality of your work.
| Condition | Action |
| Cracked or broken | Discard immediately |
| Worn smooth or flat | Replace with new block |
| Clogged with dust | Clean thoroughly or replace |
| Sticky or damp | Dry completely before use |

Credit: fastplus.eu
Frequently Asked Questions
How Can I Organize Sanding Blocks Efficiently?
Store sanding blocks in labeled containers or drawer dividers. Keep them dry and separated by grit for easy access. This prevents damage and saves time during projects.
What Is The Best Storage For Sanding Blocks?
A clear plastic box with compartments works best. It protects blocks from dust and moisture while keeping different grits organized and visible.
How Do I Keep Sanding Blocks From Getting Damaged?
Avoid stacking blocks directly on top of each other. Use dividers or individual slots to prevent bending and maintain their shape.
Can I Store Sanding Blocks With Other Tools?
Yes, but separate them using organizers or compartments. This keeps sanding blocks clean and prevents contamination from oils or dirt on other tools.
Conclusion
Storing sanding blocks properly saves time and keeps them in good shape. Use containers or racks to keep them tidy and dry. Avoid stacking blocks to prevent damage and maintain their quality. Label your storage to find blocks quickly when needed.
Regularly check for worn-out blocks and replace them promptly. Simple habits make your workspace cleaner and more efficient. Keep your sanding blocks ready for the next project without hassle. Good storage helps your tools last longer and work better.