If you’re working with galvanized pipes, knowing how to thread them properly can save you time, money, and frustration. Threading galvanized pipes might seem tricky at first, but with the right steps, tools, and tips, you can do it yourself like a pro.
Imagine finishing your project smoothly, with pipes that fit perfectly and last longer. Keep reading, and you’ll discover simple, clear instructions that make threading galvanized pipes easy and stress-free. Your next plumbing job just got a whole lot simpler.
Tools Needed
Threading galvanized pipes requires the right tools to make clean and strong threads. Using the proper equipment helps you work safely and efficiently.
Before starting, gather all tools you need. This guide explains the main types of pipe threaders and extra equipment.
Pipe Threader Types
There are several pipe threaders for threading galvanized pipes. Choose one based on the job size and your skill level.
- Manual Pipe Threader:Hand-operated tool for small jobs and tight spaces.
- Electric Pipe Threader:Powered tool that speeds up threading for medium to large pipes.
- Hydraulic Pipe Threader:Uses hydraulic power for heavy-duty and industrial projects.
Each type fits different pipe sizes and threading needs. Select the right threader to get clean threads without damaging the pipe.
Additional Equipment
Besides a pipe threader, you need other tools to prepare and finish the threading job. These help protect the pipe and improve thread quality.
- Pipe Cutter or Hacksaw:To cut the pipe to the correct length before threading.
- Pipe Vise:Holds the pipe steady while you thread it.
- Threading Oil:Lubricates the pipe and die to prevent damage and make threading smoother.
- Deburring Tool:Removes sharp edges inside and outside the pipe after cutting.
- Measuring Tape:Measures pipe length and thread depth accurately.
Having these tools ready helps you work faster and produce strong, reliable threads on galvanized pipes.
Preparing The Pipe
Preparing galvanized pipes before threading is key for a strong and safe connection. Proper prep helps the threads fit well and prevents leaks.
This guide covers cutting the pipe to the right length and cleaning its surface to get it ready for threading.
Cutting To Length
Cut the pipe to the desired length using a pipe cutter or a hacksaw. Make sure the cut is straight for a good thread fit.
- Measure the pipe length needed for your project.
- Mark the cutting spot clearly with a pencil or marker.
- Secure the pipe firmly in a vice or clamp.
- Use a pipe cutter for a clean cut or a hacksaw for thicker pipes.
- After cutting, remove any burrs or sharp edges with a file.
Cleaning The Surface
Clean the pipe’s surface before threading to remove dirt, rust, and oil. This ensures the threading tool works smoothly.
| Cleaning Step | Tools Needed | Purpose |
|---|---|---|
| Remove rust and dirt | Wire brush or sandpaper | Clear the metal for clean threads |
| Degrease surface | Rag and solvent (like acetone) | Remove oil and grease |
| Dry pipe | Clean cloth or air dry | Prevent moisture during threading |
Marking The Thread Start
Marking the thread start on galvanized pipes helps make accurate cuts and threads. This step ensures the threads begin at the right place on the pipe.
Without proper marking, the pipe threads may not fit well with fittings. This can cause leaks or weak connections.
Tools Needed For Marking
Before marking, gather the right tools. These tools help you mark clearly and measure correctly.
- Measuring tape or ruler
- Permanent marker or pencil
- Pipe cutter or saw (for cutting)
- Caliper (optional, for precision)
Measuring The Thread Length
Measure the length of the threads needed using the pipe’s specifications. Thread length depends on pipe size and fitting type.
Use a measuring tape to mark this length on the pipe surface. Marking ensures you do not cut or thread too far.
Marking The Start Point
Find the end of the pipe where threading will begin. Place a clear mark at this point. This mark shows where the die will start cutting threads.
Double-check Your Marks
After marking, check the points twice. Ensure the marks are straight and at the correct distance. This prevents errors when threading.
- Measure the thread length carefully.
- Mark the thread start clearly.
- Verify the marks before threading.
Credit: dfhydraulics.com
Applying Lubricant
Threading galvanized pipes requires careful preparation. Applying lubricant helps create clean threads.
Lubricant reduces friction and prevents damage to the pipe threads during cutting.
Choosing The Right Lubricant
Use lubricants made for metal pipe threading. These lubricants protect the pipe and your tools.
Avoid using oils that can react with galvanized coating or cause rust.
- Choose pipe thread cutting oil or lubricant
- Check that it is safe for galvanized steel
- Look for lubricants that reduce heat and wear
- Avoid general-purpose oils that may harm the pipe
Proper Application
Apply lubricant evenly on the pipe end before threading. This helps the die cut smoothly.
Reapply lubricant often during threading to keep the area slick and cool.
- Coat the pipe threads with lubricant before starting
- Apply more lubricant every few turns of the die
- Wipe off excess lubricant after threading
- Keep lubricant away from areas not being threaded
Threading Process
Threading galvanized pipes lets you connect them tightly. This process uses special tools to cut threads on pipe ends.
Correct threading ensures strong, leak-free joints. Follow the right steps for good results.
Aligning The Threader
Place the pipe securely before starting. Make sure the threader tool is straight and fits the pipe size.
Aligning the threader keeps threads even and prevents damage. Check the angle carefully before turning.
Turning Technique
Turn the threader slowly and steadily. Use even pressure to cut clean threads on the pipe.
Avoid rushing or forcing the tool. Smooth turns help make strong threads and save the pipe from cracks.
- Start turning clockwise
- Keep steady, even speed
- Do not stop and start abruptly
- Use proper tools for pipe size
Clearing Debris
Remove metal shavings and dirt after threading. Clean threads ensure tight pipe connections.
Use a brush or cloth to clear debris. Check threads carefully to avoid leaks or weak joints.
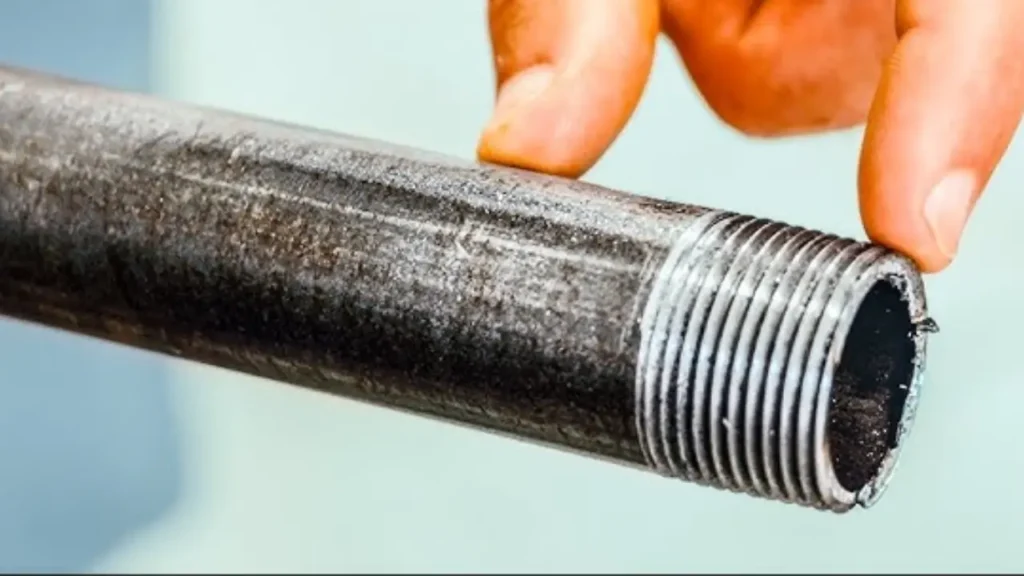
Checking Thread Quality
Checking the quality of threads on galvanized pipes is important for a good fit. It ensures the pipe will not leak and will join tightly.
Two common ways to check thread quality are visual inspection and using thread gauges. Both help find any problems before installation.
Visual Inspection
Look closely at the threads on the pipe after threading. Check for any damage or uneven cuts.
Good threads should be clean, sharp, and free from burrs or cracks. Damaged threads can cause leaks or weak joints.
- Check that threads are uniform in shape and size
- Look for any cuts or nicks on the threads
- Make sure no metal shavings or debris remain
- Ensure threads are not flattened or distorted
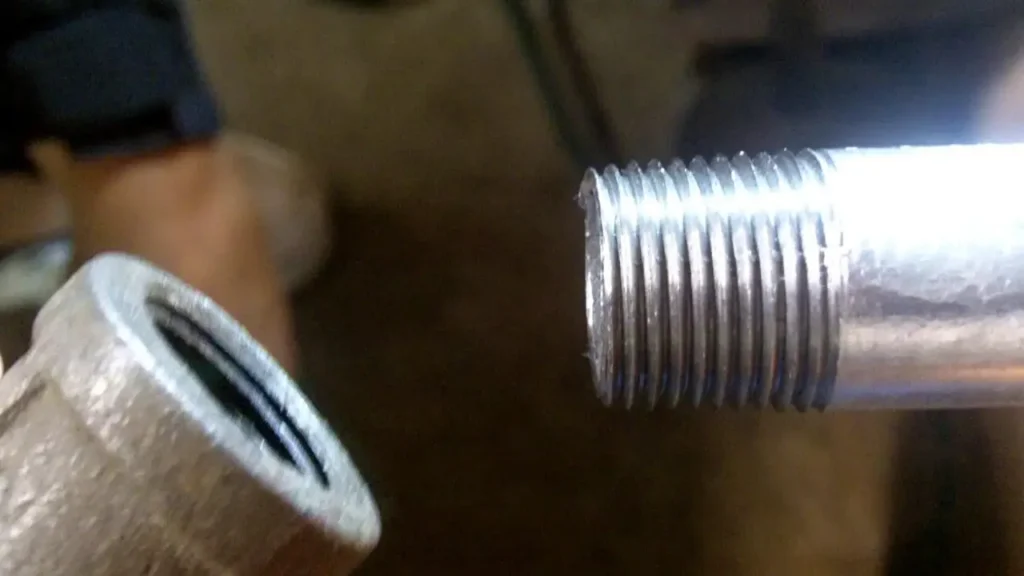
Using Thread Gauges
Thread gauges measure if the threads meet the correct size and pitch. They help confirm the threads are made properly.
Use the gauge by fitting it onto the pipe threads. If the gauge fits snugly without force, the threads are correct.
- Select the right thread gauge for your pipe size
- Place the gauge over the pipe threads
- Check that the gauge fits smoothly and fully
- If the gauge is loose or tight, threads need correction
Finishing Touches
After threading galvanized pipes, the last steps ensure a secure and leak-free connection. These finishing touches help keep your pipes strong and protected.
Proper cleaning and sealing of the threads improve pipe performance and prevent damage. Take time to do these steps carefully.
Cleaning Threads
Clean threads remove dirt, rust, and metal shavings. This helps the threads fit tightly and prevents leaks.
Use a wire brush or cloth to clean the threads after cutting or threading the pipe. Make sure the threads are dry before sealing.
- Remove all debris from inside and outside threads
- Use a wire brush for stubborn rust or dirt
- Wipe with a clean cloth to remove dust
- Ensure threads are completely dry before next step
Applying Thread Sealant
Thread sealant prevents leaks and protects threads from rust. Use a pipe thread compound or Teflon tape for best results.
Apply the sealant evenly over the threads. Avoid excess material that can block the pipe or cause damage.
- Wrap Teflon tape clockwise around threads 2-3 times
- Or apply a thin layer of pipe thread compound with a brush
- Cover all threads but avoid buildup in pipe opening
- Thread pipe carefully to avoid tearing the sealant
Credit: dfhydraulics.com
Safety Tips
Threading galvanized pipes can be risky without proper safety steps. Use the right tools and protect yourself.
Careful preparation helps avoid injuries and ensures a clean job. Follow these safety tips closely.
Wear Protective Gear
Always wear gloves to protect your hands from sharp edges. Use safety glasses to shield your eyes from metal chips.
Long sleeves and closed shoes help protect your skin from sparks and debris.
Secure The Pipe Properly
Clamp the pipe firmly in a vise before threading. This stops the pipe from moving and prevents accidents.
Make sure the vise is tight and stable to handle the pressure from threading tools.
Use The Right Tools
Choose a pipe threader that fits the pipe size. Using the wrong tools can cause slips and damage.
Check that all tools are in good condition and properly maintained before starting the job.
Work In A Well-ventilated Area
Threading galvanized pipes can release metal dust and fumes. Always work in fresh air or near an open window.
If indoors, use a fan or ventilation system to clear the air. Avoid breathing in dust or fumes.
Keep Your Workspace Clean
Remove oil, grease, and clutter from your work area. A clean space reduces the risk of slips and falls.
Dispose of metal shavings properly to avoid sharp hazards on the floor.
Follow Proper Threading Techniques
Do not force the threading tool. Use steady, even pressure to avoid tool slips.
Stop and clear metal chips regularly to prevent jams and ensure clean threads.
Credit: www.familyhandyman.com
Frequently Asked Questions
How Do You Prepare Galvanized Pipes For Threading?
Clean the pipe surface thoroughly to remove rust and debris. Use a pipe cutter to cut the pipe to length. Deburr the inside edges to ensure smooth threading.
What Tools Are Required To Thread Galvanized Pipes?
You need a pipe threading machine or manual pipe threader, cutting oil, pipe cutter, and a deburring tool. These tools help create clean, precise threads.
Can I Thread Galvanized Pipes At Home Safely?
Yes, with proper tools and safety gear, threading galvanized pipes at home is possible. Follow instructions carefully and work in a well-ventilated area.
Why Use Cutting Oil When Threading Galvanized Pipes?
Cutting oil lubricates the pipe and threading die, reducing friction and heat. It helps create clean threads and extends tool life.
Conclusion
Threading galvanized pipes becomes easy with practice. Just follow simple steps. First, gather necessary tools. Measure and cut the pipe accurately. Secure it properly in the vise. Use a threader and apply steady pressure. Rotate smoothly to create threads. Always check your work.
Ensure threads are even and clean. Practice ensures better results each time. Safety first; wear gloves and goggles. Avoid rushing to prevent mistakes. With patience and care, threading pipes becomes straightforward. Soon, you’ll handle projects with confidence. Happy threading!