If you’ve ever tried to install trim by hand, you know how tricky it can be to get those nails just right without damaging the wood or your walls. Using a nail gun for trim makes the job faster, cleaner, and more professional-looking.
But if you’re new to nail guns, it can feel a bit intimidating at first. Don’t worry—this guide is here to help you master the basics step by step. By the end, you’ll have the confidence to handle your nail gun like a pro and achieve flawless trim every time.
Ready to make your trim work easier and more precise? Let’s dive in.
Choosing The Right Nail Gun
Using a nail gun for trim work makes the job faster and cleaner. Picking the right nail gun is important for good results.
Different nail guns suit different types of trim and materials. Understanding your options helps you choose the best tool.
Types Of Nail Guns For Trim
Nail guns come in various types for trim work. The main types are brad nailers, finish nailers, and pin nailers.
Brad nailers use thin nails for delicate trim. Finish nailers use thicker nails for stronger hold. Pin nailers use very small nails for fine work.
- Brad Nailer:Good for light trim and small moldings.
- Finish Nailer:Best for baseboards and larger trim.
- Pin Nailer:Ideal for tiny trim and delicate pieces.
Selecting The Correct Nail Size
Nail size affects how well your trim stays in place. Choose nails that fit the thickness of your trim and wall material.
Use shorter nails for thin trim to avoid splitting. Longer nails work better for thick trim or hardwood surfaces.
- 1 to 1.5 inch nails: Thin trim and softwood
- 1.5 to 2.5 inch nails: Medium to thick trim
- Over 2.5 inches: Heavy trim and hardwood
Corded Vs. Cordless Options
Corded nail guns plug into power outlets. They offer continuous power but limit movement.
Cordless nail guns run on batteries. They allow more freedom but need charging. Choose based on your work area and job size.
- Corded Nail Guns:Great for long jobs near outlets
- Cordless Nail Guns:Best for tight spaces and quick jobs
- Battery Life:Check battery time for cordless guns
Preparing For The Job
Using a nail gun for trim work needs good preparation. This helps you work safely and get good results.
Before you start nailing, prepare your tools, workspace, and materials carefully.
Safety Gear Essentials
Wear safety gear to protect yourself from injuries. Nail guns can cause serious harm if not handled well.
Use gear that covers your eyes, ears, and hands. This keeps you safe from flying nails and loud noise.
- Safety glasses or goggles to protect your eyes
- Earplugs or earmuffs to protect your hearing
- Work gloves to protect your hands
- Closed-toe shoes to protect your feet
Setting Up The Workspace
Clear the area where you will work. A clean space helps you move and work safely.
Make sure there is enough light to see the trim and nail gun clearly. Organize your tools nearby for easy reach.
- Remove any clutter or obstacles
- Check for good lighting
- Place tools and nail gun on a stable surface
- Ensure the work area is dry and free from hazards
Inspecting The Trim And Surface
Look over the trim pieces before nailing. Check for cracks or damage that could cause problems.
Also, inspect the surface where you will attach the trim. It should be clean and solid for a strong hold.
- Check trim for splits, knots, or warping
- Clean dirt or dust from the surface
- Make sure the surface is dry and flat
- Mark where you want to place the nails
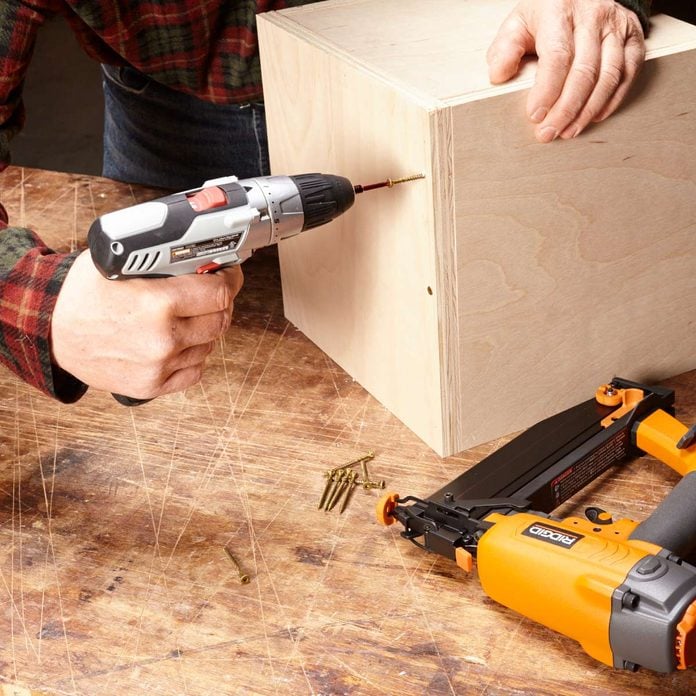
Loading And Adjusting The Nail Gun
Using a nail gun for trim work needs careful loading and adjustment. Proper handling makes your work easier and safer.
Learn how to load nails, adjust settings, and check the tool for any problems before you start.
How To Load Nails Properly
Loading nails correctly helps your nail gun work without interruptions. Follow these steps to load nails safely.
- Turn off and unplug the nail gun before loading nails.
- Open the magazine by pressing the release button or latch.
- Insert the correct size and type of nails into the magazine.
- Make sure nails are aligned and seated properly in the track.
- Close the magazine securely until it clicks into place.
- Check that nails feed smoothly by gently pulling the magazine.
Adjusting Depth And Pressure Settings
Adjusting depth and pressure controls how far nails go into the wood. Set them right to avoid damage.
| Setting | Purpose | How to Adjust |
| Depth | Control nail embedment depth | Turn depth adjustment dial or knob |
| Pressure | Control air pressure or force of nail | Use regulator knob or switch |
| Test | Check settings on scrap wood | Fire test nails and adjust as needed |
Checking For Jams And Malfunctions
Jams stop your work and can harm the nail gun. Look for signs and fix jams quickly.
- Turn off and unplug the nail gun before clearing jams.
- Open the magazine and remove any stuck nails carefully.
- Check the nail path for dirt or debris and clean it.
- Inspect the driver blade for damage and replace if needed.
- Test the nail gun after clearing to ensure it works smoothly.
Credit: www.familyhandyman.com
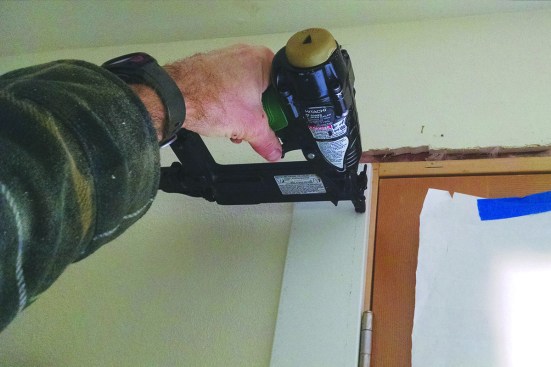
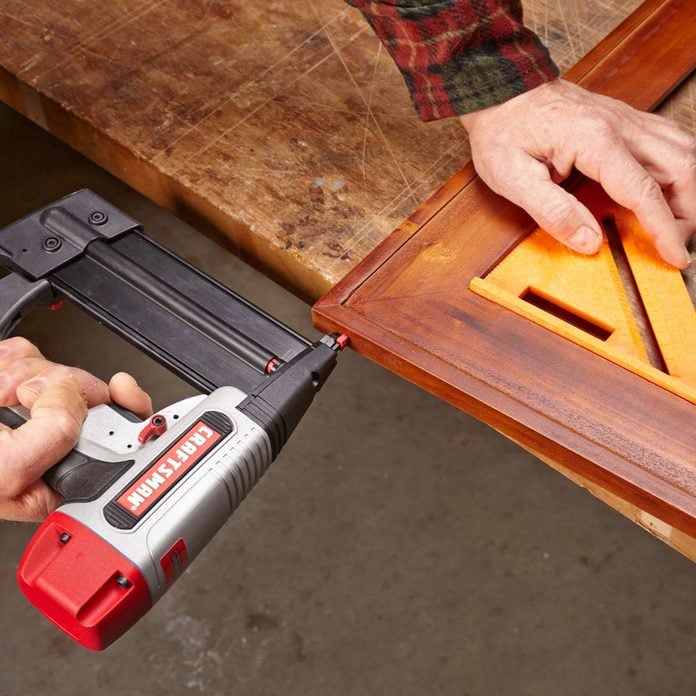
Techniques For Nailing Trim
Nailing trim properly keeps it secure and neat. Using a nail gun makes the job faster and easier.
Good techniques help avoid damage and ensure the trim stays in place for a long time.
Positioning The Nail Gun
Hold the nail gun so the tip touches the trim surface. Aim at the edge where the trim meets the wall.
Keep the gun straight and not angled. This helps nails go in clean and prevents splitting the wood.
- Place tip flush with the trim
- Aim at the stud behind the trim
- Hold nail gun perpendicular to surface
- Avoid angled shots to prevent damage
Maintaining Steady Pressure
Press the nail gun firmly against the trim before firing. Steady pressure helps nails enter smoothly.
Do not push too hard or too soft. Too much force can dent the trim, too little can cause misfires.
- Apply even pressure on the nail gun
- Hold steady until the nail fires
- Release pressure slowly after firing
- Check for dents or splits after each nail
Spacing Nails For Best Hold
Space nails evenly along the trim to keep it tight against the wall. This stops gaps and warping.
Place nails about 12 to 16 inches apart. Use more nails on longer or curved trim pieces.
- Nail every 12 to 16 inches
- Use extra nails on corners and curves
- Start nailing from one end to the other
- Check for tight fit after nailing
Avoiding Common Mistakes
Using a nail gun for trim work can be fast and efficient. Many people make simple mistakes that cause damage or slow their work.
Knowing how to avoid these errors helps you get better results and saves time. Below are common problems and how to fix them.
Preventing Splits And Damage
Wood trim can split if you use the wrong nails or too much force. Always pick nails that match the wood type and thickness.
Keep the nail gun steady and avoid driving nails too close to edges. This stops cracks and keeps your trim looking clean.
- Use smaller gauge nails for thin trim
- Place nails at least 1 inch from edges
- Adjust nail depth to avoid overdriving
- Hold the nail gun firmly against the wood
Dealing With Misfires
Misfires happen when the nail gun fires without a nail or jams. This can hurt the trim or slow your work.
Check your nail supply often and clean the gun regularly. Follow the tool’s instructions to clear jams safely.
- Keep nails loaded properly to avoid empty shots
- Clean the nail gun to prevent jams
- Wear safety glasses to protect eyes
- Unplug or disconnect the gun before fixing jams
Correcting Nail Placement Errors
Sometimes nails go in the wrong spot or angle. This looks bad and weakens the trim hold.
Remove misplaced nails with a nail puller or pliers. Fill holes with wood filler and sand smooth before nailing again.
- Use a nail puller to remove wrong nails carefully
- Fill old holes with wood filler or putty
- Sand the filled area to make it smooth
- Re-nail with steady, accurate aim
Credit: www.jlconline.com
Finishing Touches
After using a nail gun to attach trim, the job is not quite done. Finishing touches make the trim look smooth and clean. These steps help your project look professional and last longer.
Filling nail holes, sanding, and painting are key parts of the finish. Also, keeping your nail gun in good shape helps with future projects.
Filling Nail Holes
Small holes from nails can be visible on your trim. Fill these holes to create a smooth surface. Use wood filler or putty that matches the color of your trim.
Apply the filler with a putty knife. Press it into the holes and wipe away extra filler. Let it dry fully before moving on.
- Choose a filler close to your trim color
- Use a putty knife for smooth application
- Allow the filler to dry completely
Sanding And Painting Tips
After filling holes, lightly sand the trim. Sanding smooths out the filler and any rough edges. Use fine-grit sandpaper to avoid damage.
Paint or stain the trim after sanding. Use thin, even coats for the best finish. Allow each coat to dry before adding another.
- Sand with fine-grit paper for a smooth finish
- Remove dust before painting or staining
- Apply thin coats and let dry between layers
Maintaining Your Nail Gun
Keep your nail gun clean and well-oiled. Regular maintenance prevents jams and extends the tool’s life. Check for loose parts and replace worn nails or cartridges.
Store the nail gun in a dry place. Follow the manufacturer’s instructions for care and cleaning. Proper care makes your tool ready for the next job.
- Clean nail gun after each use
- Oil moving parts regularly
- Check and tighten screws often
- Store in a dry, safe place
Credit: www.familyhandyman.com
Frequently Asked Questions
How Do I Safely Operate A Nail Gun For Trim?
Always wear safety goggles and ear protection. Hold the nail gun firmly and avoid pointing it at anyone. Keep your hands clear of the nailing area. Follow the manufacturer’s instructions carefully to prevent accidents.
What Type Of Nails Work Best For Trim Nail Guns?
Use finishing nails or brad nails for trim work. These nails have smaller heads and leave minimal marks. Choose nail length based on trim thickness, usually 1 to 2 inches. This ensures a secure hold without splitting the wood.
How Do I Avoid Splitting Trim When Nailing?
Pre-drill small pilot holes if the trim is thin or delicate. Use the correct nail size to avoid excessive force. Nail at an angle to distribute pressure evenly. These steps reduce the chance of wood splitting during installation.
Can I Use A Nail Gun Without Air Compressor?
Yes, cordless and electric nail guns operate without air compressors. They offer portability and ease of use for trim projects. Choose a model with adequate power and nail capacity for your needs.
Conclusion
Mastering a nail gun for trim work is straightforward with practice. Always prioritize safety and wear protective gear. Choose the correct nail size for the job. Secure the trim properly before nailing. Position the gun at the right angle for precision.
Check the pressure settings to avoid wood damage. Keep your workspace tidy to prevent accidents. Regular maintenance of your nail gun ensures longevity. With these tips, your trim projects will look polished and professional. Enjoy the satisfaction of a job well done!