Are you ready to achieve a flawless finish on your woodworking projects? Mastering the art of using an orbital sander could be your secret weapon.
Imagine transforming rough surfaces into smooth, polished masterpieces with ease. Whether you’re a DIY enthusiast or a seasoned craftsman, knowing how to use an orbital sander effectively can make all the difference. In this guide, we’ll walk you through the simple steps to harness the power of this versatile tool.
Get ready to discover how you can elevate your projects from ordinary to extraordinary. Keep reading, and unlock the secrets to a perfect finish.
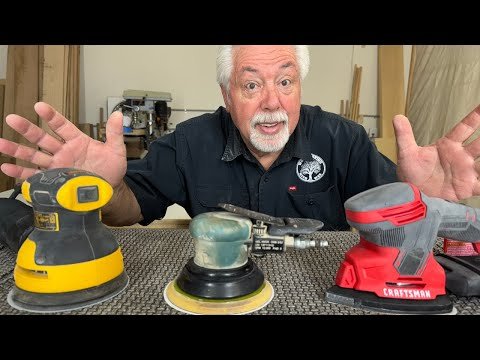
Credit: www.familyhandyman.com
Choosing The Right Orbital Sander
An orbital sander is a useful tool for finishing wood surfaces. It helps smooth the surface by sanding evenly.
Choosing the right sander makes your work easier and gives better results. This guide explains what to look for.
Types Of Orbital Sanders
There are different types of orbital sanders. Each type works best for certain tasks and surfaces.
Random orbital sanders move in a random pattern to avoid swirl marks. They are good for general sanding.
Finishing orbital sanders have finer sanding pads. They are best for smooth finishing work.
- Random Orbital Sander: Good for rough and fine sanding
- Finishing Orbital Sander: Best for smooth, final touches
- Detail Orbital Sander: Small and precise for tight spots
Selecting Sandpaper Grit
Sandpaper grit affects how smooth your surface will be. Lower grit means rougher sanding.
Start with coarse grit to remove old finish or rough spots. Use finer grit to make the wood smooth.
- Coarse Grit (40-60): Removes rough surfaces and old paint
- Medium Grit (80-120): Smooths surface before finishing
- Fine Grit (150-220): Prepares surface for final finish
- Extra Fine Grit (240+): Polishes and smooths very well
Safety Gear Essentials
Using an orbital sander needs safety gear to protect you from dust and noise.
Wear a dust mask to avoid breathing wood dust. Use safety glasses to protect your eyes.
- Dust mask or respirator to filter dust
- Safety glasses to protect eyes from debris
- Hearing protection to reduce noise
- Gloves for better grip and hand safety
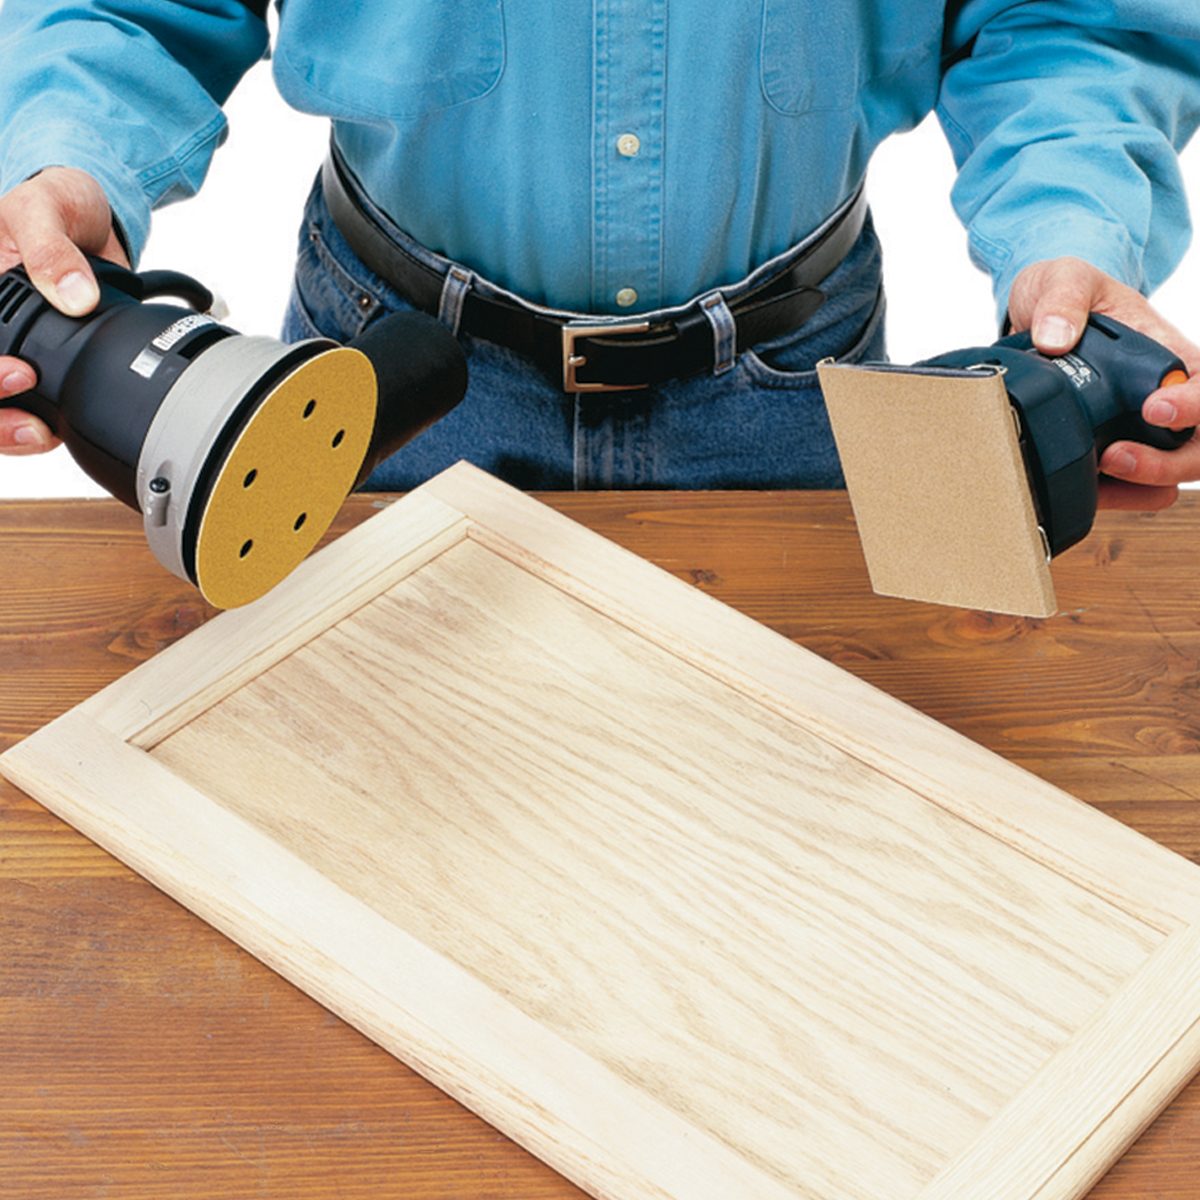
Credit: www.familyhandyman.com
Preparing The Work Surface
Getting your work surface ready is important before using an orbital sander. A clean and stable surface helps you get smooth results.
Take time to check and secure the material. Mark any problem areas to avoid mistakes.
Cleaning And Inspecting
Remove dust, dirt, and grease from the surface. A clean surface prevents scratches and helps the sander work well.
Look for nails, screws, or other things stuck in the material. These can damage the sander or your work.
- Use a clean cloth to wipe the surface
- Check for rough spots or dents
- Remove any nails or staples
- Fix loose parts before sanding
Securing The Material
Keep the material from moving while you sand. This helps you work safely and get even results.
Use clamps or a workbench to hold the piece steady. Make sure it will not slip during sanding.
- Place the material on a flat surface
- Use clamps to hold it firmly
- Check that it does not wobble
- Adjust clamps if needed before sanding
Marking Problem Areas
Mark scratches, dents, or uneven spots on the surface. This guides you to focus on these areas.
Use a pencil or chalk to make small marks. These marks will help you sand evenly and fix flaws.
- Find scratches or dents on the surface
- Mark them with a light pencil line
- Check marks before sanding
- Re-mark if the pencil fades during work
Setting Up The Orbital Sander
Setting up your orbital sander correctly ensures smooth and safe sanding. This guide covers key steps before you start your finishing work.
Pay close attention to attaching sandpaper, adjusting speed, and checking power. These simple tasks help you get the best results.
Attaching Sandpaper Correctly
Attach the sandpaper firmly to avoid slipping during use. Most orbital sanders use hook-and-loop or adhesive backing systems.
- Align the sandpaper edges with the pad.
- Press down firmly to secure it.
- Check that no corners or edges are loose.
- Replace sandpaper if it is torn or worn out.
Adjusting Speed Settings
Adjust the sander speed based on the material and finish you want. Lower speeds work well for delicate surfaces.
| Material | Recommended Speed |
| Softwood | Medium |
| Hardwood | High |
| Painted Surface | Low |
| Metal | High |
Checking Power And Controls
Before you start sanding, make sure the power source and controls work correctly. Safety is key.
- Inspect the power cord for damage.
- Test the on/off switch for smooth operation.
- Check that speed controls respond properly.
- Wear safety gear before plugging in the sander.
Sanding Techniques For Smooth Finishes
Using an orbital sander correctly helps create smooth surfaces on wood and other materials. Good sanding techniques prevent marks and uneven spots.
Focus on steady movements and proper pressure to get the best finish. These tips will guide you through the key sanding techniques.
Maintaining Consistent Pressure
Keep your hand steady and avoid pushing too hard on the sander. Too much pressure can cause scratches and uneven sanding.
Light, even pressure lets the sander do the work. It helps remove material evenly without damaging the surface.
- Hold the sander firmly but gently
- Keep pressure even across the sanding pad
- Do not press down hard in one spot
Using Overlapping Strokes
Move the sander in smooth, overlapping circles or lines. Overlapping strokes avoid missed spots and create an even finish.
Cover the entire surface methodically. Overlap each pass by about half the width of the sanding pad.
- Use steady, slow movements
- Overlap strokes by 50%
- Work in sections for best coverage
Avoiding Gouges And Swirls
Do not keep the sander in one place too long. This can cause gouges or deep scratches in the wood.
Keep the sander flat on the surface and move it evenly to prevent swirl marks. Change the sandpaper grit as needed for smooth results.
- Keep the sander moving at all times
- Hold the sander flat and steady
- Use finer grit sandpaper for final passes
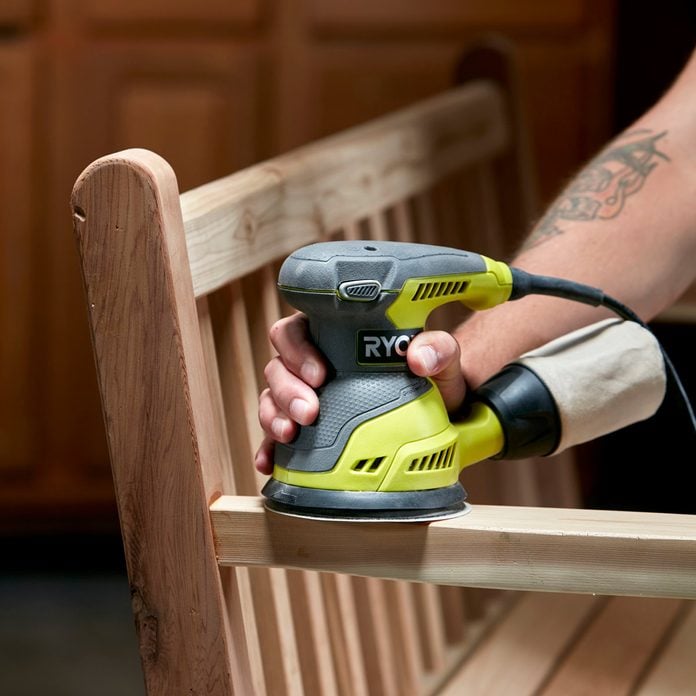
Handling Edges And Corners
Using an orbital sander on edges and corners needs care. These areas can wear down quickly or lose their shape.
Learning the right way to sand edges helps keep your project neat and strong.
Using Detail Attachments
Orbital sanders often have smaller attachments for tight spots. These detail attachments help reach edges and corners easily.
Use pads shaped to fit small areas. This prevents damage and gives better control.
- Choose the right size for narrow spaces
- Attach the detail pad firmly
- Move the sander gently along edges
Sanding Without Rounding Edges
Edges can become rounded if you sand too much or use the wrong technique. Keep edges sharp by sanding carefully.
Hold the sander flat but avoid pushing it too far over the edge.
- Sand along the edge, not across it
- Use light pressure to protect corners
- Check the edge often to keep its shape
Tips For Hard-to-reach Areas
Some corners and edges are hard to reach with a regular sander. Use small tools or hand sanding in these spots.
Patience and slow movements help avoid mistakes in tight places.
- Switch to detail attachments for narrow areas
- Try sanding blocks or folded sandpaper by hand
- Use good light to see tricky spots clearly
Finishing Touches
Using an orbital sander correctly gives your woodwork a smooth finish. The last steps are very important to get the best results.
These finishing touches help remove small flaws and prepare the surface for painting or staining.
Inspecting For Imperfections
Look closely at the sanded surface for scratches or rough spots. Good lighting helps you see these details clearly.
Run your hand over the surface to feel any uneven areas. Mark spots that need more sanding.
Switching To Fine Grit Sandpaper
Change to a fine grit sandpaper to smooth the surface. This grit removes small scratches left by coarser sandpaper.
Move the sander gently and evenly. Avoid pressing too hard to prevent damage to the wood.
- Use 220 to 320 grit sandpaper for finishing
- Sand with the grain of the wood
- Keep the sander moving to avoid uneven spots
Cleaning After Sanding
Remove dust from the surface before applying any finish. Dust can ruin the look of paint or stain.
Use a vacuum or a soft brush to clean the surface. Wipe with a damp cloth to pick up remaining dust.
Maintaining Your Orbital Sander
Taking care of your orbital sander helps it last longer. Good maintenance keeps it working well.
Simple upkeep tasks prevent damage and improve safety. Check your sander often for any issues.
Cleaning And Storage
Clean your orbital sander after every use. Remove dust and debris to stop clogs and wear.
Store the sander in a dry, cool place. Keep it away from moisture to avoid rust and damage.
- Use a soft brush or cloth to clean the outside
- Blow out dust from vents with compressed air
- Wrap the cord loosely to prevent cuts or breaks
- Keep the sander in a case or on a shelf
Replacing Sandpaper And Pads
Change sandpaper when it wears out or clogs. Old sandpaper reduces sanding quality.
Check the sanding pad for cracks or damage. Replace the pad to keep sanding smooth and safe.
- Remove the old sandpaper by peeling it off
- Attach new sandpaper firmly to the pad
- Inspect the pad for tears or hard spots
- Replace the pad if it shows signs of wear
Troubleshooting Common Issues
If your sander stops working, check the power source first. Loose cords or plugs cause many problems.
Unusual noises or vibrations may mean the pad or motor needs attention. Fix issues quickly to avoid damage.
- Make sure the sander is plugged in securely
- Replace worn or damaged sandpaper and pads
- Clean dust from vents to prevent overheating
- Contact a professional if the motor sounds strange

Credit: 100things2do.ca
Frequently Asked Questions
How Do I Prepare Wood Before Using An Orbital Sander?
Clean the wood surface and remove any nails or screws. Sand rough areas lightly by hand first. This ensures a smooth, even finish when using the orbital sander.
What Grit Sandpaper Should I Use For Finishing?
Start with medium grit (120-150) for initial sanding. Finish with fine grit (220-320) for a smooth surface. This prevents scratches and creates a polished look.
How Do I Control An Orbital Sander Effectively?
Hold the sander firmly with both hands. Move it in slow, overlapping motions. Avoid pressing too hard to prevent uneven sanding or damage.
Can I Use An Orbital Sander On Painted Surfaces?
Yes, but use finer grit sandpaper to avoid removing paint completely. Test a small area first. Orbital sanders help smooth painted surfaces without harsh damage.
Conclusion
Using an orbital sander helps achieve a smooth, even finish fast. Keep the sander moving to avoid marks or scratches. Choose the right grit for each sanding step. Always wear safety gear to protect your eyes and lungs. Practice on scrap wood before working on your project.
With patience and care, your surfaces will look great. Ready to give your woodwork a professional touch? This tool makes finishing easier and cleaner. Try these tips, and enjoy better sanding results every time.