If you want to take your carving skills to the next level, mastering the art of carving details with chisels is essential. You might have the tools, but knowing how to use them to create sharp, clean lines and intricate patterns makes all the difference.
Imagine turning a simple piece of wood into a stunning work of art that catches everyone’s eye. You’ll discover practical tips that will help you control your chisels better, avoid common mistakes, and bring your designs to life with precision.
Ready to sharpen your skills and create details that truly stand out? Keep reading—you won’t want to miss these expert insights.
Choosing The Right Chisels
Carving fine details needs the right chisel. Picking the right tool helps you work better and faster.
Good chisels give clean cuts and feel comfortable in your hand. Know what to look for before you buy.
Types Of Chisels For Detail Work
Detail carving uses special chisels made for small, precise cuts. These chisels come in different shapes.
Common types are gouges, veiners, and parting tools. Each has a unique shape for specific cuts.
- Gouges:Curved blades for scooping wood.
- Veiners:Small U-shaped blades for fine lines.
- Parting Tools:V-shaped blades for sharp cuts and edges.
Blade Shapes And Sizes
Blade shape affects how you carve wood. Choose shapes that match your project needs.
Sizes vary from very small for tiny details to medium for general work. Smaller blades give more control.
- Small blades work well for delicate details.
- Medium blades handle bigger cuts and shapes.
- Curved blades help remove wood smoothly.
- Straight blades make clean, straight cuts.
Quality And Material
High-quality chisels hold their edge longer. Look for sharp, strong steel blades.
Handles should be comfortable and sturdy. Wood or plastic handles both work well if made solidly.
- Steel blades resist dulling and damage.
- Comfortable handles reduce hand fatigue.
- Check for tight blade-to-handle fit.
- A balanced tool feels better in your hand.

Credit: beavercrafttools.com
Preparing Your Wood Surface
Carving details with chisels needs a smooth wood surface. Proper preparation helps your tools work better.
Take time to prepare the wood. It makes carving easier and improves the final look.
Selecting Suitable Wood
Choose wood that is easy to carve and has a fine grain. Hard woods can be tough for detailed work.
Soft woods like basswood or pine are good for beginners. They hold detail well and are less likely to split.
- Basswood: soft, smooth, and easy to carve
- Pine: widely available and affordable
- Butternut: soft with a nice grain pattern
- Hardwoods like cherry or walnut need sharper tools
Smoothing And Marking
Start by sanding the wood surface. Use fine-grit sandpaper to remove rough spots and splinters.
Mark your design clearly. Use a pencil or a carbon paper to trace the pattern onto the wood.
- Smooth surface prevents chisel slips
- Clear markings guide your carving
- Work in a well-lit area for accuracy
- Test your marks on scrap wood first
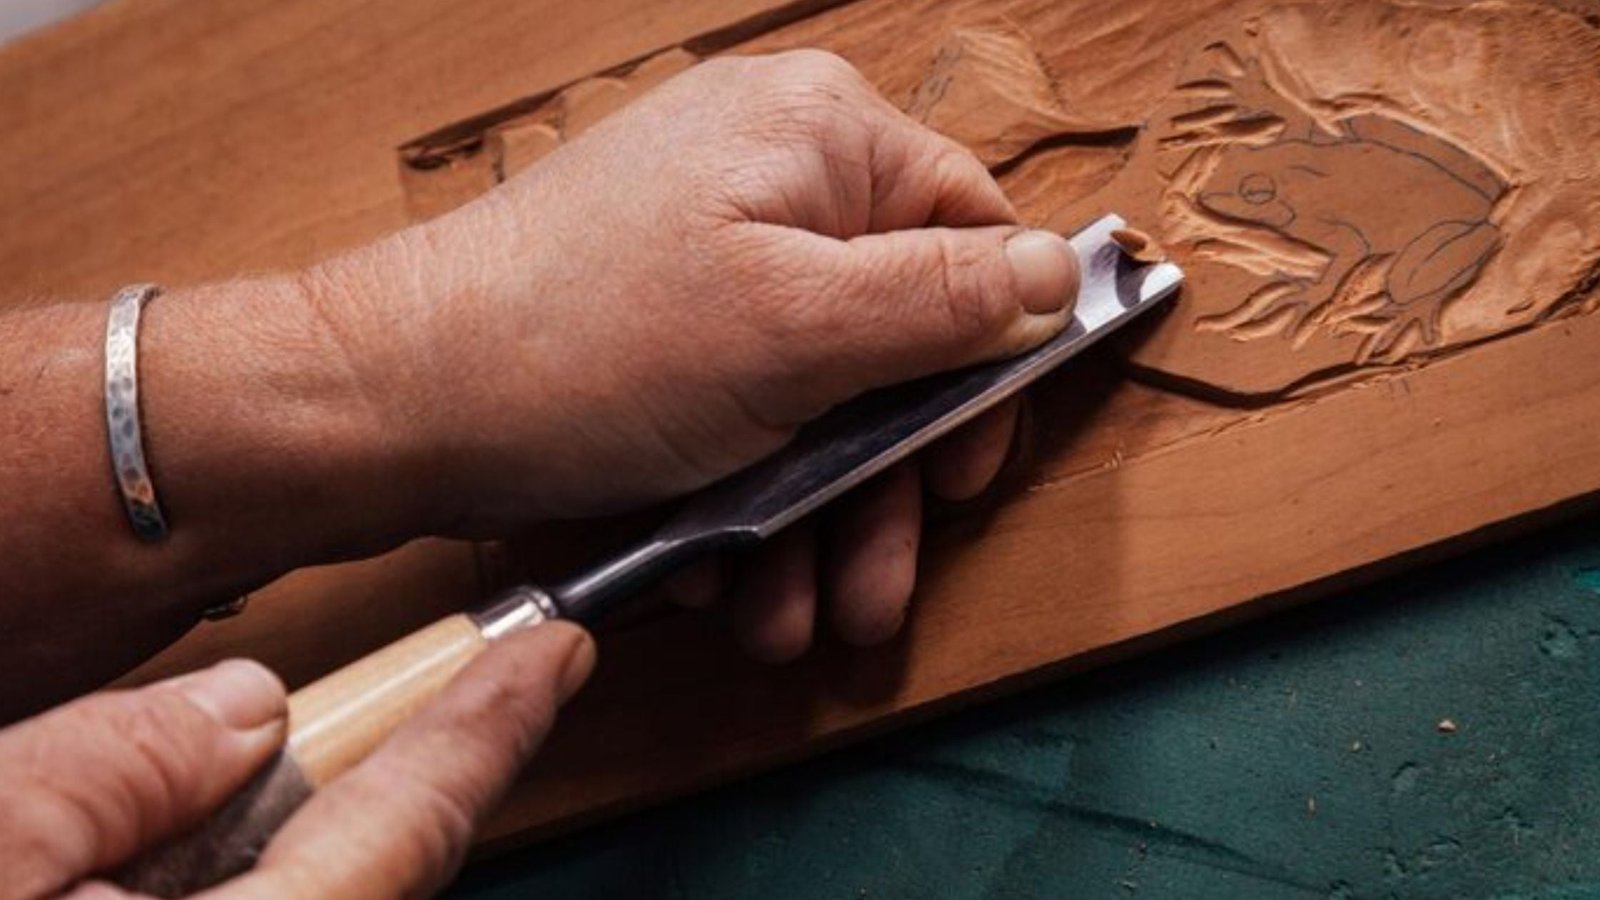
Basic Carving Techniques
Carving with chisels is an art that needs practice and care. Using the right techniques helps you create clean and detailed work.
Learning how to hold your tools and control your cuts can improve your carving results. Safety is also very important to avoid injuries.
Holding The Chisel Correctly
Hold your chisel firmly but not too tight. Your grip should feel comfortable and steady. This helps you guide the chisel smoothly.
Place one hand on the handle and the other near the blade for better control. Keep your fingers away from the cutting edge.
- Use your dominant hand to hold the handle
- Support the blade with your other hand
- Keep fingers behind the cutting edge
Controlling Depth And Pressure
Apply gentle pressure when carving small details. Pressing too hard can break the wood or ruin your design.
Control the depth by adjusting the angle of your chisel. Shallow cuts are easier to fix and look cleaner.
- Start with light cuts to outline your design
- Increase pressure slowly for deeper cuts
- Use the chisel angle to control depth
Using Mallets Safely
When using a mallet, strike the chisel handle firmly but not too hard. Too much force can cause slips and accidents.
Always keep your hands clear of the mallet’s path. Make sure your work area is stable before you start carving.
- Hold the mallet with a firm grip
- Strike the chisel handle squarely
- Keep your other hand away from the strike zone
- Work on a stable surface to avoid slips

Credit: www.schaaftools.com
Advanced Detail Carving Tips
Carving fine details with chisels takes patience and skill. Using the right techniques helps you get clear, sharp designs.
This guide covers tips for creating fine lines, layering, shaping, and avoiding common mistakes.
Creating Fine Lines And Textures
Use small, sharp chisels to carve thin lines and delicate textures. Hold the chisel steady and use light pressure.
- Work slowly to avoid slipping
- Keep chisels sharp for clean cuts
- Practice on scrap wood before working on the main piece
- Use different chisel angles to vary texture depth
Layering And Shaping
Build detail by carving in layers. Start with rough shapes, then refine edges and add texture. This method gives depth and realism.
| Layer | Purpose | Tools |
| First | Remove large wood areas | Large gouges, mallet |
| Second | Shape main forms | Medium chisels, knives |
| Third | Add fine details | Small chisels, veiners |
Avoiding Common Mistakes
Many carvers struggle with tool slips or overcutting. These errors can ruin fine details.
- Always check chisel sharpness before starting
- Keep your hands steady and supported
- Take breaks to rest your eyes and hands
- Test cuts on scrap wood to adjust pressure
- Use a magnifier for very small details
Maintaining Your Tools
Good tool care helps your chisels last longer. It keeps them sharp and safe to use.
Regular maintenance saves time and improves your carving results.
Sharpening Chisels
Sharp chisels cut wood cleanly and with less effort. Dull tools can damage your work and cause accidents.
- Use a sharpening stone or diamond plate to restore the edge.
- Keep the bevel angle steady while sharpening.
- Hone the back of the chisel to remove burrs.
- Test sharpness by gently slicing thin wood shavings.
- Sharpen your chisels often, not just when they feel dull.
Cleaning And Storage
Cleaning your chisels after use stops rust and damage. Proper storage keeps them safe and ready to use.
| Cleaning Step | Purpose |
| Wipe blade with a dry cloth | Remove dust and wood particles |
| Use oil to coat metal parts | Prevent rust |
| Check handles for cracks | Ensure safe grip |
| Store in a dry place | Avoid moisture damage |
| Use a tool roll or box | Protect edges and keep organized |
Safety Practices
Carving with chisels can be safe if you follow the right steps. Using proper safety gear and setting up your workspace well helps avoid injuries.
These tips focus on how to protect yourself and create a safe place to carve details with chisels.
Protective Gear
Wear the right gear to protect your hands, eyes, and body while carving. This reduces the chance of cuts and splinters.
- Use cut-resistant gloves to guard your hands.
- Wear safety goggles to protect your eyes from flying chips.
- Put on a dust mask if you work with wood that creates dust.
- Use ear protection if you carve with power tools nearby.
- Wear a long-sleeve shirt to protect your arms.
Safe Workspace Setup
A tidy and well-lit workspace keeps you focused and reduces accidents. Organize your tools and keep the area clear.
| Workspace Element | Safety Tip |
| Lighting | Use bright, even lighting to see details clearly. |
| Tool Storage | Keep chisels in a rack or holder to avoid cuts. |
| Work Surface | Use a stable bench with clamps to hold your workpiece. |
| Floor Area | Keep the floor clean and dry to prevent slips. |
| Distractions | Work in a quiet space to stay alert. |

Credit: daitool.com
Frequently Asked Questions
What Chisels Work Best For Carving Fine Details?
For fine details, use small, sharp chisels with narrow blades. Detail gouges and V-tools also work well. Choose high-quality steel chisels that hold a sharp edge longer for precise cuts.
How To Maintain Chisels For Better Carving Results?
Keep chisels sharp by regularly honing and sharpening them. Clean blades after use to prevent rust. Store chisels in a dry, safe place to maintain their edge and ensure smooth carving.
What Techniques Improve Carving Precision With Chisels?
Use controlled, light taps with a mallet for delicate cuts. Always carve with the grain to avoid splitting. Practice steady hand movements and keep the chisel angle consistent for clean, detailed carvings.
How To Avoid Wood Splitting When Carving Details?
Carve slowly and gently, especially near edges. Always work with the wood grain, not against it. Use sharp chisels to reduce force, preventing wood from splitting or tearing during detailed carving.
Conclusion
Carving details with chisels requires patience and practice. Small steps lead to big improvements. Use the right chisel for each detail. Keep tools sharp for clean cuts. Always prioritize safety when working. Experiment with different techniques to find what suits you best.
Mistakes are part of learning. So, don’t get discouraged. Practice regularly to build confidence and skill. Enjoy the creative process and watch your skills grow. With time, your work will reflect your dedication and effort. Happy carving!
