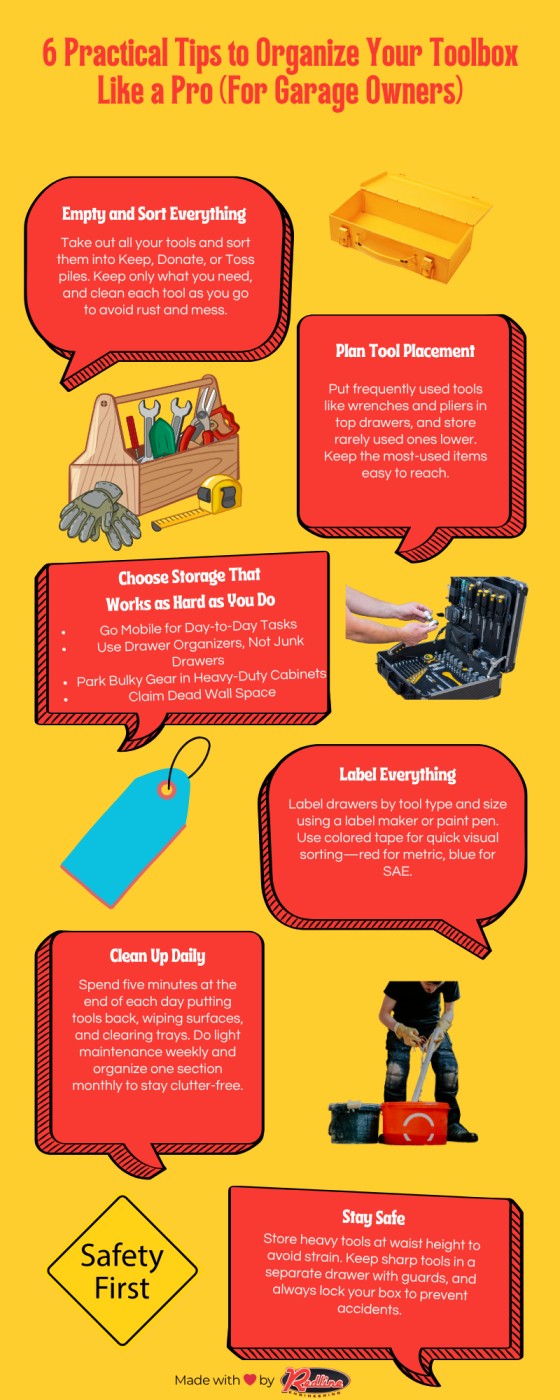
Are you tired of digging through a messy toolbox every time you need your pliers or cutters? Keeping these essential tools organized can save you time and frustration, especially when you’re in the middle of a project.
Imagine reaching for exactly the tool you need, right when you need it. You’ll discover simple, effective tips that make organizing your pliers and cutters easier than ever. Stick with me, and you’ll never waste time searching through clutter again.
Choosing The Right Storage
Organizing pliers and cutters keeps your workspace tidy and tools easy to find. Choosing the right storage helps protect your tools from damage.
Good storage also saves time and space. Different options suit different work areas and tool collections.
Wall-mounted Holders
Wall-mounted holders keep pliers and cutters off your workbench. They save space and make tools easy to grab.
These holders come in slots or clips that hold tools firmly. You can install them at eye level for convenience.
- Save bench space
- Keep tools visible
- Protect tool edges
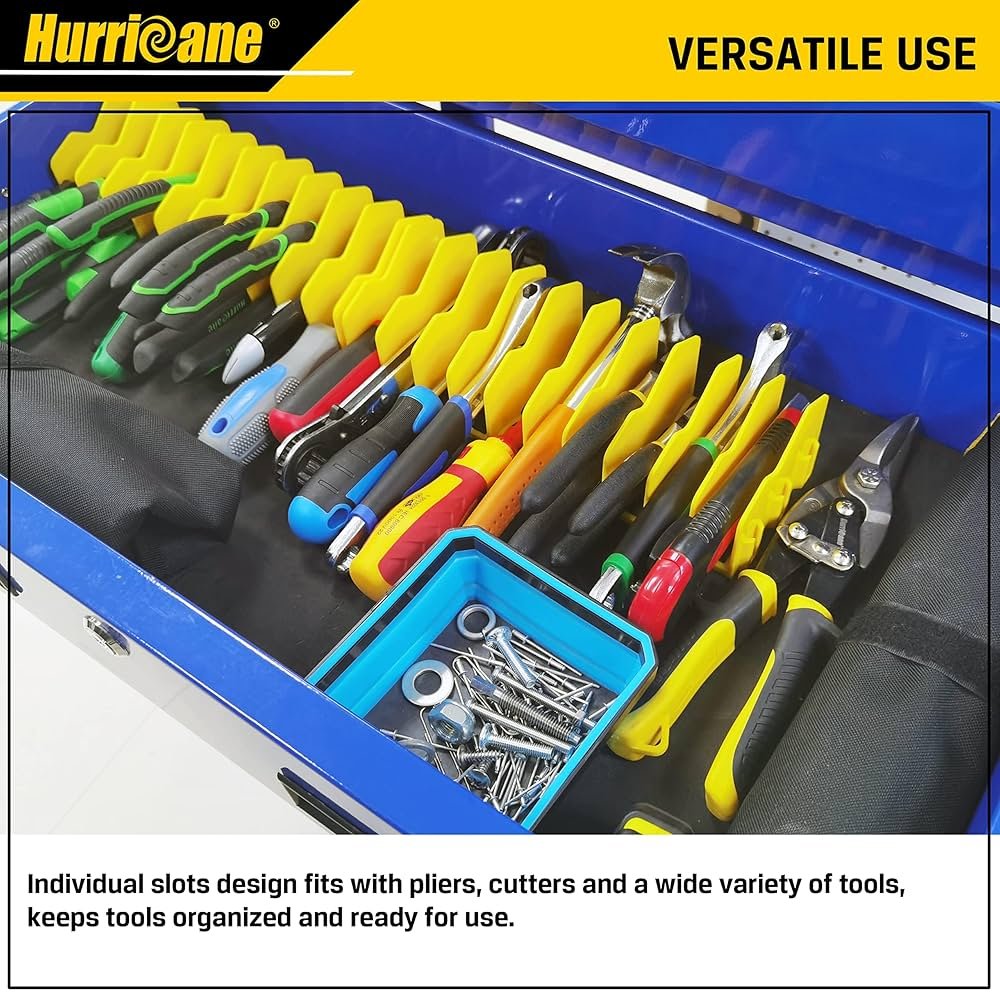
Drawer Organizers
Drawer organizers help separate pliers and cutters from other tools. They prevent tools from moving and getting damaged.
Choose organizers with compartments or foam inserts. This keeps each tool in its own spot for quick access.
- Protect sharp edges
- Keep tools sorted
- Reduce noise when closing drawers
Magnetic Strips
Magnetic strips hold metal tools like pliers and cutters securely on walls. They make tools easy to reach and organize.
Mount magnetic strips in your workspace for quick tool access. Make sure the magnet is strong enough to hold heavy tools.
- Save space on benches
- Display tools clearly
- Easy to install
Pegboards
Pegboards offer flexible storage for pliers and cutters. You can hang tools on hooks and arrange them as needed.
Use pegboards to keep tools visible and organized. Add labels or outlines to remember tool placement.
- Customizable layout
- Easy to add or remove tools
- Good for small or large tool collections
Credit: www.redlinestands.com
Sorting Techniques
Organizing pliers and cutters helps you find tools quickly. Sorting them properly saves space and keeps your workspace tidy.
Using clear sorting methods lets you keep your tools ready for any job. Focus on size, use, and project needs to arrange them well.
By Size And Type
Sorting pliers and cutters by size and type groups similar tools together. This method makes it easy to pick the right tool for your task.
- Separate small, medium, and large pliers
- Group needle-nose, slip-joint, and cutting pliers by type
- Store cutters like wire cutters and cable cutters in their own sections
- Use labeled bins or trays for each size and type group
Frequency Of Use
Keep the most used pliers and cutters within easy reach. Less used tools can be stored farther away or in drawers.
| Use Frequency | Storage Location |
| Daily | Top drawer or pegboard at eye level |
| Weekly | Middle drawer or shelf |
| Rarely | Lower drawer or closed cabinet |
Project-based Grouping
Group pliers and cutters by the projects you often work on. This keeps all needed tools together for each type of job.
Example of project-based groups:
- Electrical work: wire strippers, needle-nose pliers, diagonal cutters
- Jewelry making: round-nose pliers, flat-nose pliers, flush cutters
- Automotive repair: slip-joint pliers, locking pliers, cable cutters
Space-saving Hacks
Organizing pliers and cutters can free up your workspace. Using smart storage ideas keeps tools tidy and easy to find.
Try these space-saving hacks to store your tools efficiently. They save room and keep your tools ready to use.
Vertical Storage Ideas
Vertical storage uses wall space to hold pliers and cutters. You can hang tools on hooks or pegboards to keep them visible.
- Install pegboards with hooks for easy tool hanging
- Use magnetic strips to hold metal tools upright
- Mount small shelves to store tools in containers
- Hang a tool rack with slots designed for pliers
Multi-tool Holders
Multi-tool holders keep various tools in one place. They reduce clutter and make tools easy to grab.
| Holder Type | Description | Best Use |
|---|---|---|
| Rotating Stand | Holds many tools on a spinning base | Workbenches with limited surface space |
| Wall-Mounted Rack | Secures tools vertically on a wall | Garages or tool sheds |
| Desk Organizer | Compact holder for desktop use | Small work areas or craft rooms |
Stackable Containers
Stackable containers save space by piling up vertically. Use clear boxes to see tools without opening lids.
- Choose containers that lock securely when stacked
- Label each container with the tool type inside
- Use small compartments to separate different cutters and pliers
- Keep containers on shelves or under workbenches

Credit: www.amazon.com
Maintenance Tips
Keeping pliers and cutters in good shape makes them last longer. Regular care helps tools work better every time.
Follow simple maintenance steps to organize and protect your tools from damage.
Regular Cleaning
After each use, clean your pliers and cutters. Dirt and grease can cause damage over time.
Wipe tools with a dry cloth or use mild soap and water for tough grime. Make sure to dry them completely.
- Remove dirt and dust
- Use a soft cloth to avoid scratches
- Dry tools to prevent moisture buildup
Rust Prevention
Rust can ruin your tools quickly. Keep pliers and cutters dry and protected from moisture.
Apply a thin layer of oil to the metal parts to stop rust from forming. Store tools in a dry place.
- Use machine or mineral oil
- Wipe off excess oil
- Store in a toolbox or dry drawer
Routine Inspections
Check your tools often for damage or wear. Fixing small problems early saves money and time.
Look for loose parts, dull edges, or cracks. Tighten screws and sharpen blades as needed.
- Inspect handles for cracks
- Check for smooth joint movement
- Sharpen cutting edges regularly
Diy Storage Solutions
Keeping pliers and cutters organized helps you find tools fast. It also protects tools from damage.
DIY storage ideas let you save money and customize your workspace. You can use simple materials at home.
Repurposing Household Items
Use old jars, cans, or boxes to store pliers and cutters. These items keep tools visible and easy to reach.
Attach jars to a board or shelf for vertical storage. Small boxes can hold cutters and small pliers neatly.
- Clean jars can hold small cutters upright
- Old tins can store medium-sized pliers
- Shoe boxes work well for large tools
- Magnetic strips on jars keep metal tools in place
Building Custom Racks
Build racks from wood or metal to fit your tool sizes. Custom racks save space and keep tools organized.
Use hooks, slots, or holes on racks to hold each tool. You can mount racks on walls or inside cabinets.
- Cut wooden planks with holes for tool handles
- Add hooks to hang pliers by their grips
- Build tiers for storing different tool types
- Paint racks to protect wood and improve look
Creative Labeling Methods
Label storage spaces to find tools quickly. Clear labels help keep your area tidy and organized.
Use stickers, tags, or paint to mark tool spots. Label by tool type or size for easy sorting.
- Write tool names on masking tape labels
- Use color-coded stickers for different tool groups
- Attach tags with string to handles
- Paint labels directly on wooden racks

Credit: www.amazon.co.uk
Frequently Asked Questions
How To Organize Pliers For Easy Access?
To organize pliers efficiently, use a pegboard or magnetic strip. Arrange them by size or function for quick access. Label each section if needed. Regularly declutter to maintain order. This method saves time and enhances workspace efficiency, making it easier to find the right tool quickly.
What’s The Best Way To Store Cutters?
The best way to store cutters is by using a tool drawer organizer. Ensure each cutter has a designated spot. Use foam inserts to keep them in place. This prevents damage and makes tools easy to find. Regularly inspect and clean them to maintain their longevity.
How Can I Prevent Tool Rust?
To prevent rust on tools, store them in a dry environment. Use silica gel packs to absorb moisture. Regularly oil metal parts to create a protective barrier. Clean tools after use to remove dirt and moisture. Proper storage and maintenance extend the life of your tools.
Why Use A Pegboard For Tool Organization?
A pegboard offers flexible storage and easy access to tools. It allows you to customize the layout based on your needs. Tools are visible and within reach, reducing search time. Pegboards are space-efficient and perfect for keeping your workspace tidy and organized.
Conclusion
Organizing pliers and cutters saves time and reduces frustration. Keep tools in labeled containers or on pegboards. Group similar items together for easy access. Regularly check and clean your tools to keep them in good shape. A tidy workspace helps you work faster and safer.
Small steps lead to big improvements in your tool area. Start organizing today and enjoy a clutter-free workshop tomorrow. Simple habits make a big difference.
