Are you tired of spending more time searching for your power sander than actually using it? You’re not alone.
Many DIY enthusiasts and professionals alike struggle with keeping their tools organized, which can lead to frustration and lost productivity. Imagine being able to grab your sander at a moment’s notice, knowing exactly where it is, and having all the accessories at your fingertips.
Sounds like a dream, right? With the right organization tips, you can make this dream a reality. In this guide, you’ll discover practical and easy-to-implement strategies to keep your power sanders neatly organized. Let’s transform your workspace into a haven of efficiency and creativity.
Choosing The Right Storage Space
Keeping power sanders organized saves time and protects your tools. Choosing a good storage space is key to this.
A well-chosen spot helps you find your sanders fast. It also keeps them safe from damage and dust.
Assessing Available Areas
Look around your workspace to find spots for storage. Check shelves, cabinets, and unused corners.
Measure the size of the space to make sure your sanders fit well. Avoid tight spots that are hard to reach.
- Check wall space for hanging options
- Look under workbenches for extra room
- Consider toolboxes with enough space
Considering Accessibility
Store sanders where you can reach them quickly. Keep frequently used sanders at eye level or within arm’s reach.
Make sure the storage does not block your walking paths. Easy access saves time and keeps your work area safe.
- Place heavy sanders lower to avoid lifting strain
- Use clear containers for fast tool ID
- Label storage spots for quick returns
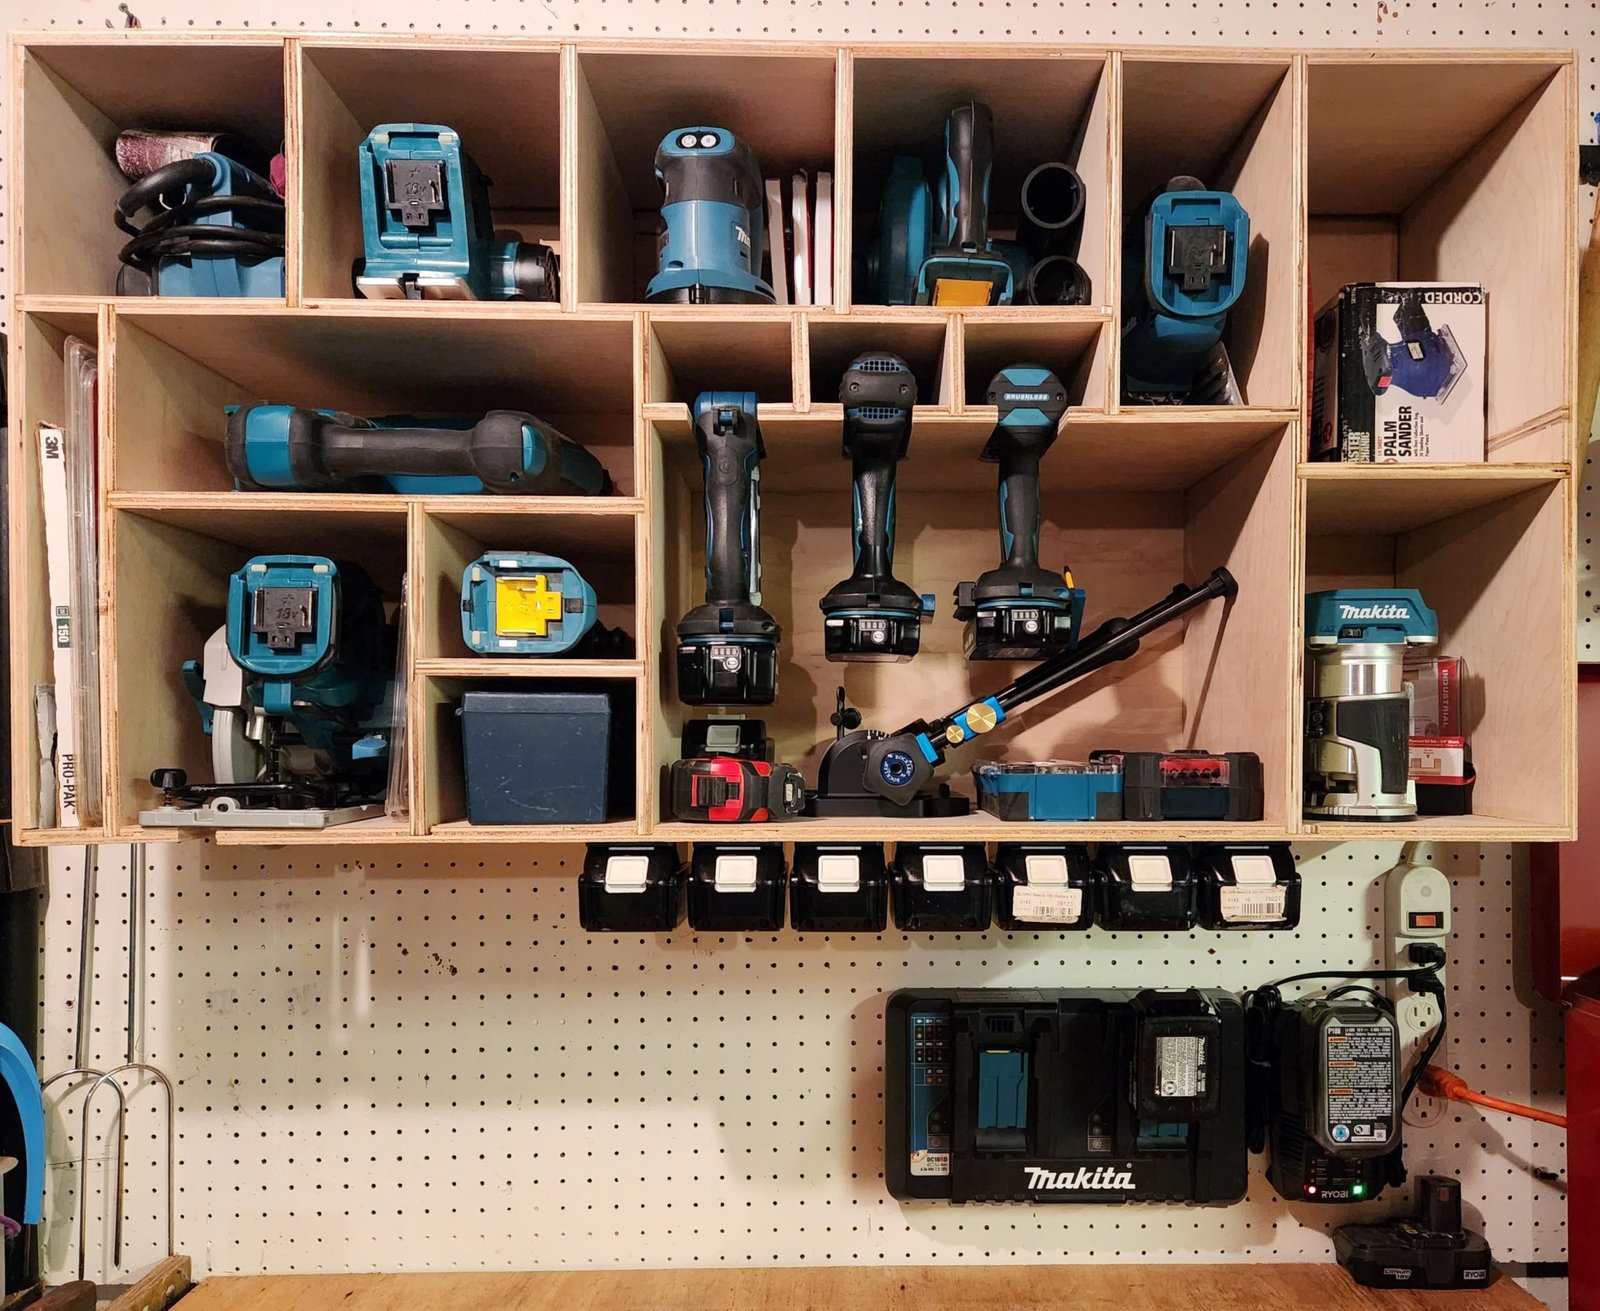
Maximizing Vertical Space
Use wall space to keep your work area clear. Vertical storage frees floor space and keeps tools visible.
Install hooks, shelves, or pegboards to hang your sanders safely. This keeps tools organized and easy to grab.
- Hang sanders by their handles for stability
- Use pegboards for flexible tool placement
- Add shelves above benches for less-used sanders

Credit: www.reddit.com
Using Wall-mounted Solutions
Wall-mounted solutions save space and keep power sanders easy to find. They help organize your tools neatly and safely.
These options work well in small workshops and garages. They make your workspace more efficient and clean.
Installing Pegboards
Pegboards are a flexible way to store power sanders. You can move hooks and holders to fit different tools.
- Mount the pegboard on a sturdy wall.
- Use hooks that fit the size of your sanders.
- Label each spot to keep tools organized.
- Keep heavier sanders lower for safety.
Hanging Tool Racks
Tool racks hold power sanders securely off the ground. They keep tools visible and easy to grab.
| Type of Rack | Best Use | Material |
| Horizontal Bars | Multiple sanders | Metal or wood |
| Slotted Racks | Individual tools | Plastic or metal |
| Custom Hooks | Heavy sanders | Heavy-duty steel |
Magnetic Strips For Accessories
Magnetic strips hold small parts and accessories for power sanders. They keep these items in one place.
- Install the strip near your sanding area.
- Use it for sanding belts, screws, and small tools.
- Choose strong magnets to hold metal accessories firmly.
- Keep the strip clean to maintain strong magnetism.
Customizing Storage Containers
Organizing power sanders helps you find tools quickly. Custom storage containers make your workspace neat.
Good storage protects your sanders and saves space. Customizing containers fits your needs perfectly.
Labeling And Sorting
Label each container clearly. Sorting by type or size keeps things easy to find.
Labels save time and reduce clutter. Use simple words and large fonts for quick reading.
- Label by sander model or size
- Sort accessories separately
- Use waterproof labels for durability
Using Clear Bins
Clear bins let you see contents without opening. This helps find sanders fast.
Choose bins that fit your tools snugly. Clear plastic is strong and easy to clean.
- Pick bins with secure lids
- Use different sizes for parts and tools
- Keep bins dust-free and dry
Stackable Storage Options
Stackable containers save floor space. They help keep your area tidy and organized.
Use containers designed to stack safely. Label the sides for easy access to each layer.
- Choose sturdy containers that lock together
- Stack by frequency of use
- Keep heavy items on the bottom

Credit: www.youtube.com
Creating Portable Storage
Keeping power sanders organized helps you work faster. Portable storage makes moving tools easy. Choose the right storage for your space and needs.
Good storage protects your sanders and keeps accessories handy. This guide covers three smart storage ideas.
Toolboxes With Compartments
Toolboxes with compartments keep your power sander and parts separated. Compartments stop items from banging together. Look for boxes with adjustable dividers.
- Choose a sturdy toolbox with a secure latch.
- Use foam inserts to protect your sander.
- Label compartments for sandpaper and accessories.
- Keep cords wrapped neatly inside a compartment.
Rolling Carts
Rolling carts offer mobility and large storage space. They work well if you move between work areas often. Choose carts with shelves and locking wheels.
| Feature | Benefit |
| Multiple shelves | Store sanders and supplies separately |
| Locking wheels | Keep cart steady during use |
| Handle | Easy to push and pull |
| Side hooks | Hang cords and small tools |
Diy Carrying Cases
You can build a custom carrying case to fit your power sanders perfectly. Use wood or plastic containers with padding. Customize compartments to hold your tools and parts.
DIY cases help save money and fit your exact needs. Add a handle and secure fasteners for easy transport.
- Measure your sander and accessories first.
- Cut foam or padding to protect your tools.
- Build compartments for sandpaper and attachments.
- Use waterproof materials for durability.
Maintaining Organized Storage
Keeping power sanders organized helps you find tools quickly. It also protects them from damage.
Organized storage saves space and makes your workspace safer. Regular care keeps sanders ready to use.
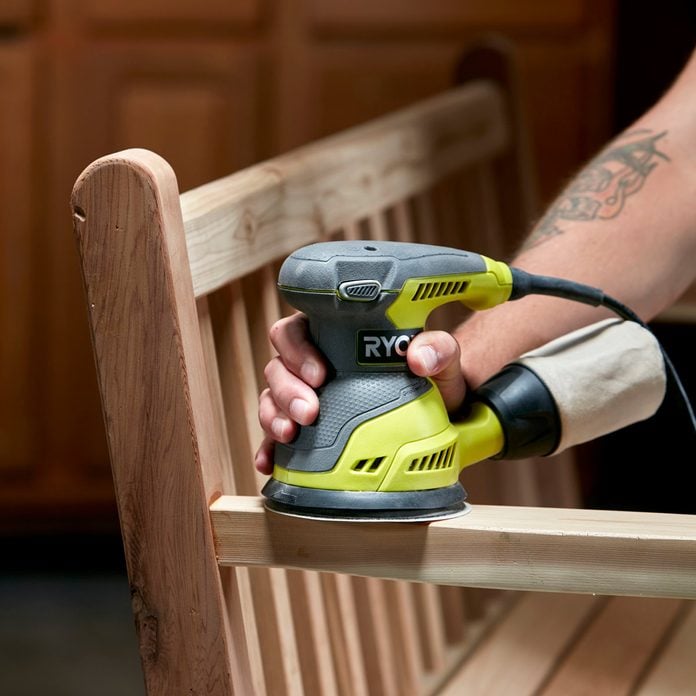
Regular Cleaning Routines
Clean your power sanders after each use. Dust and debris can harm the motor and parts.
Use a soft brush or compressed air to remove dust. Wipe the outside with a dry cloth.
- Remove sanding dust from vents
- Check the power cord for dirt
- Store in a dry place after cleaning
Replacing Worn Out Holders
Holders and attachments wear out from heavy use. Replace them to keep sanders working well.
Check holders often for cracks or damage. Using worn holders can cause poor sanding results.
- Inspect holders before every job
- Keep spare holders in storage
- Replace damaged parts immediately
Updating Inventory Lists
Keep a list of all your power sanders and accessories. Update it after buying or discarding items.
This helps track what you have and what needs replacement. It also prevents buying duplicates.
- Note tool names and models
- Record the condition of each item
- Update list monthly or after projects
Credit: www.familyhandyman.com
Frequently Asked Questions
How Can I Store Power Sanders Safely?
Store power sanders in a dry, secure area to prevent damage. Use wall hooks or shelves to keep them off the floor and organized. Always unplug and clean the sander before storing to maintain its condition.
What Is The Best Way To Organize Sanding Accessories?
Use labeled bins or small containers to separate sanding discs by grit and size. Keep accessories near the sander for easy access. Clear containers help quickly identify contents, saving time during projects.
How Often Should I Clean My Power Sander?
Clean your power sander after every use to remove dust and debris. Use compressed air or a brush to clean vents and moving parts. Regular cleaning extends the tool’s life and ensures optimal performance.
Can I Use A Toolbox For Power Sander Storage?
A sturdy toolbox can work if it’s large enough and has compartments. Use foam inserts to protect the sander and accessories from damage. Ensure the toolbox is kept in a dry, cool place to avoid rust.
Conclusion
Organizing power sanders keeps your workspace neat and safe. Store each sander in its own spot to avoid damage. Keep cords untangled and check them often for safety. Label storage areas so you find tools quickly. Clean sanders after use to keep them working well.
Small steps like these save time and reduce stress. A tidy workshop helps you work faster and better. Simple habits make a big difference in tool care. Start organizing today to enjoy easier projects tomorrow.
