Are you ready to make your construction projects smoother and more precise? Using a tape measure might seem simple, but mastering a few key tips can save you time, reduce mistakes, and boost your confidence on site.
Whether you’re a beginner or have some experience, the right techniques will help you measure faster and more accurately every time. Keep reading to discover practical tips that will transform how you use your tape measure and make your work easier from start to finish.

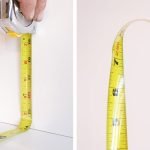
Credit: tikweld.com
Choosing The Right Tape Measure
Using a tape measure correctly helps you get precise measurements. Picking the right tape measure makes your construction work easier.
Different tape measures fit different jobs. You should know what to look for before buying one.
Types Of Tape Measures
There are several types of tape measures. Each type has a special use in construction.
- Steel Tape:Strong and stiff, good for long measurements.
- Cloth Tape:Flexible and soft, often used for curved surfaces.
- Fiberglass Tape:Resistant to stretching and weather, used outdoors.
- Digital Tape:Shows measurements on a screen, easy to read.
Material And Durability
The tape’s material affects how long it will last. Tough materials resist damage and wear.
| Material | Durability | Best Use |
|---|---|---|
| Steel | High | Indoor and outdoor construction |
| Fiberglass | Very High | Wet or rough environments |
| Cloth | Low | Light indoor use, fabric work |
Length Considerations
Choose a tape measure length that fits your projects. Too short or too long can cause problems.
- For small projects, 12 to 25 feet is enough.
- For large construction, use 30 feet or longer.
- Check if the tape locks well at longer lengths.
- Long tapes may be harder to handle alone.

Credit: georgefurniture.com
Preparing For Accurate Measurement
Accurate measurements are key in construction work. Preparing your tape measure properly helps avoid mistakes.
Taking time to check and set up your tape measure ensures your project goes smoothly.
Checking Tape Condition
Before using your tape measure, inspect it closely. Look for dents, bends, or worn markings. A damaged tape can give wrong readings.
- Make sure the tape retracts smoothly.
- Check that numbers and lines are clear and not faded.
- Look for rust or dirt that may affect accuracy.
- Ensure the tape’s hook moves slightly to allow correct inside and outside measurements.
Calibrating Your Tape
Calibrate your tape measure to confirm it shows correct lengths. This step is simple and saves rework later.
| Calibration Check | How to Perform | What to Look For |
| Hook Movement | Pull tape and check hook play | Hook should move about 1/16 inch |
| Length Test | Measure a known length, like a ruler | Numbers should match exactly |
| Retract Test | Let tape retract fully | Tape should retract smoothly, no jams |
Setting A Stable Base
Place the tape measure on a firm, flat surface for steady readings. An unstable base leads to errors.
- Hold the tape hook firmly against the edge of the object.
- Keep the tape straight without sagging.
- Use clamps or assistants if needed to hold tape in place.
- Stand in a comfortable position to read the tape easily.
Measuring Techniques
Using a tape measure correctly helps you get accurate results. It is important to use the right methods to avoid mistakes.
This guide covers key techniques for measuring well on construction projects. Follow these tips to improve your work.
Proper Tape Placement
Place the tape measure flat and straight along the surface you want to measure. Make sure the tape does not twist or lift.
- Start measuring from the zero mark on the tape.
- Keep the tape close to the edge or point you are measuring.
- Hold the tape firmly to avoid slipping.
Avoiding Slack And Bends
Slack or bends in the tape cause wrong measurements. Keep the tape tight and straight for the best accuracy.
| Problem | Effect | Solution |
| Slack in tape | Length appears longer | Pull tape tight |
| Bends or curves | Length appears shorter | Lay tape flat and straight |
| Twisted tape | Hard to read numbers | Untwist tape before measuring |
Using The Hook Correctly
The metal hook at the tape end helps hold the tape in place. Use it properly for accurate starting points.
- Hook the tape on the edge of the object you measure.
- Use the hook’s small movement to measure inside or outside edges.
- Ensure the hook is not bent or loose for correct reading.

Credit: www.youtube.com
Reading Measurements Precisely
Using a tape measure correctly is key for accurate construction work. Reading the marks with care helps avoid mistakes. This guide shows how to read measurements precisely on your tape measure.
Knowing how to interpret fractional marks, use different units, and double check measurements can save time and materials. These tips focus on clear and simple methods to get exact readings.
Interpreting Fractional Marks
Tape measures use fractions to show parts of an inch. Understanding these marks helps you measure with precision below one inch. Each small line means a fraction like 1/16 or 1/8.
- The longest lines show full inches.
- Medium lines usually mark halves or quarters.
- Shorter lines show eighths and sixteenths.
- Count the lines from the inch mark to know the fraction.
- Use a magnifier if marks are hard to see clearly.
Using Metric And Imperial Units
Some tape measures show both metric and imperial units. Metric uses centimeters and millimeters. Imperial uses inches and fractions. Knowing both helps on different projects.
| Unit System | Main Units | Smallest Mark |
| Imperial | Inches | 1/16 inch |
| Metric | Centimeters | 1 millimeter |
Use the system that fits your project. Metric units are easier for precise small measurements. Imperial units are common in the US construction industry.
Double Checking Key Measurements
Always double check important measurements before cutting or drilling. This prevents costly errors and wasted materials. Use these tips to verify your numbers.
- Measure twice from the same starting point.
- Use a second tape measure if possible.
- Compare your measurement with project plans.
- Mark the measurement clearly on the material.
- Ask a coworker to confirm if unsure.
Advanced Tips For Construction Accuracy
Using a tape measure well is key to getting precise results in construction. Small mistakes can cause big problems later.
These advanced tips help you measure more accurately on tricky surfaces and use your tape measure with other tools.
Measuring Around Corners And Angles
Measuring around corners or angles can be hard. The tape may not lay flat, causing errors.
Use the tape’s hook to catch the edge firmly. Pull the tape tight but do not bend it too much.
- Mark the tape at the corner carefully before moving it.
- Use a framing square to check right angles.
- For inside corners, measure along each wall separately, then add lengths.
Using A Tape Measure With Other Tools
Combine your tape measure with tools like levels and squares for better results. This reduces guesswork.
Check the tape’s reading against a level or square to confirm accuracy before marking.
- Use a speed square to mark angles precisely.
- Double-check long measurements with a laser level.
- Clamp the tape measure to keep it steady for one-person jobs.
Recording And Marking Measurements
Write down measurements immediately to avoid mistakes. Use clear and simple notes.
Mark measurements directly on the material with a pencil or chalk. Use small, neat marks.
- Label each mark with its purpose or location.
- Use a fine pencil for precise lines.
- Double-check recorded numbers before cutting or drilling.
Common Mistakes To Avoid
Using a tape measure seems simple, but many make errors that affect accuracy.
These mistakes can cause wrong cuts and wasted materials in construction projects.
Ignoring Tape Tension
Pulling the tape too tight or leaving it slack changes the length shown.
- Pull the tape straight and firm, but not too hard.
- Keep the tape level and avoid bending it.
- Let the tape retract slowly to avoid damage.
Misreading The Tape End
The tape end may move or have a small gap for inside measurements.
| Tape End Type | How to Read |
|---|---|
| Hook with Movement | Allow for its thickness when measuring outside edges. |
| Fixed Hook | Measure directly from the hook tip. |
| Inside Measurement Gap | Use the gap for accurate inside dimensions. |
Overlooking Environmental Factors
Temperature and surface can change tape length and reading accuracy.
- Heat can stretch the tape, making it longer.
- Cold can shrink the tape, making it shorter.
- Rough surfaces may damage the tape markings.
- Keep the tape clean and dry for best results.
Maintaining Your Tape Measure
Keeping your tape measure in good condition helps you get accurate measurements. Proper care extends its life and keeps it working smoothly.
Below are tips on cleaning, repairing, and knowing when to replace your tape measure.
Cleaning And Storage
After use, clean dirt and dust from the tape blade with a soft cloth. Avoid using water or harsh chemicals.
- Wipe the tape blade dry before retracting it.
- Keep the tape measure in a dry place to prevent rust.
- Store it in a case or pouch to protect from damage.
Repairing Damage
Small damages can affect your tape measure’s accuracy. Fix minor issues quickly to keep it reliable.
| Damage Type | Repair Tip |
|---|---|
| Cracked casing | Use strong glue or replace casing if possible |
| Loose hook | Tighten screws or replace the hook |
| Blade rust | Lightly sand rust, then clean and dry |
| Sticky blade | Clean blade and lubricate with light oil |
When To Replace Your Tape
Replace your tape measure if it does not retract smoothly or if the blade is badly bent or cracked.
- Blade markings are hard to read or worn off.
- Hook is missing or broken.
- The tape measure case is broken or cracked.
- The blade bends and does not stay straight.
Frequently Asked Questions
How Do I Read A Tape Measure Correctly?
Read a tape measure by lining up the start edge with your object. Note the measurement at the object’s end. Use the marked increments for precise readings. Understand both metric and imperial units on the tape for accuracy.
What Are Common Tape Measure Mistakes In Construction?
Common mistakes include not locking the tape, misreading fractions, and measuring from the wrong end. Avoid bending the tape, which causes inaccuracies. Always double-check measurements before cutting or marking.
How Do I Maintain My Tape Measure For Accuracy?
Keep the tape clean and dry to prevent rust. Retract the tape slowly to avoid damage. Store it in a protective case and check calibration periodically to ensure accuracy.
Can I Use A Tape Measure For Both Small And Large Projects?
Yes, tape measures are versatile for small and large projects. Use longer tapes for big projects and smaller ones for tight spaces. Always choose a tape measure with clear markings suited to your task.
Conclusion
Mastering the tape measure is crucial in construction. It ensures precise measurements. Avoid costly mistakes by using it correctly. Regular practice helps improve your accuracy. Always double-check your measurements. This saves time and resources. Choose a durable tape measure for reliability.
Keep it clean and in good condition. A well-maintained tool lasts longer. Remember, every detail counts in construction. So, measure twice, cut once. This simple habit makes a big difference. Stay patient and practice often. Your skills will improve over time.
Happy building!