
Imagine diving into your next painting project with confidence, knowing you’re fully protected. Respirators are your best friends when it comes to safeguarding your lungs from harmful fumes and particles.
But using them effectively isn’t always straightforward. Are you sure you’re wearing yours correctly? The right fit and usage can make all the difference in your safety and comfort. In this guide, you’ll discover essential tips for wearing respirators during your painting projects, ensuring you’re not only safe but also comfortable and efficient.
Get ready to transform your painting experience and breathe easy with peace of mind.
Choosing The Right Respirator
Wearing a respirator is important for safety in painting projects. It protects you from harmful paint fumes and dust.
Choosing the right respirator helps you stay safe and work comfortably. This guide explains what to look for.
Types Of Respirators For Painting
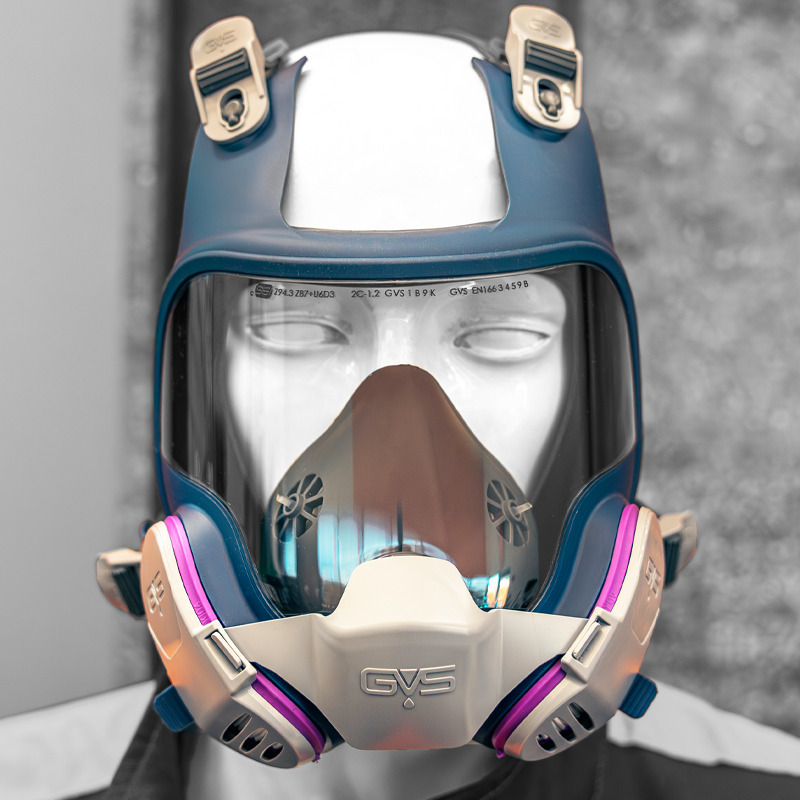
There are different respirators for painting. The most common are disposable masks, half-face, and full-face respirators.
Disposable masks are easy to use but offer less protection. Half-face respirators cover your nose and mouth. Full-face respirators also protect your eyes.
- Disposable masks: lightweight, limited use
- Half-face respirators: reusable, better protection
- Full-face respirators: highest protection, eye safety
Filters And Cartridges Selection
Filters and cartridges remove paint fumes and particles. Choose the right type for your painting chemicals.
Some filters block dust, while cartridges protect against gases and vapors. Check what chemicals you will use before buying.
- Particulate filters: block dust and paint particles
- Gas and vapor cartridges: block harmful fumes
- Combination filters: protect against both dust and gases
Fit And Comfort Considerations
A good fit keeps paint fumes out and makes breathing easier. Try different sizes and styles to find your fit.
Comfort matters if you wear the respirator for long periods. Look for soft seals, adjustable straps, and lightweight designs.
- Check for tight seal around nose and mouth
- Use adjustable straps for better fit
- Choose lightweight models for long use
- Look for soft, flexible face seals
Credit: www.blastone.com
Preparing For Respirator Use
Using a respirator properly keeps you safe during painting projects. Preparing your respirator before use is key.
Check your respirator carefully and clean it often. Store it correctly to keep it ready for the next job.
Inspecting The Respirator
Look over your respirator before each use. Check for cracks, tears, or worn parts. Make sure the straps and facepiece fit well.
- Check the filters for damage or clogging
- Ensure all valves move freely
- Look for any dirt or paint on the mask
- Test the seal by covering the filters and breathing in
Cleaning And Maintenance Tips
Keep your respirator clean to avoid breathing harmful particles. Clean it after every use following these steps:
- Remove filters and cartridges before cleaning
- Wash the facepiece with warm water and mild soap
- Rinse well to remove all soap
- Let the parts air dry completely
- Check parts for wear and replace if needed
Proper Storage Practices
| Storage Tip | Reason |
|---|---|
| Store in a clean, dry place | Prevents mold and damage |
| Keep away from direct sunlight | Avoids material breakdown |
| Use a sealed container or bag | Keeps dust and dirt out |
| Store with filters removed | Extends filter life |
Wearing The Respirator Correctly
Using a respirator properly is important for safety during painting projects. A well-fitted respirator protects you from harmful fumes and dust. This guide explains how to wear your respirator correctly.
Focus on securing the straps, checking the fit, and avoiding common mistakes. These steps help ensure the respirator works as it should.
Securing Straps And Adjustments
Make sure the straps are tight but not too tight. The respirator should sit snugly on your face without causing discomfort. Adjust the straps evenly on both sides to prevent gaps.
- Place the respirator over your nose and mouth
- Pull the top strap over your head and rest it high on the back of your head
- Pull the bottom strap over your head and position it around your neck
- Tighten the straps evenly by pulling the ends gently
- Check that the respirator feels secure but not painful
Performing Fit Checks
Always perform a fit check before starting work. This step helps you find leaks and ensure the respirator seals properly.
- Cover the respirator with your hands
- Inhale gently and hold your breath for 5 seconds
- Feel for air leaks around the edges
- If you detect leaks, adjust the straps and reposition the respirator
- Repeat the test until no air leaks are felt
Avoiding Common Fit Issues
Common fit problems reduce the respirator’s protection. Watch out for these issues and fix them quickly.
| Issue | Cause | Solution |
|---|---|---|
| Straps too loose | Improper tightening | Tighten straps evenly |
| Facial hair | Beard or stubble blocks seal | Shave area under respirator |
| Wrong respirator size | Using a respirator too big or small | Choose the correct size for your face |
| Incorrect positioning | Respirator not covering nose or chin | Adjust respirator to cover nose and chin fully |

Credit: www.brewers.co.uk
Using Respirators During Painting
Wearing a respirator protects your lungs from harmful paint fumes. It is important to use the right respirator and maintain it well. This helps keep you safe during painting jobs.
Understanding how to replace filters, take breaks, and work in different places will make your painting safer. Follow simple tips to get the best use from your respirator.
When To Replace Filters
Filters stop dangerous chemicals from reaching your lungs. You must change them often to stay protected. Old filters do not work well and can make breathing unsafe.
- Change filters if breathing becomes hard
- Replace filters after 8 hours of use
- Switch filters if you smell paint fumes
- Always use filters that match the paint type
- Store spare filters in a clean, dry place
Handling Breaks Safely
Taking breaks helps you rest but keep safety first. Remove the respirator only in clean air. Avoid touching your face or the respirator’s inside during breaks.
| Break Tip | Why It Matters |
| Remove respirator in fresh air | Prevents breathing in paint fumes |
| Wash hands before touching face | Stops paint chemicals from spreading |
| Keep respirator clean | Ensures it works properly |
| Store respirator safely during breaks | Protects it from dirt and damage |
Working In Different Environments
Painting indoors or outdoors needs different care. Check the air flow and temperature. Adjust your respirator use to fit the conditions.
Tips for Different Settings:
- Indoor: Use respirators with high-efficiency filters.
- Outdoor: Watch for wind that can spread fumes.
- Hot areas: Replace filters more often due to sweat.
- Cold areas: Check respirator seals as skin shrinks.
Health And Safety Precautions
Wearing a respirator during painting helps protect your lungs. It stops harmful paint fumes from entering your body.
Use the right respirator and wear it properly. This keeps you safe while working on your project.
Recognizing Signs Of Exposure
Paint fumes can cause headaches, dizziness, and nausea. If you feel any of these, you might be exposed.
Other signs include coughing, throat irritation, and difficulty breathing. Stop working if you notice these symptoms.
- Headache or dizziness
- Nausea or vomiting
- Coughing or throat irritation
- Shortness of breath
Dealing With Discomfort Or Breathing Issues
Respirators can feel tight or hot. This may cause discomfort or make breathing hard.
Take short breaks in fresh air. Adjust the straps for a better fit if needed.
- Loosen straps slightly if too tight
- Take breaks outside the work area
- Drink water to stay hydrated
- Practice breathing calmly and slowly
Emergency Procedures
If you feel very sick or have trouble breathing, stop working at once. Remove your respirator carefully.
Get fresh air quickly and call for medical help if needed. Tell someone nearby about your condition.
- Stop painting immediately
- Remove respirator slowly to avoid inhaling fumes
- Move to fresh air area
- Seek medical attention if symptoms worsen
- Inform a coworker or family member
Credit: www.homedepot.com
Additional Protective Gear
Wearing a respirator is important for painting projects. It helps protect your lungs from harmful fumes. But using other protective gear can keep you safer.
This guide covers how to combine respirators with other gear. You will also learn how to protect your eyes and skin. Plus, get clothing tips for painting safely.
Combining Respirators With Other Ppe
Respirators work best when you use them with other personal protective equipment (PPE). This includes gloves, goggles, and ear protection. These items help reduce risks from paint fumes, dust, and noise.
- Wear gloves made from chemical-resistant materials.
- Use safety goggles to prevent paint splashes in your eyes.
- Consider earplugs if you use loud paint sprayers.
- Check that all PPE fits well and does not interfere with your respirator.
Protecting Eyes And Skin
Paint can irritate your eyes and skin. It is important to keep these areas safe during painting. Use eye protection and cover exposed skin to avoid problems.
| Protection Type | Recommended Gear |
| Eyes | Safety goggles or face shield |
| Skin | Long sleeves, gloves, and barrier cream |
| Hands | Disposable or chemical-resistant gloves |
Clothing Recommendations
Choose clothing that shields you from paint and fumes. Loose clothes can catch paint easily. Use the right fabrics and designs for better protection.
- Wear long-sleeved shirts and long pants made of thick fabric.
- Avoid open-weave or thin materials that let paint pass through.
- Use disposable coveralls if working with spray paint.
- Choose clothes that are easy to wash or dispose of after use.
Frequently Asked Questions
How Do I Choose The Right Respirator For Painting?
Select a respirator based on paint type and fumes. Use NIOSH-approved respirators for chemical vapors. Ensure a proper fit for safety and comfort during painting projects.
How Should I Fit A Respirator Before Painting?
Perform a fit test by sealing the mask to your face. Check for leaks by inhaling and exhaling sharply. Adjust straps and nose clips to ensure a snug, airtight fit.
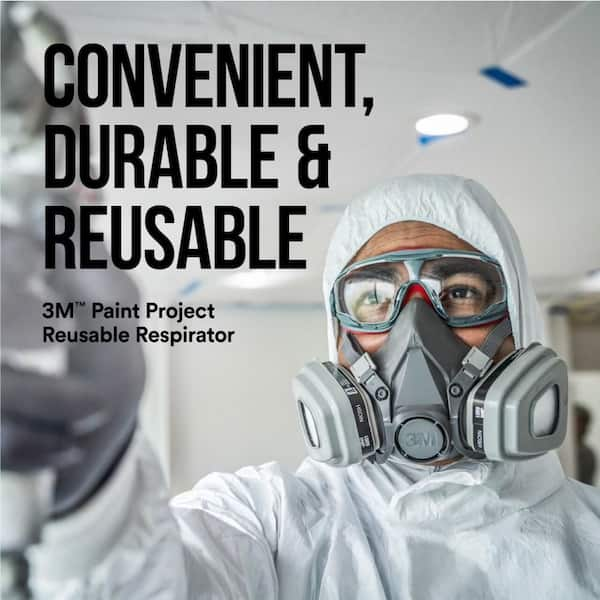
Can I Reuse A Respirator For Multiple Painting Sessions?
Reusable respirators can be used multiple times if cleaned properly. Replace filters after each use or as recommended. Disposable respirators should be discarded after one session to maintain safety.
Why Is Respirator Maintenance Important For Painting Safety?
Proper maintenance ensures effective filtration and prevents exposure to harmful fumes. Clean respirators regularly with mild soap and water. Store them in a clean, dry place to extend their life.
Conclusion
Wearing a respirator keeps you safe during painting. Choose the right type for your project. Make sure it fits snugly on your face. Replace filters as needed to stay protected. Clean your respirator after each use. Breathing clean air helps you work better.
Stay comfortable and avoid health risks. Follow these tips for safer painting projects. Safety always comes first.
