Are you struggling to get perfect bends in your EMT conduit? Using a pipe bender can make your work faster, cleaner, and more precise.
Whether you’re a beginner or have some experience, mastering this tool will save you time and frustration. You’ll discover simple tips and tricks to bend EMT conduit like a pro, so your projects look professional and run smoothly. Ready to take your skills to the next level?
Keep reading to learn how to use a pipe bender the right way.
Choosing The Right Pipe Bender
Using a pipe bender correctly makes bending EMT conduit easier. Picking the right tool saves time and effort. It also ensures clean, safe bends.
This guide helps you choose the best pipe bender. We look at types of benders, conduit size, and power options.
Types Of Pipe Benders
Pipe benders come in different styles. Each type suits specific jobs and skill levels. Common types include hand benders, lever benders, and electric benders.
- Hand Benders:Small and portable, good for light work.
- Lever Benders:Use leverage to bend thicker conduit easily.
- Electric Benders:Powered machines for fast, consistent bends.
Selecting Based On Conduit Size
Conduit size affects the choice of pipe bender. Larger conduits need stronger tools. Smaller conduits can be bent with simpler benders.
| Conduit Size | Recommended Bender |
| 1/2 inch to 3/4 inch | Hand or lever bender |
| 1 inch to 1 1/4 inch | Lever or electric bender |
| 1 1/2 inch and above | Electric or hydraulic bender |
Manual Vs. Hydraulic Benders
Manual benders use your strength to bend conduit. They are light and easy to carry. Hydraulic benders use fluid pressure for power. They require less effort and work faster.
- Manual Benders:Best for small jobs and light conduit.
- Hydraulic Benders:Ideal for large conduits and heavy work.
Preparing For Bending
Using a pipe bender for EMT conduit needs careful preparation. Proper steps help ensure clean and accurate bends.
This guide covers measuring, marking, securing, and safety before bending EMT conduit.
Measuring And Marking Bends
Measure the conduit length where the bend will go. Mark the exact spot for a precise bend.
Use a permanent marker or pencil to mark the bend point clearly. This helps avoid mistakes.
- Measure twice to avoid errors
- Mark the conduit with clear, visible lines
- Check the bend angle needed before marking
Securing The Conduit
Hold the conduit firmly in place before bending. This prevents slipping and uneven bends.
Use a vise or clamps to secure the conduit on a stable surface. Keep it steady during bending.
- Place conduit in a vise or clamp
- Tighten clamps without deforming conduit
- Ensure the conduit does not move while bending
Safety Precautions
Wear safety glasses to protect your eyes from metal shards. Gloves help protect your hands.
Keep your work area clean and free of obstacles. Use tools properly to avoid accidents.
- Wear safety glasses and gloves
- Clear the workspace before starting
- Follow tool instructions carefully
- Keep fingers away from moving parts
Bending Techniques For Emt Conduit
Bending EMT conduit is a common task in electrical work. Using a pipe bender helps shape the conduit for neat and safe installations.
Good bending techniques save time and prevent damage to the conduit. This guide covers key bends for EMT conduit.
Making Accurate 90-degree Bends
Accurate 90-degree bends are essential for corners and turns. Mark the conduit where the bend will start before bending.
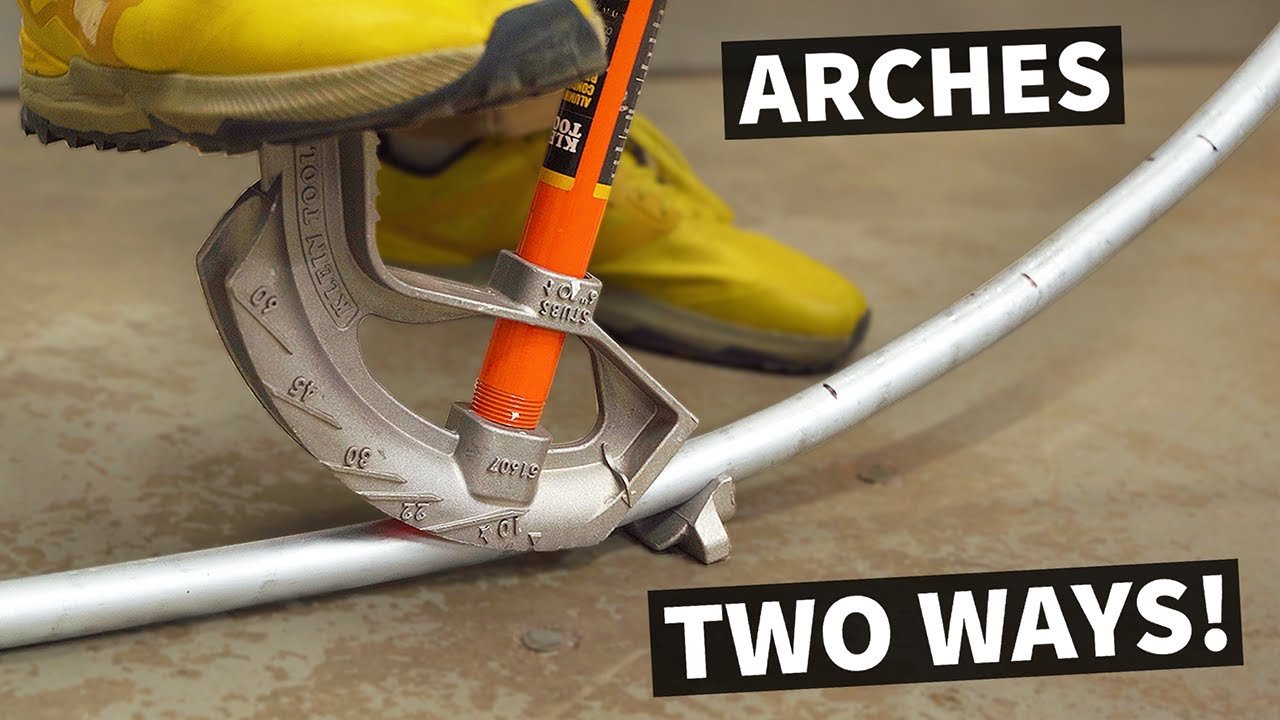
Use the degree marks on the bender to check the bend angle. Bend slowly to avoid kinks or flattening the conduit.
- Place conduit in bender with mark at the arrow
- Pull the handle steadily to form the bend
- Stop when the 90-degree mark aligns with the conduit
- Check the bend with a square tool for accuracy
Creating Offset Bends
Offset bends move the conduit around obstacles. They use two bends separated by a straight section.
Measure the distance needed to clear the obstacle. Bend the conduit at two points with the correct angle to create the offset.
- Mark the start point of the first bend
- Bend the conduit at a 22.5 or 30-degree angle
- Measure and mark the second bend location
- Bend the second point at the same angle but opposite direction
- Ensure the straight section matches the obstacle width
Forming Saddles And Kick Bends
Saddle bends allow the conduit to go over pipes or beams. Kick bends adjust the conduit height in small steps.
For saddles, use three bends: two offset bends with a center bend. Kick bends use one or two bends to raise or lower the conduit.
- Mark three points for saddle bends
- Bend the first and third points at 22.5 or 30 degrees
- Bend the middle point opposite to create the peak
- For kick bends, mark one or two points depending on height change
- Bend each point to the needed angle to lift the conduit

Credit: www.amazon.com
Avoiding Common Bending Mistakes
Using a pipe bender for EMT conduit needs care and skill. Mistakes can damage the conduit or make bends unusable.
Learning how to avoid common bending errors helps create safe and neat electrical runs. Focus on key details for better results.
Preventing Crushed Or Flattened Conduits
Crushing or flattening happens when too much pressure is applied. This weakens the conduit and can stop wires from fitting.
Use the right bender and support the conduit well. Move slowly and avoid forcing the pipe into tight bends.
- Check the conduit size matches the bender
- Use a pipe guide or padding to protect the surface
- Bend gradually, avoid sharp or fast movements
- Support the pipe at both ends during bending
Maintaining Consistent Bend Radius
Consistent bend radius keeps the conduit smooth and easy to run wire through. Inconsistent bends cause weak spots or kinks.
Mark the bending point clearly and use the bender’s scale to guide each bend. Practice helps you keep even curves every time.
- Measure and mark bend points before starting
- Use the bender’s built-in radius guide
- Keep steady speed and pressure during bends
- Check bends with a template or gauge if possible
Handling Springback Effect
Springback happens when the conduit tries to return to its original shape after bending. It makes bends less sharp than needed.
To fix this, bend the conduit slightly past the target angle. This extra bend balances the springback and gives the right shape.
- Estimate springback based on conduit material and size
- Bend 5 to 10 degrees past the desired angle
- Check the bend angle and adjust if needed
- Practice helps predict springback more accurately
Tools And Accessories To Enhance Bending
Using a pipe bender for EMT conduit needs more than just the basic tool. Extra tools and accessories help you bend pipes better and faster.
These add-ons improve accuracy and protect the conduit during the bending process. They also make the work easier for you.
Using Bending Shoes And Guides
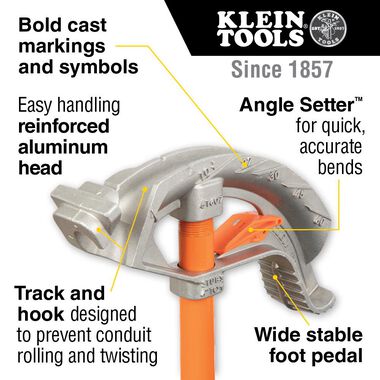
Bending shoes and guides attach to the pipe bender to shape the conduit correctly. They support the conduit and prevent kinks.
- Bending shoes fit different conduit sizes for smooth bends.
- Guides keep the conduit aligned during bending.
- They reduce the risk of flattening the pipe.
- Using the right shoe improves bend quality.
Lubricants For Smooth Bends
Lubricants lower friction between the conduit and the bender parts. This makes the bending motion smoother and reduces damage.
| Type of Lubricant | Use |
| Silicone Spray | Prevents sticking and eases bending |
| Grease | For heavy bends and thick conduit |
| Dry Lubricant | Works well on clean surfaces |
Measuring Devices For Precision
Accurate measuring tools help you mark exact bend points. This avoids mistakes and saves time on rework.
- Use a tape measure to find the bend location.
- Mark the conduit with a pencil or marker.
- Try a protractor or angle finder for checking bend angles.
- Use a bend radius gauge to confirm the curve size.
Maintaining And Storing Your Pipe Bender
Using a pipe bender for EMT conduit requires care. Proper maintenance keeps it working well.
Storing the tool correctly helps it last longer and stay ready for use.
Cleaning After Use
Clean your pipe bender after each job. Dirt and dust can cause damage over time.
Use a dry cloth to wipe all surfaces. Remove any metal shavings or grease.
- Wipe down handles and bending parts
- Remove stuck debris carefully
- Use a light oil for metal parts if needed
Checking For Wear And Tear
Inspect your pipe bender often. Look for cracks, rust, or worn parts.
Replace any damaged pieces to avoid poor bends or injury.
- Check bending dies for smooth edges
- Examine handles for cracks or looseness
- Look for rust spots and clean them
Proper Storage Tips
Store your pipe bender in a dry place. Keep it away from moisture and dust.
Hang it or place it on a shelf where it won’t fall or get damaged.
- Use a tool rack or pegboard hook
- Cover with a cloth to keep dust off
- Keep away from heavy tools that can cause dents
Troubleshooting Bend Issues
Using a pipe bender for EMT conduit can sometimes cause issues with the bends. These problems may include incorrect angles, dents, or difficulty bending certain sections.
Knowing how to fix these problems can save time and improve your work quality. Let’s explore common troubleshooting tips.
Fixing Inaccurate Angles
Inaccurate angles happen when the conduit does not bend at the right degree. This can cause fitting problems later on.
- Check the angle markings on your bender before starting.
- Align the conduit carefully with the bender’s guide marks.
- Apply steady pressure during the bend to avoid slipping.
- Use a level to measure the bend angle after bending.
- Make small adjustments by bending slightly more or less as needed.
Repairing Minor Deformations
Minor dents or creases can happen when the conduit is bent incorrectly. These deformities can weaken the pipe or affect its fit.
| Deformation Type | Cause | Fix |
| Small Dent | Too much pressure at one point | Use a wooden dowel inside pipe to reshape |
| Crease | Bending without support inside conduit | Apply gentle pressure from outside with pliers |
| Flattened Section | Pipe rolled during bend | Replace if severe, otherwise reshape carefully |
Adjusting Techniques For Difficult Bends
Some bends are harder to make due to tight spaces or unusual angles. Adjust your method to get better results.
- Use a bending spring to support the pipe inside during tight bends.
- Mark the conduit clearly to guide your bend direction.
- Bend slowly and in small increments to avoid mistakes.
- Try reheating the conduit if the material allows, to make bending easier.
- Practice on scrap pieces before working on final conduit.
Credit: www.acmetools.com

Credit: shieldenstrut.com
Frequently Asked Questions
What Tools Are Needed For Bending Emt Conduit?
You need a pipe bender, measuring tape, marker, and gloves. These tools help ensure precise, safe bends in EMT conduit.
How Do You Measure Bends For Emt Conduit?
Measure the distance from the bend point to the desired length. Mark the conduit accurately before bending for proper fit and alignment.
Can A Manual Pipe Bender Bend All Emt Sizes?
Manual benders typically handle 1/2 to 1-inch EMT sizes. Larger sizes may require hydraulic or electric benders for smooth bends.
What Are Common Bending Angles For Emt Conduit?
Common angles include 30°, 45°, and 90°. These angles help route conduit around corners and obstacles effectively.
Conclusion
Mastering EMT conduit bending enhances any electrical project. A pipe bender simplifies this process. It ensures precise bends. Avoiding costly mistakes becomes easier. Safety also improves with proper technique. Practice regularly for better results. Use quality tools for durability. Follow guidelines to avoid errors.
Investing time in learning pays off. It boosts confidence and skill. Your projects will look professional. Properly bent conduit enhances functionality. It also improves the overall appearance. Enjoy the satisfaction of a job well done.