
When you’re working with pipes, getting clean, smooth ends is crucial for a perfect fit and leak-free connections. But rough edges and burrs can make your job harder and your results less reliable.
That’s where a pipe reamer comes in. Using a pipe reamer helps you remove those unwanted rough spots quickly and easily, saving you time and frustration. If you want your pipes to fit just right and your projects to look professional, understanding how to use a pipe reamer is a game-changer.
Keep reading to discover simple tips that will make your pipe ends flawless every time.
Benefits Of Clean Pipe Ends
Using a pipe reamer helps to clean the ends of pipes. Clean pipe ends improve the quality of pipe work and make fitting easier.
Removing burrs and rough edges creates smooth surfaces. This makes pipe connections stronger and more reliable.
Improved Joint Connections
Clean pipe ends fit better with joints and fittings. This leads to tighter and more secure connections.
Removing rough edges prevents damage to seals and gaskets. This helps keep joints intact over time.
- Tighter fit between pipe and fitting
- Less risk of joint damage
- Stronger connections
Enhanced Flow Efficiency
Smooth pipe ends reduce flow resistance inside the pipe. This helps fluids move more easily through the system.
Burrs and rough edges can cause turbulence. Cleaning the pipe ends lowers turbulence and improves flow speed.
- Smoother flow path
- Less pressure loss
- Improved system performance
Reduced Leakage Risks
Clean pipe ends create better seals with fittings. This lowers the chance of leaks forming at connection points.
Removing sharp edges stops damage to sealing materials. This keeps the system leak-free for longer.
- Better seal contact
- Less wear on gaskets and O-rings
- Reduced chance of leaks
Credit: www.vevor.com
Choosing The Right Pipe Reamer
Using a pipe reamer helps create clean, smooth pipe ends. This makes fitting pipes easier and safer. Picking the right reamer is important for good results.
This guide covers the types of pipe reamers, material compatibility, and size tips. Knowing these points helps you select the best tool for your work.
Types Of Pipe Reamers
Pipe reamers come in several styles. Each style fits different tasks and pipe types. Choose the one that fits your needs for smooth pipe ends.
- Hand Reamers:Simple tools for manual use, ideal for small jobs.
- T-Handle Reamers:Provide better grip and control for precise reaming.
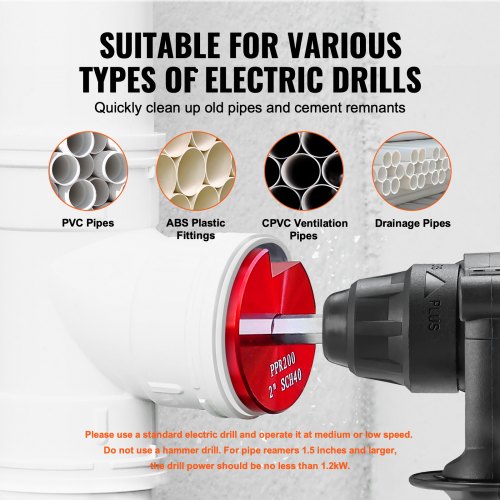
- Rotary Reamers:Attach to drills for faster, power-driven reaming.
- Adjustable Reamers:Can be sized to fit different pipe diameters.
Material Compatibility
Not all reamers work well with every pipe material. Some tools suit soft pipes, others fit hard metals. Match your reamer to the pipe material for best results.
| Pipe Material | Recommended Reamer Type | Notes |
|---|---|---|
| Copper | Hand or T-Handle Reamer | Easy to ream, soft material |
| Steel | Rotary or Adjustable Reamer | Requires stronger, power tools |
| Plastic (PVC/CPVC) | Hand or Adjustable Reamer | Avoid over-reaming to prevent cracks |
| Cast Iron | Rotary Reamer with Carbide Tips | Hard material, needs durable blades |
Size Selection Tips
Choose a pipe reamer size that fits your pipe diameter. Using the wrong size can damage the pipe or tool. Follow these tips for correct size selection.
- Measure the pipe’s inner diameter accurately.
- Select a reamer slightly smaller than the pipe size.
- Check the reamer’s specifications before buying.
- For adjustable reamers, set the tool to match the pipe size.
- Test the reamer on a scrap piece before actual use.
Step-by-step Reaming Process
Using a pipe reamer helps you get smooth, clean pipe ends. This process removes burrs and sharp edges. Clean ends make joining pipes easier and safer.
Follow these simple steps to ream your pipes correctly. Each step ensures a neat finish and proper pipe fitting.
Preparing The Pipe
Start by cutting the pipe to the needed length. Check the cut end for any rough spots. Clean off dirt, rust, or grease to avoid damage.
Make sure the pipe is steady before you begin reaming. Use a vise or clamp to hold it firmly. This prevents slipping during work.
Proper Reamer Positioning
Place the reamer blade inside the pipe end. Hold it straight and centered. This helps you remove burrs evenly around the edge.
- Insert the reamer gently into the pipe
- Keep the tool perpendicular to the pipe end
- Check that the blade fits inside without forcing
Applying Correct Pressure
Turn the reamer slowly while pressing lightly. Too much pressure can damage the pipe or tool. Let the blade cut the burrs smoothly.
- Use steady, gentle force
- Turn the tool clockwise for best results
- Stop if you feel resistance or roughness
Finishing Touches
After reaming, wipe the pipe end clean. Check for any remaining rough spots. Repeat the process if needed for a smooth finish.
Inspect the pipe end with your fingers. It should feel smooth and safe to handle. Proper reaming helps pipes fit better and last longer.

Credit: www.reedmfgco.com
Safety Tips During Reaming
Using a pipe reamer can make pipe ends clean and smooth. Safety must be a top priority during reaming. Careful steps help prevent injuries and ensure good results.
Always prepare well before you start. Follow safety rules to protect yourself from sharp edges and other hazards. Keep your workspace organized and free of clutter.
Protective Gear Recommendations
Wearing the right protective gear reduces the risk of injury. Gloves, eye protection, and sturdy clothing are important. They shield you from metal shavings and sharp pipe edges.
- Wear cut-resistant gloves to protect your hands.
- Use safety goggles to guard your eyes from debris.
- Wear long sleeves to protect your arms from cuts.
- Use ear protection if working with noisy tools.
Handling Sharp Edges
Pipe ends can have sharp edges after cutting. Handle these edges with care to avoid cuts. Use tools and gloves instead of bare hands when possible.
| Safety Tip | Reason |
|---|---|
| Hold pipes with a clamp or vise | Prevents slipping and unexpected movement |
| Use a deburring tool after reaming | Removes sharp burrs and smooths edges |
| Keep hands away from cutting edges | Reduces risk of deep cuts and injuries |
| Inspect pipe ends before handling | Identifies sharp spots to avoid |
Avoiding Common Mistakes
Many accidents happen due to simple errors. Avoid rushing and stay focused. Use the correct reaming speed and pressure to keep control.
- Do not force the reamer if it feels stuck.
- Keep the tool perpendicular to the pipe end.
- Clean the pipe before starting to prevent damage.
- Check your tool for damage before use.
- Work in a well-lit area to see clearly.
Maintaining Your Pipe Reamer
Keeping your pipe reamer in good shape helps it work better and last longer. Regular care prevents damage and keeps the tool ready for use.
Simple maintenance tasks like cleaning, sharpening, and proper storage make a big difference. Follow these tips to keep your pipe reamer effective.
Cleaning After Use
After each use, clean the pipe reamer to remove debris and dirt. Use a brush to clear out metal shavings and dust. Wipe the tool with a dry cloth to prevent rust.
- Remove all metal filings and dirt
- Use a stiff brush for tight spaces
- Wipe the reamer dry with a clean cloth
- Apply a light coat of oil to prevent rust
Sharpening Techniques
Sharpen the blades of your pipe reamer to keep them sharp and effective. Use a fine file or sharpening stone and follow the original angle of the blade edges. Do not remove too much metal.
| Sharpening Tool | Purpose | Tip |
|---|---|---|
| Fine file | Reshape dull edges | Use smooth, even strokes |
| Sharpening stone | Polish and refine blades | Keep stone wet for best results |
| Sandpaper (fine grit) | Remove small burrs | Wrap around a flat block for control |
Storage Best Practices
Store your pipe reamer in a dry, safe place. Keep it away from moisture and dust. Use a protective case or wrap it in cloth to avoid damage.
- Keep the reamer in a toolbox or protective pouch
- Store in a dry area to prevent rust
- Do not place heavy tools on top of it
- Check the tool regularly for signs of wear

Credit: www.amazon.com
Troubleshooting Common Issues
Using a pipe reamer helps make pipe ends clean and smooth. Sometimes, problems can arise during the process. Fixing these issues quickly keeps your work safe and precise.
This guide covers common troubles you may face with pipe reamers. Learn how to handle rough edges, misaligned cuts, and reamer wear to keep your pipes perfect.
Dealing With Rough Edges
Rough edges appear when the reamer does not cut cleanly. These sharp edges can cause injury or fitting problems. You can fix rough edges by smoothing the pipe end carefully.
- Use fine-grit sandpaper or a metal file to smooth edges.
- Apply light pressure and move evenly around the pipe.
- Check the pipe edge often to avoid removing too much material.
- Wear gloves to protect your hands during smoothing.
Fixing Misaligned Cuts
Misaligned cuts happen when the pipe is not held steady. This causes uneven or angled pipe ends. To fix this, realign the pipe and re-cut carefully.
| Cause | Solution |
| Pipe moves while cutting | Use a clamp or vise to hold pipe steady |
| Reamer is not straight | Check and replace bent reamer |
| Uneven pressure applied | Apply even, firm pressure during reaming |
| Incorrect angle of tool | Keep reamer perpendicular to pipe end |
Handling Reamer Wear And Tear
Over time, reamers lose sharpness and may wear out. A dull reamer produces poor cuts and rough edges. Regular maintenance extends tool life and improves results.
Follow these tips to handle reamer wear:
- Inspect the cutting edges before use for chips or dullness.
- Sharpen the reamer with a fine file or take it to a professional.
- Clean the reamer after each use to prevent rust or debris buildup.
- Replace the reamer if sharpening no longer restores its edge.
Frequently Asked Questions
What Is The Purpose Of A Pipe Reamer?
A pipe reamer removes burrs and smooths pipe ends. It ensures clean cuts for better fitting and sealing. Using a reamer prevents damage to pipes and improves joint quality in plumbing or construction tasks.
How Do You Use A Pipe Reamer Correctly?
Insert the reamer into the pipe end and rotate it smoothly. Apply moderate pressure to remove burrs without damaging the pipe. Repeat until the edges are clean and smooth for optimal pipe joining.
Can A Pipe Reamer Be Used On All Pipe Materials?
Pipe reamers work best on metal pipes like copper, steel, and aluminum. Some plastic pipes may require special reamers. Always check compatibility to avoid damaging the pipe material during reaming.
Why Is Deburring Pipe Ends Important?
Deburring removes sharp edges and burrs after cutting. It prevents injuries and ensures tight, leak-free connections. Proper deburring also extends pipe life and improves overall plumbing system performance.
Conclusion
Choosing the right pipe reamer ensures clean pipe ends. This tool simplifies the task, making your work more efficient. Clean ends mean better connections and reduced leakage risks. Always handle the reamer with care for safety. Regular maintenance of the tool guarantees its longevity.
Practicing correct techniques will improve your results. So, invest in a good reamer and enhance your piping projects. Remember, quality tools lead to quality work. Enjoy the benefits of smooth, clean pipe ends with ease.
