When it comes to woodworking, precision is everything. If your cuts and measurements aren’t spot on, your project won’t fit together the way you want.
That’s where woodworking squares come in. Using these simple tools effectively can save you time, reduce mistakes, and make your work look professional. You’ll discover how to choose the right square, use it like a pro, and avoid common pitfalls.
Ready to take your woodworking skills to the next level? Keep reading and see how mastering woodworking squares can transform your projects.

Credit: indiandiy.blogspot.com
Types Of Woodworking Squares
Woodworking squares help you measure and mark right angles and lines. They are essential tools for woodworkers of all skill levels.
Different types of squares serve different purposes. Knowing each type helps you use them correctly for your projects.
Try Squares
Try squares are simple and common tools. They consist of a fixed blade set at a 90-degree angle to the handle. They check the squareness of edges and corners.
They are best for quick checks on small pieces of wood. A try square gives a clear, straight line for marking cuts or joints.
Combination Squares
Combination squares have a ruler and a movable head. The head can be locked at different angles, usually 90 and 45 degrees. This tool measures, marks, and checks angles.
- Mark 90 and 45-degree angles
- Measure depths or heights
- Check flatness and straightness
- Use the ruler for simple measurements
Speed Squares
Speed squares are triangular and made of metal. They combine a ruler, a protractor, and a square. This tool is popular for framing and roofing.
| Feature | Use |
| Flat edge | Align on board edges |
| Notched fence | Hold square against material |
| Degree markings | Mark angles for cuts |
| Pivot point | Draw arcs or circles |
Bevel Squares
Bevel squares have an adjustable blade. You can set the blade at any angle. They help mark and check angles other than 90 or 45 degrees.
Common uses for bevel squares include:
- Setting angles for miters
- Transferring angles from one piece to another
- Checking complex angles in furniture making
Choosing The Right Square
Using woodworking squares correctly starts with picking the right one. The right square helps you measure and mark wood accurately.
Different tasks need different types of squares. Choose one that fits your project and skill level.
Material And Build Quality
Woodworking squares come in many materials like steel, aluminum, and plastic. Steel is strong and lasts long. Aluminum is light but still tough. Plastic squares are good for light jobs.
Look for squares with clear, easy-to-read markings. The edges should be straight and smooth. A well-built square gives better results and lasts longer.
- Steel: durable and accurate
- Aluminum: lightweight and strong
- Plastic: affordable and good for beginners
- Clear markings improve accuracy
- Smooth edges prevent damage to wood
Size Considerations
Squares come in different sizes. Small squares are easy to carry and good for small projects. Large squares help with bigger pieces of wood. Choose a size that fits your work.
A larger square can measure bigger angles and lines. A smaller square fits tight spaces. Keep both sizes if you do many types of projects.
- Small squares: easy to handle, best for small cuts
- Large squares: good for big boards and sheets
- Consider the space where you will work
- Carry a set for more flexibility
Specialized Uses
Some woodworking squares are made for special tasks. Try a combination square for measuring and marking angles. A speed square helps mark quick angles for framing.
Use a try square for checking right angles on edges. Each square type has a unique use that makes your work easier and more precise.
- Combination square: measures angles and depth
- Speed square: marks angles fast for framing
- Try square: checks 90-degree angles
- Dovetail square: marks angled cuts for joints
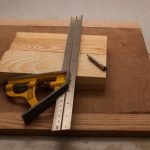
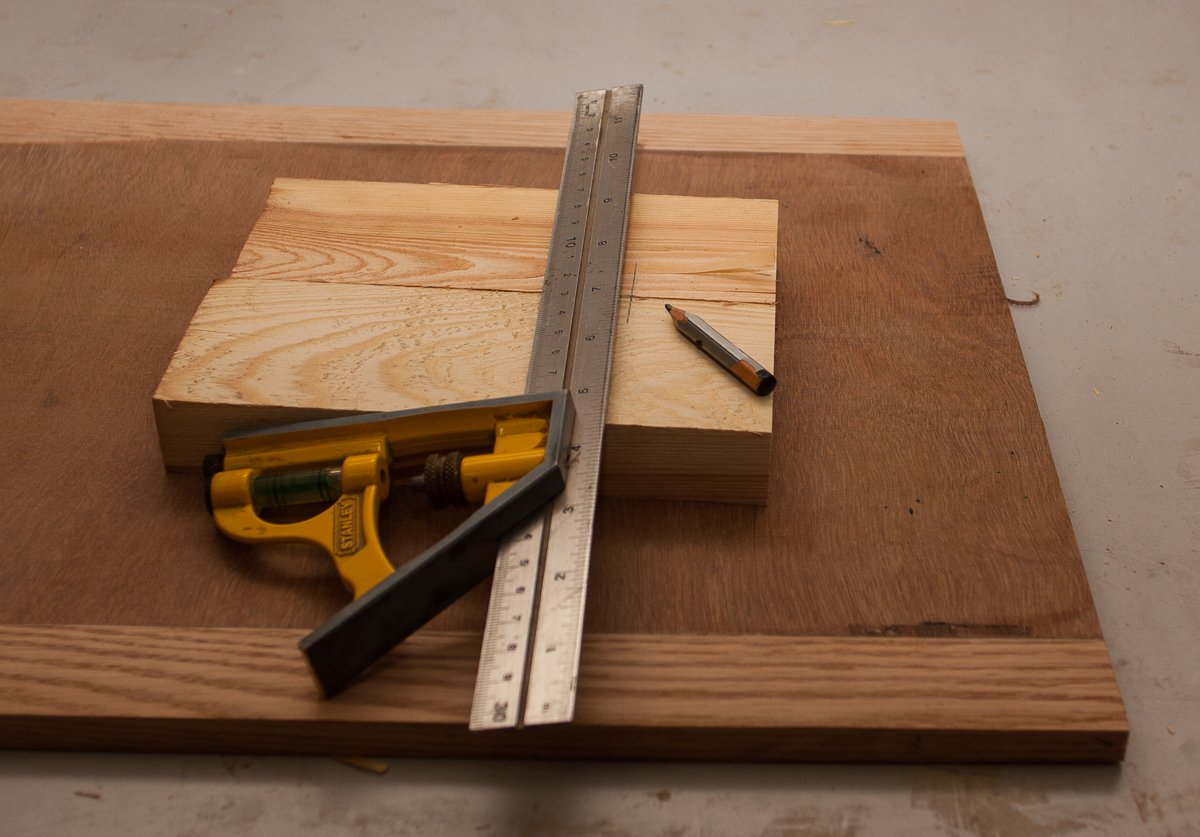
Basic Techniques For Accurate Marking
Using a woodworking square helps you make precise marks for cutting and joining wood. Accurate marking ensures your project pieces fit well together.
Learn how to position the square, apply the right pressure, and use marking tips to improve your work.
Proper Positioning
Place the woodworking square firmly against the wood edge. Make sure it is flush and does not move while marking.
Align the square’s blade and body so your mark is straight and at the correct angle.
- Hold the square tight to avoid shifting
- Check the square is not warped or damaged
- Use the right side of the square for your mark
Consistent Pressure
Apply steady pressure on the square to keep it in place. This prevents slipping and uneven lines.
Use enough force to hold the square but not too much to bend it or damage the wood.
- Press the square firmly against the wood edge
- Hold your marking tool steady while drawing
- Keep your hand steady to avoid shaky lines
Marking Tips
Use a sharp pencil or marking knife for clear, thin lines. Thick lines can reduce accuracy.
Mark lightly at first. You can darken the line if needed after checking alignment.
- Sharpen pencils regularly for fine lines
- Try a marking knife for precise edges
- Double-check measurements before marking
- Mark on the waste side of your cut line

Credit: www.youtube.com
Measuring And Checking Angles
Woodworking squares help check and measure angles accurately. Correct angles ensure your project fits well and looks good.
Using the right square for the job saves time and avoids mistakes. Learn how to use different squares for common angles.
Verifying 90-degree Angles
Check if your corner is a perfect right angle using a try square or combination square. Place the square inside the corner and look for gaps.
- Place the square’s blade flush against one edge.
- Ensure the handle touches the other edge without gaps.
- If there is space, adjust the material or cut again.
- Repeat the check after adjustments.
Setting And Measuring 45-degree Angles
Use a combination square or speed square to mark 45-degree angles. These angles are common for miter joints and trim work.
- Open the square to the 45-degree setting.
- Align the square’s edge with the workpiece.
- Draw a line along the blade to mark the cut.
- Check the angle by folding two 45-degree cuts to form a 90-degree corner.
Using Bevel Squares For Custom Angles
Bevel squares measure and transfer angles that are not 45 or 90 degrees. They have an adjustable blade and handle for flexibility.
| Step | Action |
| 1 | Loosen the blade lock on the bevel square. |
| 2 | Place the handle on the reference surface. |
| 3 | Adjust the blade to match the angle. |
| 4 | Tighten the blade lock to hold the angle. |
| 5 | Transfer the angle to your workpiece for marking or cutting. |
Common Mistakes To Avoid
Using woodworking squares correctly ensures accurate measurements and cuts. Many woodworkers make simple mistakes that lead to errors.
Knowing these common mistakes helps you avoid wasting time and materials. Focus on the key areas to improve your work quality.
Misalignment Issues
Misalignment happens when the square is not placed flush against the wood. This causes incorrect angles and poor fitting joints.
- Make sure the square’s blade and stock touch the workpiece fully.
- Check for gaps between the square and the wood surface.
- Use clamps to hold the square steady if needed.
- Double-check angles with a second square or protractor.
Worn Or Damaged Squares
Old or damaged squares can cause big errors. A bent blade or chipped corner means your measurements won’t be accurate.
| Type of Damage | Effect on Measurement | Fix or Replace |
| Bent Blade | Incorrect angle reading | Replace square |
| Chipped Edge | Misalignment with wood edge | Replace square |
| Worn Markings | Hard to read measurements | Mark again or replace |
| Loose Joints | Blade moves during use | Tighten screws or replace |
Improper Handling
Careless handling reduces the life of your square. Dropping or storing it with heavy tools causes damage.
- Always store your square in a dry, safe place.
- Handle with care to avoid drops and impacts.
- Clean the square after use to remove dust and debris.
- Do not use the square as a hammer or pry bar.

Credit: fencearmor.com
Maintenance And Calibration
Woodworking squares help you measure and mark angles accurately. To keep them reliable, you must maintain and calibrate them regularly.
Good care extends the life of your square and ensures your work stays precise.
Cleaning And Storage
Keep your woodworking square clean by wiping off dust and dirt after each use. Avoid using harsh chemicals that may damage the metal.
Store your square in a dry place to prevent rust. Use a protective case or hang it where it won’t get knocked around.
- Wipe with a soft cloth after use
- Use light oil to prevent rust
- Store away from moisture and dust
- Keep in a dedicated toolbox or case
Checking Accuracy
Check your square’s accuracy before important projects. Test it by drawing a line, then flipping the square to see if the lines match.
If the lines do not align, your square may be out of calibration and need adjustment.
- Place the square on a flat surface
- Draw a straight line along the blade
- Flip the square over and draw another line
- Compare both lines for alignment
Calibrating Your Square
To calibrate a woodworking square, loosen the screws slightly. Adjust the blade until it forms a perfect 90-degree angle with the handle.
Tighten the screws carefully while keeping the correct angle. Repeat the accuracy check to confirm the calibration.
- Loosen screws holding the blade
- Align blade to 90 degrees
- Tighten screws without shifting the blade
- Test accuracy again after adjustment
Advanced Tips For Faster Precision
Using woodworking squares correctly improves your project accuracy. Advanced techniques help speed up your work. This guide covers smart ways to use squares with other tools.
Learn how to make quick angle changes and fit squares into your workflow. These tips save time and reduce mistakes.
Using Squares With Other Tools
Combining squares with tools like marking gauges or clamps increases precision. Use squares to check angles, then transfer measurements with other tools.
- Pair a try square with a marking gauge for straight, repeatable lines.
- Use a combination square with a bevel gauge to set complex angles.
- Clamp a square to wood edges for steady marking or cutting guides.
- Check tool calibration by comparing square edges before use.
Quick Angle Adjustments
Speed up angle changes by presetting squares or using adjustable models. This reduces time spent measuring each cut.
| Adjustment Method | Benefit | Tip |
| Pre-mark common angles | Faster setup | Mark 45°, 30°, 60° on your square |
| Use combination square | Easy angle locking | Set blade and lock firmly |
| Bevel gauge with square | Quick angle transfer | Match bevel to square edge, then lock |
Efficient Workflow Integration
Integrate squares into your work routine to cut errors and speed up tasks. Keep tools handy and organized for quick access.
- Store squares near your workbench for fast reach.
- Use dedicated spots for each tool to avoid searching.
- Mark repeated measurements on a scrap board to reuse.
- Combine measuring and marking steps to save time.
- Practice smooth hand movements when positioning squares.
Frequently Asked Questions
What Is The Purpose Of Woodworking Squares?
Woodworking squares help ensure precise right angles in cuts and assemblies. They improve accuracy and consistency in woodworking projects. Using them reduces errors and saves time during construction and finishing.
How Do I Choose The Right Woodworking Square?
Select a square based on your project type and size. Try combination squares for versatility or try try squares for basic right angles. Material quality affects durability and accuracy.
How Can I Maintain My Woodworking Square?
Keep your square clean and dry to prevent rust. Store it in a protective case to avoid damage. Regularly check for accuracy and recalibrate if needed.
What Are Common Woodworking Square Types?
Common types include try squares, combination squares, speed squares, and framing squares. Each serves different measuring and marking purposes in woodworking tasks.
Conclusion
Woodworking squares make projects precise and efficient. Use them correctly for best results. Always ensure your square is clean and undamaged. Check for accuracy regularly to avoid mistakes. Practice using different types of squares. Try combination, speed, and framing squares.
Each serves a unique purpose. Understand your tools for better outcomes. Improve your woodworking skills with consistent practice. Remember, patience and practice yield great results. Keep learning and experimenting with new techniques. This ensures growth in your woodworking journey. Embrace these tips, and watch your projects transform.
Happy woodworking!