If you want smooth, flawless finishes on your projects, knowing how to replace sanding discs on your orbital sander is key. Struggling with worn-out discs can slow you down and ruin your work.
But don’t worry—this guide will walk you through the simple steps to swap out your sanding discs quickly and easily. By the end, you’ll save time, get better results, and keep your sander working like new. Ready to master this essential skill?
Let’s dive in!
Choosing The Right Sanding Disc
Choosing the right sanding disc helps you get the best results. It depends on the task and the material you work on.
Picking the correct disc saves time and prevents damage to your project surface.
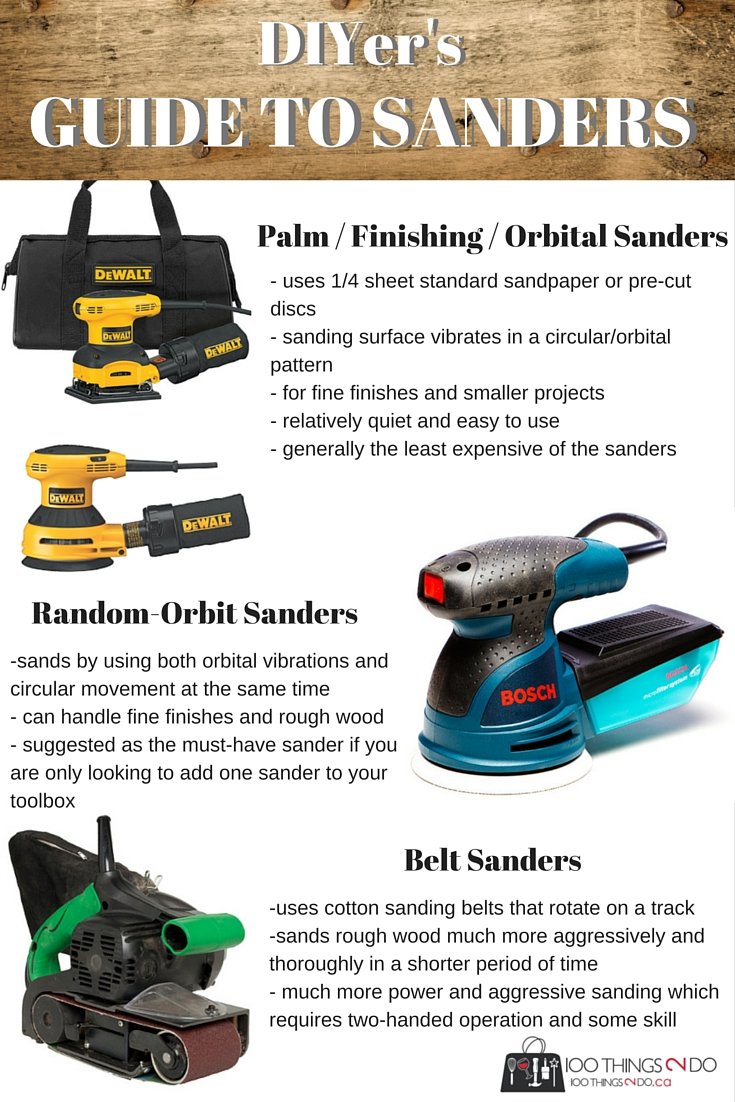
Types Of Sanding Discs
Sanding discs come in many types. Each type fits different sanding needs and materials.
- Aluminum Oxide: Good for wood and metal.
- Silicon Carbide: Best for metal and plastic.
- Ceramic: Very durable for tough sanding jobs.
- Garnet: Ideal for fine wood sanding.
Selecting Grit Sizes
Grit size shows how coarse or fine the disc is. Lower numbers mean rougher grit for fast material removal.
Higher grit numbers mean finer discs for smooth finishes and light sanding.
- 40-60 grit: Heavy sanding and stripping.
- 80-120 grit: General purpose sanding.
- 150-220 grit: Fine sanding and finishing.
- 320+ grit: Ultra-fine sanding.
Material Compatibility
Choose a sanding disc that matches your material. This avoids damage and gives better results.
Some discs work better on soft wood, while others suit metal or plastic surfaces.
| Material | Recommended Disc Type | Suggested Grit |
|---|---|---|
| Soft Wood | Aluminum Oxide or Garnet | 80-150 grit |
| Hard Wood | Aluminum Oxide | 60-120 grit |
| Metal | Silicon Carbide or Ceramic | 40-80 grit |
| Plastic | Silicon Carbide | 120-220 grit |
Credit: www.familyhandyman.com
Preparing The Orbital Sander
Replacing sanding discs on an orbital sander needs some preparation. Taking time to prepare ensures safety and better results.
Follow these steps carefully before you start changing the sanding disc. Proper preparation protects you and the tool.
Safety Precautions
Wear safety glasses to protect your eyes from dust and debris. Use gloves to avoid cuts and irritation. Work in a well-ventilated area to reduce dust inhalation.
- Wear safety glasses
- Use gloves
- Ensure good ventilation
- Keep your workspace clean
- Read the sander’s manual
Power Off And Unplug
Always turn off the orbital sander before changing discs. Unplug the power cord from the outlet. This prevents accidental starts that can cause injury.
Check the power switch to confirm it is off. Never work on the sander while it is plugged in or running.
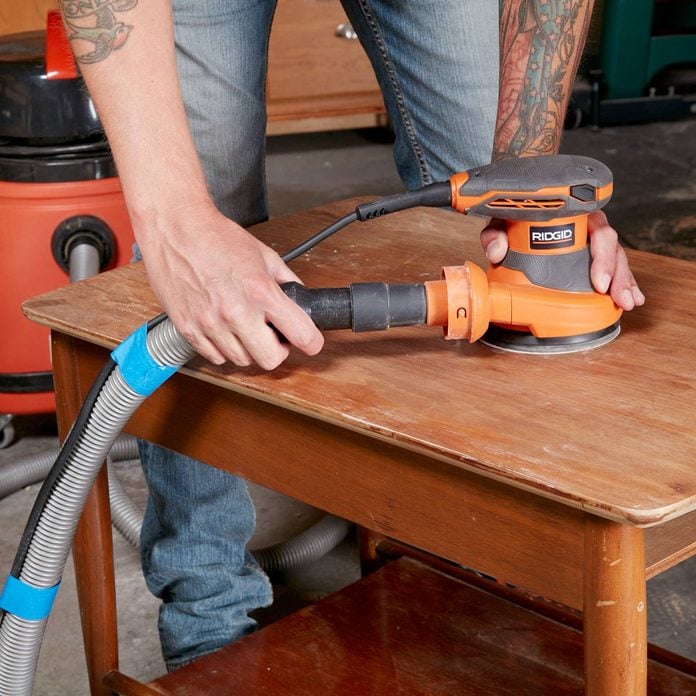
Cleaning The Sander Pad
Before attaching a new sanding disc, clean the sander pad. Dust and debris can reduce the disc’s grip and cause uneven sanding.
| Cleaning Tool | Purpose |
| Soft brush | Remove loose dust and particles |
| Cloth | Wipe off remaining debris |
| Compressed air | Blow out dust from crevices |
Removing The Old Sanding Disc
Replacing sanding discs on orbital sanders is a simple task. Removing the old disc properly helps your sander work well.
This guide explains how to remove two common types of sanding discs: hook and loop, and adhesive-backed.
Detaching Hook And Loop Discs
Hook and loop discs stick to the sander with tiny hooks and loops. They come off easily by pulling them gently.
Start at the edge and peel the disc back slowly. Avoid pulling too hard to stop damage to the pad.
- Hold the sander steady.
- Lift the disc edge carefully.
- Pull the disc away slowly and evenly.
- Check the pad for leftover debris.
Handling Adhesive-backed Discs
Adhesive-backed discs stick tightly to the sander pad. Removing them needs a bit more care.
Start by lifting the disc edge with your fingers or a plastic scraper. Pull it back slowly to avoid tearing.
- Keep the sander flat on a surface.
- Use a plastic tool to lift the edge if needed.
- Peel the disc off gently.
- Clean any sticky residue from the pad before adding a new disc.
Attaching The New Sanding Disc
Replacing the sanding disc on your orbital sander is a simple task. Proper attachment ensures smooth sanding and longer disc life.
Focus on aligning the disc correctly and pressing it firmly for a secure hold. These steps help prevent disc slipping during use.
Aligning The Disc Correctly
Start by matching the holes on the sanding disc with the holes on the sander’s pad. This alignment is important for dust collection and disc stability.
- Place the disc flat against the sanding pad.
- Line up all the holes precisely.
- Check that the edges of the disc match the pad shape.
Pressing For Secure Attachment
After aligning, press the disc firmly onto the pad. The disc should stick tightly to avoid movement during sanding.
| Action | Purpose |
|---|---|
| Apply even pressure across the disc | Ensures full contact with the pad |
| Press for 10 seconds | Helps adhesive bond securely |
| Check for loose edges | Prevents disc from peeling off |
Testing The New Disc
After replacing sanding discs on your orbital sander, testing the new disc is important. This ensures the disc is safe and works well.
Testing helps avoid damage to your project and keeps you safe during use.
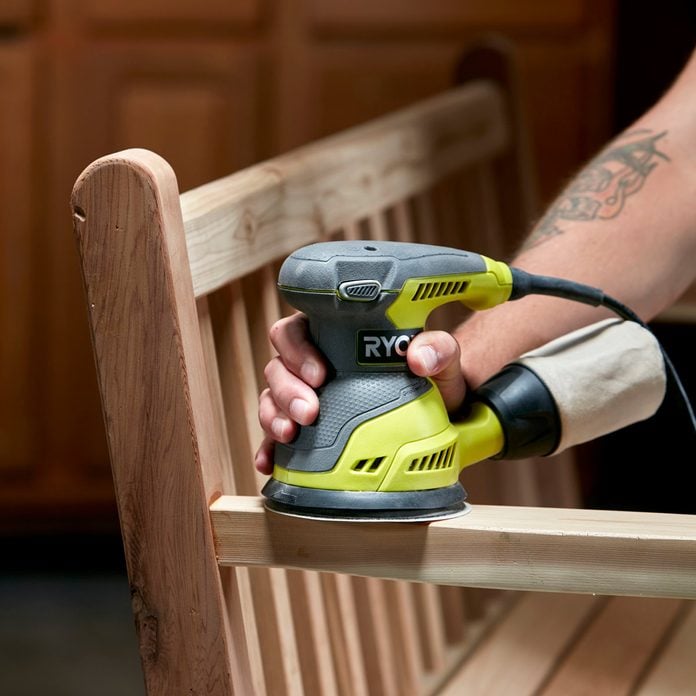
Powering On Safely
Before turning on the sander, hold it firmly with both hands. Keep the sander away from your body and any loose objects.
Turn on the sander slowly and listen for unusual sounds. Stop if you hear grinding or rattling noises.
Checking For Proper Attachment
Watch the sanding disc closely as it spins. It should stay flat and not wobble or shake.
Make sure the disc is centered and fully attached to the sanding pad. Loose discs can cause accidents.
- Check for gaps between disc and pad
- Look for any movement or slipping
- Ensure the disc is clean and free from debris
Adjusting For Optimal Performance
If the sander vibrates too much, stop and adjust the disc. Remove and reattach it if needed.
You can also check the sanding speed and pressure. Use moderate pressure for smooth sanding and longer disc life.
- Use firm but gentle pressure
- Keep the sander moving to avoid grooves
- Adjust speed settings for best results
Credit: www.familyhandyman.com
Maintaining Sanding Discs
Keeping your sanding discs in good shape helps you work better. Proper care makes them last longer and perform well.
Follow simple steps to clean, store, and know when to replace your sanding discs. This guide helps you maintain them easily.
Cleaning Tips
Clean sanding discs after use to remove dust and debris. This keeps the grit effective and stops clogging.
Use a sanding disc cleaning stick or a rubber eraser to rub the disc gently. Avoid using water or harsh chemicals.
- Turn off the sander before cleaning
- Rub the disc surface with a cleaning stick
- Remove dust with a soft brush
- Store discs dry to prevent damage
Storage Recommendations
Store sanding discs in a dry, cool place away from sunlight. Heat and moisture can damage the adhesive and grit.
Keep discs flat and avoid stacking heavy items on top. Proper storage prevents bending and warping.
- Use original packaging if possible
- Keep discs flat on a shelf or in a drawer
- Avoid humid or hot areas
- Label discs by grit size for easy access
When To Replace Discs
Replace sanding discs when they lose grit or become clogged. Worn discs reduce sanding quality and can damage surfaces.
Check discs regularly for tears, wrinkles, or missing sections. Replace damaged discs immediately for safety and best results.
- Disc feels smooth instead of rough
- Disc has tears or wrinkles
- Sanding takes longer or is uneven
- Disc no longer sticks properly to the sander

Credit: www.youtube.com
Frequently Asked Questions
How Do You Replace Sanding Discs On An Orbital Sander?
To replace sanding discs, first, unplug the sander. Remove the old disc by peeling it off. Align the new disc with the sander’s pad and press firmly to ensure it’s secure. Make sure the grit type matches your project needs for optimal results.
What Tools Do I Need For Replacing Sanding Discs?
You only need your hands to replace sanding discs on an orbital sander. Ensure the sander is unplugged for safety. Simply remove the old disc and attach the new one by aligning it with the sander’s pad.
How Often Should Sanding Discs Be Replaced?
Sanding discs should be replaced when they become less effective or clogged. The frequency depends on usage and material type. Regularly check your discs to maintain sanding efficiency and quality in your projects.
Can Any Sanding Disc Fit An Orbital Sander?
Not all sanding discs fit all orbital sanders. Ensure the disc size and type match your sander’s specifications. Check your sander’s manual for compatible discs to ensure effective and safe sanding operations.
Conclusion
Replacing sanding discs on orbital sanders is simple and quick. Follow the steps carefully to avoid mistakes. Always choose the right disc size for your sander. Check the disc for wear before use to ensure smooth sanding. Change discs regularly to keep your work clean and even.
Proper disc replacement helps your sander last longer. Practice often to get comfortable with the process. You will save time and get better results with each project. Keep your tools ready and enjoy sanding with ease.