Do you find yourself struggling with dull chisels that make your woodworking projects more frustrating than fulfilling? If so, you’re not alone.
Many DIY enthusiasts and professionals alike underestimate the importance of keeping their chisel sets sharp. A sharp chisel not only enhances your craftsmanship but also ensures safety, precision, and efficiency in your work. In this guide, you’ll discover simple yet effective techniques to keep your chisels in top-notch condition.
Imagine the satisfaction of slicing through wood effortlessly, achieving cleaner cuts, and completing your projects faster. Ready to transform your woodworking experience? Dive into our comprehensive guide to sharpening chisel sets, and unlock the secret to mastering your tools.
Choosing The Right Sharpening Tools
Sharpening chisels keeps them safe and ready for work. Choosing the right tools makes sharpening easier and better.
Different tools suit different skill levels and needs. Learn about stones, guides, and other ways to sharpen chisels.
Types Of Sharpening Stones
Sharpening stones come in many kinds. They help you shape and smooth your chisels’ edges.
Here are common types of sharpening stones:
- Oil Stones:Use oil to lubricate. They last long and cut slow but steady.
- Water Stones:Use water as lubricant. They sharpen fast but wear quicker.
- Diamond Stones:Have diamond grit for fast and tough sharpening. They stay flat longer.
Using Honing Guides
Honing guides help keep the right angle while sharpening. This makes your chisel edge more accurate.
They are great for beginners and those wanting consistent results. The guides hold the chisel steady on the stone.
- Attach the guide to your chisel.
- Set the sharpening angle.
- Move the chisel evenly across the stone.
Alternative Sharpening Methods
You can sharpen chisels with other tools too. Some use machines or simple home tools instead of stones.
Electric sharpeners and leather strops are popular alternatives. They save time and add a fine edge.
- Electric Sharpeners:Fast and easy but can remove too much metal.
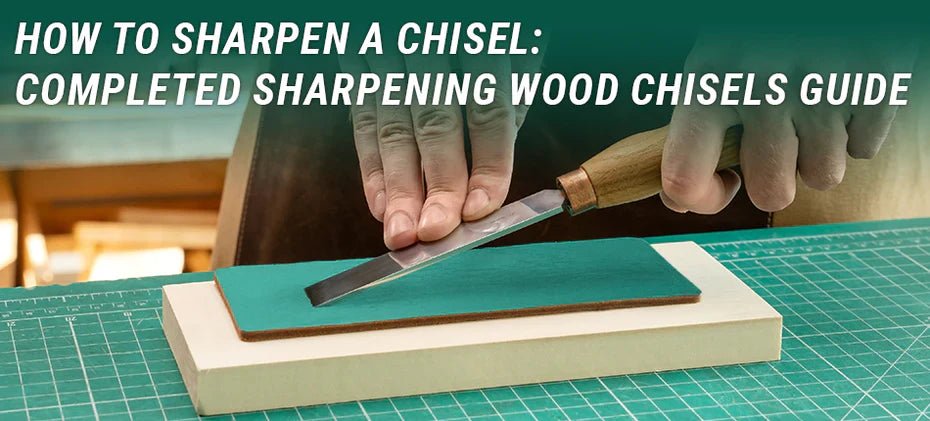
- Leather Strops:Use after stones to polish and smooth the edge.
- Sandpaper on Flat Surface:Cheap and effective for small touch-ups.

Credit: www.amazon.ca
Preparing Your Chisels For Sharpening
Proper preparation helps you sharpen chisels safely and effectively. Take time to get your tools ready. This saves effort and improves results.
Focus on cleaning, checking for damage, and setting the right sharpening angle. These steps protect your chisels and ensure sharp edges.
Cleaning The Blades
Remove dirt, resin, and rust from the chisel blades before sharpening. Clean blades sharpen more evenly and quickly.
- Use a cloth with light oil to wipe the blades.
- Scrape off any stuck-on wood or glue carefully.
- Apply rust remover if you see corrosion.
- Dry the blades completely to avoid moisture.
Inspecting For Damage
Look closely at each blade for nicks, chips, or bends. Damaged blades need special care before sharpening.
| Type of Damage | What to Do |
|---|---|
| Small nicks | Remove with coarse sharpening stone |
| Large chips | Grind edges carefully before sharpening |
| Bent blade | Straighten with gentle hammer taps if possible |
| Rust spots | Clean thoroughly and apply rust remover |
Setting The Correct Angle
Sharpening at the right angle keeps your chisels sharp longer. Most chisels need a 25 to 30-degree bevel angle.
Follow these tips for angle setup:
- Check manufacturer’s recommendations if available.
- Use an angle guide or jig for consistency.
- Keep the angle steady during sharpening.
- A sharper angle suits fine work; a steeper angle suits heavy use.
Step-by-step Sharpening Process
Sharpening chisel sets keeps them sharp and safe to use. It improves cutting performance and extends tool life.
Follow simple steps to sharpen chisels correctly. Use proper tools and take your time with each step.
Grinding The Bevel
Start by grinding the bevel on your chisel. This shapes the edge and removes any nicks or damage.
Use a coarse grinding wheel or stone for this step. Keep the bevel angle consistent to avoid uneven edges.
- Hold the chisel firmly at the correct bevel angle (usually 25-30 degrees).
- Move the chisel evenly across the grinding surface.
- Check progress often to avoid overheating the blade.
- Stop grinding once the bevel is smooth and even.
Refining With Medium Grit
Refine the bevel using a medium grit sharpening stone. This step smooths the rough surface from grinding.
Use water or oil on the stone to reduce friction. Move the chisel in a circular or back-and-forth motion.
- Maintain the same bevel angle as before.
- Sharpen both sides of the bevel evenly.
- Keep the stone wet to protect the blade.
- Stop when the bevel feels smooth and even.
Polishing With Fine Grit
Finish by polishing the edge with a fine grit stone or strop. This creates a sharp, shiny edge.
Use light pressure and consistent strokes. This step removes small burrs and improves cutting ability.
- Keep the bevel angle steady during polishing.
- Use a leather strop with polishing compound if available.
- Polish both sides until the edge is razor sharp.
- Test sharpness carefully on scrap wood.
Maintaining A Sharp Edge
Keeping your chisels sharp helps you work better and safer. A sharp edge cuts cleanly and needs less force.
Regular care stops your chisels from getting dull fast. This guide shows simple ways to keep edges sharp.
Regular Honing Techniques
Honing keeps the edge smooth and sharp. Use a fine sharpening stone or a honing guide for best results.
Light honing after each use helps stop dullness from building up. It only takes a few minutes.
- Use a water or oil stone with fine grit
- Hold the chisel at a consistent angle (usually 25 degrees)
- Move the blade gently across the stone in a circular or back-and-forth motion
- Check the edge often to avoid over-honing
- Finish with a leather strop to polish the edge
Storing Your Chisels Properly
Proper storage protects the edges and prevents damage. Keep chisels dry and safe from knocks.
Use a wooden rack, chisel roll, or box with soft lining to store your tools. Avoid piling them together.
- Clean and dry chisels before storing
- Cover the edges with guards or caps
- Store in a dry place to stop rust
- Keep chisels separate to avoid chipping
When To Resharpen
Resharpen your chisels when they no longer cut cleanly or feel dull. Dull edges need more pressure.
Look for chips, rolled edges, or uneven surfaces. Resharpening removes damage and restores the correct angle.
- Chisel pulls or tears wood fibers instead of slicing
- Edge looks shiny or rounded
- Visible nicks or chips on the blade
- Blade requires more force to cut
Common Sharpening Mistakes To Avoid
Sharpening chisel sets takes care and attention. Many people make simple mistakes that hurt their tools. Avoiding these errors keeps your chisels sharp and ready.
Knowing what to avoid helps you sharpen better and safer. Here are some common sharpening mistakes to watch out for.
Over-grinding The Blade
Grinding too much removes more metal than needed. This shortens the blade’s life and weakens it. Over-grinding also wastes time and effort.
Keep sharpening sessions short and check often. Stop once the edge feels sharp and smooth.
Ignoring The Back Of The Chisel
Many focus only on sharpening the front edge. The back of the chisel needs attention too. A flat, smooth back helps make a sharp edge.
Regularly flatten the back on a stone to keep it clean. This step improves cutting and tool control.
Using Incorrect Angles
Sharpening at the wrong angle weakens the cutting edge. Too steep or too flat angles cause poor cuts or blade damage. Find the correct angle for your chisel type.
- Most chisels sharpen well at 25 to 30 degrees
- Keep the angle consistent during sharpening
- Use guides or jigs if needed to hold the angle

Credit: www.ebay.ca
Tips For Different Chisel Types
Sharpening chisels keeps them working well and safe. Different chisels need different care.
Knowing how to sharpen each type helps you get the best results. This guide covers key tips.
Woodworking Chisels
Woodworking chisels have a thin blade and a sharp edge. Keep the bevel angle around 25 to 30 degrees.
Use a fine sharpening stone for a smooth edge. Avoid overheating the blade when sharpening.
- Start with a coarse stone to remove nicks
- Progress to finer stones for polish
- Use a leather strop for the final edge
Mortise Chisels
Mortise chisels have a thick blade and strong edge. Keep the bevel angle steeper, about 30 to 35 degrees.
Sharpen with care to keep the edge durable. Use water stones or oil stones for good control.
- Remove chips with a coarse stone
- Use medium stones for shaping
- Finish on a fine stone for sharpness
Paring Chisels
Paring chisels have a long, thin blade for delicate work. Keep the bevel angle low, about 20 degrees.
Use very fine stones to sharpen. Stropping is important for a razor-sharp edge.
- Use a fine diamond stone or water stone
- Strop with polishing compound for smoothness
- Check the edge under light for evenness

Credit: www.amazon.co.uk
Frequently Asked Questions
How Often Should I Sharpen My Chisel Set?
Sharpen your chisels whenever you notice dullness or reduced cutting efficiency. Frequent sharpening ensures precise cuts and prolongs tool life. For regular users, sharpening after every few hours of work is ideal. Always maintain a sharp edge for best woodworking results.
What Tools Are Needed For Sharpening Chisels?
You need sharpening stones, honing guides, and oil or water for lubrication. A coarse stone starts the process, followed by finer stones for a polished edge. Proper tools ensure accurate sharpening and prevent damage to your chisels.
Can I Sharpen Chisels Without A Sharpening Jig?
Yes, you can sharpen chisels freehand, but it requires skill and practice. A jig helps maintain a consistent angle, making sharpening easier and more precise. Beginners benefit from a jig for better results and less frustration.
What Is The Best Angle For Sharpening Chisels?
A 25 to 30-degree bevel angle is ideal for most chisels. This angle balances sharpness and durability for efficient woodworking. Adjust the angle slightly depending on chisel type and use for optimal performance.
Conclusion
Sharpening chisel sets keeps your tools working well and safe. Regular sharpening saves time and effort during projects. Use the right stones and techniques for best results. Practice often to improve your sharpening skills. Clean and oil your chisels after sharpening to prevent rust.
Sharp chisels make carving and cutting easier and more precise. Keep your tools ready, and your work will look better. Simple steps lead to long-lasting, sharp chisels for every job.