
Imagine walking into your garage or workshop and instantly finding every tool you need, right at your fingertips. A pegboard tool wall can transform chaos into order, saving you time and frustration.
You might feel overwhelmed at first, but setting up a pegboard is simpler than it seems. With just a few steps, you can create a neat, organized space that boosts your productivity and even sparks joy every time you see it.
Keep reading to discover how you can set up your own pegboard tool wall and turn clutter into clarity.
Choosing The Right Pegboard
Setting up a pegboard tool wall starts with choosing the right pegboard. This choice affects how well your tools fit and how easy it is to organize them.
Consider the material, size, and wall type before buying your pegboard. These factors help make a strong and useful tool wall.
Material Options
Pegboards come in different materials. Each material has its own strength and look. Choose one that fits your tools and space.
- Masonite:Smooth and easy to write on, but less strong for heavy tools.
- Metal:Very strong and durable, good for heavy tools and outdoor use.
- Wood:Stylish and sturdy, but can be expensive and harder to install.
- Plastic:Lightweight and resistant to moisture, good for light to medium tools.
Size And Placement
Pick a pegboard size that fits your wall space and tool collection. Measure your space first to avoid buying too big or too small.
Place the pegboard where you can reach your tools easily. Think about your workflow and tool use frequency.
- Measure the wall space before buying.
- Choose a size that allows room for tool growth.
- Mount at a height easy to reach for all users.
- Leave space around the pegboard for tool handles and hooks.
Wall Compatibility
Check if your wall can support the pegboard weight and tools. Some walls need extra support or special fasteners.
Use anchors or screws designed for your wall type. This keeps the pegboard safe and secure.
- Drywall:Use wall anchors or mount into studs for strength.
- Concrete or brick:Use masonry screws or anchors.
- Wood walls:Screws can go directly into studs.
- Metal walls:Use special fasteners or brackets designed for metal.
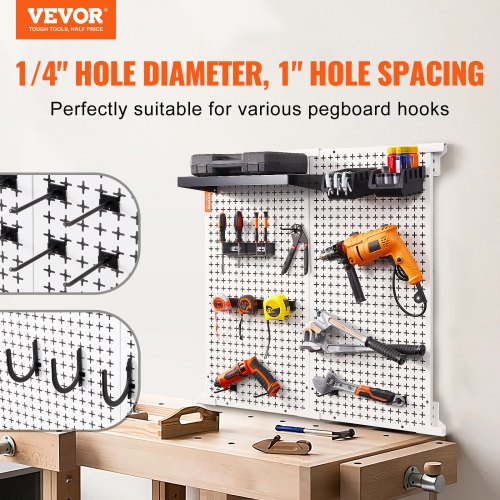
Credit: www.vevor.ca
Gathering Necessary Tools And Supplies
Setting up a pegboard tool wall needs the right tools and materials. Collect everything before you start to work smoothly.
This guide helps you find the essential items to build a strong and organized pegboard wall.
Essential Tools
You need basic tools to install the pegboard securely. These tools help you measure, cut, and attach the board.
- Measuring tape to get exact dimensions
- Level to keep the pegboard straight
- Drill for making holes and fixing screws
- Screwdriver for tightening screws
- Stud finder to locate wall studs
- Safety goggles to protect your eyes
Pegboard Accessories
Choose pegboard accessories that fit your tools and keep your workspace tidy. These make it easy to store and reach your items.
| Accessory | Use | Material |
|---|---|---|
| Hooks | Hang hand tools like hammers and wrenches | Metal or plastic |
| Bins | Hold small parts like nails and screws | Plastic |
| Tool holders | Secure power tools or bulky items | Metal |
| Shelves | Store larger tools or containers | Wood or metal |
Mounting Hardware
Good mounting hardware keeps your pegboard firm on the wall. Choose the right size and type for your wall material.
- Screws that fit wall studs or anchors
- Wall anchors for drywall or plaster walls
- Washers to spread screw pressure
- Spacers to create space between pegboard and wall
Preparing The Wall
Setting up a pegboard tool wall starts with good preparation. The wall must be ready to hold the pegboard firmly.
Take time to prepare the wall correctly. This will make the pegboard strong and safe for your tools.
Clearing The Space
Clear the area around the wall before you start. Remove any furniture, decorations, or obstacles.
This gives you enough room to work and prevents damage to other items.
Measuring And Marking
Measure the wall space where you want to hang the pegboard. Use a tape measure for accuracy.
Mark the top and bottom edges lightly with a pencil. This helps place the pegboard evenly on the wall.
Locating Wall Studs
Find the wall studs behind the drywall. Studs give strong support to hold the pegboard and tools.
Use a stud finder or tap the wall to listen for solid spots. Mark the stud locations clearly.
- Use a stud finder tool for precise detection
- Mark each stud with a pencil line
- Studs are usually 16 or 24 inches apart
Installing The Pegboard
Installing a pegboard tool wall helps organize tools and saves space. Proper installation keeps the pegboard stable and secure for daily use.
This guide covers drilling pilot holes, securing the pegboard to the wall, and ensuring stability for a strong setup.
Drilling Pilot Holes
Drilling pilot holes prevents the wood from splitting when you insert screws. Use a drill bit slightly smaller than your screws. Mark the spots on the wall where you will attach the pegboard.
Make sure to drill into wall studs to hold the pegboard firmly. Check the level before marking the holes to keep the pegboard straight.
Securing Pegboard To Wall
Attach the pegboard by screwing it into the pilot holes. Use screws long enough to go through the pegboard and into the studs. This keeps the board from falling off.
- Hold the pegboard against the wall at your marked spots.
- Insert screws through the pegboard into the pilot holes.
- Tighten screws until the pegboard is flush with the wall.
- Check the level again and adjust if needed.
Ensuring Stability
Proper spacing and support help the pegboard hold heavy tools. Add wooden furring strips behind the pegboard for extra strength. These strips create a gap for hooks to fit.
| Tip | Reason |
|---|---|
| Use wall studs for screws | Strong support for heavy tools |
| Add furring strips behind pegboard | Keeps hooks secure and pegboard stable |
| Check level often | Prevents tools from sliding off |
Organizing Tools On The Pegboard
Organizing your tools on a pegboard makes your workspace tidy and tools easy to find. A well-set pegboard saves time and effort during projects.
Choosing the right hooks and holders helps keep tools secure. Arranging tools by how often you use them improves efficiency. Labeling ensures you find tools quickly every time.
Selecting Hooks And Holders
Select hooks and holders based on the size and weight of your tools. Use strong hooks for heavy tools like hammers. Smaller hooks are good for items like screwdrivers.
- Use straight hooks for hanging wrenches and pliers.
- Choose loop hooks for scissors or tape rolls.
- Install baskets or shelves for small parts and accessories.
- Magnetic strips can hold metal tools securely.
Arranging Tools By Frequency
Place frequently used tools at eye level and close to your main work area. Less used tools can go higher or lower on the pegboard.
| Tool | Placement |
| Hammer | Eye level, center |
| Screwdrivers | Eye level, side |
| Measuring tape | Upper section |
| Paint brushes | Lower section |
| Drill bits | In baskets or small holders |
Labeling For Easy Access
Label each hook or section to quickly identify where tools belong. Use clear, simple labels that are easy to read.
- Use waterproof labels for durability.
- Place labels above or below each tool spot.
- Use large fonts for quick reading.
- Consider color-coding tool groups.

Credit: www.reddit.com
Maintaining Your Pegboard Wall
Keeping your pegboard wall in good shape makes your tools easy to find. It also keeps your workspace neat and safe.
This guide covers simple ways to care for your pegboard wall every day and over time.
Regular Cleaning
Dust and dirt build up on pegboards and hooks. Clean the wall often to keep tools visible and easy to grab.
- Use a soft cloth or brush to remove dust.
- Wipe hooks with a damp cloth to remove grime.
- Dry the pegboard well to prevent moisture damage.
- Clean tools before hanging them back on the board.
Updating Tool Layout
Change your tool arrangement if your needs change. A good layout saves time and keeps tools safe.
| Change Reason | Action |
| New Tools Added | Make space by moving existing tools |
| Rarely Used Tools | Move to lower or hidden spots |
| Frequently Used Tools | Place near the center or eye level |
| Large Tools | Use stronger hooks or special holders |
Checking For Wear
Inspect your pegboard and hooks often. Look for signs of damage or weakness that could cause tools to fall.
- Check hooks for rust or bending.
- Make sure the pegboard is firmly fixed to the wall.
- Replace any broken or weak hooks right away.
- Look for cracks or holes in the pegboard surface.

Credit: www.reddit.com
Frequently Asked Questions
What Materials Do I Need To Set Up A Pegboard Tool Wall?
You need a pegboard panel, mounting hardware, wall anchors, hooks, and a drill. Choose the pegboard size based on your wall space and tool collection.
How Do I Properly Mount A Pegboard On The Wall?
Locate wall studs and mark their positions. Use spacers behind the pegboard to allow hook clearance. Secure the pegboard with screws into the studs for stability.
What Tools Work Best On A Pegboard Tool Wall?
Hand tools like hammers, screwdrivers, pliers, and wrenches are ideal. Use specialized hooks and holders to organize power tools and accessories efficiently.
How Can I Maximize Storage On My Pegboard Wall?
Arrange tools by frequency of use and size. Use bins, shelves, and multi-hook hangers to keep small items organized and accessible.
Conclusion
Setting up a pegboard tool wall makes your workspace neat and easy to use. You can find tools quickly and keep them organized. This simple project saves time and helps you work better. Choose the right pegboard and hooks for your needs.
Take your time to arrange tools by size or type. A tidy tool wall keeps your garage or workshop clean. Start today, and enjoy a clutter-free space. Tools will always have a spot, ready when you need them.
